
Popular categories
Looking for a yarn?


Comments / Questions (3)
![]() Camilla wrote:
Camilla wrote:
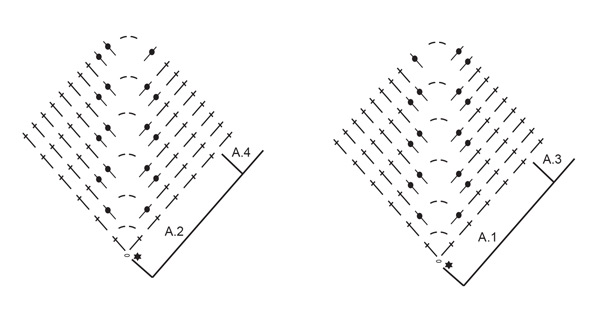
Vad är skillnaden på A1 och A2?
23.06.2025 - 19:32DROPS Design answered:
Hej Camilla, skillnaden är på sista varvet på A.3 och A.4 :)
26.06.2025 - 13:39
![]() Jacki Fagan wrote:
Jacki Fagan wrote:
What does A.1 A.2 A.3 A.4 stand for/represent?
28.04.2025 - 16:50DROPS Design answered:
Hi Jacki, They are the numbers for the diagrams, which are shown at the bottom of the pattern. Regards, Drops Team.
29.04.2025 - 07:31
![]() Sirpa Backfolk wrote:
Sirpa Backfolk wrote:
Tässä mallissa ei kyllä kaikki täsmää.neuletiheys pituus ja leveyssuuntaan täsmää, ohjeessa maininta valmiin kpl:een mitta koossa M 104 cm((ympärimitta), mutta tekemäni työ antaa mitaksi 124 cm. Eli aivan liian leveä.käytän työssä v.koukkua nr 4, pinempää ei tuolle langalle voi käyttää.
31.03.2025 - 10:21
|
||||||||||||||||
Love Stripes#lovestripessweater |
||||||||||||||||
 |
 |
|||||||||||||||
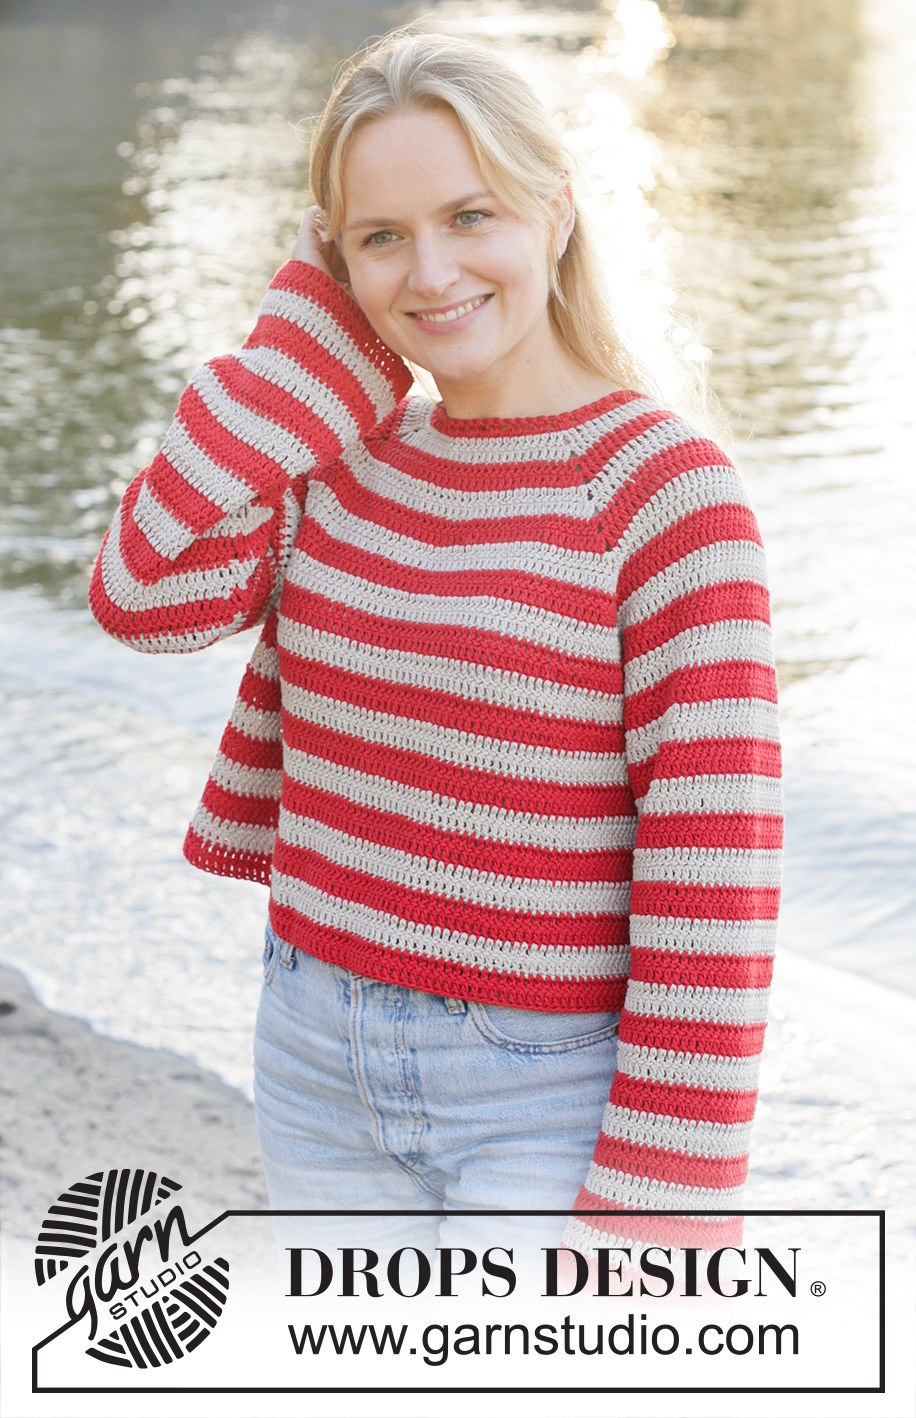
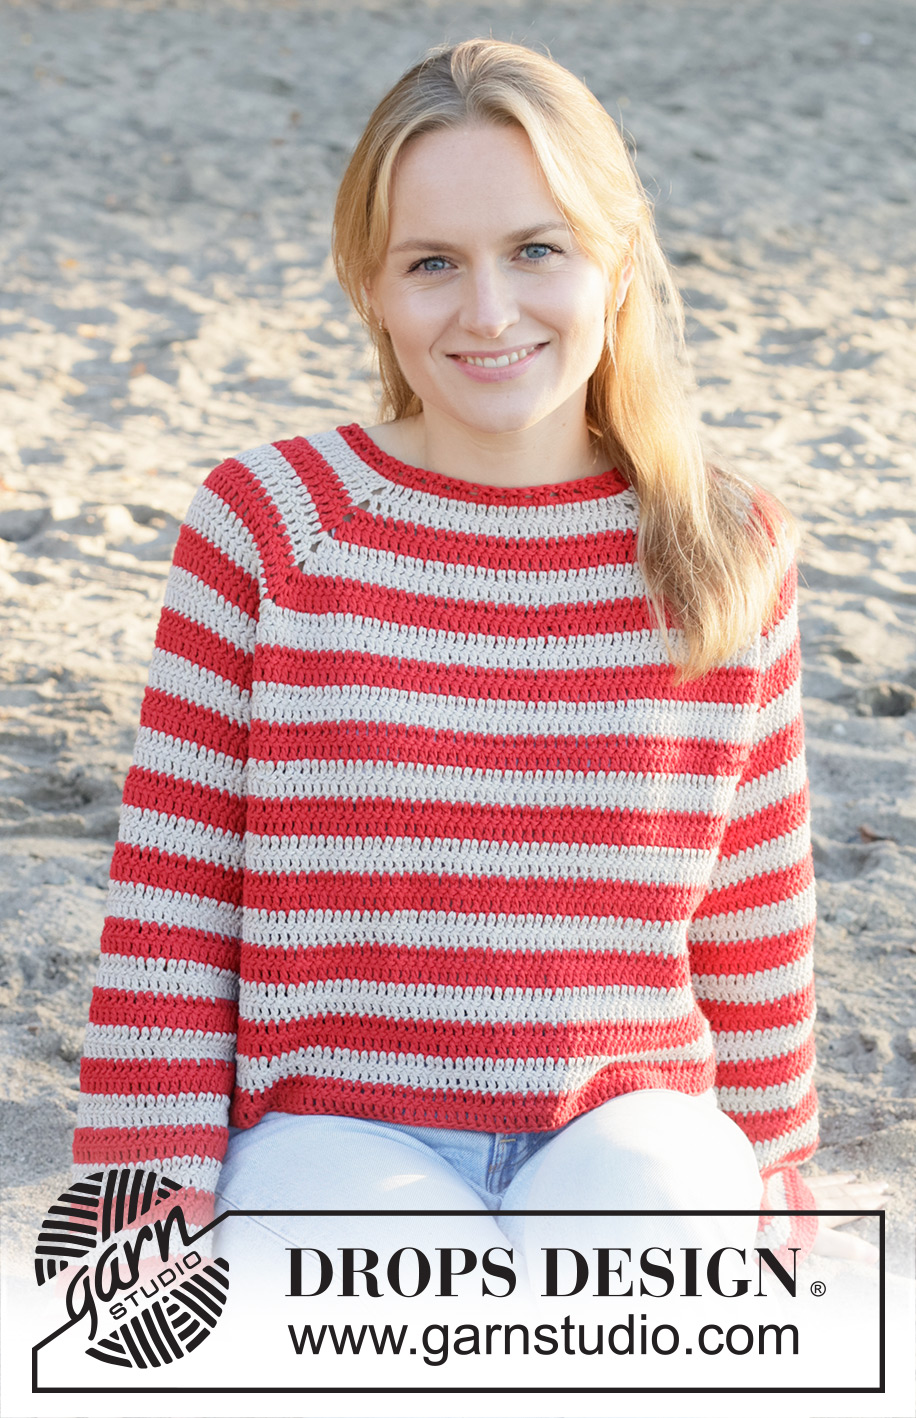
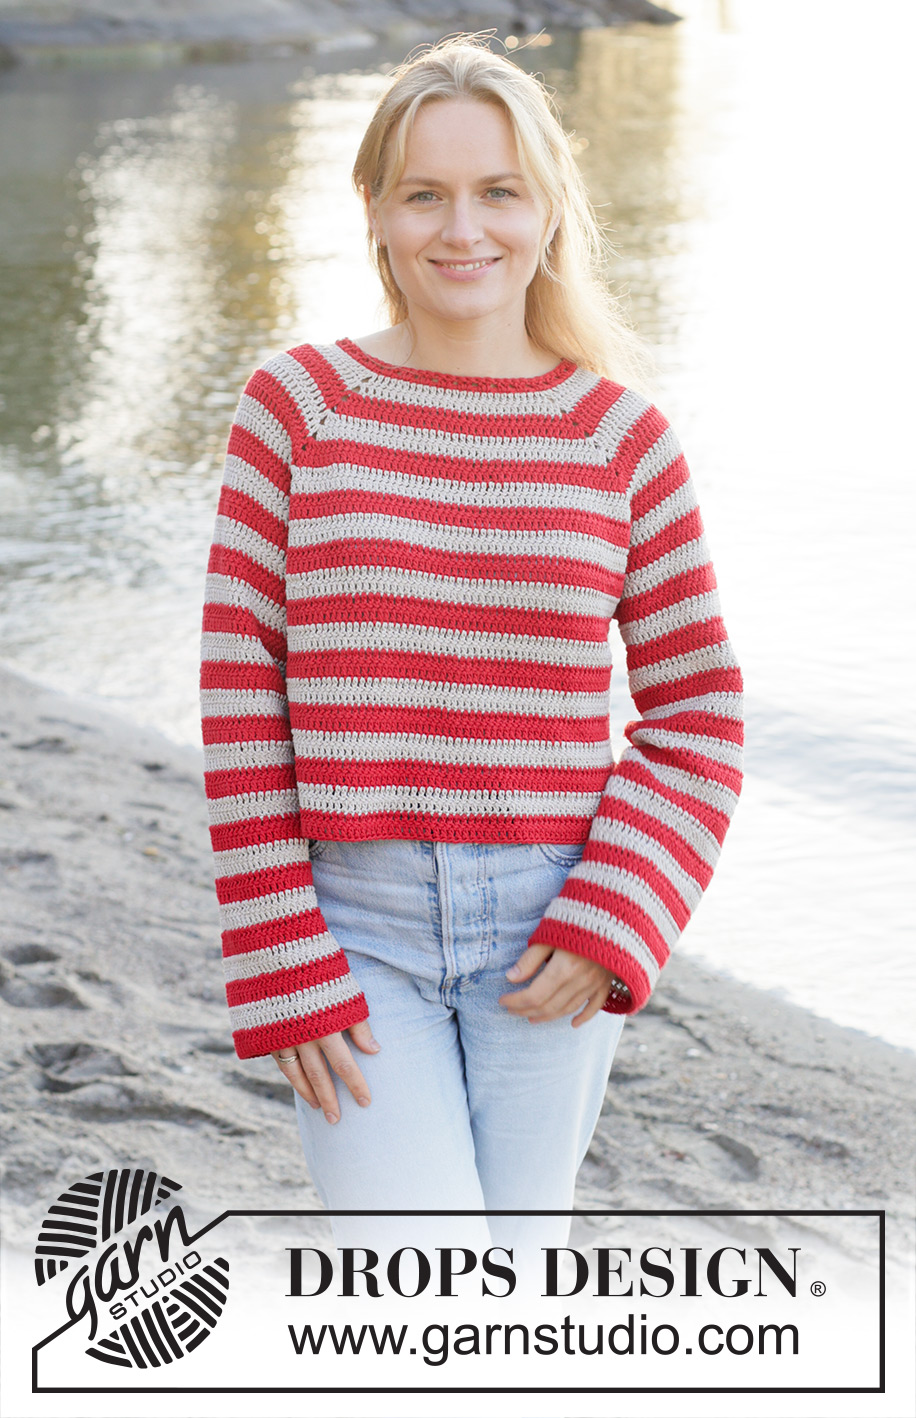
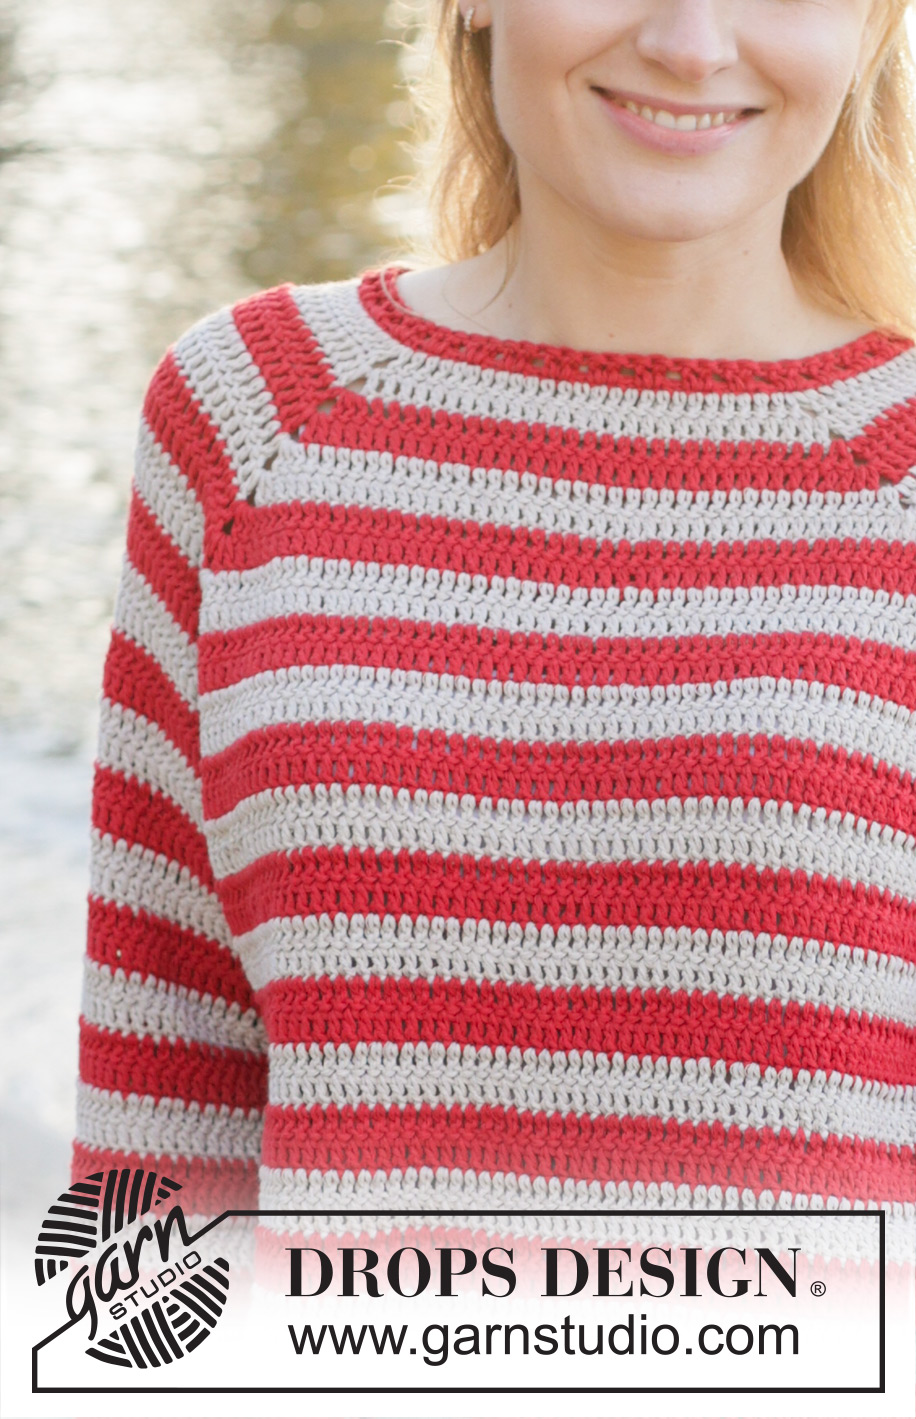
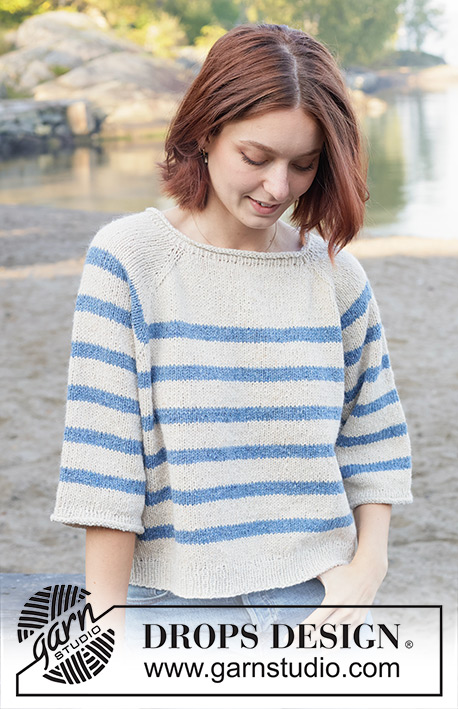
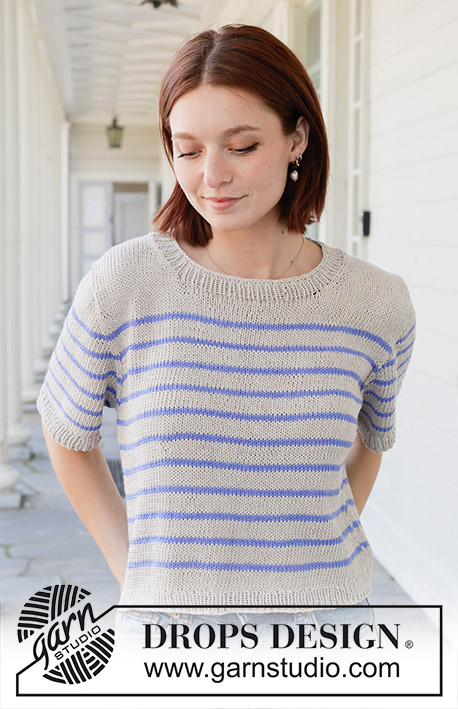
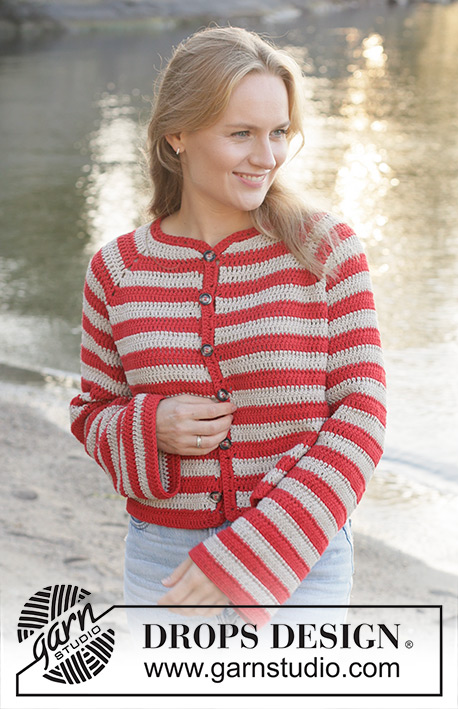
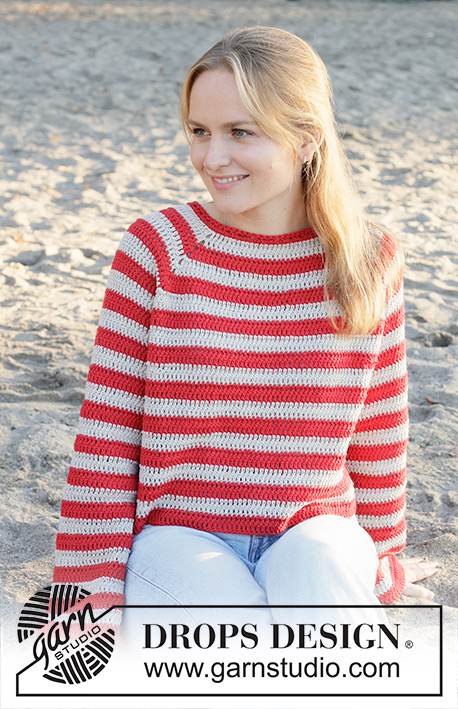
Crocheted jumper in DROPS Cotton Light. The piece is worked top down with raglan and stripes. Sizes S - XXXL.
DROPS 257-28 |
||||||||||||||||
|
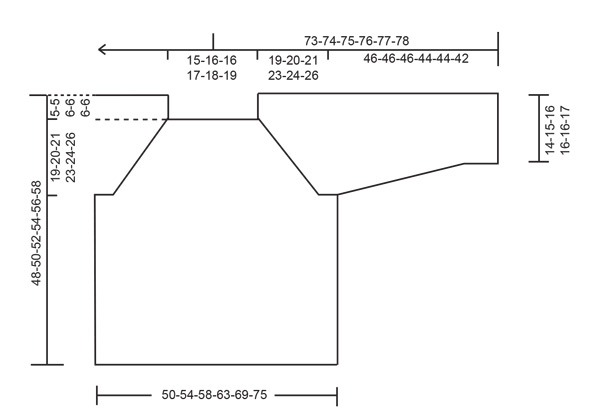
------------------------------------------------------- EXPLANATIONS FOR THE PATTERN: ------------------------------------------------------- PATTERN: See diagrams A.1 to A.4. The diagrams are read from right to left from the right side and left to right from the wrong side. CHAIN STITCH: If you work outermost on the hook the chain stitch will often be too tight; 1 chain stitch should be as long as 1 treble crochet is wide. STRIPES: The whole piece is worked in alternate stripes of 2 rows colour light beige and 2 rows colour crimson red (1 row from the right side and from the wrong side in each colour). CROCHET INFORMATION: Each round begins with 3 chain stitches, which replace the first treble crochet. The round finishes with 1 slip stitch in the 3rd chain stitch at the beginning of the round, before turning and working the next round from the other side (alternate rounds from the right and wrong side). STRIPE TIP: When working stripes, it is neatest to fasten and cut the strand after each stripe. 2 TREBLE CROCHETS TOGETHER: To close a hole, work as follows after each chain-space (yoke) or in the outermost chain stitch (sleeve): * Make 1 yarn over, insert the hook round the chain-space/chain stitch, pick up the strand, make 1 yarn over and pull it through the first 2 loops on the hook *, work from *-* 1 more time, make 1 yarn over and pull it through all 3 loops on the hook (1 stitch decreased). DECREASE TIP: Decrease at the beginning and end of the round/row as follows: Work the first treble crochet as before (i.e., 3 chain stitches which replace the first treble crochet), work the next 2 treble crochets together as follows: * Make 1 yarn over, insert the hook through the next stitch, pick up the strand, make 1 yarn over and pull it through the first 2 loops on the hook *, work from *-* 1 more time, make 1 yarn over and pull it through all 3 loops on the hook (1 stitch decreased). Work as before until there are 3 treble crochets left on the round, decrease 1 treble crochet in the same way, then work 1 treble crochet in the last treble crochet (= 2 stitches decreased). ------------------------------------------------------- START THE PIECE HERE: ------------------------------------------------------- JUMPER – SHORT OVERVIEW OF THE PIECE: The jumper is worked back and forth, joining the rounds at the end to avoid seams mid-back and on the sleeves. The yoke is worked from mid-back, top down. When the yoke is finished, it is divided for the body and sleeves and the body is continued back and forth, while the sleeves wait. The sleeves are worked top down, back and forth. An edge is worked around the neckline to finish. YOKE: Use DROPS Cotton Light colour crimson red and crochet hook size 4.5 mm. Work 80-84-88-92-96-100 CHAIN STITCHES – read description above. The whole piece is worked in STRIPES – read description above. Turn. Change to colour light beige. Read PATTERN, CROCHET INFORMATION and STRIPE TIP. Work the first round from the right side as follows: 1 treble crochet in each of the first 11-12-12-13-14-15 chain stitches (= half back piece), A.1 in the next chain stitch (= raglan), 1 treble crochet in each of the next 16-16-18-18-18-18 chain stitches (= sleeve), A.2 in the next chain stitch (= raglan), 1 treble crochet in each of the next 22-24-24-26-28-30 chain stitches (= front piece), A.1 in the next chain stitch (= raglan), 1 treble crochet in each of the next 16-16-18-18-18-18 chain stitches (= sleeve), A.2 in the next chain stitch (= raglan), 1 treble crochet in each of the next 11-12-12-13-14-15 chain stitches (= half back piece). There are 84-88-92-96-100-104 treble crochets and 4 chain-spaces on the round. Continue working alternately from the right and wrong side until A.1 and A.2 are finished in height – remember each round finishes with 1 slip stitch in the 3rd chain stitch at the beginning of the round before turning, to join the yoke. There are 140-144-148-152-156-160 treble crochets on the round, divided as follows between the 4 chain-spaces: 32-32-34-34-34-34 treble crochets on each sleeve and 38-40-40-42-44-46 treble crochets on the front and back pieces. Remember to maintain the crochet tension. Continue with A.3 over A.1 and A.4 over A.2 a total of 9-10-11-12-13-15 times in height (14-15-16-17-18-20 worked rounds from the cast-on edge). There are 248-264-280-296-312-340 treble crochets, divided as follows between the 4 chain-spaces: 50-52-56-58-60-64 treble crochets on each sleeve and 74-80-84-90-96-106 treble crochets on the front and back pieces. Work 1 round with 1 treble crochet in each treble crochet; to close the holes work 2 TREBLE CROCHETS TOGETHER around each chain-space – read description above = 252-268-284-300-316-344 treble crochets. The yoke measures approx. 19-20-21-23-24-26 cm mid-back. Now divide for the body and sleeves. DIVIDE FOR BODY AND SLEEVES: Work 1 treble crochet in each of the first 38-41-43-46-49-54 treble crochets (= half back piece), skip 50-52-56-58-60-64 treble crochets (= sleeve), work 4-4-6-8-12-12 chain stitches (under sleeve), work 1 treble crochet in each of the next 76-82-86-92-98-108 treble crochets (= front piece), skip 50-52-56-58-60-64 treble crochets (= sleeve), work 4-4-6-8-12-12 chain stitches (under sleeve), work 1 treble crochet in each of the last 38-41-43-46-49-54 treble crochets (= half back piece). Work the body while the sleeves wait. Cut the strand; the new round begins mid-under one sleeve. BODY: = 160-172-184-200-220-240 stitches. Continue from the right or wrong side, so the texture from the yoke is continued. Continue the stripes from the yoke. Start with 1 slip stitch in the 3rd-3rd-4th-5th-7th-7th chain stitch worked under the sleeve, work 3 chain stitches (replace the first treble crochet), work 1 treble crochet in each of the following 1-1-2-3-5-5 chain stitches, work 1 treble crochets as far as the next set of chain stitches, 1 treble crochet in each of the 4-4-6-8-12-12 chain stitches, 1 treble crochet in each of the treble crochets as far as the first set of chain stitches, 1 treble crochet in each of the 2-2-3-4-6-6 chain stitches = 160-172-184-200-220-240 treble crochets. Continue back and forth with treble crochets and stripes until the piece measures 43-45-46-48-50-52 cm mid-back, finishing after 2 rows of colour crimson red. The jumper measures approx. 48-50-52-54-56-58 cm from top of shoulder. SLEEVES: Continue from the right or wrong side so the texture from the yoke is continued. Continue the stripes from the yoke. Start with 1 slip stitch in the 3rd-3rd-4th-5th-7th-7th chain stitch worked under the sleeve, work 3 chain stitches (replace the first treble crochet), work 1 treble crochet in each of the following 0-0-1-2-4-4 chain stitches, work 2 treble crochets together in the last chain stitch, 1 treble crochet in each of the 50-52-56-58-60-64 skipped stitches for the sleeve, work 2 treble crochets together in the first chain stitch and 1 treble crochet in each of the last 1-1-2-3-5-5 chain stitches under the sleeve = 54-56-62-66-72-76 treble crochets. Finish the round with 1 slip stitch in the 3rd chain stitch at the beginning of the round. Insert 1 marker at the beginning of the round (mid-under sleeve). Continue with treble crochets and stripes alternately from the right and wrong side until the sleeve measures 3 cm. Now decrease 1 treble crochet on each side of the marker mid under sleeve – read DECREASE TIP. Decrease like this every 12-12-7-6-4-3 cm a total of 4-4-6-7-10-11 times = 46-48-50-52-52-54 treble crochets. Work until the sleeve measures 46-46-46-44-44-42 cm from the division, finishing after 2 rows of colour crimson red. NECK-EDGE: Use colour crimson red and crochet hook size 4.5 mm. Fasten the strand with 1 slip stitch mid-back. Work around the neckline as follows: * 2 chain stitches, skip 1 treble crochet, 1 slip stitch in the next treble crochet *, work from *-* to end of round = 40-42-44-46-48-50 chain-spaces. On the next round work 1 slip stitch around the first chain-space – remember CROCHET INFORMATION, work 2 treble crochets around each chain-space to end of round = 80-84-88-92-96-100 treble crochets. Cut and fasten the strand. |
||||||||||||||||
Diagram explanations |
||||||||||||||||
|
||||||||||||||||
|
||||||||||||||||
|
||||||||||||||||
Have you finished this pattern?Tag your pictures with #dropspattern #lovestripessweater or submit them to the #dropsfan gallery. Do you need help with this pattern?You'll find 12 tutorial videos, a Comments/Questions area and more by visiting the pattern on garnstudio.com. © 1982-2025 DROPS Design A/S. We reserve all rights. This document, including all its sub-sections, has copyrights. Read more about what you can do with our patterns at the bottom of each pattern on our site. |
||||||||||||||||


With over 40 years in knitting and crochet design, DROPS Design offers one of the most extensive collections of free patterns on the internet - translated to 17 languages. As of today we count 314 catalogues and 11822 patterns translated into English (UK/cm).
We work hard to bring you the best knitting and crochet have to offer, inspiration and advice as well as great quality yarns at incredible prices! Would you like to use our patterns for other than personal use? You can read what you are allowed to do in the Copyright text at the bottom of all our patterns. Happy crafting!
Post a comment to pattern DROPS 257-28
We would love to hear what you have to say about this pattern!
If you want to leave a question, please make sure you select the correct category in the form below, to speed up the answering process. Required fields are marked *.