


Komentáře / Otázky (20)
![]() Francoise napsala:
Francoise napsala:
Je ne comprends pas les explications pour le biais des épaules. Il suffit de rabattre les mailles en prenant soin de ne pas faire d’escalier (ne pas tricoter la dernière maille du rang concerné )
18.06.2025 - 10:30Odpověď DROPS Design :
Re-bonjour Françoise, vous pouvez tout à fait procéder ainsi si vous le préférez, à vous de voir. Bon tricot!
18.06.2025 - 16:18
![]() Francoise napsala:
Francoise napsala:
Je ne comprends pas les explications pour le biais des épaules, pourquoi ne pas faire comme pour le dos ?
18.06.2025 - 10:24Odpověď DROPS Design :
Bonjour Françoise, le biais des épaules se fait de la même façon sur les devants et sur le dos - pour le biais de l'épaule droite du dos, vous avez mis en attente les mailles en début de rang à partir de l'emmanchure = en début de rang sur l'endroit; pour le devant droit, vous mettrez les mailles en attente en début de rang sur l'envers = à partir de l'emmanchure. Bon tricot!
18.06.2025 - 16:18
![]() Femke Zwegers napsala:
Femke Zwegers napsala:
Ik heb een vraag over het stuk hals en diagonale schouders. Ik zie niet hoe deze al gedaan kunnen worden (er wordt gesproken van een armsgat) als alleen het achterpand af is en begrijp dus niet welk onderdeel hiermee gemaakt/bedoeld wordt. Na 'Achterband' is het achterpand, inclusief schouders, toch al afgerond?
18.03.2025 - 17:21Odpověď DROPS Design :
Dag Femke,
Nadat je voor het achterpand aan beide kanten hebt afgekant voor de armsgaten brei je verder tot de hals en kant je de middelste steken af. Dan brei je beide kanten apart verder. Die beide kanten die je apart verder breit zijn de diagonale schouders. In de 2 paragrafen die volgen na het achterpand staat beschreven hoe je aan de kant van de hals breit en hoe je de diagonale schouder breit.
18.03.2025 - 20:00
![]() Katrin napsala:
Katrin napsala:
Ich habe es aus Versehen nicht als Frage gepostet: Ich habe eine Frage zu den V-Ausschnitt-Abnahmen (Größe M). Nach 33 cm soll in der folgenden Hinreihe mit den Abnahmen begonnen werden, also nehme ich dieser Reihe schon eine Masche ab. Dann eine Abnahme in der nächsten 4. Reihe, dann 12 Abnahmen in jeder 2. Reihe und dann 3 Abnahmen in jeder 4. Reihe. Damit käme ich mit der ersten Abnahme auf 17 Abnahmen insgesamt anstatt der 16 aus der Anleitung. Habe ich da etwas missverstanden?
23.01.2025 - 15:23Odpověď DROPS Design :
Liebe Kathrin, nach der 1. Abnahmen nach 33 cm stricken Sie 3 Reihen ohne Abnahmen, dann beginnen Sie die 12 Abnahmen in jeder 2. Reihe/in jeder Hin-Reihe, dann nehmen Sie in jeder 4. Reihe ab = 16 Abnahmen. Viel Spaß beim Stricken!
24.01.2025 - 08:07
![]() Katrin napsala:
Katrin napsala:
Ich habe eine Frage zu den V-Ausschnitt-Abnahmen (Größe M). Nach 33 cm soll in der folgenden Hinreihe mit den Abnahmen begonnen werden, also nehme ich dieser Reihe schon eine Masche ab. Dann eine Abnahme in der nächsten 4. Reihe, dann 12 Abnahmen in jeder 2. Reihe und dann 3 Abnahmen in jeder 4. Reihe. Damit käme ich mit der ersten Abnahme auf 17 Abnahmen insgesamt anstatt der 16 aus der Anleitung. Habe ich da etwas missverstanden?
23.01.2025 - 14:45
![]() Sandrine napsala:
Sandrine napsala:
Bonjour, je ne comprends pas comment se construit le biais de l'épaule. Je découvre cette nouvelle construction et serais heureuse que vous m'apportiez les explications afin de réussir. Cordialement Sandrine.
27.03.2024 - 09:58Odpověď DROPS Design :
Bonjour Sandrine, vous allez tricoter des rangs raccourcis en mettant les mailles de l'épaule en début de rang à partir de l'emmanchure (sur l'endroit épaule droite dos/épaule gauche devant - sur l'envers épaule gauche dos/droite devant). Dans cette vidéo, nous montrons (pour un autre modèle = nombre de mailles différent) comment procéder. Bon tricot!
02.04.2024 - 10:51
![]() Nariman napsala:
Nariman napsala:
Sollen wir für den V Ausschnitt (Vorderteil) immer an der selben Stelle (11 Masche) eine Masche abnehmen oder sollen wir die Abnahme auf dem Vorderteil verteilen. Bsp. Einmal an Stelle 11 M dann 20M dann 30M …
24.02.2024 - 17:31Odpověď DROPS Design :
Liebe Frau Nariman, die Abnahmen für den V-Halsausschnitt werden immer innerhalb die 10 ersten Maschen (rechtes Vorderteil) / die 10 letzten Maschen (linkes Vorderteil) gestrickt; Viel Spaß beim stricken!
26.02.2024 - 08:29
![]() Paula napsala:
Paula napsala:
Hei, En ymmärrä, miten olan viistotus tehdään.
18.02.2024 - 17:18Odpověď DROPS Design :
Olan viistotus tehdään siten, että silmukoita siirretään apulangalle kerroksen lopussa (silmukat neulotaan ennen kuin niitä siirretään apulangalle). Tämän jälkeen työ käännetään ja sitten neulotaan takaisin.
20.03.2024 - 17:27
![]() Nariman napsala:
Nariman napsala:
Ich habe das Rückenteil wie beschrieben gestrickt sowie die mittleren Maschen für den Halsausschnitt abgekettet und verstehe nicht warum ich jetzt danach nur 1 Masche abketten muss die am Halsrand beginnt.
06.02.2024 - 14:36Odpověď DROPS Design :
Liebe Nariman, für den Halsausschnitt wird man zuerst die mittleren 29 - 31 Maschen (siehe Größe) abketten, dann noch 1 Masche beidseitig von diesen Maschen, jede Schulter strickt man separat weiter und am Anfang der nächsten Reihe ab Halsausschnitt (Rückreihe für rechte Schulter/Hinreihe für linke Schulter) wird noch 1 Masche abgekettet, gleichzeitig stricken Sie die diagonale Schulter am Anfang jeder Reihe ab Armausschnitt weiter. Viel Spaß beim stricken!
07.02.2024 - 08:02
![]() Siobhan Schömig napsala:
Siobhan Schömig napsala:
Hallo, ich bin grade beim V-Ausschnitt des rechten Vorderteils und hab die erste Masche in einer Hinreihe abgenommen wie beschrieben. Jetzt steht dieses in der folgenden 4. Reihe wiederholen. Das wäre aber eine Rückreihe. Ist das richtig? Oder ist damit gemeint und der folgenden 4. Hinreihe?
14.09.2023 - 10:52Odpověď DROPS Design :
Liebe Frau Schömig, nach dieser Abnahmen-Reihe stricken Sie jetzt 3 Reihen ohne Abnahmen, und bei der nächsten Reihe = eine Hin-Reihe, nehmen Sie noch einmal wieder ab. Viel Spaß beim stricken!
14.09.2023 - 17:12
|
||||
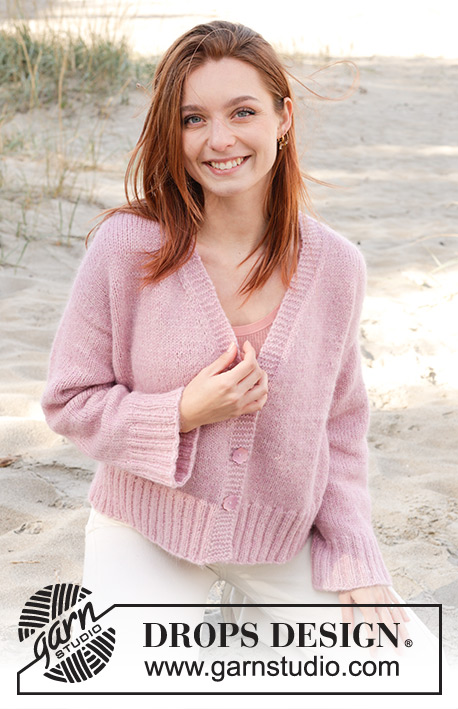
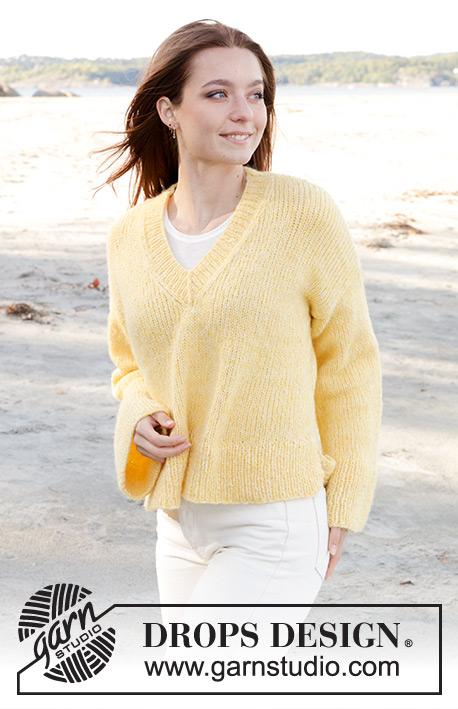
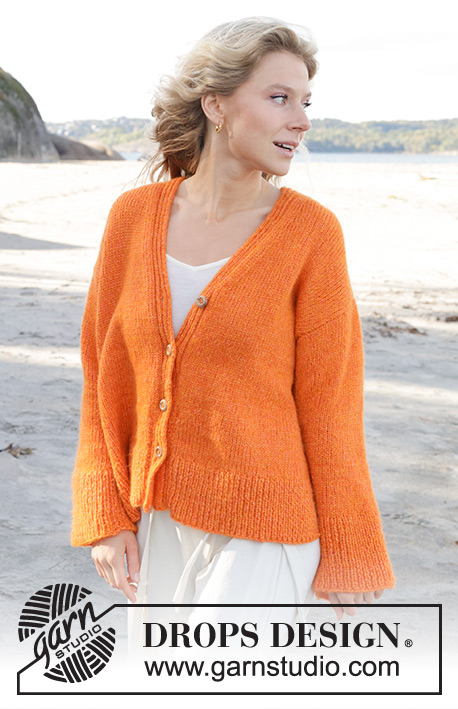
October Sun#octobersuncardigan |
||||
 |
 |
|||
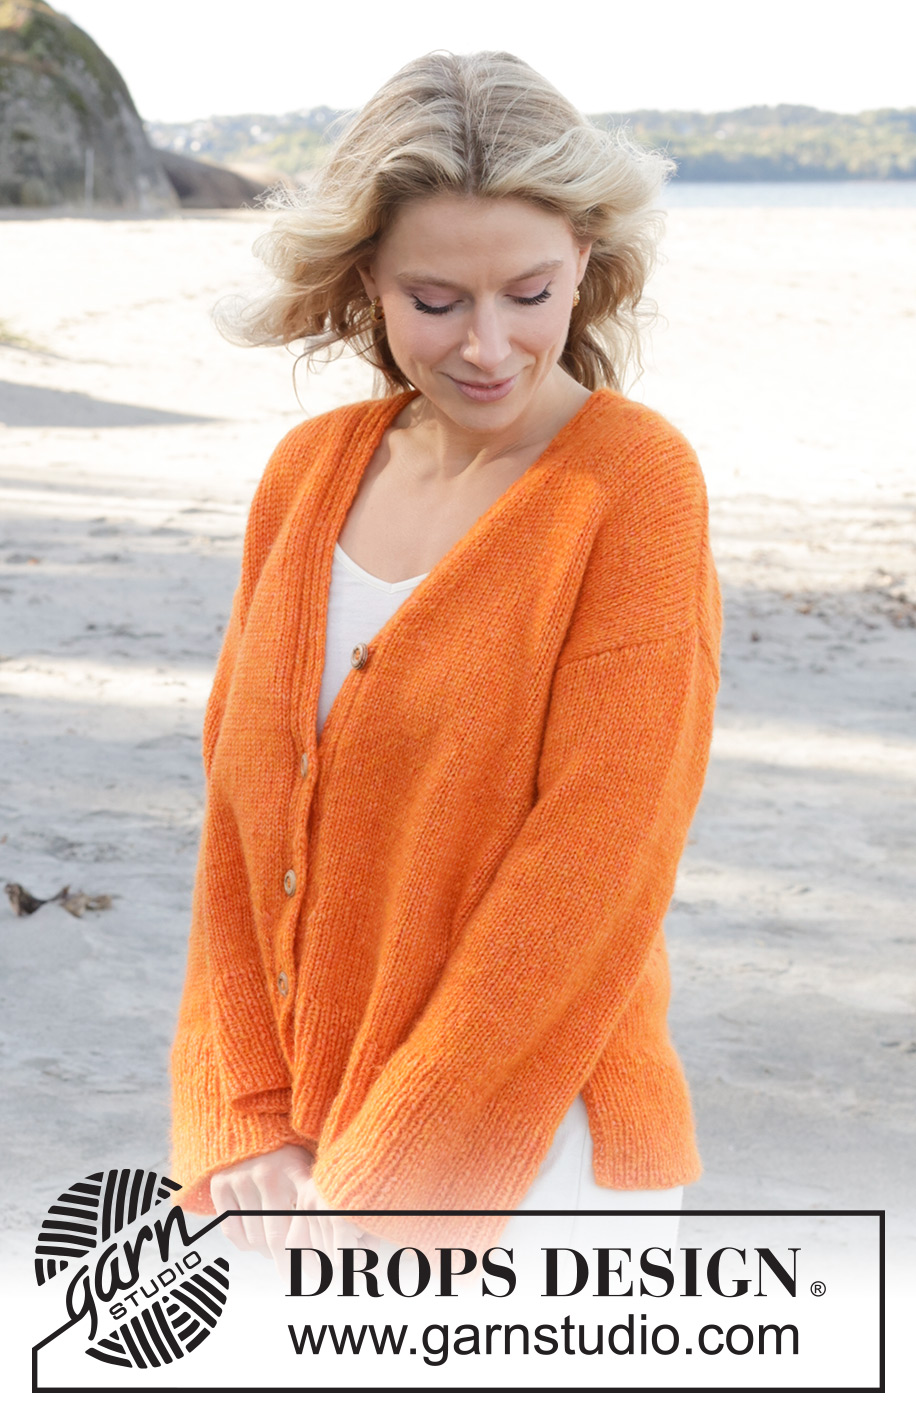
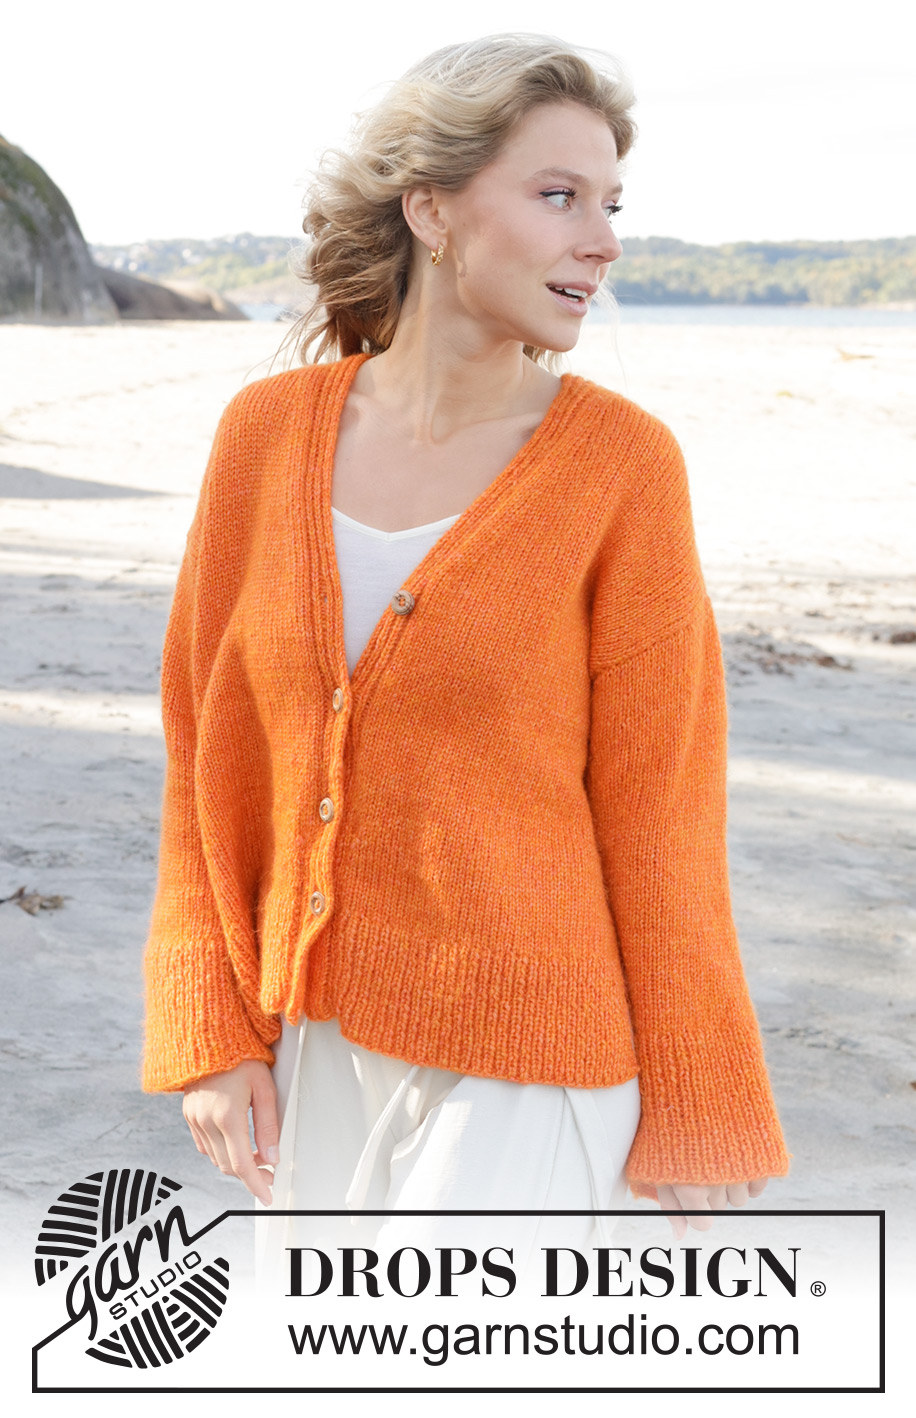
Propínací svetr se zešikmenými náramenicemi a postranními rozparky pletený zdola nahoru z příze DROPS Air. Velikost S - XXXL.
DROPS 240-20 |
||||
|
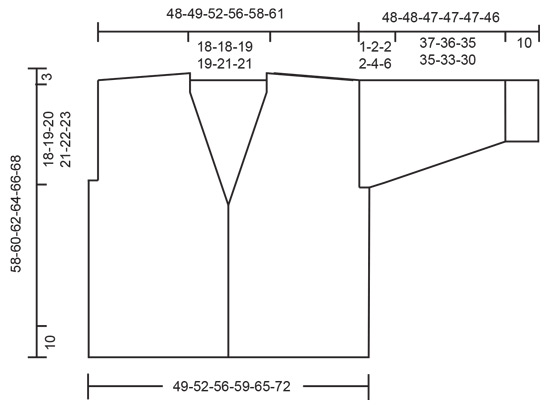
------------------------------------------------------- VYSVĚTLIVKY K NÁVODU: ------------------------------------------------------- VROUBKOVÝ VZOR: Pleteme stále hladce, lícové i rubové řady. 1 vroubek = 2 řady hladce. KNOFLÍKOVÉ DÍRKY: Knoflíkové dírky vyplétáme v léze pravého předního dílu. 1 KNOFLÍKOVÁ DÍRKA = spleteme 3. a 4. oko od kraje hladce, a 1 oko nahodíme. V následující řadě pleteme nahození hladce - tím vznikne dírka. Knoflíkové dírky vyplétáme v těchto rozestupech: S: 11, 18, 25, 31 cm M: 11, 18, 25, 32 cm L: 11, 18, 25, 33 cm XL: 11, 18, 26, 34 cm XXL: 11, 19, 27, 35 cm XXXL: 11, 19, 27, 36 cm TIP – UJÍMÁNÍ (platí pro rukávy): Ujímáme 1 oko na každé straně značky takto: začínáme 3 oka před značkou, spleteme 2 oka hladce, 2 oka upleteme hladce (značka leží mezi nimi), 1 oko sejmeme hladce, 1 upleteme hladce a sejmuté přes ně přetáhneme (= ujmuli jsme 2 oka). ------------------------------------------------------- PRÁCE ZAČÍNÁ ZDE: ------------------------------------------------------- SVETR – JAK BUDEME POSTUPOVAT: Zadní a přední díl upleteme odděleně v řadách, zdola nahoru. Rukávy pleteme shora dolů. Nejdříve upleteme v řadách rukávovou hlavici, pak pleteninu spojíme a rukávy dokončíme v kruhových řadách na ponožkových jehlicích. ZADNÍ DÍL: Na kruhovou jehlici č. 4 nahodíme přízí DROPS Air 113-119-127-135-149-165 ok. Pleteme pružný lem, začínáme lícovou řadou: 2 krajová oka VROUBKOVÝM VZOREM – viz popis výše, * 1 oko hladce, 1 oko obrace *, mezi *-* opakujeme po poslední 3 oka, upleteme 1 oko hladce a 2 krajová oka vroubkovým vzorem. V tomto rozvržení pleteme pružný lem do výše 10 cm - končíme rubovou řadou. Upleteme 1 řadu hladce a SOUČASNĚ rovnoměrně ujmeme 28-28-30-32-36-40 ok = 85-91-97-103-113-125 ok. Převedeme práci na kruhovou jehlici č. 5 a pokračujeme lícovým žerzejem do výše 37-38-39-40-41-42 cm; na obou stranách pleteme 1 krajové oko vroubkovým vzorem. Na začátku následujících 2 řad uzavřeme 2-4-4-4-7-11 ok pro průramky = 81-83-89-95-99-103 ok. Potom pleteme do výšky 55-57-59-61-63-65 cm. Teď uzavřeme prostředních 29-29-31-31-33-33 ok (= průkrčník), a každou náramenici dokončíme samostatně. POPIS DALŠÍHO POSTUPU: Nyní budeme ujímat oka pro průkrčník a také budeme odkládat oka na pomocnou jehlici pro zešikmené náramenice. Před pokračováním si nejdříve přečtěte postup pro PRŮKRČNÍK a ZEŠIKMENÉ NÁRAMENICE. PRŮKRČNÍK: Na začátku následující řady u průkrčníku uzavřeme 1 oko. ZEŠIKMENÉ NÁRAMENICE: Odložíme krajní oka u průramku na pomocnou jehlici pro náramenice, oka nejdříve upleteme a pak je odložíme. Na pomocné jehlice odložíme 2x 8-8-9-10-10-11 ok a potom odložíme posledních 9-10-10-11-12-12 ok. Všechna oka jsou nyní buď uzavřená, nebo odložená na pomocnou jehlici. Odložených 25-26-28-31-32-34 ok vrátíme z pomocné jehlice zpět na kruhovou jehlici č. 5 a upleteme 1 řadu lícovým žerzejem - v místě uprostřed pleteniny, kde jsme práci otočili, nabereme přízi mezi 2 oky a upleteme ji za zadní nit společně s prvním okem na levé jehlici - tím zamezíme vzniku dírky. Potom všechna oka volně uzavřeme. Díl měří asi 58-60-62-64-66-68 cm od nahozeného okraje (měřeno od vrcholku náramenice). Stejným způsobem upleteme i druhou náramenici. PRAVÝ PŘEDNÍ DÍL: Na kruhovou jehlici č. 4 nahodíme přízí DROPS Air 66-70-76-80-88-96 ok. Pleteme pružný lem, začínáme lícovou řadou: 2 oka hladce, 1 oko obrace, * 1 oko hladce, 1 oko obrace *, mezi *-* opakujeme po poslední 3 oka, upleteme 1 oko hladce a 2 krajová oka vroubkovým vzorem. V tomto rozvržení pleteme pružný lem do výše 10 cm - končíme rubovou řadou. Následující lícovou řadu pleteme v tomto rozvržení: 2 oka hladce, 1 oko obrace, 1 oko hladce, 1 oko obrace, 1 oko hladce, 1 oko obrace (= léga), následujících 58-62-68-72-80-88 ok pleteme lícovým žerzejem a SOUČASNĚ rovnoměrně ujmeme 16-17-20-21-24-26 ok, nakonec 1 krajové oko vroubkovým vzorem = 50-53-56-59-64-70 ok. V tomto rozvržení pleteme do výšky 11 cm. Nyní začneme vyplétat KNOFLÍKOVÉ DÍRKY – viz popis výše. Pleteme až do výšky 32-33-34-35-36-37 cm. POPIS DALŠÍHO POSTUPU: Nyní budeme ujímat oka pro V-výstřih a SOUČASNĚ pro průramky. PŘED POKRAČOVÁNÍM SI PŘEČTĚTE CELÝ NÁSLEDUJÍCÍ ODSTAVEC! V-VÝSTŘIH: Ve výši 32-33-34-35-36-37 cm začínáme v následující lícové řadě ujímat oka pro V-výstřih: Upleteme 10 ok jako dosud, sejmeme 1 oko hladce, 1 oko upleteme hladce a sejmuté oko přes upletené přetáhneme (= ujmuli jsme 1 oko), potom pleteme do konce řady. Tímto způsobem ujímáme každou 4. řadu 1x (= první ujímání je popsáno výše), potom každou 2. řadu 12-12-13-13-14-14x a nakonec každou 4. řadu 3x = 16-16-17-17-18-18 ok. PRŮRAMEK: Ve výši 37-38-39-40-41-42 cm uzavřeme v další rubové řadě na boku 2-4-4-4-7-11 ok. Po dokončení veškerého ujímání (průramky + V-výstřih) nám zbývá 32-33-35-38-39-41 ok náramenice. Pokračujeme lícovým žerzejem a légou jako dříve až do výše 55-57-59-61-63-65 cm. ZEŠIKMENÁ NÁRAMENICE: Krajní oka u průramku odložíme na pomocnou jehlici pro náramenice - oka nejdříve upleteme a pak je odložíme. Na pomocné jehlice odložíme 2x 8-8-9-10-10-11 ok, a potom odložíme posledních 16-17-17-18-19-19 ok. Všechna oka jsou nyní buď uzavřená, nebo odložená na pomocnou jehlici. Vrátíme odložených 32-33-35-38-39-41 ok z pomocné jehlice zpět na kruhovou jehlici č. 5 a upleteme 1 řadu lícovým žerzejem - v místě uprostřed pleteniny, kde jsme práci otočili, nabereme přízi mezi 2 oky a upleteme ji za zadní nit společně s prvním okem na levé jehlici - tím zamezíme vzniku dírky. Potom oka volně uzavřeme. Díl měří asi 58-60-62-64-66-68 cm od nahozeného okraje (měřeno od vrcholku náramenice). V další řadě uzavřeme 25-26-28-31-32-34 ok náramenice = na jehlici zbývá 7 ok légy. Nad těmito oky upleteme dalších 9-9-10-10-11-11 cm výšky a nakonec všechna oka uzavřeme. LEVÝ PŘEDNÍ DÍL: Na kruhovou jehlici č. 4 nahodíme přízí DROPS Air 66-70-76-80-88-96 ok. Pleteme pružný lem, začínáme lícovou řadou: 2 krajová oka vroubkovým vzorem, * 1 oko hladce, 1 oko obrace*, opakujeme mezi *-* až po poslední 2 oka, upleteme 2 oka hladce. V tomto rozvržení pleteme pružný lem do výše 10 cm - končíme rubovou řadou. Následující lícovou řadu pleteme v tomto rozvržení: 1 krajové oko vroubkovým vzorem, následujících 58-62-68-72-80-88 ok lícovým žerzejem a SOUČASNĚ rovnoměrně ujmeme 16-17-20-21-24-26 ok, upleteme 1 oko obrace, 1 oko hladce, 1 oko obrace, 1 oko hladce, 1 oko obrace, 2 oka hladce (= léga) = 50-53-56-59-64-70 ok. V tomto rozvržení pleteme do výše 32-33-34-35-36-37 cm. POPIS DALŠÍHO POSTUPU: Nyní budeme ujímat oka pro V-výstřih a SOUČASNĚ pro průramky. PŘED POKRAČOVÁNÍM SI PŘEČTĚTE CELÝ NÁSLEDUJÍCÍ ODSTAVEC! V-VÝSTŘIH: Ve výši 32-33-34-35-36-37 cm začínáme v následující lícové řadě ujímat oka pro V-výstřih. Upleteme 1 krajové oko vroubkovým vzorem, pak pleteme jako dosud až po posledních 12 ok, spleteme 2 oka hladce (= ujmeme 1 oko) a upleteme posledních 10 ok. Tímto způsobem ujímáme každou 4. řadu 1x (= první ujímání je popsáno výše), potom každou 2. řadu 12-12-13-13-14-14x a nakonec každou 4. řadu 3x = 16-16-17-17-18-18 ok. PRŮRAMEK: Ve výši 37-38-39-40-41-42 cm uzavřeme v další lícové řadě na boku 2-4-4-4-7-11 ok. Po dokončení veškerého ujímání (průramky + V-výstřih) nám zbývá 32-33-35-38-39-41 ok náramenice. Pokračujeme lícovým žerzejem a légou jako dříve až do výše 55-57-59-61-63-65 cm. ZEŠIKMENÉ NÁRAMENICE: Krajní oka u průramku odložíme na pomocnou jehlici pro náramenice - tato oka nejdříve upleteme a pak je odložíme. Na pomocné jehlice odložíme 2x 8-8-9-10-10-11 ok, potom odložíme posledních 16-17-17-18-19-19 ok. Všechna oka jsou nyní buď uzavřená, nebo odložená na pomocnou jehlici. Odložených 32-33-35-38-39-41 ok vrátíme z pomocné jehlice zpět na kruhovou jehlici č. 5 a upleteme 1 řadu lícovým žerzejem - v místě uprostřed pleteniny, kde jsme práci otočili, nabereme přízi mezi 2 oky a upleteme ji za zadní nit společně s prvním okem na levé jehlici - tím zamezíme vzniku dírky. Potom tato oka volně uzavřeme. Díl měří asi 58-60-62-64-66-68 cm od nahozeného okraje (měřeno od vrcholku náramenice). V další řadě uzavřeme 25-26-28-31-32-34 ok náramenice = na jehlici zbývá 7 ok légy. Nad těmito oky upleteme dalších 9-9-10-10-11-11 cm výšky a potom všechna oka uzavřeme. RUKÁVY: Rukávy pleteme shora dolů. Na krátkou kruhovou jehlici č. 5 nahodíme přízí DROPS Air 61-65-69-71-75-79 ok. Pleteme lícovým žerzejem v řadách do výše 1-2-2-2-4-6 cm. Pak pleteme v tomto rozvržení: Na začátek kruhové řady vložíme 1 značku - později ji využijeme při ujímání, a proto ji během práce snímáme vždy do aktuálně pletené kruhové řady. Pleteme v kruhových řadách lícovým žerzejem, podle potřeby převedeme pleteninu s ubývajícím počtem ok na ponožkové jehlice. Ve výši 3-4-4-4-6-8 cm od nahozeného okraje ujmeme na každé straně značky 1 oko – viz TIP - UJÍMÁNÍ. Takto ujímáme každých 5,5-4-3,5-3,5-3-2 cm výšky, celkem 6-7-8-8-9-11x = 49-51-53-55-57-57 ok. Pak pokračujeme v pletení do výše rukávu 38-38-37-37-37-36 cm. Upleteme 1 kruhovou řadu hladce a SOUČASNĚ přidáme rovnoměrně 17-17-17-19-19-19 ok = 66-68-70-74-76-76 ok. Převedeme pleteninu na ponožkové jehlice č. 4 a pleteme pružným vzorem (1 oko hladce, 1 oko obrace). Když je lem vysoký 10 cm, všechna oka volně uzavřeme. Rukáv měří 48-48-47-47-47-46 cm. Stejným způsobem upleteme i druhý rukáv. DOKONČENÍ: Sešijeme náramenice. Na zátylku, uprostřed zadního dílu, sešijeme lem průkrčníku a přišijeme ho k výstřihu. Rukávovou hlavici vsadíme do průramku - viz nákres. Sešijeme postranní švy, spodních 10 cm od dolního okraje ponecháme nesešitých (= rozparky). Na levou légu přišijeme knoflíky. |
||||
Vysvětlivky ke schématu |
||||
|
||||

|
||||
|
||||
Dokončili jste tento model?Pak označte své fotky tagem #dropspattern #octobersuncardigan nebo je pošlete do galerie #dropsfan. Potřebujete s tímto návodem poradit?Otevřete-li si návod na stránce garnstudio.com, najdete tam 29 výukových video-ukázek, Komentáře/Dotazy a další užitečné informace. © 1982-2025 DROPS Design A/S. Vyhrazujeme si veškerá práva. Tento dokument, včetně všech jeho dílčích částí, podléhá autorským právům. Podrobnější komentář k možnostem užití našich návodů najdete dole pod každým návodem na našich stránkách. |
||||


V oblasti pletené a háčkované módy působí DROPS Design více než 40 let. Díky tomu vám můžeme nabídnout jednu z nejrozsáhlejších kolekcí modelů s bezplatnými návody dostupnými na internetu - navíc v 17 jazycích. K dnešnímu dni máme na 314 katalogů a 11822 návodů celkem - z nich je už 7048 dostupných v [češtině].
Přidejte komentář k návodu DROPS 240-20
Rádi bychom věděli, co si o tomto modelu myslíte!
Pokud se chcete na něco zeptat, dbejte prosím na to, abyste ve formuláři níže vybrali správnou kategorii - díky tomu se dříve dozvíte, co potřebujete vědět. Povinná pole jsou označena *.