DROPS Wish
DROPS Wish
50% Alpaca, 33% Cotton, 17% Wool
from 4.80 £ /50g
Get the yarn to make this pattern from 48.00£.

The yarn cost is calculated from the pattern’s smallest size and the yarn’s cheapest product type. Looking for an even better price? You might find it on the DROPS Deals!

DROPS SS24

Almond Breeze

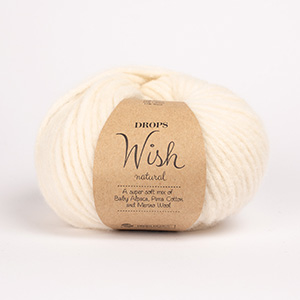
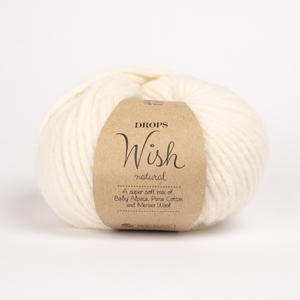
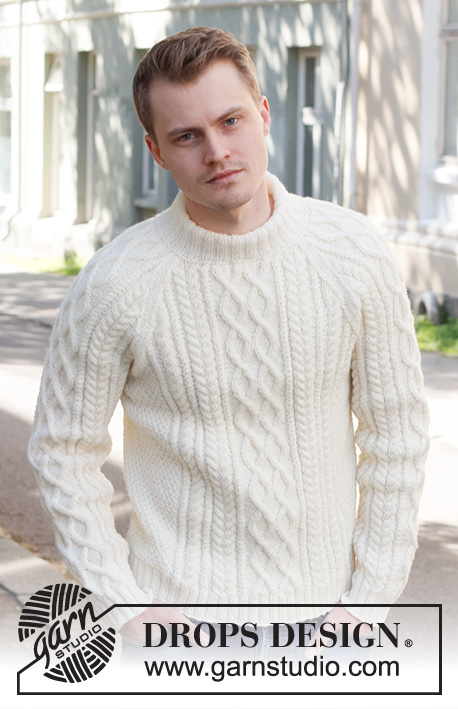
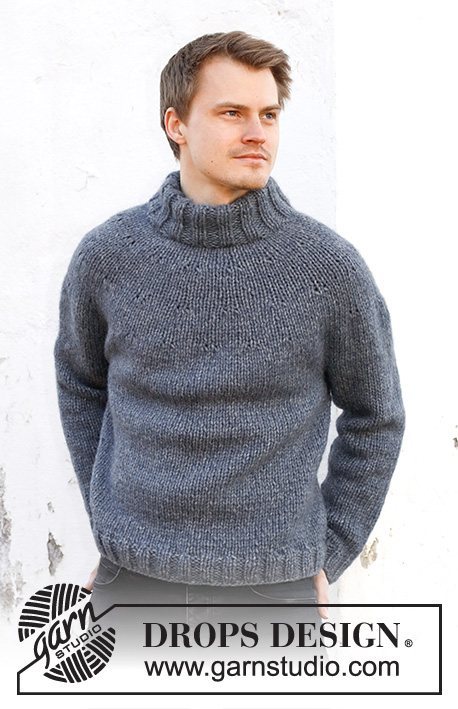
Knitted jumper for men in 1 strand DROPS Wish or 2 strands DROPS Air. The piece is worked top down, with raglan and double neck. Sizes S - XXXL.

DROPS 224-13
DROPS Design: Pattern no wi-018
Yarn group E or C + C
-------------------------------------------------------

SIZES:
S - M - L - XL - XXL - XXXL

MATERIALS:
DROPS WISH from Garnstudio (belongs to yarn group E)
500-550-600-650-750-800 g colour 08, grey beige

Or use:
DROPS AIR from Garnstudio (belongs to yarn group C)
500-550-600-650-700-750 g colour 26, beige

NEEDLES:
DROPS CIRCULAR NEEDLE SIZE 8 MM: Length 40 cm and 80 cm.
DROPS CIRCULAR NEEDLE SIZE 7 MM: Length 40 cm and 80 cm.
DROPS DOUBLE POINTED NEEDLES SIZE 8 MM.
DROPS DOUBLE POINTED NEEDLES SIZE 7 MM.
The technique MAGIC LOOP can be used – you then only need circular needle of 80 cm in each size.

KNITTING TENSION:
11 stitches in width and 15 rows in height with stocking stitch = 10 x 10 cm with 1 strand DROPS Wish or 2 strands DROPS Air.
NOTE: Needle size is only a guide. If you get too many stitches on 10 cm, change to a larger needle size. If you get too few stitches on 10 cm, change to a smaller needle size.

-------------------------------------------------------

Alternative Yarn – See how to change yarns here
Yarn Groups A to F – Use the same pattern and change the yarn here
Yarn usage using an alternative yarn – Use our yarn converter here

-------------------------------------------------------

DROPS Wish
DROPS Wish
50% Alpaca, 33% Cotton, 17% Wool
from 4.80 £ /50g
Get the yarn to make this pattern from 48.00£.

The yarn cost is calculated from the pattern’s smallest size and the yarn’s cheapest product type. Looking for an even better price? You might find it on the DROPS Deals!

Pattern instructions

NOTE: This pattern is written in British English. All measurements in charts are in cm. For conversion from cm to inches - click here. There are different terms for crocheting in British and American English. If this pattern includes crochet, click for "crochet terms" here. For this pattern in American English, please click here.
-------------------------------------------------------

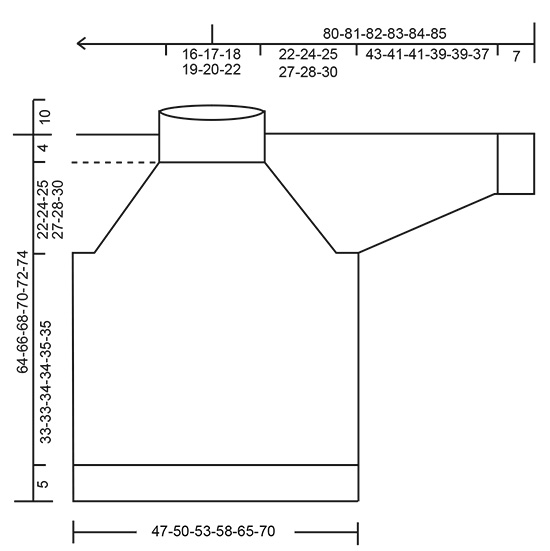
EXPLANATIONS FOR THE PATTERN:

-------------------------------------------------------

INCREASE/DECREASE TIP (evenly spaced):
To work out how to increase/decrease evenly, count the total number of stitches on needle (e.g. 60 stitches), and divide by the number of increases/decreases to be made (e.g. 6) = 10. In this example, increase by making 1 yarn over after each 10th stitch. On the next round knit the yarn overs twisted to avoid holes. When decreasing, knit together each 10th and 11th stitch.

RAGLAN:
Increase 2 stitches at each marker as follows:
Work to the marker-stitch, make 1 yarn over, knit 1 (= marker-stitch), 1 yarn over (a total of 8 stitches increased on the round). At the beginning of the round increase after the first marker-stitch and then again after the last stitch on the round (the first marker-stitch remains the first stitch on the round).
On the next round, knit the yarn overs twisted to avoid holes.

DECREASE TIP (for sleeves): 
Decrease 1 stitch on either side of the marker thread as follows: Work until there are 3 stitches left before the marker thread, knit 2 together, knit 2 (marker thread sits between these 2 stitches), slip 1 stitch as if to knit, knit 1 and pass the slipped stitch over the knitted stitch (2 stitches decreased).

CASTING-OFF TIP:
To avoid the cast-off edge being tight you can cast off with a larger size needle. If the edge is still tight, make 1 yarn over after approx. each 4th stitch at the same time as casting off; the yarn overs are cast off as normal stitches.

-------------------------------------------------------

START THE PIECE HERE:

-------------------------------------------------------

JUMPER – SHORT OVERVIEW OF THE PIECE:
The neck and yoke are worked in the round with circular needle, top down. The yoke is divided for body and sleeves and the body is continued in the round with circular needle. The sleeves are worked with double pointed needles/short circular needle, top down.

DOUBLE NECK:
Cast on 87-90-96-102-108-114 stitches with short circular needle size 7 mm and 1 strand DROPS Wish or 2 strands DROPS Air. Work rib (knit 1, purl 2) for 4 cm. Now decrease all purl-2 to purl-1 = 58-60-64-68-72-76 stitches. Continue the new rib until the piece measures 21 cm.
Knit 1 round where you decrease 6-6-8-8-10-10 stitches evenly spaced – read INCREASE/DECREASE TIP = 52-54-56-60-62-66 stitches.
Insert 1 marker at the beginning of the round; the yoke is measured from this marker.

YOKE:
Change to circular needle size 8 mm.
Insert 4 markers (without working the stitches) as follows:
Insert 1 marker in the first stitch (= transition between sleeve and back piece), count 16-17-18-20-21-23 stitches (= back piece), insert 1 marker in the next stitch, count 8 stitches (= sleeve), insert 1 marker in the next stitch, count 16-17-18-20-21-23 stitches (= front piece), insert 1 marker in the next stitch, there are 8 stitches left on the round (= sleeve).
Continue with stocking stitch and increase to RAGLAN – read description above. Increase like this every 2nd round a total of 15-16-17-18-20-21 times = 172-182-192-204-222-234 stitches. REMEMBER THE KNITTING TENSION!
The piece measures approx. 20-21-23-24-27-28 cm from the marker. Continue with stocking stitch, without further increases, until the piece measures 22-24-25-27-28-30 cm from the marker – in sizes XXL and XXXL adjust so the round ends 1 stitch before the last stitch (i.e. 1 stitch before the marker-stitch) so the piece is symmetrical.
Now divide for the body and sleeves as follows:
Knit 48-51-54-58-65-69, place the next 38-40-42-44-46-48 stitches on a thread for the sleeve, cast on 4-4-4-6-6-8 stitches, knit 48-51-54-58-65-69, place the next 38-40-42-44-46-48 stitches on a thread for the sleeve, cast on 4-4-4-6-6-8 stitches.

BODY:
= 104-110-116-128-142-154 stitches. Continue with stocking stitch in the round for 33-33-34-34-35-35 cm. Try the jumper on and work to desired length; there is approx 5 cm left to finished length.
Knit 1 round where you increase 20-22-24-24-28-28 stitches evenly spaced = 124-132-140-152-170-182 stitches.
Change to circular needle size 7 mm and work rib (knit 1, purl 1) for 5 cm. Cast off with knit over knit and purl over purl – read CASTING-OFF TIP!
The jumper measures approx. 64-66-68-70-72-74 cm from the shoulder down.

SLEEVES:
Place the 38-40-42-44-46-48 stitches from the thread on the one side of the piece on double pointed needles/short circular needle size 8 mm and knit up 1 stitch in each of the 4-4-4-6-6-8 stitches cast on under the sleeve = 42-44-46-50-52-56 stitches. Insert a marker thread in the middle of the new stitches under the sleeve.
Start at the marker thread and work stocking stitch in the round for 4 cm. Now decrease 2 stitches under the sleeve – read DECREASE TIP.
Decrease like this every 6½-5-5-4-3½-3 cm a total of 6-7-7-8-9-10 times = 30-30-32-34-34-36 stitches.
Continue working until the sleeve measures 43-41-41-39-39-37 cm from the division (shorter measurements in larger sizes due to wider neck and longer yoke). Try the jumper on and work to desired length; there is approx 7 cm left to finished length).
Change to double pointed needles size 7 mm and work rib (knit 1, purl 1) for 7 cm. The sleeve measures approx. 50-48-48-46-46-44 cm.
Cast off with knit over knit and purl over purl – remember CASTING-OFF TIP!
Work the other sleeve in the same way.

ASSEMBLY:
Fold the neck double to the inside and sew down. To avoid the neck being tight and rolling outwards, it is important that the seam is elastic.

This pattern has been corrected.

Updated online: 29.09.2021
Yarn amount in size L has been edited.

Diagram

diagram measurements

Each of our patterns has specific tutorial videos to help you.

Do you have a question? See a list of frequently asked questions (FAQ)

Knitting tension is what determines the final measurements of your work, and is usually measured per 10 x 10 cm. It is provided like so: number of stitches in width x number of rows in height - eg: 19 stitches x 26 rows = 10 x 10 cm.

The knitting tension is very individual; some people knit/crochet loosely while others work tightly. You adjust the knitting tension with the needle size, which is why the suggested needle size is only meant as a guide! You need to adjust this (up or down) to ensure that YOUR knitting tension matches the knitting tension provided in the pattern. If you work with a different knitting tension than provided you will have a different yarn consumption, and your work will have different measurements than what the pattern suggests.

The knitting tension also determines which yarns can replace each other. As long as you achieve the same knitting tension you can replace one yarn with another.

See DROPS lesson: How to measure your tension/gauge

See DROPS video: How to make a gauge tension swatch

The required amount of yarn is provided in grams, eg: 450 g. To calculate how many balls you’ll need you first need to know how many grams are in 1 ball (25g, 50g or 100g). This information is available if you click on the individual yarn quality on our pages. Divide the amount required with the amount of each ball. For example, if each ball is 50g (the most common amount), the calculation will be as follows: 450 / 50 = 9 balls.

The important thing when changing from one yarn to another is that the knitting/crochet tension remains the same. This is so that the measurements of the finished piece will be the same as on the sketch provided. It is easier to achieve the same knitting tension using yarns from the same yarn group. It is also possible to work with multiple strands of a thinner yarn to achieve the knitting tension of a thicker one. Please try our yarn converter. We recommend you to always work a test swatch.

Please NOTE: when changing yarn the garment might have a different look and feel to the garment in the photo, due to individual properties and qualities of each yarn.

See DROPS lesson: Can I use a different yarn than the one mentioned in the pattern?

All our yarns are categorised into yarn groups (from A to F) according to thickness and knitting tension – group A contains the thinnest yarns and group F the thickest. This makes it easier for you to find alternative yarns to our patterns, should you wish to switch yarn. All yarns within the same group have a similar knitting tension and can easily replace each other. However, different yarn qualities have different structures and properties which will give the finished work a unique look and feel.

Click here for an overview of the yarns in each yarn group

At the top of all our patterns you’ll find a link to our yarn calculator, which is a helpful tool should you wish to use a different yarn than suggested. By filling in the yarn quality you wish to replace, the amount (in your size) and number of strands, the calculator will present good alternative yarns with the same knitting tension. Additionally it will tell you how much you’ll require in the new qualities and whether you’ll need to work with multiple strands. Most skeins are 50g (some are 25g or 100g).

If the pattern is worked with multiple colours, every colour will have to be calculated separately. Similarly, if the pattern is worked with several strands of different yarns (for example 1 strand Alpaca and 1 strand Kid-Silk) you will have to find alternatives for each, individually.

Click here to see our yarn calculator

Since different yarns have different qualities and textures we have chosen to keep the original yarn in our patterns. However, you can easily find options among our available qualities by using our yarn calculator, or simply pick a yarn from the same yarn group.

It is possible that some retailers still have discontinued yarns in stock, or that someone has a few skeins at home that they would like to find patterns for.

The yarn calculator will provide both alternative yarn as well as required amount in the new quality.

If you think it's hard to decide what size to make, it can be a good idea to measure a garment you own already and like the size of. Then you can pick the size by comparing those measures with the ones available in the pattern's size chart.

You'll find the size chart at the bottom of the pattern.

See DROPS lesson: How to read size chart

The needle size provided in the pattern serves only as a guide, the important thing is to follow the knitting tension. And since knitting tension is very individual, you will have to adjust the needle size to ensure that YOUR tension is the same as in the pattern – maybe you’ll have to adjust 1, or even 2 needle sizes, up or down to achieve the correct tension. For this, we recommend that you work test swatches.

Should you work with a different knitting tension than the one provided, the measurements of the finished garment might deviate from the measurement sketch.

See DROPS lesson: How to measure your tension/gauge

See DROPS video: How to make a tension/gauge swatch

Working a garment top-down provides more flexibility and room for personal adjustment. For example it is easier to try the garment on while working, as well as making adjustments to length of yoke and shoulder caps.

The instructions are carefully explaining every step, in the correct order. Diagrams are adjusted to the knitting direction and are worked as usual.

The diagram depicts all rows/rounds, and every stitch seen from the right side. It is read from bottom to top, from right to left. 1 square = 1 stitch.

When working back and forth, every other row is worked from the right side and every other row is worked from the wrong side. When working from the wrong side, the diagram will have to be worked reversed: from left to right, knit stitches are purled, purl stitches are knit etc.

When working in the round every round is worked from the right side and the diagram are worked from right to left on all rounds.

See DROPS lesson: How to read knitting diagrams

The diagram depicts all rows/rounds, and every stitch seen from the right side. It is worked from bottom to top, from right to left.

When working back and forth every other row is worked from the right side: from right to left and every other row is worked from the wrong side: from left to right.

When working in the round, every row in the diagram are worked from the right side, from right to left.

When working a circular diagram you start in the middle and work your way outwards, counter clockwise, row by row.

The rows usually start with a given number of chain stitches (equivalent to the height of the following stitch), this will either be depicted in the diagram or explained in the pattern.

See DROPS lesson: How to read crochet diagrams

Instructions for working several diagrams after each other on the same row/round, will often be written like so: “work A.1, A.2, A.3 a total of 0-0-2-3-4 times". This means you work A.1 once, then A.2 is worked once, and A.3 is repeated (in width) the number of times provided for your size – in this case like so: S = 0 times, M = 0 times, L=2 times, XL= 3 times and XXL = 4 times.

The diagrams are worked as usual: begin with the first row in A.1, then work the first row in A.2 etc.

See DROPS lesson: How to read knitting diagrams

See DROPS lesson: How to read crochet diagrams

The total width of the garment (from wrist-to-wrist) will be larger in the larger sizes, despite the actual sleeves being shorter. The larger sizes have longer sleeve caps and wider shoulders, so there will be a good fit in all sizes.

The measurement sketch/schematic drawing provides information regarding the full length of the garment. If it’s a jumper or a jacket the length is measured from the highest point on the shoulder closest to the neckline, and straight down to the bottom of the garment. It is NOT measured from the tip of shoulder. Similarly, the length of yoke is measured from the highest point on the shoulder and down to where yoke is split into body and sleeves.

On a jacket measures are never taken along bands, unless specifically stated. Always measure inside band stitches when measuring the length.

See DROPS lesson: How to read a schematic drawing

Diagrams are often repeated on the round or in height. 1 repeat is the diagram the way it appears in the pattern. If it says to work 5 repeats of A.1 in the round, then you work A.1 a total of 5 times after/next to each other in the round. If it says to work 2 repeats of A.1 vertically/in height you work the entire diagram once, then begin again at the start and work the entire diagram one more time.

Chain stitches are slightly narrower than other stitches and to avoid working the cast-on edge too tight, we simply chain more stitches to begin with. The stitch count will be adjusted on the following row to fit the pattern and measurement sketch.

The rib edge is more elastic and will contract slightly compared to, for example, stocking stitch. By increasing before the rib edge, you avoid a visible difference in width between the rib edge and the rest of the body.

It’s very easy to cast off too tightly, and by making yarn overs while casting off (and simultaneously casting these off) you avoid a too tight cast off edge.

See DROPS video: How to bind off with yarn overs (yo)

To achieve an even increase (or decrease) you can increase on, for example: every 3rd and 4th row alternately, like so: work 2 rows and increase on the 3rd row, work 3 rows and increase on the 4th. Repeat this until the increase is complete.

See DROPS lesson: Increase or decrease 1 st on every 3rd and 4th row alternately

Should you prefer to work in the round instead of back and forth, you may of course adjust the pattern. You’ll need to add steeks mid-front (usually 5 stitches), and follow the instructions. When you would normally turn and work from the wrong side, simply work across the steek and continue in the round. At the end you’ll cut the piece open, pick up stitches to work bands, and cover the cut edges.

See DROPS video: How to knit steeks and cut open

Should you prefer to work back and forth instead of in the round, you may of course adjust the pattern so you work the pieces separately and then assemble them at the end. Divide the stitches for the body in 2, add 1 edge stitch in each side (for sewing) and work the front and back pieces separately.

See DROPS lesson: Can I adapt a pattern for circular needles into straight needles?

Pattern repeats can vary slightly in the different sizes, in order to get the correct proportions. If you’re not working the exact same size as the garment in the photo, yours might deviate slightly. This has been carefully developed and adjusted so that the complete impression of the garment is the same in all sizes.

Make sure to follow instructions and diagrams for your size!

If you have found a pattern you like which is available in women’s size it’s not very difficult to convert it to men’s size. The biggest difference will be the length of sleeves and body. Start working on the women size that you think would fit across the chest. The additional length will be worked right before you cast off for the armhole/sleeve cap. If the pattern is worked top-down you can add the length right after the armhole or before the first decrease on sleeve.

Regarding additional yarn amount, this will depend on how much length you add, but it is better with a skein too many than too few.

All yarns will have excess fibres (from production) that might come off as lint or shedding. Brushed yarns (ie hairier yarns) have more of these loose, excess fibres, causing more shedding.

Shedding also depends on what is worn under or over the garment, and whether this pulls at the yarn fibres. It’s therefore not possible to guarantee that there will be no shedding

Below are some tips on how to get the best result when working with hairier yarns:

1. When the garment is finished (before you wash it) shake it vigorously so the looser hairs come off. NOTE: do NOT use a lint roller, brush or any method that pulls at the yarn.

2. Place the garment in a plastic bag and put it in your freezer - the temperature will cause the fibres to become less attached to each other, and excess fibres will come off easier.

3. Leave in the freezer for a few hours before taking it out and shaking it again.

4. Wash the garment according to the instructions on the yarn label.

Pilling is a natural process that happens to even the most exclusive of fibers. It's a natural sign of wear and tear that is hard to avoid, and that is most visible in high friction areas of your garment like a sweater's arms and cuffs.

You can make your garment look as new by removing the pilling, using a fabric comb or a pill/lint remover.

Still can't find the answer you need? Then scroll down and leave your question so one of our experts can try to help you. This will be done normally within 5 to 10 working days.
In the meantime, you can read the questions and answers that others have left to this pattern or join the DROPS Workshop on Facebook to get help from fellow knitters/crocheters!

You might also like...

Post a comment to pattern DROPS 224-13

We would love to hear what you have to say about this pattern!

If you want to leave a question, please make sure you select the correct category in the form below, to speed up the answering process. Required fields are marked *.

Comments / Questions (14)

country flag Wijnanda wrote:

Voor maat M had ik 12 bollen nodig ipv 11 van Drops Wish. Ik brei niet strak, dus ik denk dat anderen dit ook nodig zullen hebben.

16.03.2024 - 21:10

country flag Maja Mortensen wrote:

Udgår wish garnet helt eller kommer der nye farver?

04.02.2024 - 09:17

DROPS Design answered:

Hei Maja. Garnet er dessverre på vei ut av vårt sortiment. mvh DROPS Design

12.02.2024 - 12:44

country flag Divya wrote:

I would like to add some short row shaping for the neck. Could you help me figure out how to modify the raglan increases for that for size L?

21.10.2023 - 23:50

DROPS Design answered:

Dear Divya, we don't make custom patterns. You can search for sweaters with an ELEVATION at the back (like this one: https://www.garnstudio.com/pattern.php?id=11621&cid=19) and try to apply them for this pattern. Happy knitting!

23.10.2023 - 00:19

country flag Samantha wrote:

I'm confused by the raglan increases. It says to increase by one on either side of the marked stitches for a total of 8 stitches increases per increase round. But it also says to increase after the first marked stitch of the round and after the last stitch of the round. Should it be a total of 10 stitches increased per round?

27.09.2023 - 02:35

DROPS Design answered:

Hi Samantha, The first marker is in the first stitch on the round, with the other 3 markers inserted as described in the text. So there will only be 8 increased stitches on each raglan-round. Happy knitting!

27.09.2023 - 06:56

country flag Ines wrote:

Hallo, ich stricke dieses Model in Größe XL und mir kommt der Kragen sehr weit vor? Habe 102 Maschen aufgenommen .

18.03.2023 - 23:41

DROPS Design answered:

Liebe Ines, mit Bündchen wird die Arbeit sich etwas zusammenziehen - dann wird man 1 Masche in jeder Linke-Partie abnehmen und weiter mit 1 M re/1 M li weiterstricken. Sollte Ihre Maschenprobe stimmen, dann werden die Maßen richtig sein. Viel Spaß beim stricken!

20.03.2023 - 09:05

country flag Ines wrote:

Muss bei dem Model Almond Breeze unbedingt die Nadelstärke 8 und 7 genommen werden? Oder reicht Nadelstärke 7 zu? Vielen Dank

15.03.2023 - 15:13

DROPS Design answered:

Liebe Ines, hier strickt man mit 2 Nadelstärke: Nr 7 für die Bündchen und Nr 8 für alle glattgestrickte Teile - stricken Sie zuerst eine Maschenprobe, so wissen Sie welche Nadelstärke Sie brauchen (glattrechts wird hier mit Nr 8 gestrickt). Viel Spaß beim stricken!

15.03.2023 - 16:01

country flag Gitte wrote:

Strikker str L, og har lige sat masker til hvile. Der er så 2 masker mere på det ene ærme jf. jeres opskrift. Hvad plejer I at gøre? Tage 2 masker ekstra op på det ene ærme, når jeg strikker ærmer?

24.02.2023 - 23:54

DROPS Design answered:

Hej Gitte, det skal være 44 masker på begge ærmer, tak for info - vi retter :)

28.02.2023 - 15:10

country flag Gitte wrote:

Strikker en str L. Har lige sat ærmer til hvile. Der er 2 masker mere på det ene. Er det meningen?

24.02.2023 - 23:52

country flag Annette Christensen wrote:

Hej jeg ville høre hvilken str modellen på billedet er strikket i, da det ville være en stor hjælp jeg strikker trøjen i Snow garn\r\nMvh Annette Christensen

16.11.2022 - 16:27

country flag Emma wrote:

Hi, there's an error in this piece for size L. The stitch count on setting up the yoke is 56, but the instructions for placing markers give 18 (back) + 8 (sleeve) + 18 (front) + 8 (sleeve) = 52 stitches. Either the decrease count is wrong or the number of stitches in the front and back is incorrect. I chose to use 20 stitches in the front and back.

24.04.2022 - 22:33

DROPS Design answered:

Dear Emma, you should insert a marker in each of the raglan stitches between body and sleeves, so that you will have: 1 stitch with a marker, 18 sts for back piece, 1 stitch with a marker, 8 sts for 1st sleeve, 1 stitch with a marker, 18 sts for front piece, 1 stitch with a marker, 8 sts for 2nd sleeve = 1+18+1+8+1+18+1+8=56 sts. Happy knitting!

25.04.2022 - 08:40