Commentaires / Questions (423)
![]() Siv Gulliksen a écrit:
Siv Gulliksen a écrit:
Strikker til en hanhund dachs, har denne oppskriften åpning under så han kan tisse? Hvis ikke hvordan kan jeg gjøre d?
19.12.2014 - 09:48DROPS Design a répondu:
Hei Siv. Ja, den er aaben nederst, men pröv eventuelt jakken paa undervejs saa den passer praecis.
19.12.2014 - 19:03
![]() Felicia a écrit:
Felicia a écrit:
Holy cow. Now I am more confused. So when there are 4 m.2 in the xs do I just keep repeating the first m.2 row until the end and then move up to the 2nd m.2 for the next round?. Ugh. I am feeling really cIueless. I was moving up the ladder each time there was an m.2. So at the end of the first row I had done 4 rungs on the diagram. I was doing the same thing for the others that repeated in the row as well. That may be why it wasn't looking right.:(
19.12.2014 - 01:40DROPS Design a répondu:
Dear Felicia, M.2 is worked over 4 sts in width and 8 rows in height, ie when you work M2,P2,M2, on first row, you will work K4,P2,K4 (from RS = in the round), then on 2nd round, you will *cross the sts for cable, K3 rounds and cable, K2 rounds (then repeat diagram from beg, ie K1 round and repeat from *. read more about diagrams here. Happy knitting!
19.12.2014 - 08:58Marja Wakeford a écrit:
I am confused about the leg opening. There seems to be only one 'hole'. Is this correct? There appears to be two sleeves in the the picture of the completed sweater. Could you please explain? Thank you.
18.12.2014 - 16:46DROPS Design a répondu:
Dear Mrs Wakeford, there should be 2 holes, ie when dividing work at 4 ¾”-6 ¼”-8”, you slip the first 10-16-22 sts on a st holder, bind off next st, work remaining sts, turn and bind off 1 st at the beg of next round (= 1 st bound off each side of st holder). Happy knitting!
19.12.2014 - 08:41
![]() Felicia a écrit:
Felicia a écrit:
I know how to cable. That wasn't the question. The question was the first time you use the M.2 cable pattern in the xs size it just creates a long line of bumps. The pattern reads, M.2,P2,M.2..... It's the second one that is just creating a line of bumps. No particular design as the others are doing. I wish I could attach a picture but I can't. I was wondering if anyone has made this has had the same type of thing and if that is just how it is supposed to be.
16.12.2014 - 22:15DROPS Design a répondu:
Dear Felicia, when you work M.2, you make the 1st cable on 2nd row, so that it may contract the work - then work 3 rows and cable on next row, repeat then all the way K3 rows over the 4 sts, cable on 4th row. Happy knitting!
17.12.2014 - 08:44Carmen Laube a écrit:
Is there a picture of the underside, the stomach? I don't understand the underside instructions at all. What stitches go between the front leg openings? How to reconnect to the underside after casting off for the leg openings? I thought it would help to see a picture. With thanks.
16.12.2014 - 19:30DROPS Design a répondu:
Dear Mrs Laube, you work over the sts between legs as before, following the diagrams you started before casting off the 1 st 2 times for legs, ie the first 10-16-22 sts (worked M2, P2 over the first 10-16-22 sts at beg of round). You then first work back piece over the remaining sts, put piece aside and work then over the sts for stomach as before (make sure that cables will be worked on a RS row). Happy knitting!
17.12.2014 - 08:37
![]() Seiler a écrit:
Seiler a écrit:
Bonjour, je fait ce modèle en S et j'aurai voulu savoir pour le col, c'est bien 10 cm col replié? ce qui fait donc 20 cm de cotes? donc la division de l'ouvrage se fera en plein col? merci beaucoup car je suis un peu perdue
15.12.2014 - 13:57DROPS Design a répondu:
Bonjour Mme Seiler, le col mesure 10 cm au total en taille S et il est plié en double à la fin. On tricote 10 cm de côtes et on divise l'ouvrage pour les pattes avant à 16 cm de hauteur totale. Bon tricot!
15.12.2014 - 17:28
![]() Clarissa a écrit:
Clarissa a écrit:
I am very confused about the decreases for the back piece when I start working back and forth again. This section is very unclear in the pattern. Could someone please explain it to me?
12.12.2014 - 00:26DROPS Design a répondu:
Dear Clarissa, cast off first for stomach and continue back and forth (make sure cables will be done in a RS row), casting off at beg of each row each side (from RS and from WS) 3 sts 1 time, 2 sts 2-3-4 times etc.. Happy knitting!
12.12.2014 - 10:00
![]() Marjo Laurila a écrit:
Marjo Laurila a écrit:
Ohje briardille sopivaksi. 40 kg ja 67 cm?
07.12.2014 - 20:17DROPS Design a répondu:
Hei! Kun tarkistan ohjeessa annettuja mittoja vaikuttaa valitettavasti siltä, että puserosta tulisi liian pieni. Voit kysellä lähimmästä DROPS liikkeestäsi voisivatko he auttaa sinua soveltamaan neuleesta koirallesi sopivan.
08.12.2014 - 15:53
![]() Diana Lovatt a écrit:
Diana Lovatt a écrit:
Hej!, Jag vill veta hur jag skall göra för att kunna sticka detta mönster för en Whippet? Hur räknar jag om det så det kan passa en Whippet (Hane)?
02.12.2014 - 16:13DROPS Design a répondu:
Hej Diana. Der staar maal paa baade brystvidde og ryglaengde per störrelse. Du kan sammenligne disse med din egen hund og se om det er nödvendigt at tilpasse. Du kan beregne extra/mindre masker med hjaelp fra din strikkefasthed.
02.12.2014 - 16:44
![]() Laura a écrit:
Laura a écrit:
En tajunnut, että mitä puikkoja nyt tarvitaan. Sukkapuikot juu, mutta ne pyöröpuikot. niin mitkä koot tarkasti?
01.12.2014 - 20:04DROPS Design a répondu:
Sukkapuikkoja tarvitaan vain koossa XS, muut koot neulotaan pyöröpuikolla.
02.12.2014 - 15:44
The Lookout |
|||||||||||||||||||
 |
 |
||||||||||||||||||
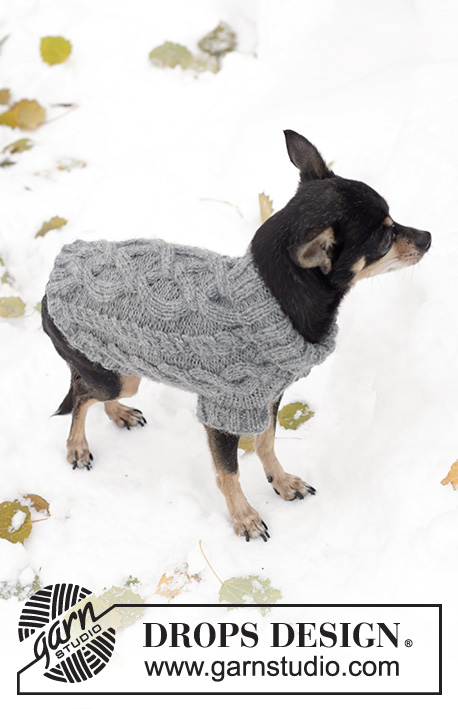
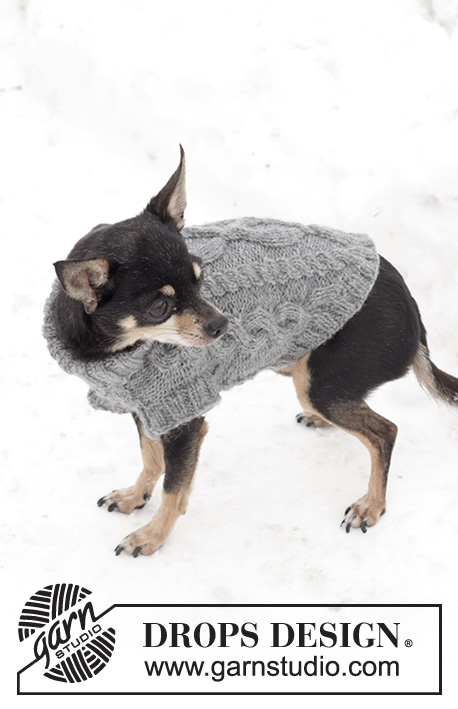
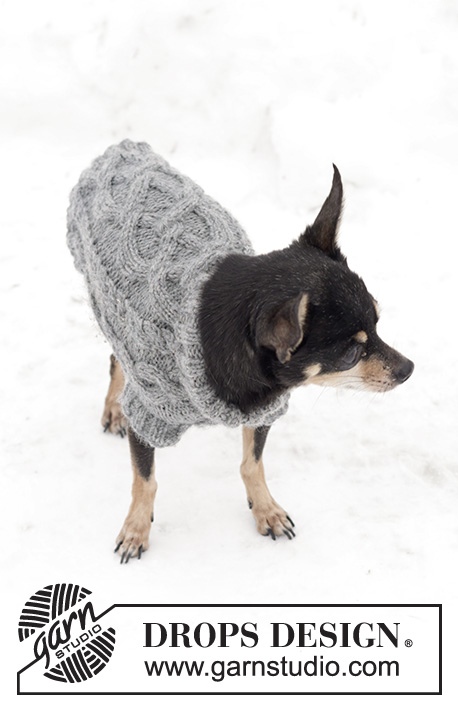
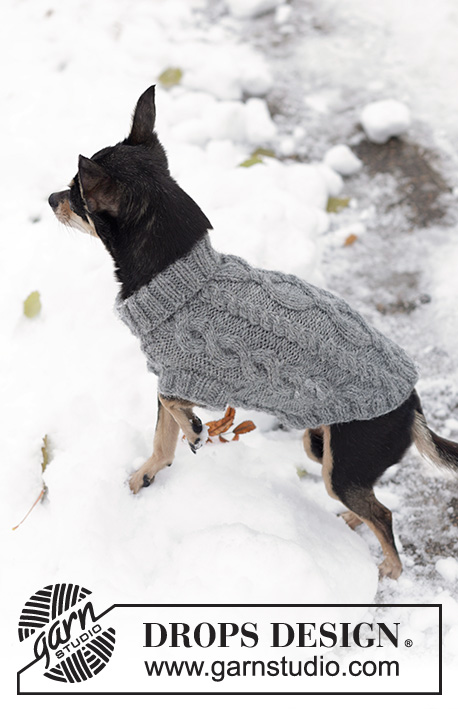
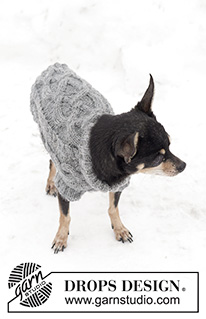
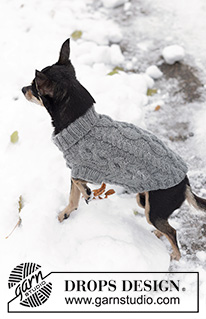
Manteau pour chien tricoté en DROPS Karisma, avec torsades.
DROPS 102-43 |
|||||||||||||||||||
|
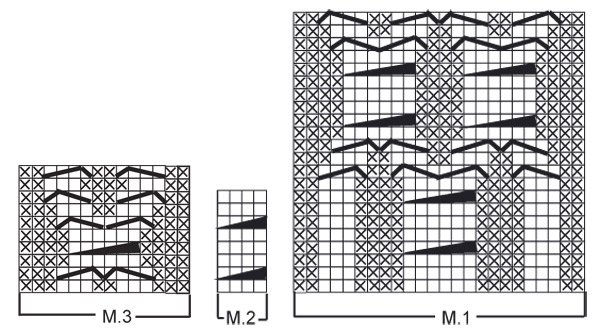
ÉCHANTILLON : 21 m x 28 rangs = 10 x 10 cm POINT FANTAISIE : voir diagrammes M1 à M3. Les diagrammes montrent le point fantaisie sur l'endroit. CÔTES : *2 m end, 2 m env * répéter de * à * -------------------------------------------------------------------------------- RÉALISATION Se tricote en rond à partir de l'encolure Avec le fil gris clair et les aiguilles doubles pointes 3 monter 60-80-100 m. Tricoter en côtes pendant 8-10-12 cm (=col – replié en double). Continuer avec la petite aiguille circulaire 4. Tricoter 1 rang endroit en répartissant 16-32-54 augmentations = 76-112-154 m. Continuer ainsi : Taille XS : M2, 2 m env, M2, 3 m env, M3, M2, M1 (= milieu dos), M2, M3, 3 m env Taille S : *M2, 2 m env * répéter de * à * 2 fois, M2, *M3, M2 * répéter de * à * 2 fois, M1 (=milieu dos), *M2, M3 * répéter de * à * 2 fois Taille M : *M2, 2 m env * répéter de * à * 3 fois, M2, *M3, M2 * répéter de * à * 3 fois, M1 (=milieu dos), *M2, M3 * répéter de * à * 3 fois EN MÊME TEMPS, à 12-16-20 cm de hauteur totale, diviser l'ouvrage pour les pattes avant de la façon suivante : mettre en attente sur un fil ou un arrêt de mailles les 10-16-22 premières m (=abdomen), rabat 1 m env, continuer en allers retours sur les mailles restantes et rabattre la dernière m de l'autre côté = 64-94-130 m (= dos). Continuer en allers retours sur ces mailles pendant 6-8-10 cm (l'ouvrage mesure 18-24-30 cm de hauteur totale). Placer ces mailles en attente et reprendre celles de l'abdomen. Monter 1 m de chaque côté = 12-18-24 m. Continuer en point fantaisie en allers retours avec 1 m env de chaque côté. A 6-8-10 cm de hauteur d'abdomen, reprendre toutes les mailles sur l'aiguille = 76-112-154 m. A 24-31-38 cm de hauteur totale, rabat 12-20-28 m pour l'abdomen, puis continuer en allers retours en rabattant de chaque côté tous les 2 rangs : 1 fois 3 m, 2-3-4 fois 2 m, 2-3-4 fois 1 m, 2-3-4 fois 2 m et 1 fois 3 m = 32-50-74 m. L'ouvrage mesure environ 30-39-48 cm. ASSEMBLAGE : glisser les mailles restantes sur la petite aiguille circulaire 3 et relever le long des mailles rabattues de la bordure environ 84-108-140 m. Tricoter en côtes pendant 2-3-4 cm et rabattre souplement. PATTES : Avec les aiguilles doubles pointes 3 relever environ 36-44-52 m autour d'une des ouvertures. Tricoter en côtes pendant 2-3-4 cm et rabattre souplement les mailles comme elles se présentent. Faire la même bordure autour de l'autre ouverture. |
|||||||||||||||||||
Légende diagramme(s) |
|||||||||||||||||||
|
|||||||||||||||||||
 |
|||||||||||||||||||
Vous avez terminé ce modèle?Alors taguez vos photos avec #dropspattern ou bien présentez-les dans la galerie #dropsfan Vous avez besoin d'aide pour ce modèle ?Vous trouverez 24 tutoriels vidéo, une rubrique commentaires/questions et plus encore en vous rendant sur la page du modèle sur garnstudio.com © 1982-2025 DROPS Design A/S. Tous droits réservés. Ce document, y compris ces sous-sections, est protégé par les droits d'auteur (copyright). Apprenez-en davantage sur ce que vous pouvez faire avec nos modèles en bas de chacune des pages de notre site. |
|||||||||||||||||||





Poster un commentaire sur le modèle DROPS 102-43
Nous aimerions connaître votre avis sur ce modèle !
Si vous souhaitez poser une question, merci de bien vouloir vérifier que vous avez choisi la bonne catégorie dans le formulaire ci-dessous afin d'accélérer la réponse. Les champs obligatoires sont indiqués par une *.