
Popular categories
Looking for a yarn?


Comments / Questions (113)
![]() Bergit Bertram wrote:
Bergit Bertram wrote:
Werden die Träger der Tasche vor oder nach dem Filzen zusammen genäht? Wie werden die Träger eingefädelt?
06.09.2012 - 16:10DROPS Design answered:
Es wird in der Reihenfolge gemacht wie es in der Anleitung beschrieben ist: erst filzen, dann einfädeln, Die Träger werden durch die Löcher gezogen.
10.09.2012 - 14:44
![]() Marjo wrote:
Marjo wrote:
Miten tämä ohje on tehty puikoilla nro 5 vaikka kyseessä on huovutettu laukku,yleensä ne ovat kuitenkin muissa ohjeissa olleet 8-10.
30.07.2012 - 20:25
![]() Angela wrote:
Angela wrote:
Sehr farbenfroh und es passt bestimmt viel hinein. Gefällt mir sehr gut.
29.07.2012 - 14:00
![]() Nathalex wrote:
Nathalex wrote:
Un super sac que je vais adapter pour le transformer en sac à langer pour mon bébé à naître ! Bravo.
24.07.2012 - 10:56
![]() Marijke Wauman wrote:
Marijke Wauman wrote:
Alvast bedankt voor de extra uitleg. Het is al iets duidelijker en ik zal een poging wagen.
04.07.2012 - 15:24
![]() Inge wrote:
Inge wrote:
Marijke, Je moet in plaats van alle steken naar rechts, alle steken naar links schuiven. Je neemt 4 steken op de rondbreinaald, Je breit de steken recht. Dan staan ze aan de rechterkant. Nu trek je alle steken over de draad naar links. Je werktdraad zit dus aan de verkeerde kant van je werk. Dat hoort zo. Nu trek je de draad aan en naar voren, vervolgens brei je de 4 steken weer recht. Je kunt ook gewoon een koord punniken (heet dat in belgië ook zo?)
03.07.2012 - 18:41
![]() Marijke Wauman wrote:
Marijke Wauman wrote:
Help!!!!! Hoe brei je in hemelsnaam die tube ? Ik begrijp er niets van. Ik vind ook geen instructievideo.
03.07.2012 - 16:51DROPS Design answered:
Het is niet juist wat Inge schrijft. Nadat je de steken gebreid hebt (van de linkernaald naar de rechternaald) staan ze aan de linkerkant van de rechternaald. Je schuift ze dan naar rechts en breit verder - de draad zit nu aan de linkerkant van deze steken, dus inderdaad aan de verkeerde kant. Ik heb gevraagd voor het maken van een instructievideo, maar vanwege drukte en vakantietijd denk ik helaas niet dat het binnen korte tijd zal gebeuren. Ik hoop dat je zo verder kan.
04.07.2012 - 11:09
![]() Maureen wrote:
Maureen wrote:
Fabulous!
03.07.2012 - 14:54
![]() Rita Carlsson wrote:
Rita Carlsson wrote:
SUUUUUPERSNYGG......Väntar med spänning på mönstret !
03.07.2012 - 08:00
![]() Elsa wrote:
Elsa wrote:
Wat een mooie kleurencobinatie. De wol is binnen, dus het feest kan beginnen!
29.06.2012 - 09:28
|
|||||||
Anatolia#anatoliabag |
|||||||
|
|
|||||||
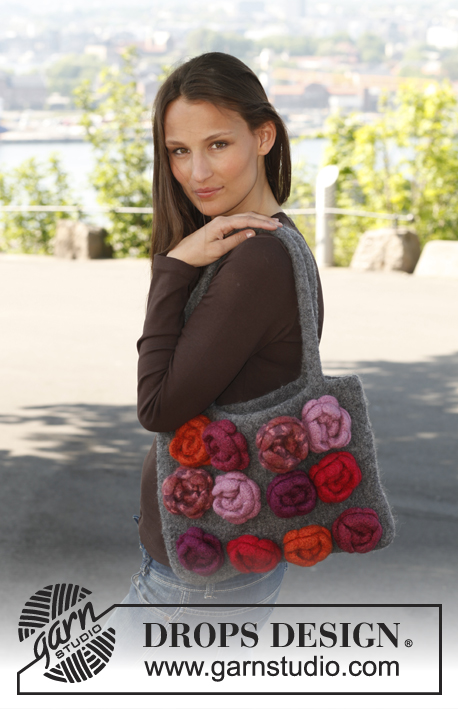
Felted DROPS bag in ”Alaska”.
DROPS 140-33 |
|||||||
|
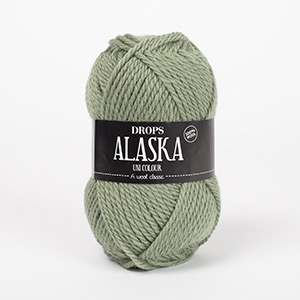
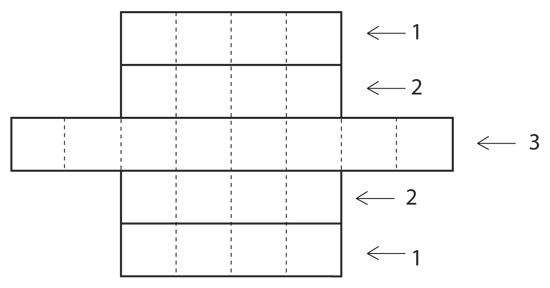
BAG: The entire bag is worked in stocking st, work 5 strips that are sewn tog when finished. STRIP 1 (make 2): Worked back and forth on circular needle. Cast on 20 sts on circular needle size 5 mm with colour no 54 and work 34 rows in each colour in the following order: Colour no 54, 53, 58, 37, cast off. STRIP 2 (make 2): Worked back and forth on circular needle. Cast on 20 sts on circular needle size 5 mm with colour no 56 and work 34 rows in each colour in the following order: Colour no 56, 11, 57, 45, cast off. STRIP 3 (make 1): Worked back and forth on circular needle. Cast on 20 sts on circular needle size 5 mm with colour no 45 and work 34 rows in each colour in the following order: Colour no 45, 57, 37, 58, 53, 54, 11, 56, cast off. Sew strips tog sideways – see figure for placement. Sew the rest of strip 3 to short side on strip 1 and 2 in each side. Knit up 200 sts around the upper edge of bag with colour no 23 on circular needle size 5 mm. Insert 1 marker in the middle st from one short side = beg of round. Work in stocking st in the round. When 3 cm have been worked, work as follows: K 8, 2 YO, K 2 tog, K 18, 2 YO, K 2 tog, K 38, 2 YO, K 2 tog, * K 18, 2 YO, K 2 tog *, repeat from *-* 3 times, K 38, 2 YO, K 2 tog, K 18, 2 YO, K 2 tog, K 10. On next row slip one YO off the needle and K the other YO – make sure that holes are made. Continue in stocking st. When piece measures 7 cm, work as follows: Cast off the first 40 sts on round, work 20 sts, cast off the remaining sts. Cut the thread. Work 28 rows in stocking st over the 20 sts, work next row as follows: Work 9 sts, 2 YO, K 2 tog, work the rest of row. On next row slip one YO off the needle and K the other YO – make sure that a hole is made. Work 5 rows in stocking st over all sts, cast off. TIE: Work a tube with 4 sts back and forth on circular needle size 5 mm as follows: Cast on 4 sts with colour no 23 and K 1 row. Then work as follows: * Slide all sts to the right side of needle without turning the piece, tighten thread and K over all sts *, repeat from *-* until tie measures 200 cm. Cut and fasten the thread. FELTING: The piece can be felted either in the washing machine or the tumble dryer – read description below. Remember: Subsequent washes are as for a normal wool garment. IN WASHING MACHINE: Washing machines will vary when felting. If the piece is not felted enough, it can be felted again. If it is felted too much, it can be stretched to the correct size while still wet. DO THE FOLLOWING: Lay the piece in the washing machine, using a programme of approx. 40 minutes (not a wool programme). Wash at 40 degrees without pre-wash, detergent is optional. After washing, shape the piece while it is still wet. IN TUMBLE DRYER: Felting in a tumble dryer gives good control over the degree of felting. The tumble dryer can be opened during drying to check the size of the piece. If it is not felted enough it can be thoroughly wetted and felted again. If it is felted too much it can be stretched to the correct size while still wet. DO THE FOLLOWING: Lay the piece in water so it becomes completely wet, then place it in the tumble dryer and begin the drying process. Dry to the desired size, checking regularly. Thread tie up and down the holes and tie ends tog inside the bag. Sew button on top of bag. |
|||||||
Diagram explanations |
|||||||
|
|||||||
 |
|||||||
Have you finished this pattern?Tag your pictures with #dropspattern #anatoliabag or submit them to the #dropsfan gallery. Do you need help with this pattern?You'll find 6 tutorial videos, a Comments/Questions area and more by visiting the pattern on garnstudio.com. © 1982-2026 DROPS Design A/S. We reserve all rights. This document, including all its sub-sections, has copyrights. Read more about what you can do with our patterns at the bottom of each pattern on our site. |
|||||||


With over 40 years in knitting and crochet design, DROPS Design offers one of the most extensive collections of free patterns on the internet - translated to 17 languages. As of today we count 324 catalogues and 12267 patterns translated into English (UK/cm). 12267
We work hard to bring you the best knitting and crochet have to offer, inspiration and advice as well as great quality yarns at incredible prices! Would you like to use our patterns for other than personal use? You can read what you are allowed to do in the Copyright text at the bottom of all our patterns. Happy crafting!
Post a comment to pattern DROPS 140-33
We would love to hear what you have to say about this pattern!
If you want to leave a question, please make sure you select the correct category in the form below, to speed up the answering process. Required fields are marked *.