
Popular categories
Looking for a yarn?


Comments / Questions (36)
![]() Judith wrote:
Judith wrote:
Dank voor jullie reactie. Ik ben het nu aan het uitproberen, maar heb toch het gevoel dat het wat gaat trekken aan de zijkanten. wat doe ik fout? Of is dat moeilijk te zeggen op afstand?
11.05.2012 - 20:59DROPS Design answered:
Ik kan dat inderdaad moeilijk zeggen, ik weet alleen dat het lapje moet niet trekken. Ik heb precies deze bolero voor mijn eigen dochtertje gemaakt en hij is mooi geworden. Misschien kan je langs je verkoopppunt gaan voor persoonlijke ondersteuning?
14.05.2012 - 12:20
![]() Judith wrote:
Judith wrote:
Ik begrijp de algemene de instructie niet dat je aan het eind van de toer eindigt met een hv? Je bent toch stokjes aan het haken?
10.05.2012 - 21:39DROPS Design answered:
Ja, maar je eindigt altijd de toer met een hv in de 3e l v an het begin van de toer. De 3 l aan het begin van de toer vervangen het eerste stk en de hv is eigenlijk bedoeld om de toer te "sluiten".
11.05.2012 - 11:59Catherine wrote:
Need more crochet patterns for kids this is why I downloaded this pattern
22.03.2012 - 13:44
![]() Martine Van Dijk wrote:
Martine Van Dijk wrote:
Uiteindelijk heb ik toch met 3 mm gehaakt, en is het prachtig geworden. Ik heb er nu 2 voor mijn jongste dochters. Zo leuk model!
29.02.2012 - 12:46
![]() DROPS Design NL wrote:
DROPS Design NL wrote:
U kunt proberen met haaknld 3.5mm en probeer wat strakker te haken. Was beide proeflapjes - dan heeft u de juiste afmetingen. Kies dan de beste nld maat.
25.01.2012 - 13:15
![]() Martine Van Dijk wrote:
Martine Van Dijk wrote:
Helemaal verliefd op dit bolero'tje. Ben meteen een proeflapje gaan maken voor de stekenverhouding, maar helaas: het proeflapje van 23 stk x 12 toeren wordt 11 x 8 cm. de bloementjes 5x 4,5 cm. Ik heb nu gehaakt met 3 mm. Helpt het in dit geval een andere haaknaald te gebruiken???????
24.01.2012 - 12:43
|
|
Tilda#tildavest |
|
 |
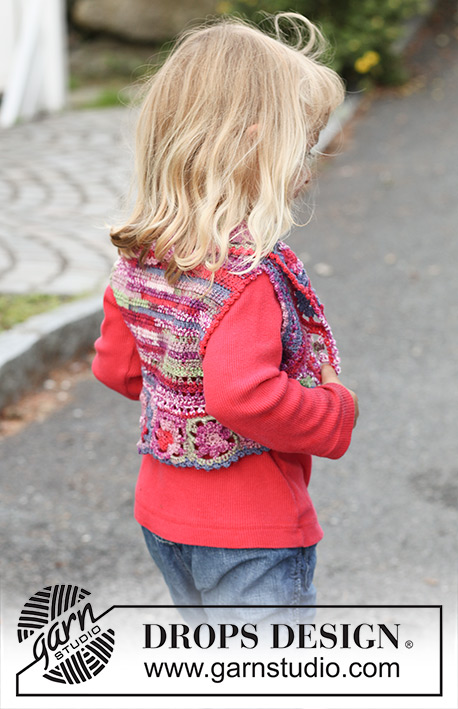 |
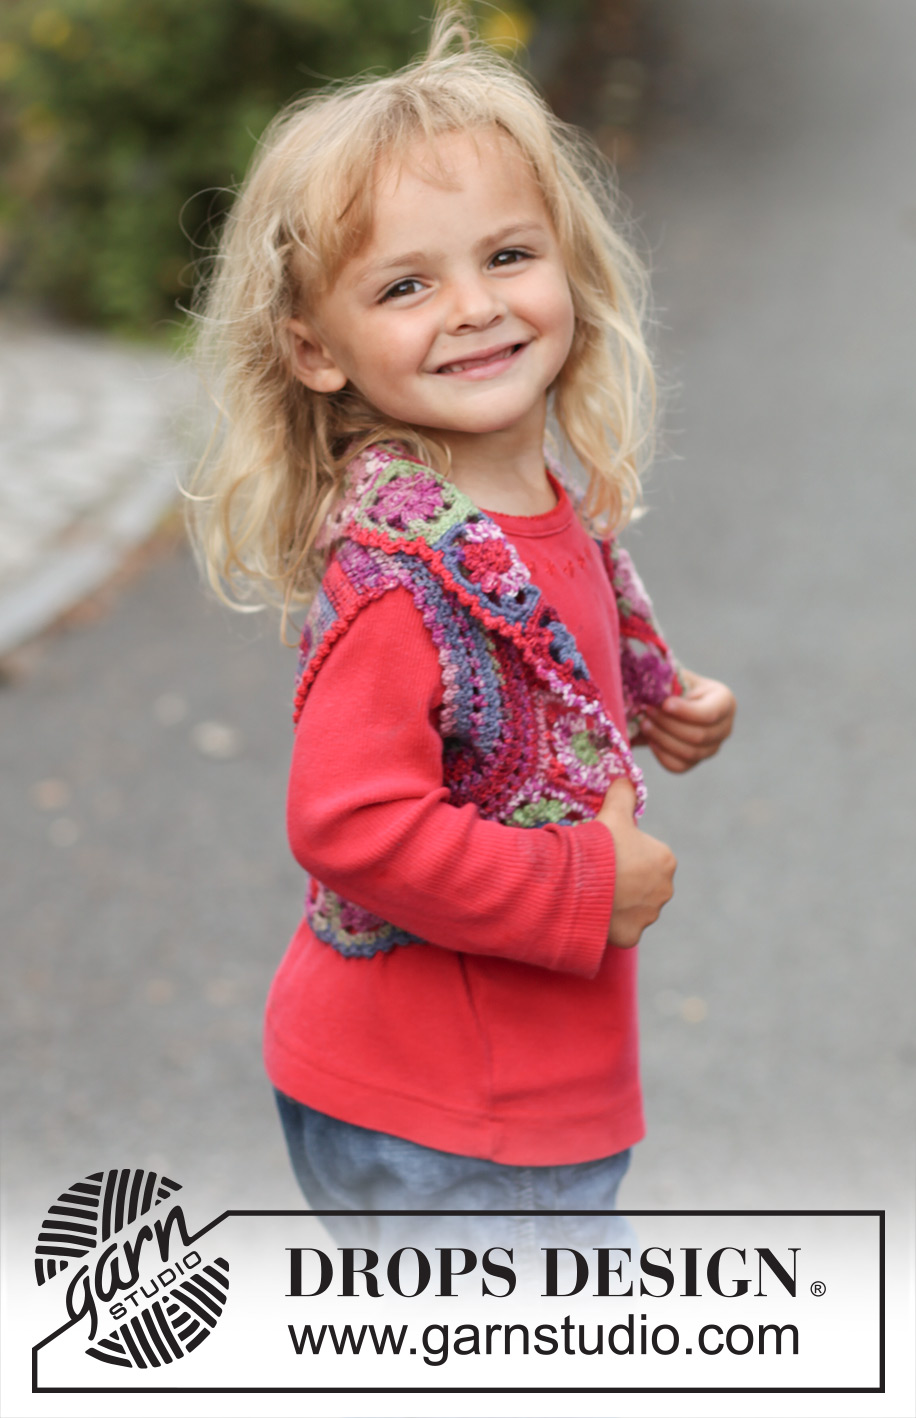
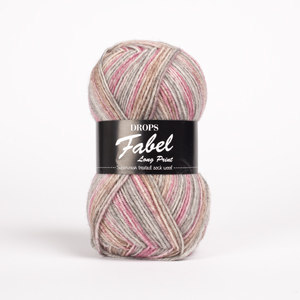
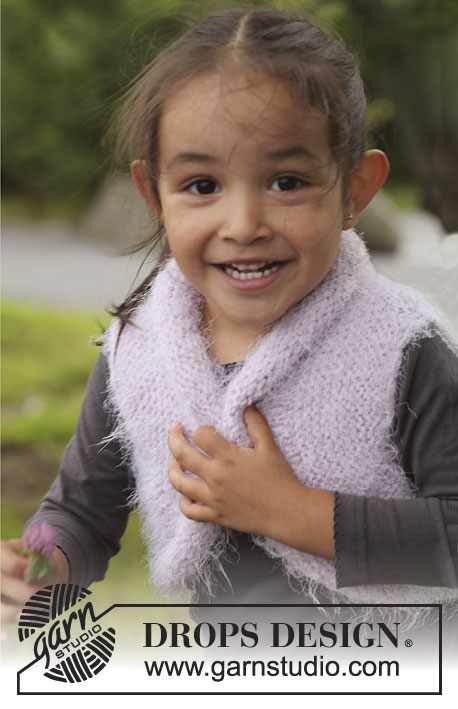
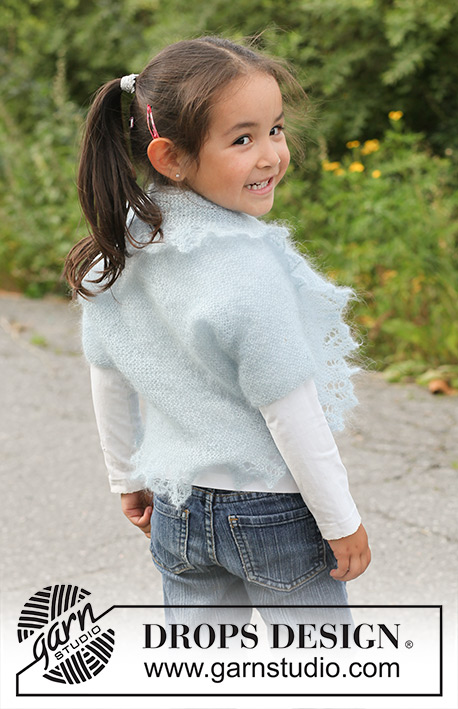
Crochet DROPS bolero in "Fabel". Size 3 - 12 years.
DROPS Children 22-29 |
|
|
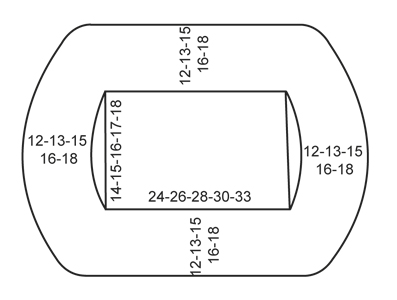
CROCHET INFO: Replace first tr on every row/round with 3 ch. Finish every round with 1 sl st in 3rd ch from beg of round. INCREASE TIP: Inc by working 2 tr in 1 st. --------------------------------------------------------- BACK PIECE: Worked back and forth - SEE CROCHET INFO! Work 67-73-79-85-91 loose ch on hook size 3 mm with Fabel. Work 1 tr in 4th ch from hook, 1 tr in each of the next 3 ch, * skip 1 ch, 1 tr in each of the next 5 ch *, repeat from *-* the rest of the row = 55-60-65-70-75 tr. Then work 1 tr in every tr back and forth until piece measures 14-15-16-17-18 cm. EDGE PIECE: Work 1 tr in each of the 55-60-65-70-75 tr at the top along back piece, then work 39-42-44-46-49 ch (= armhole), 1 tr in each of the 55-60-65-70-75 tr at the bottom along back piece and then 39-42-44-46-49 ch (= armhole), finish with 1 sl st in first tr on round. On next round work 1 tr in every tr at the top and at the bottom of back and in every ch-loop work 33-35-37-39-41 tr = 176-190-204-218-232 tr in total. Continue in the round as follows: ROUND 1: 1 tr in first tr (replaced with 3 ch), * 1 ch, skip 1 tr, 1 tr in next tr *, repeat from *-* and finish with 1 ch, skip 1 tr and 1 sl st in 3rd ch from beg of round. ROUND 2: 1 tr in every tr and 1 tr in every ch. Repeat these 2 rounds upwards - AT THE SAME TIME when edge measures approx. 3-3-3-4-4 cm (adjust so that next round is a round with tr only), inc 16-20-24-29-34 tr evenly - READ INCREASE TIP - repeat inc when piece measures approx. 5-6-7-7-8 cm = 208-230-252-276-300 tr. Work until edge measures approx. 7-8-10-11-13 cm. Put piece aside. CROCHET SQUARE: Work 4 ch on hook size 3 mm with Fabel, form a ring with 1 sl st in first ch. ROUND 1: 8 dc in ch-ring, finish with 1 sl st in first dc from beg of round. ROUND 2: 1 sl st in first dc, * 3 ch, in same dc as sl st work 2 tr but wait with last pull through on each tr until both have been worked, make 1 YO and pull thread through all 3 loops on hook, 3 ch, 1 sl st in same dc as both tr were worked, 1 sl st in next dc *, repeat from *-* until 1 dc remains, work as follows in this dc: 1 sl st, 3 ch, then 3 tr but wait with last pull through on each tr until all 3 have been worked, make 1 YO and pull thread through all 4 loops on hook (= 8 leaves). ROUND 3: * 4 ch, at the top of next leaf work 1 tr + 2 ch + 1 tr (= corner), 5 ch, 1 dc at the top of next leaf, 5 ch, at the top of next leaf work 1 tr + 2 ch + 1 tr (= corner), 4 ch, 1 dc at the top of next leaf, 4 ch, at the top of next leaf work 1 tr + 2 ch + 1 tr (= corner), 3 ch, 1 dc at the top of next leaf, 3 ch, at the top of next leaf work 1 tr + 2 ch + 1 tr (= corner), 4 ch, 1 sl st in first ch from beg of round. ROUND 4: In the 4-ch-loops work 4 dc, in the 5-ch-loops work 5 dc, in the 3-ch-loops work 3 dc and in the 2-ch-loops in every corner work 1 dc, 3 ch, 1 dc = a total of 40 dc around the square, finish with 1 sl st in first dc, cut the thread. Two of the sides are the same width - approx. 5 cm, 1 side is narrower - approx. 4½ cm and 1 side is wider - approx. 5½ cm. Work 20-22-24-26-30 squares. Sew the squares tog in one long strip – sew edge to edge – make sure that the shorter sides are placed against the same side and that the longer sides are placed against the opposite side so that the strip is curved. Begin by fastening the 2 middle squares on the strip mid back at the top of edge piece – sew edge to edge along the shortest side on the squares. Continue to sew down the one side and until mid back at the bottom of edge piece, then sew the other side of the strip on – make sure not sew too tightly when sewing on the strip. If more or less squares are needed this must be adjusted before the last 2 squares are sewn tog mid back. PICOT BORDER: Work on hook size 3 mm with Fabel at the edge around the entire strip of crochet squares. Beg in the first square that was sewn on at the back of neck and work as follows: 1 dc in the second st on square, * 1 picot (= 3 ch, 1 dc in first ch), skip 1 dc, 1 dc in next dc *, repeat from *-* (there should be approx. 5 picots along every square + 1 in the transition to next square), finish with 1 sl st in first dc from beg of round. Work picot border the same way around the armholes. |
|
 |
|
Have you finished this pattern?Tag your pictures with #dropspattern #tildavest or submit them to the #dropsfan gallery. Do you need help with this pattern?You'll find 7 tutorial videos, a Comments/Questions area and more by visiting the pattern on garnstudio.com. © 1982-2026 DROPS Design A/S. We reserve all rights. This document, including all its sub-sections, has copyrights. Read more about what you can do with our patterns at the bottom of each pattern on our site. |
|


With over 40 years in knitting and crochet design, DROPS Design offers one of the most extensive collections of free patterns on the internet - translated to 17 languages. As of today we count 325 catalogues and 12298 patterns translated into English (UK/cm). 12298
We work hard to bring you the best knitting and crochet have to offer, inspiration and advice as well as great quality yarns at incredible prices! Would you like to use our patterns for other than personal use? You can read what you are allowed to do in the Copyright text at the bottom of all our patterns. Happy crafting!
Post a comment to pattern DROPS Children 22-29
We would love to hear what you have to say about this pattern!
If you want to leave a question, please make sure you select the correct category in the form below, to speed up the answering process. Required fields are marked *.