
Categorie popolari
State cercando un filato?


Commenti / Domande (35)
![]() Esther ha scritto:
Esther ha scritto:
Erstmal vielen Dank für die schnelle Antwort. Den maschenstich finde ich sehr gut. Aber - ich Kette ja die Krausrippenreihe nicht ab sondern starte ja mit ihnen. Hm? Benötige ich die denn wirklich oder kann ich sie einfach weglassen
04.03.2026 - 09:13DROPS Design ha risposto:
Liebe Esther, oops ja sorry es stimmt, wahrscheinlich können Sie diese 2 Krausrippen am Anfang von jedem Teil weglassen, Rückenteil wird dann etwas unterschiedlich als wie im Foto aussehen. Viel Spaß beim Stricken!
05.03.2026 - 09:23
![]() Esther ha scritto:
Esther ha scritto:
Eine Frage habe ich noch :Wenn ich die strickrichtung betrachte und mit Krausrippenreihe beginne, dann habe ich beim zusammennähen eine deutlich sichtbare naht oder habe ich einen Denkfehler?
04.03.2026 - 06:01DROPS Design ha risposto:
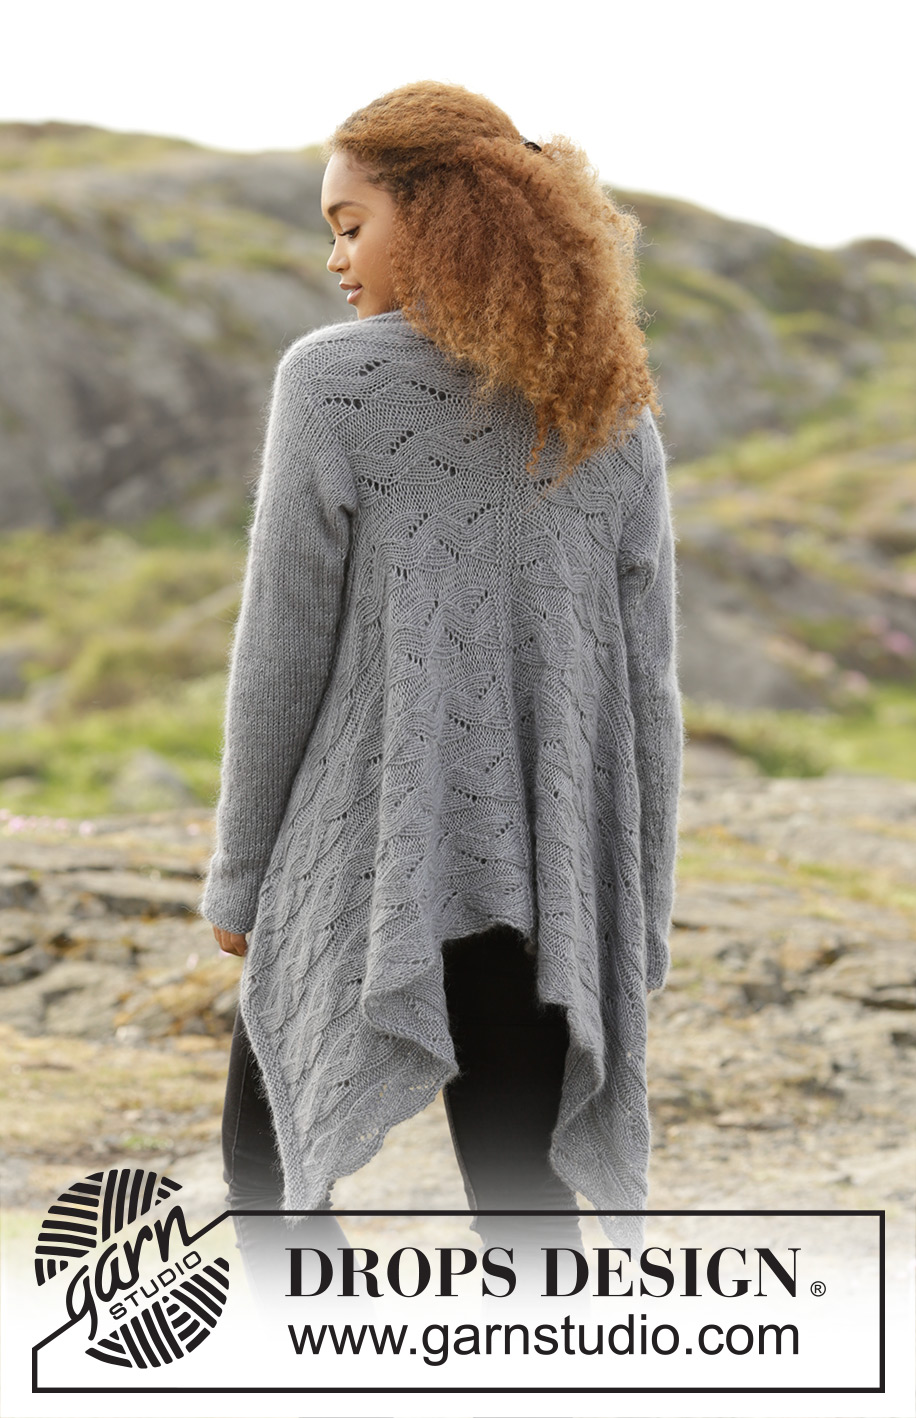
Liebe Esther, in der Mitte vom Rückenteil können Sie ja beim 2. Foto die Krausrippen schauen. Gerne könnnen Sie die Maschen nicht abketten und dann die beiden Teilen mit dieser Technik zusammennähen. Viel Spaß beim Stricken!
04.03.2026 - 08:06
![]() Esther Jürgens ha scritto:
Esther Jürgens ha scritto:
Auch ich hänge bei : Gleichzeitig in der ersten R 2 M über jedem Linksteil a' 4 M abnehmen. Das wie hab ich - glaube ich - verstanden. Auf was bezieht sich "in der ersten R" - auf die erste Krausrippenreihe?
03.03.2026 - 21:25DROPS Design ha risposto:
Liebe Frau Jürgens, diese Abnahmen entstehen bei der 1. Reihe der 3 Krausrippen / der 6 Reihen kraus rechts. Viel Spaß beim Stricken!
04.03.2026 - 07:51
![]() Kaja ha scritto:
Kaja ha scritto:
Hi! If I want to make it with Drops Paris (one C strand instead of A+A), how many grams/metres do I need for size S? I tried to calculate, but I'm getting different results each time, so I figured I'd just ask. :) Thanks!
22.03.2025 - 01:11DROPS Design ha risposto:
Hi Kaja, You need the same amount of yarn, whether you are working 2 A strands or 1 C strand. Happy knitting!
22.03.2025 - 12:04
![]() Merrilyn ha scritto:
Merrilyn ha scritto:
Hi, I can’t seem to find how much wool is required to knit this garment please advise.
11.04.2022 - 05:50DROPS Design ha risposto:
Hi Merrilyn, The yarn amounts are specified below the title and pattern number at the top of the page. Happy crafting!
11.04.2022 - 07:11
![]() Sareith ha scritto:
Sareith ha scritto:
Bonjour, J'aimerais savoir quand rabattre à 43-44-46-48-54-57 cm de hauteur totale ou depuis l'emmanchure comme expliqué sur les mesures soit 17½-18-19-20-23-24½ cm + 43-44-46-48-54-57 ?? Dois je regarder le plan ou lire les instructions ?
05.01.2021 - 22:03DROPS Design ha risposto:
Bonjour Mme Sareith! Vous devez rabattre à 43-44-46-48-54-57 cm depuis l'emmanchure (dans les explications vous avez plus tot la phrase MESURER MAINTENANT À PARTIR D'ICI, cela veut dire depuis l'emmanchure). Bon tricot!
06.01.2021 - 09:32
![]() Anna ha scritto:
Anna ha scritto:
Ho un dubbio sull'aumento: dalla foto sembra che nel giro successivo venga lavorato senza essere ritorto (infatti c'è il buco) mentre nelle istruzioni scritte dice chiaramente di lavorare l'aumento ritorto (per evitare il buco). Come fare? Grazie
22.03.2020 - 17:41DROPS Design ha risposto:
Buongiorno Anna. Gli aumenti nei diagrammi vanno lavorati non ritorti, per formare un buco come vede nella fotografia. Il suggerimento per gli aumenti deve essere seguito quando viene indicato nel testo, p.es quando aumenta sulle maniche. Buon lavoro!
22.03.2020 - 20:58
![]() Hayly Wiggins ha scritto:
Hayly Wiggins ha scritto:
I love this pattern! I am working on my sleeve and have a question about the first increase. The pattern says “inc 1 at inside 1 edge st and K1 in each side of piece. I read this as 3 inc stitches, but the next line is -read increase tip (= 2 sts inc). Does this mean that I only do an increase stitch on one side of the piece?
23.02.2020 - 16:52DROPS Design ha risposto:
Hi Hayly, You increase 1 stitch on each side of the piece, which means a total of 2 stitches increased on the row. The increases are worked after/before the 1 knitted edge-stitch on each side. Happy knitting!
24.02.2020 - 07:16
![]() Melanie ha scritto:
Melanie ha scritto:
Sorry, es sollte natürlich "Hallo Drops Design" und "ich hänge auch hier" und nicht "Haengesessel" heißen. LG
18.02.2020 - 20:08
![]() Melanie ha scritto:
Melanie ha scritto:
Hallo Mona, ich haengesessel auch hier: GLEICHZEITIG in der ersten R 2 M über jedem Linksbereich à 4 M abnehmen (indem 2 M re zusgestr werden). Stricke ich 2x2 oder 4x2 M re. Zusammen? Danke für deine Antwort. Herzliche Grüße Melanie
18.02.2020 - 20:02DROPS Design ha risposto:
Liebe Melanie, alle Maschen stricken Sie jetzt rechts (Krausrippe), dh die Abnahmen werden über die linke Maschen mit 2 M rechts zusammen gestrickt. Viel Spaß beim stricken!
19.02.2020 - 09:08
|
|||||||||||||||||||
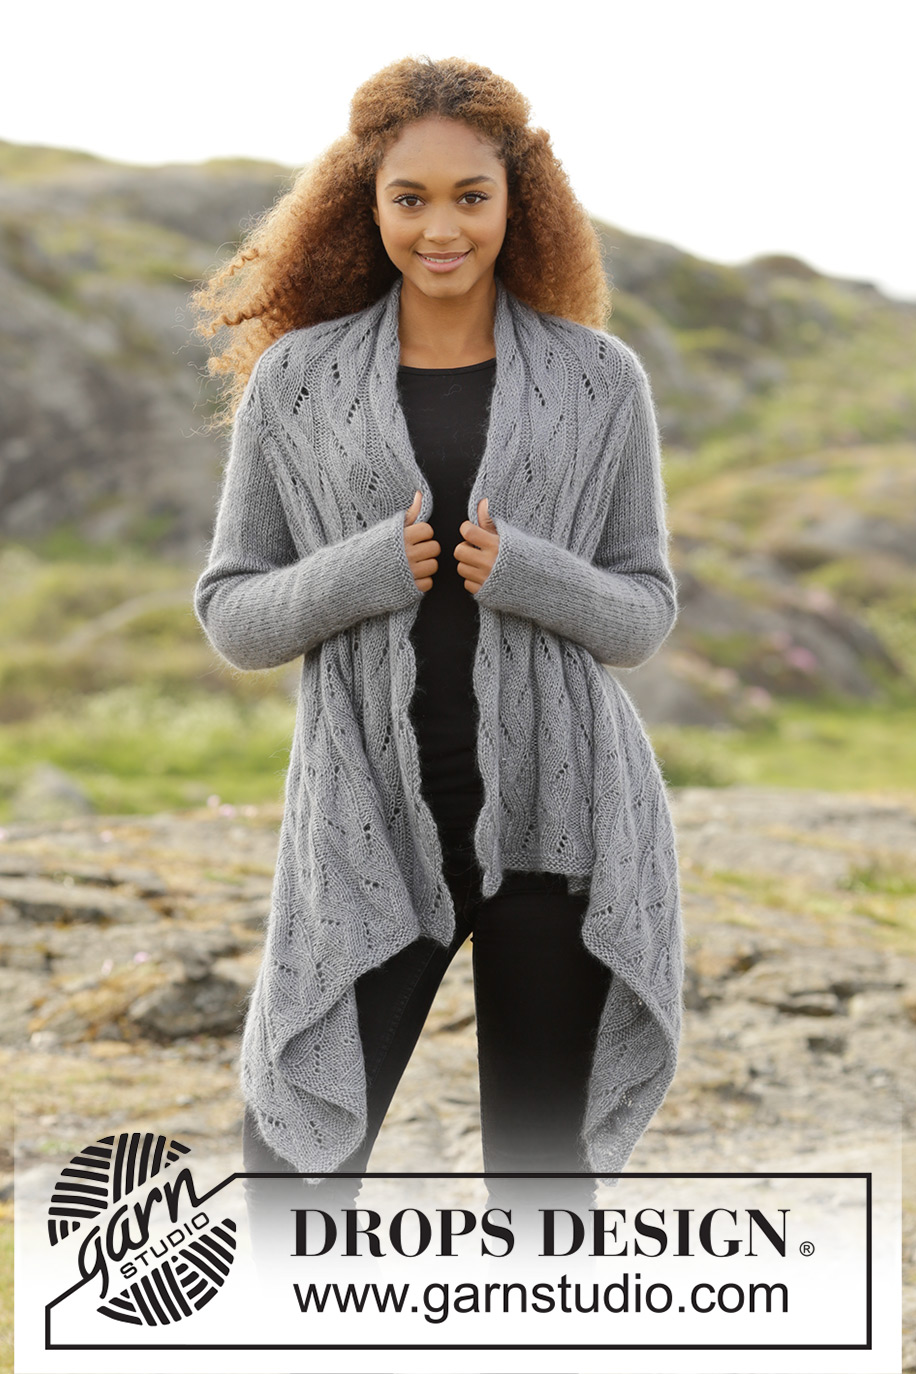
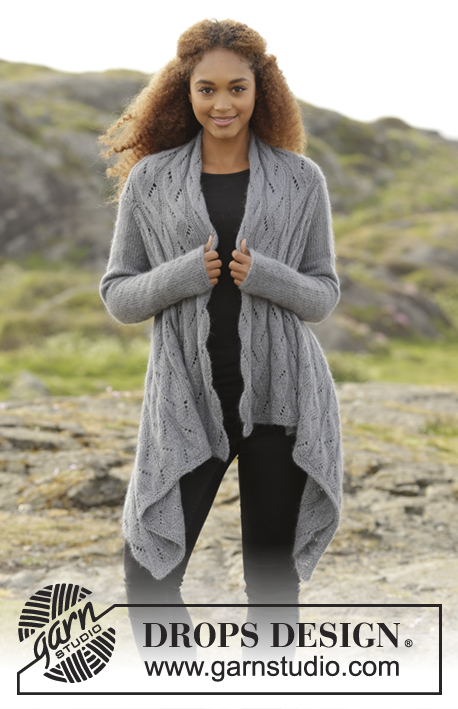
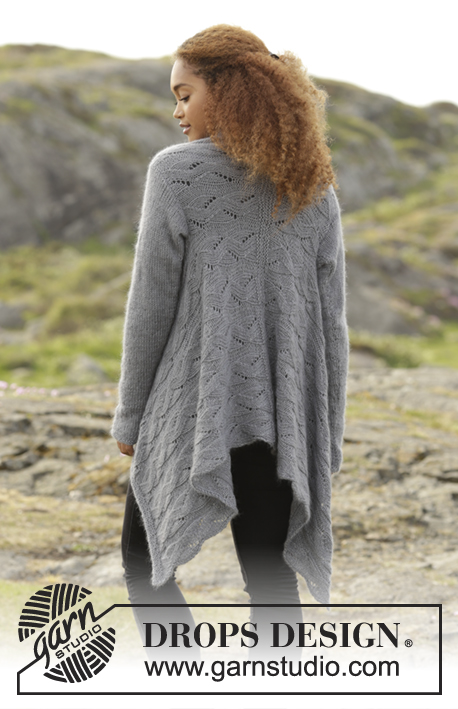
Winter Bird#winterbirdcardigan |
|||||||||||||||||||
 |
 |
||||||||||||||||||
Cardigan quadrato DROPS lavorato ai ferri con motivo traforato, lavorato da lato a lato in "BabyAlpaca Silk" e "Kid-Silk". Taglie: S - XXXL.
DROPS 173-6 |
|||||||||||||||||||
|
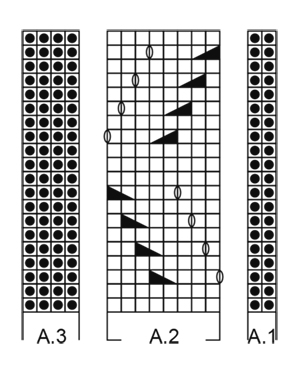
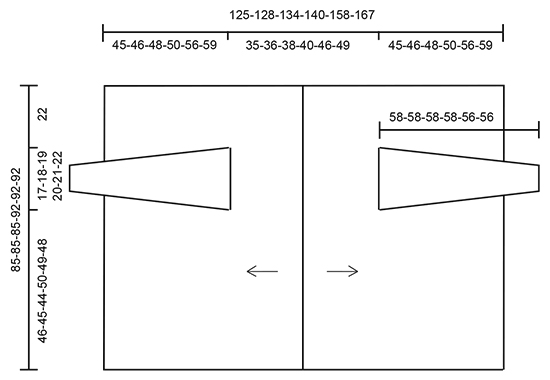
M LEGACCIO (avanti e indietro sui f): Lavorare tutti i f a dir. 1 “costa” a m legaccio = 2 f dir. MOTIVO: Vedere i diagrammi A.1-A.3. I diagrammi mostrano tutti i f del motivo visti dal diritto del lavoro. SUGGERIMENTO PER GLI AUMENTI: Tutti gli aumenti sono fatti dal diritto del lavoro. Aumentare all’interno della m legaccio e di 1 m dir: fare 1 gettato, sul f successivo, lavorare il gettato a rov ritorto per evitare buchi. ---------------------------------------------------------- CARDIGAN: Lavorato in 2 parti da lato a lato che poi vengono cucite insieme alla fine. Lavorare dal centro dietro sul dietro verso il centro davanti. DIETRO/DAVANTI SINISTRO: Lavorato avanti e indietro sui f circolari per avere spazio per tutte le m. Avviare 144-144-144-156-156-156 m con i f n° 4 mm con 1 capo di BabyAlpaca Silk e 1 capo di Kid-Silk (= 2 capi). Lavorare 2 coste a M LEGACCIO – leggere la spiegazione sopra. Passare ai f circolari n° 5 mm e lavorare come segue dal diritto del lavoro: lavorare A.1 (= 2 m) * A.2 (= 8 m), A.3 (= 4 m) *, ripetere *-* altre 10-10-10-11-11-11 volte, A.2 (= 8 m), finire con A.1 (= 2 m). Continuare il motivo in questo modo. FARE ATTENZIONE ALLA TENSIONE DEL LAVORO! Quando il lavoro misura 17½-18-19-20-23-24½ cm, intrecciare per lo scalfo dal diritto del lavoro come segue: lavorare le prime 38 m, intrecciare le 29-31-32-34-36-38 m successive e lavorare come prima sulle ultime 77-75-74-84-82-80 m. ORA MISURARE IL LAVORO DA QUI! Sul f successivo avviare 29-31-32-34-36-38 nuove m sulle m intrecciate e continuare il motivo come prima. Quando il lavoro misura 43-44-46-48-54-57 cm, lavorare 3 “coste” – ALLO STESSO TEMPO sul 1° f diminuire 2 m in ogni sezione a rov di 4 m (diminuire lavorando 2 m insieme a dir) = 122-122-122-132-132-132 m. Intrecciare SENZA STRINGERE. DIETRO/DAVANTI DESTRO: Avviare e lavorare come per il davanti/dietro sinistro ma intrecciare per lo scalfo dopo le prime 38 m iniziando dal rovescio del lavoro e avviare le nuove m dal diritto del lavoro. MANICA: Lavorata avanti e indietro sui f circolari. Avviare 38-38-40-40-44-44 m (compresa 1 m di vivagno a ogni lato) con i f circolari n° 4 mm con 1 capo di BabyAlpaca + 1 capo di Kid-Silk (= 2 capi). Lavorare 2 “coste”. Passare ai f circolari n° 5 mm e lavorare a m rasata con 1 m di vivagno a m legaccio a ogni lato. Quando il lavoro misura 11-12-12-13-12-11 cm, aumentare 1 m all’interno della m di vivagno e lavorare 1 m dir a ogni lato del lavoro – leggere il SUGGERIMENTO PER GLI AUMENTI (= 2 aumenti). Ripetere gli aumenti ogni 4-3-3-2½-2½-2½ cm 11-13-13-15-15-16 volte in totale = 60-64-66-70-74-76 m. Quando il lavoro misura 53-53-53-53-51-51 cm (NOTA: Misure più corte per le taglie più grandi a causa della maggiore ampiezza delle spalle), intrecciare per l’arrotondamento della manica all’inizio di ogni f come segue: intrecciare 4 m 5 volte in totale a ogni lato = 20-24-26-30-34-36 m. Intrecciare le m rimaste, il lavoro misura circa 58-58-58-58-56-56 cm. Lavorare l’altra manica. CONFEZIONE: Cucire insieme i bordi di avvio nel filo più esterno delle m di vivagno. Attaccare le maniche. Cucire il margine sotto il braccio all’interno della m di vivagno. |
|||||||||||||||||||
Spiegazioni del diagramma |
|||||||||||||||||||
|
|||||||||||||||||||
 |
|||||||||||||||||||
 |
|||||||||||||||||||
Avete terminato questo modello?Allora taggate le vostre foto con #dropspattern #winterbirdcardigan o inviatele alla #dropsfan gallery. Avete bisogno di aiuto con questo modello?Troverete 21 video tutorial, una sezione per i commenti/domande e molto altro guardando il modello su www.garnstudio.com © 1982-2026 DROPS Design A/S. Ci riserviamo tutti i diritti. Questo documento, compreso tutte le sue sotto-sezioni, è protetto dalle leggi sul copyright. Potete leggere quello che potete fare con i nostri modelli alla fine di ogni modello sul nostro sito. |
|||||||||||||||||||


Con oltre 40 anni di esperienza nel design di modelli di maglia e uncinetto, DROPS Design offre la più estesa collezione di modelli gratuiti su internet - tradotti in 17 lingue. Ad oggi vi possiamo fornire 324 cataloghi e 12290 modelli - 9561 dei quali sono tradotti in Italiano.
Ci stiamo impegnando molto per darvi il meglio che vi possiamo offrire in termini di maglia e uncinetto, ispirazioni e consigli così come filati di grande qualità ad un prezzo incredibile! Volete utilizzare i nostri modelli per qualcosa d'altro oltre al vostro uso personale? Potete leggere tutto ciò che è consentito nel testo sul Copyright in basso su tutte le pagine dei nostri modelli. Buon lavoro!
Lasciare un commento sul modello DROPS 173-6
Noi saremmo felici di ricevere i tuoi commenti e opinioni su questo modello!
Se vuoi fare una domanda, fai per favore attenzione a selezionare la categoria corretta nella casella qui sotto per velocizzare il processo di risposta. I campi richiesti sono indicati da *.