
Categorie popolari
State cercando un filato?


Commenti / Domande (16)
![]() Sharon ha scritto:
Sharon ha scritto:
Any suggestion on how I could make this a bit wider? This was a funn project. Instruction was easy to follow. S
06.12.2021 - 16:33DROPS Design ha risposto:
Hi Sharon, If you cast on more stitches then the head band will be wider. Just make sure the number of stitches is divisible by 3 + 2. Happy knitting!
07.12.2021 - 07:03
![]() Stephanie Bedard ha scritto:
Stephanie Bedard ha scritto:
Hi there, I am stuck at the middle part! Here’s the part of the pattern I’m having issues with: ROW 5: K 1 edge st, * 1 YO, K 2 in next st *, repeat from *-* 4 times in total and finish with K 1 edge st = 14 sts on needle I had 6 sts on my needle as mentioned after decreasing on row 1 as expected, but when increasing at row 5, I am left with only 11 sts and not 14. Is there any troubleshooting possible here ? Thank you!!
03.12.2021 - 18:29DROPS Design ha risposto:
Dear Stephanie, you have 2 edge stitches on each side + 4 YO + 2x4=8 sts. So in total you have 14 stitches. You k2 in each of the 4 sts between the edge stitches, so you increase one stitch in each stitch. Happy knitting!
05.12.2021 - 17:27
![]() Sharon ha scritto:
Sharon ha scritto:
What is the correct size needles to make the headband. A size 10,75 give a head band hard like a board. This cannot be the correct needles. Is the size give in the pattern correct.
26.11.2021 - 18:29DROPS Design ha risposto:
Dear Sharon, everyone knits with a different gauge, Pleade make a swatch and use the needles with which you can achieve the knitting tension goven in the pattern. Happy Stitching!
28.11.2021 - 00:26
![]() Sharon ha scritto:
Sharon ha scritto:
Hi, looking to start the headband an am confused on how to join the back invisible using kitichner stitch. The first time I made this 3 needle bind off was the solution but it was not invisible and an unhappy with the results. The one am working on now is a Christmas gift so it has to be prefect. So my question again is how do I kitichner the back to make it invisible? Thanks for your response.
26.11.2021 - 09:33DROPS Design ha risposto:
Dear Sharon, this video shows how to sew together patterns such as rib in this pattern and should help you to finish your piece. Happy finishing!
26.11.2021 - 15:46
![]() Pru ha scritto:
Pru ha scritto:
Hello- on knitting the headband as per the instructions...i get a 'seed stitch' pattern...ive ripped out and started 5 times now...am i reading this wrong? please help me...thank you!!
07.12.2019 - 22:19DROPS Design ha risposto:
Dear Pru, check your number of stitches (you should have 14) and remember to work with 1 edge stitch in garter stitch in each side.On row 1, work: K1 (edge st), then (K1, P1, K1) until 1 stitch remain, K the last st. On row 2, work: K1 (edge st), then repeat: (P1, K1, P1) until last st remain, K last st. Repeat rows 1 and 2. Happy knitting!
09.12.2019 - 08:54
![]() Tanja Kroczek ha scritto:
Tanja Kroczek ha scritto:
Hallo Zusammen! Ich stricke gerade das Stirnband. Nach dem 1. Absatz "Wie folgt weiterstricken" steht unter dem 1. Punkt: 6 Maschen übrig, was passiert damit?
02.02.2019 - 12:16DROPS Design ha risposto:
Liebe Frau Kroczek, bei der 1. Hin-Reihe hier nehmen Sie Maschen ab (= 2 M so abheben als würden sie re zusgestr, 1 M re, die 2 abgehobenen M überziehen), am Ende dieser Reihe sind es nur noch 6 Maschen auf der Nadel. Viel Spaß beim stricken!
04.02.2019 - 11:06
![]() Nagymama ha scritto:
Nagymama ha scritto:
Pedig automatával könnyebb és mindenekelőtt pontosabb lenne a fordítás! Egyszer kell jól beprogramozni, és onnantól kezdve nem hibázik. Nem úgy, mint... na mindegy, szóval a leírás még mindig nem jó, mert van ám 6. meg 7. sora is. Hogy a helyesírásról meg az elírásokról ne is beszéljünk. :(
01.10.2018 - 09:39
![]() Nagymama ha scritto:
Nagymama ha scritto:
Már megint rossz a magyar leírás. Nem ez az első eset. Tessenek már végiggondolni, hogy ha a fejpántnál ezt a két sort váltogatjuk, akkor abból milyen minta lesz!
30.09.2018 - 09:34DROPS Design ha risposto:
Kedves Nagymama! Köszönjük, hogy felhívta a figyelmünket a hibára, ami így javításra is került. A fordításokat nem automata készíti, így sajnos, a legnagyobb odafigyelés mellett is előfordulhatnak hibák. Célunk, hogy minél pontosabb minták legyenek a weboldalon, ezért mindig köszönettel vesszük, ha jelzést kapunk egy-egy javítani valóról. Sikeres kézimunkázást!
30.09.2018 - 14:52
![]() Gail Thorpe ha scritto:
Gail Thorpe ha scritto:
Thank you for your help on pattern #164-27. The tutorial is very helpful. I have another question. I knit the piece in Polaris yarn. Should I block it before I sew it together? The yarn is so plush and heavy that it seems daunting to plunge it under water. Will it be okay to do so? Please give me some detailed instructions. Thank you.
16.06.2017 - 01:11DROPS Design ha risposto:
Dear Mrs Thorpe, some knitters block every piece, some others don't. Feel free to contact your DROPS store even per mail or telephone they will have some more individual tipps for you. Happy knitting!
16.06.2017 - 09:12
![]() Anne ha scritto:
Anne ha scritto:
Que veux dire, pour le rang 2 du tour de cou: i m lis à l'end. Que veux dire lis???je n'ai jamais pu trouver l'explication! Merci
01.03.2017 - 19:52DROPS Design ha risposto:
Chere Anne, 1 maille lis est la premiere maille du rang. Parfois elle est tricotee autrement que les autres mailles pour que le bord du tricot soit esthetique et facile a assemler a la fin. Bon tricot!
01.03.2017 - 20:27
|
|
What A Sight!#whatasightset |
|
|
|
|
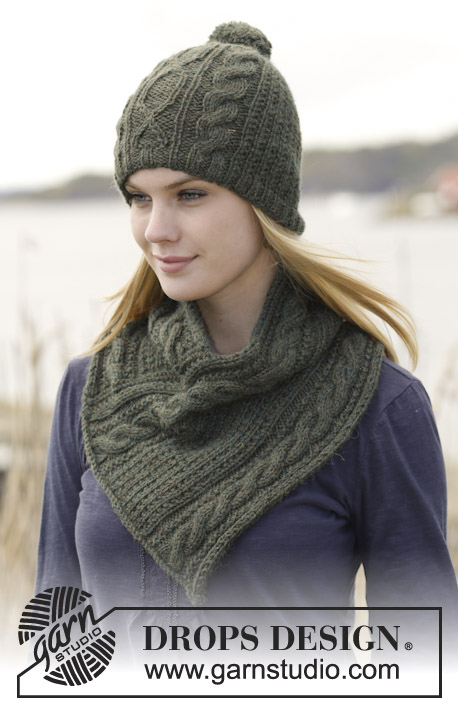
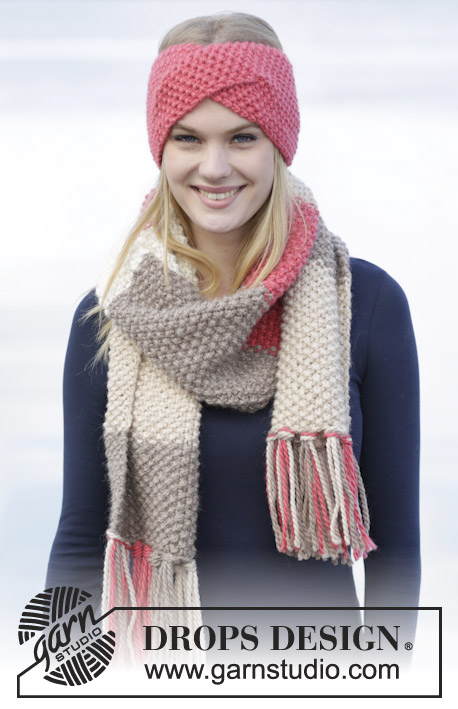
Completo formato da: Fascia per la testa e scalda collo DROPS ai ferri, a coste, in "Polaris".
DROPS 164-27 |
|
|
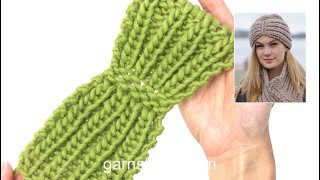
FASCIA PER LA TESTA: Avviare 14 m sui ferri n° 7 con il filato Polaris e lavorare come segue: FERRO 1 (= rovescio del lavoro): 1 m vivagno a dir, * 1 m dir, 1 m rov, 1 m dir *, ripetere da *-* 4 volte in tutto e finire con 1 m vivagno a dir. FERRO 2 (= diritto del lavoro): 1 m vivagno a dir, * 1 m rov, 1 m dir, 1 m rov *, ripetere da *-* 4 volte in tutto e finire con 1 m vivagno a dir. Ripetere i ferri 1 e 2 finché il lavoro non misura ca. 23 cm, assicurarsi che il ferro successivo sia sul diritto del lavoro. RICORDARSI LA TENSIONE DEL LAVORO! Proseguire come segue: FERRO 1 (= diritto del lavoro): 1 m vivagno a dir, * passare 2 m insieme a dir senza lavorarle, 1 m dir, accavallare le 2 m passate sulla m lavorata *, ripetere da *-* 4 volte in tutto e finire con 1 m vivagno a dir = sui ferri rimangono 6 m. FERRO 2 (= rovescio del lavoro): Lavorare tutte le m a dir. FERRO 3: Lavorare tutte le m a dir. FERRO 4: Lavorare tutte le m a dir. FERRO 5: 1 m vivagno a dir, * 1 m gettata, lavorare 2 m nella m successiva (lavorare nel filo davanti e in quello dietro della m) *, ripetere da *-* 4 volte in tutto e finire con 1 m vivagno a dir = 14 m. FERRO 6: 1 m vivagno a dir, * 1 m dir, 1 m rov, 1 m dir *, ripetere da *-* 4 volte in tutto e finire con 1 m vivagno a dir - ATTENZIONE: Al ferro successivo, lavorare le m gettate ritorte per evitare che si formino dei buchi. FERRO 7: 1 m vivagno a dir, * 1 m rov, 1 m dir, 1 m rov *, ripetere da *-* 4 volte in tutto e finire con 1 m vivagno a dir. Ripetere i ferri 6 e 7 finché il lavoro non misura ca.48 cm (o la lunghezza desiderata); intrecciare le m lavorando a dir le m dir e a rov le m rov. Cucire la fascia per la testa insieme al centro, sul dietro a punto maglia per una cucitura invisibile. ---------------------------------------------------------- SCALDA COLLO: PUNTO LEGACCIO (avanti e indietro): Lavorare tutti i ferri a dir. 1 “costa” a legaccio = 2 ferri a dir. SUGGERIMENTO PER CAMBIARE GOMITOLO: Quando si cambia gomitolo con il filato Polaris, dividere in 2 gli ultimi 15 cm del filo del gomitolo finito – tagliare una delle due parti e fare la stessa cosa con il filo del gomitolo da iniziare. Sovrapporre i primi e gli ultimi 15 cm dei due gomitoli, in modo da ottenere lo spessore giusto e continuare a lavorare – questo consente di rendere invisibile il passaggio tra i due gomitoli. ---------------------------------------------------------- SCALDA COLLO: Si lavora avanti e indietro e viene cucito alla fine. Avviare 18-21 m sui ferri n° 10 con il filato Polaris. Lavorare 2 coste a PUNTO LEGACCIO - vedere le spiegazioni sopra. Proseguire a coste come segue: FERRO 1 (= diritto del lavoro): 2 m dir, * 2 m rov, 1 m dir *, ripetere da *-* finché non rimane 1 m e finire con 1 m dir. FERRO 2 (= rovescio del lavoro): 1 m vivagno a dir, * 1 m rov, 2 m dir *, ripetere da *-* finché non rimangono 2 m, finire con 1 m rov e 1 m vivagno a dir. Ripetere i ferri 1 e 2. RICORDARSI LA TENSIONE DEL LAVORO e VEDERE IL SUGGERIMENTO PER CAMBIARE GOMITOLO. Quando il lavoro misura 23-26 cm, inserire 1 segno nella prima m sui ferri (visto sul diritto del lavoro). Proseguire finché il lavoro non misura 86-88 cm, lavorare 2 coste a legaccio e intrecciare lavorando le m a dir sul diritto del lavoro. CONFEZIONE: Piegare lo scalda collo in modo che il bordo di chiusura delle m sia appoggiato contro il lato, tra il ferro di avvio delle m e il segno.. Cucire insieme bordo contro bordo. |
|
Avete terminato questo modello?Allora taggate le vostre foto con #dropspattern #whatasightset o inviatele alla #dropsfan gallery. Avete bisogno di aiuto con questo modello?Troverete 19 video tutorial, una sezione per i commenti/domande e molto altro guardando il modello su www.garnstudio.com © 1982-2026 DROPS Design A/S. Ci riserviamo tutti i diritti. Questo documento, compreso tutte le sue sotto-sezioni, è protetto dalle leggi sul copyright. Potete leggere quello che potete fare con i nostri modelli alla fine di ogni modello sul nostro sito. |


Con oltre 40 anni di esperienza nel design di modelli di maglia e uncinetto, DROPS Design offre la più estesa collezione di modelli gratuiti su internet - tradotti in 17 lingue. Ad oggi vi possiamo fornire 324 cataloghi e 12290 modelli - 9561 dei quali sono tradotti in Italiano.
Ci stiamo impegnando molto per darvi il meglio che vi possiamo offrire in termini di maglia e uncinetto, ispirazioni e consigli così come filati di grande qualità ad un prezzo incredibile! Volete utilizzare i nostri modelli per qualcosa d'altro oltre al vostro uso personale? Potete leggere tutto ciò che è consentito nel testo sul Copyright in basso su tutte le pagine dei nostri modelli. Buon lavoro!
Lasciare un commento sul modello DROPS 164-27
Noi saremmo felici di ricevere i tuoi commenti e opinioni su questo modello!
Se vuoi fare una domanda, fai per favore attenzione a selezionare la categoria corretta nella casella qui sotto per velocizzare il processo di risposta. I campi richiesti sono indicati da *.