
Categorie popolari
State cercando un filato?


Commenti / Domande (46)
![]() Titie Van Der Veen ha scritto:
Titie Van Der Veen ha scritto:
In de beschrijving van het patroon is het mij niet duidelijk of er na de plaatsing van de markeerders in het werk, dus na 19 cm. en na de 1 naald tricotsteek, verder wordt gebreid in het spiraalpatroon of dat er door minderingen een soort spiraalpatroon ontstaat. Indien er wordt geminderd, wat is dan de werkwijze? Ik kom er niet uit, Mag ik op korte termijn een reactie?
13.02.2015 - 18:56DROPS Design ha risposto:
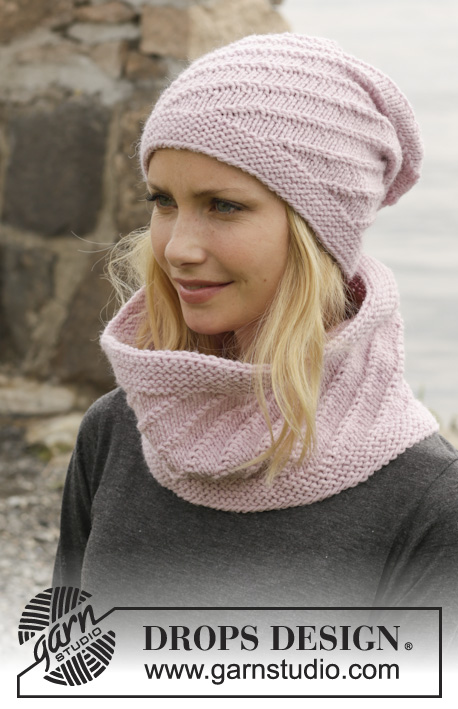
Hoi Titie. Na 19 cm brei je verder in tricotsteken. Door het plaatsen van de markeerders en de minderingen krijg je de spiraal aan de bovenkant, die ook te zien is op de tweede foto.
17.02.2015 - 16:01
![]() Pat ha scritto:
Pat ha scritto:
Can you use worsted weight for this pattern? Do you have a yarn equivalency chart for this and other patterns . I don't have drops at our local store and love lots of your patterns but don't know how to figure out a suitable equivalent
10.02.2015 - 02:46DROPS Design ha risposto:
Dear Pat, please click here for all informations about our yarns and category and here to read more about getting our yarns from Canada. Happy knitting!
10.02.2015 - 09:11
![]() Pat ha scritto:
Pat ha scritto:
Thank you for explaning,it makes perfect sense now! It is a great feature to be able to ask and receive support as I am teaching myself. My mom was from England and was an amazing knit and crocheter but regrettably i didnt make the time to learn from her. Is it easy to extend the spiral to the top of the hat?
28.01.2015 - 14:02DROPS Design ha risposto:
Dear Pat, you are very welcome. To extend the spiral to the top of the hat, you would have to adjust dec and pattern together - it may be easier to work as in the pattern. Happy knitting!
28.01.2015 - 16:37
![]() Kristi ha scritto:
Kristi ha scritto:
Eestikeelses õpetuses on viga. SPIRAL PATTERN: * P 2, K 5 *, repeat from *-* the entire round. Pattern is over 7 sts and no of sts are divisible by 7 + 1. When working in the round, the pattern will displace 1 st towards the right on every round and forms a spiral pattern.
03.01.2015 - 19:05
![]() Iris ha scritto:
Iris ha scritto:
Welche Abnahmen sind nach den gesetzten Markierungen zu stricken 2 Maschen rechts zusammen oder 2 Maschen rechts verschränkt zusammen?
10.12.2014 - 15:26DROPS Design ha risposto:
Sie stricken die M immer direkt VOR jedem Markierer zusammen und zwar 2 M re zusammen, nicht verschränkt.
10.12.2014 - 23:04
![]() Tine ha scritto:
Tine ha scritto:
Nein, die Abnahmen habe ich nicht an derselben Stelle gemacht. Ich denke das wird das Problem sein. Ich muss wahrscheinlich wirklich direkt vor den Markierern die 2 re zusammen stricken und nicht irgendwo dazwischen. Ich probier es gleich nochmal aus und hoffe es klappt! Lieben Dank für die flotte Hilfe
08.12.2014 - 17:32DROPS Design ha risposto:
Liebe Tine, ja dann wird es klappen, wenn Sie die Abnahmen immer an denselben Stellen machen! Viel Spaß beim Tragen!
08.12.2014 - 20:35
![]() Tine ha scritto:
Tine ha scritto:
Ich habe wie folgt gestrickt: ab 19 cm nur noch glatt rechts in allen Reihen. Nachdem die Markierungen angebracht waren habe ich 1 Runde glatt rechts ohne Abnahmen, 1 Runde glatt rechts mit Abnahmen im Wechsel 5x und dann in jeder Runde Abnahmen. Erhalte aber eben keine Strahlen wie auf dem Bild. Was habe ich falsch gemacht? Dankbar für Hilfe
08.12.2014 - 10:17DROPS Design ha risposto:
Es klingt an sich alles richtig, was Sie gemacht haben. Haben Sie die Abnahmen immer an derselben Stelle gemacht, also immer vor den Markierern 2 M re zusammengestrickt? Die Markierer müssen ja immer an derselben Stelle bleiben.
08.12.2014 - 15:28
![]() Tine ha scritto:
Tine ha scritto:
Laut Anleitung soll ich ab 19-20 cm glatt rechts stricken. Dann erhalte ich aber nicht das Muster laut Abbildung. Das Spiralmuster läuft ja dann nicht weiter?!
07.12.2014 - 23:59DROPS Design ha risposto:
Wenn Sie sich das zweite Foto anschauen, sehen Sie, dass die Mütze oben glatt rechts gestrickt ist, die Anleitung passt genau zu den Fotos. Die "Strahlen", die Sie auf dem Foto im Glatt-re-Gestrick sehen können, ergeben sich durch die Abnahmen an den Markierern. Die Mütze wird oben glatt re gestrickt, da das Spiralmuster mit den Abnahmen nicht mehr richtig aufgehen würde.
08.12.2014 - 09:27
![]() Cynthia ha scritto:
Cynthia ha scritto:
Bonjour, concernant les diminutions, je ne comprends pas comment un point jersey peut reproduire le motif observé sur la photographie. Faut-il donc poursuivre le point fantaisie ?
23.11.2014 - 14:39DROPS Design ha risposto:
Bonjour Cynthia, à la fin du bonnet, quand il mesure 19-20 cm de hauteur totale, on continue en jersey (= tout à l'endroit) en faisant les diminutions indiquées. Bon tricot!
24.11.2014 - 11:27
![]() Nath ha scritto:
Nath ha scritto:
Bonjour, Pour le bonnet, pourriez-vous me dire qelle est la technique de diminution à employer ?
30.09.2014 - 14:15DROPS Design ha risposto:
Bonjour Nath, les diminutions se tricotent en jersey, en rond, on va donc tricoter 2 m ens à l'end. Bon tricot!
30.09.2014 - 16:48
|
|
Belinda's Dream#belindasdreamset |
|
 |
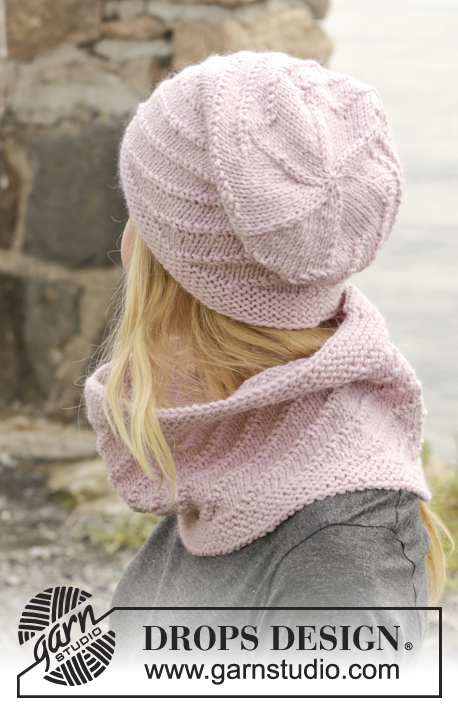 |
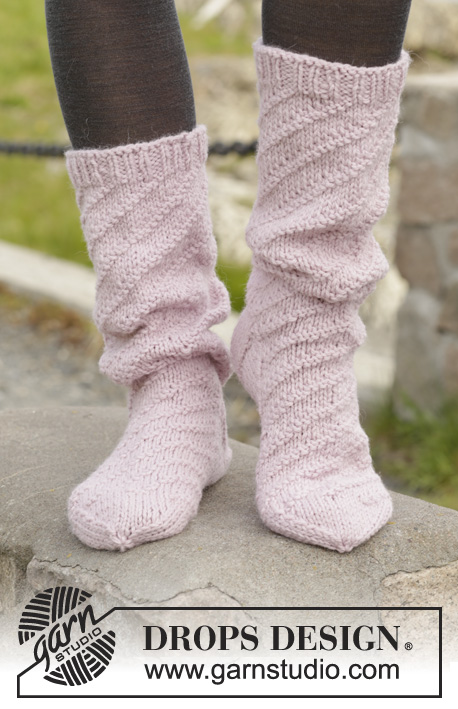
Cappello e scaldacollo DROPS lavorati ai ferri a maglia rasata con motivo a spirale in "Nepal".
DROPS 156-24 |
|
|
M LEGACCIO (in tondo con i ferri circolari): * 1 giro dir e 1 giro rov *, ripetere *-*. 1 “costa” a m legaccio = 2 giri. MOTIVO A SPIRALE: * 2 m rov, 5 m dir *, ripetere *-* per tutto il giro. Il motivo è su 7 m e il n° di m è divisibile per 7 + 1. Lavorando in tondo, il motivo si sposterà di 1 m verso destra su ogni giro e formerà il motivo a spirale. ---------------------------------------------------------- CAPPELLO: Lavorato in tondo con i f circolari, passare ai f a doppia punta quando necessario. Avviare 85-92 m con i f circolari n° 4,5 mm con Nepal. Lavorare a M LEGACCIO – leggere la spiegazione sopra – fino a quando il lavoro misura 3 cm. Poi lavorare il MOTIVO A SPIRALE – leggere la spiegazione sopra. FARE ATTENZIONE ALLA TENSIONE DEL LAVORO! Quando il lavoro misura 19-20 cm, lavorare a m rasata – ALLO STESSO TEMPO sul 1° giro diminuire 1-2 m = 84-90 m. Poi inserire 6 segnapunti nel lavoro con 14-15 m tra ognuno. Sul giro successivo, diminuire 1 m prima di ogni segnapunti = 78-84 m. Ripetere le diminuzioni a giri alterni altre 5-6 volte (= 6-7 volte in totale) = 48 m. Poi diminuire su ogni giro 5 volte in totale = 18 m. Sul giro successivo lavorare tutte le m insieme 2 a 2 a dir = 9-9 m. Il lavoro misura circa 27-28 cm. Tagliare il filo, usare un ago e farlo passare attraverso le m rimaste, tirare forte e affrancare. ---------------------------------------------------------- SCALDACOLLO: Lavorato in tondo con i f circolari. Avviare 109-116 m con i f circolari n° 4,5 mm con Nepal. Lavorare 3 “coste” a M LEGACCIO – leggere la spiegazione sopra. Lavorare 1 giro dir e ALLO STESSO TEMPO distribuire 10 diminuzioni in modo uniforme = 99-106 m. Lavorare 1 giro rov. Lavorare il MOTIVO A SPIRALE – leggere la spiegazione sopra – fino a quando il lavoro misura 16-20 cm. FARE ATTENZIONE ALLA TENSIONE DEL LAVORO! Poi lavorare a m legaccio fino a quando il lavoro misura 18-22 cm, finire con 1 giro rov e intrecciare a dir sul giro successivo. |
|
Avete terminato questo modello?Allora taggate le vostre foto con #dropspattern #belindasdreamset o inviatele alla #dropsfan gallery. Avete bisogno di aiuto con questo modello?Troverete 15 video tutorial, una sezione per i commenti/domande e molto altro guardando il modello su www.garnstudio.com © 1982-2026 DROPS Design A/S. Ci riserviamo tutti i diritti. Questo documento, compreso tutte le sue sotto-sezioni, è protetto dalle leggi sul copyright. Potete leggere quello che potete fare con i nostri modelli alla fine di ogni modello sul nostro sito. |
|


Con oltre 40 anni di esperienza nel design di modelli di maglia e uncinetto, DROPS Design offre la più estesa collezione di modelli gratuiti su internet - tradotti in 17 lingue. Ad oggi vi possiamo fornire 324 cataloghi e 12290 modelli - 9561 dei quali sono tradotti in Italiano.
Ci stiamo impegnando molto per darvi il meglio che vi possiamo offrire in termini di maglia e uncinetto, ispirazioni e consigli così come filati di grande qualità ad un prezzo incredibile! Volete utilizzare i nostri modelli per qualcosa d'altro oltre al vostro uso personale? Potete leggere tutto ciò che è consentito nel testo sul Copyright in basso su tutte le pagine dei nostri modelli. Buon lavoro!
Lasciare un commento sul modello DROPS 156-24
Noi saremmo felici di ricevere i tuoi commenti e opinioni su questo modello!
Se vuoi fare una domanda, fai per favore attenzione a selezionare la categoria corretta nella casella qui sotto per velocizzare il processo di risposta. I campi richiesti sono indicati da *.