
Categorie popolari
State cercando un filato?


Commenti / Domande (208)
![]() Pas ha scritto:
Pas ha scritto:
Les commentaires précédent sont vrai lorsqu'il disent que les augmentations ne sont pas exact. Moi aussi je ne les trouve pas exact. Je suis obligé de tricoter le poncho selon mon patron transformé.
07.06.2014 - 01:00
![]() Paloma ha scritto:
Paloma ha scritto:
Es un poncho muy femenino. Felicidades a su diseñador/a. Adoro estas prendas. Tengo una pregunta, podría hacerse con puntos altos o medios punto manteniendo el mismo patrón con sus medidas? Lo digo porque no sé tejer a dos agujas... Gracias, sois muy amables.
01.06.2014 - 23:17DROPS Design ha risposto:
Hola Paloma. El patrón está diseñado para tejerse en punto. A ganchillo el resultado no sería igual: el efecto, la caida. Te recomiendo que estés atenta a la nueva colección que incluirá bonitas prendas a ganchillo.
03.06.2014 - 09:28Mary ha scritto:
I am having some difficulty with this pattern. I understand that the first increase row is after the first ridge. But when do I start the next increases - the ones that are done every 2 cm?
12.04.2014 - 13:48DROPS Design ha risposto:
Dear Mary, the inc to be done every 2 cm are worked as follows : 1st one when piece measures 2 cm, next one when it measures 4 cm (2 more cm), next one when it measures 6 cm (2 more cm) and so on. Happy knitting!
14.04.2014 - 09:48Mary ha scritto:
I am having some difficulty with this pattern. I understand that the first increase row is after the first ridge. But when do I start the next increases - the ones that are done every 2 cm?
12.04.2014 - 13:48Mary ha scritto:
I am having some difficulty with this pattern. I understand that the first increase row is after the first ridge. But when do I start the next increases - the ones that are done every 2 cm?
12.04.2014 - 13:48
![]() Hege Kaspersen ha scritto:
Hege Kaspersen ha scritto:
Så altfor stor når jeg strikker etter oppskriften. Prøver å regne om etter å ha strikket en topp ferdig som ble helt ubrukelig... Flere som har opplevd det..?
12.04.2014 - 12:08
![]() Corinne Nygren ha scritto:
Corinne Nygren ha scritto:
I appreciate the free patterns. This poncho is cute. Love the pattern, yarn & color & want to make it but instructions on increasing & buttonholes aren't clear & very confusing even for an advanced knitter. No indication of the measurements for sm, med, lg etc. tried to calculate with the number of st & gauge but was difficult to determine. More clarification on this pattern would be nice. I've knitted the drops jackie 131-1 jumper & it was a nice pattern.
27.03.2014 - 13:39
![]() Päivi ha scritto:
Päivi ha scritto:
Neuletiheys täsmää. Alareunan leveys täsmää, mutta ylhäällä leveyttä liikaa 15 cm. Mitä olen tehnyt väärin? Tämä ei ollut todellakaan ensimmäinen neuleeni, mutta en ymmärrä mikä meni väärin. Neuleen purkaminen ei houkuta lankan pörröisyyden takia.
25.03.2014 - 18:42DROPS Design ha risposto:
Hei! Jos neuletiheys täsmää ja alareunan leveys on oikea, myös yläreunan tulisi olla oikean mittainen, koska työ neulotaan ylhäältä alas. Näkemättä työtä on vaikea sanoa mitä ongelma on. Voit kuitenkin viedä neuleen lähimmälle DROPS jälleenmyyjäliikkeeseesi. He auttavat sinua mielellään.
27.03.2014 - 16:20Veronica Cofre ha scritto:
Me quedo precioso!!! gracias por compartir el modelo!! ojala lleguen sus lanas a mi pais CHILE.
24.03.2014 - 18:27
![]() Simona ha scritto:
Simona ha scritto:
Complimenti per i vostri bellissimi modelli. Mi potreste spiegare cosa significa 1 "costa" a m legaccio = 2 f dir. grazie.
01.03.2014 - 15:23DROPS Design ha risposto:
Buongiorno Simona. Quando trova l'indicazione: lavorare 1 costa a legaccio, significa che deve lavorare 2 ferri a dir. Buon lavoro!
01.03.2014 - 16:20
|
|
First date#firstdateponcho |
|
|
|
|
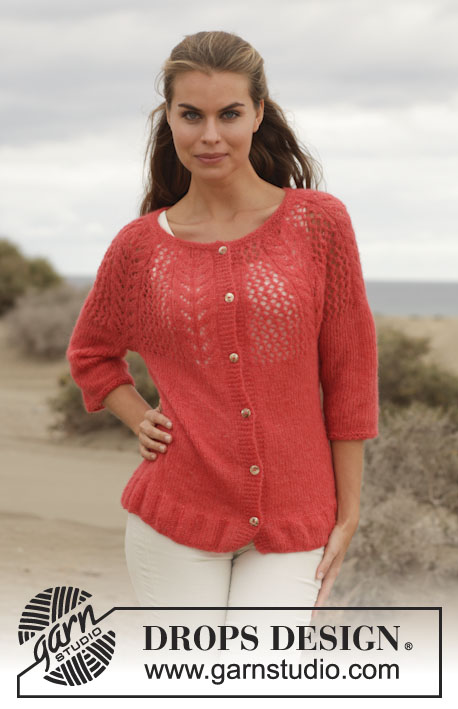
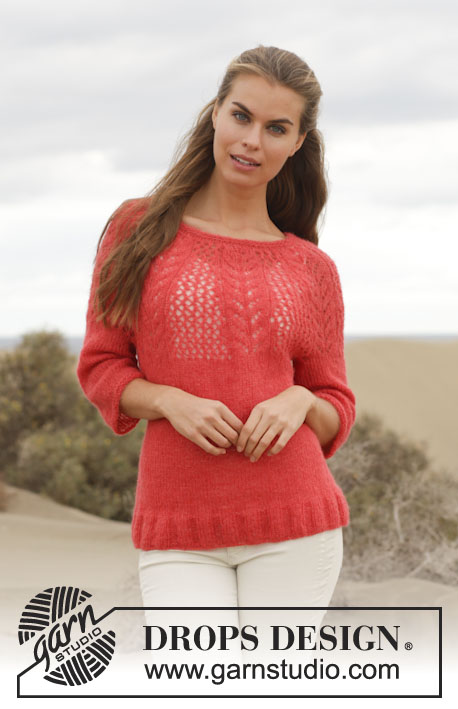
Poncho DROPS lavorato ai ferri a maglia legaccio con spacco in "Brushed Alpaca Silk". Taglie: S-XXXL.
DROPS 154-4 |
|
|
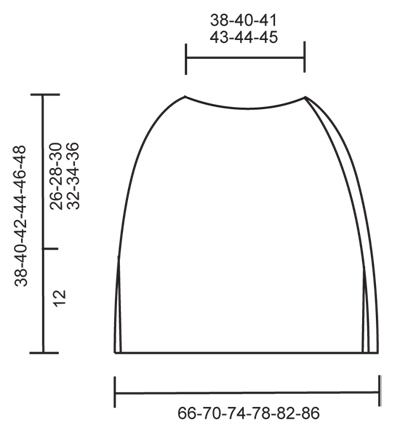
M LEGACCIO (avanti e indietro sui f): Lavorare tutti i f a dir. 1 “costa” a m legaccio = 2 f dir. SUGGERIMENTO PER GLI AUMENTI: Aumentare 1 m prendendo il filo tra 2 m del f precedente – lavorare questa m a dir ritorto, cioè lavorare nel filo dietro della m anziché in quello davanti per evitare buchi. ASOLE: Diminuire per le asole sul lato destro del lavoro, visto dal diritto del lavoro. 1 asola = lavorare insieme a dir la 3° e la 4° m dal bordo e fare un gettato. Misurare dal bordo del collo e diminuire per le asole quando il lavoro misura: TAGLIA S: 2, 10, 18 e 26 cm TAGLIA M: 2, 10, 18 e 26 cm TAGLIA L: 2, 10, 18 e 26 cm TAGLIA XL: 2, 11, 20 e 29 cm TAGLIA XXL: 2, 11, 20 e 29 cm TAGLIA XXXL: 2, 11, 20 e 29 cm ---------------------------------------------------------- PONCHO: Lavorato avanti e indietro con i f circolari, dall’alto in basso. Avviare senza stringere 106-111-115-119-123-126 m con Brushed Alpaca Silk con i f circolari n° 7 mm. Lavorare 1 “costa” a M LEGACCIO – leggere la spiegazione sopra. Sul f successivo dal diritto del lavoro, distribuire 20-21-23-23-25-24 aumenti in modo uniforme = 126-132-138-142-148-150 m – LEGGERE IL SUGGERIMENTO PER GLI AUMENTI. Continuare avanti e indietro a m legaccio fino alla fine del lavoro. ALLO STESSO TEMPO diminuire per le ASOLE e aumentare in modo uniforme come segue: aumentare 8-9-10-10-10-10 m ogni 2 cm 5-5-6-6-6-7 volte in totale, 8-8-6-7-9-9 m ogni 4 cm 2 volte in totale per tutte le taglie e 8-7-0-6-8-8 m dopo altri 5 cm 1 volta (= 64-68-72-80-86-96 aumenti) = 190-200-210-222-234-246 m. Continuare a lavorare fino a quando il lavoro misura 26-28-30-32-34-36 cm in totale. Poi inserire un segnapunti a lato per lo spacco in modo che ci siano 95-100-105-111-117-123 m a ogni lato del segnapunti. Poi finire il davanti e il dietro in modo separato. DAVANTI: Continuare avanti e indietro a m legaccio sulle 95-100-105-111-117-123 m del davanti. Intrecciare senza stringere tutte le m dal rovescio del lavoro quando il lavoro misura 38-40-42-44-46-48 cm in totale. DIETRO: Lavorare come per il davanti e intrecciare senza stringere dal rovescio del lavoro. CONFEZIONE: Affrancare tutti i capi e attaccare i bottoni sul bordo sinistro, cioè sul lato sinistro del lavoro visto dal diritto del lavoro. |
|
 |
|
Avete terminato questo modello?Allora taggate le vostre foto con #dropspattern #firstdateponcho o inviatele alla #dropsfan gallery. Avete bisogno di aiuto con questo modello?Troverete 12 video tutorial, una sezione per i commenti/domande e molto altro guardando il modello su www.garnstudio.com © 1982-2026 DROPS Design A/S. Ci riserviamo tutti i diritti. Questo documento, compreso tutte le sue sotto-sezioni, è protetto dalle leggi sul copyright. Potete leggere quello che potete fare con i nostri modelli alla fine di ogni modello sul nostro sito. |


Con oltre 40 anni di esperienza nel design di modelli di maglia e uncinetto, DROPS Design offre la più estesa collezione di modelli gratuiti su internet - tradotti in 17 lingue. Ad oggi vi possiamo fornire 324 cataloghi e 12290 modelli - 9561 dei quali sono tradotti in Italiano.
Ci stiamo impegnando molto per darvi il meglio che vi possiamo offrire in termini di maglia e uncinetto, ispirazioni e consigli così come filati di grande qualità ad un prezzo incredibile! Volete utilizzare i nostri modelli per qualcosa d'altro oltre al vostro uso personale? Potete leggere tutto ciò che è consentito nel testo sul Copyright in basso su tutte le pagine dei nostri modelli. Buon lavoro!
Lasciare un commento sul modello DROPS 154-4
Noi saremmo felici di ricevere i tuoi commenti e opinioni su questo modello!
Se vuoi fare una domanda, fai per favore attenzione a selezionare la categoria corretta nella casella qui sotto per velocizzare il processo di risposta. I campi richiesti sono indicati da *.