
Categorie popolari
State cercando un filato?


Commenti / Domande (32)
![]() Susanne Müters ha scritto:
Susanne Müters ha scritto:
Hallo, ich habe den Pullunder in der kleinsten Größe begonnen, aber ich verstehe die Markierungen nicht. Wo genau sind zu Beginn die Markierungen zu machen. "Am Anfang", nach 60 Maschen und dann wieder nach 30?
30.05.2015 - 18:51DROPS Design ha risposto:
"Am Anfang" bedeutet direkt am Rd-Beginn, also vor der 1. M (d.h. zwischen der letzten und 1. M). Den zweiten Markierer setzen Sie nach 60 M ab Rd-Beginn, also nach genau der Hälfte der M. Diese beiden Markierer zeigen die Seiten des Pullunders an (= Seitenmarkierer), also die Grenzen zwischen Vorder- und Rückenteil. Den letzten Markierer setzen Sie genau in die Mitte des Vorderteils, denn er soll genau das anzeigen - die Mitte des Vorderteils, um ab hier die M für die Tasche abzuzählen. Der 3. Markierer befindet sich also nach 30 M ab Rd-Beginn.
30.05.2015 - 23:45
![]() Susanne Müters ha scritto:
Susanne Müters ha scritto:
Hallo, ich verstehe das mit den Markierungen nicht so ganz. "Am Anfang eine Markierung setzen", also nach der wievielten Masche? Ich setze dann nach 60 eine weitere und sodann nach 30? Nach der 60sten Masche wäre auch gar nicht die Mitte. LG Susanne
30.05.2015 - 18:34DROPS Design ha risposto:
Nach der 60. M bedeutet nach der Hälfte der M (Sie haben ja 120 M angeschlagen), also eine der beiden Seiten des Pullunders. Die andere Seite befindet sich am Rd-Beginn und wird dort durch den Rd-Anfangs-Markierer angezeigt. Weiteres siehe oben! :-)
30.05.2015 - 23:48Hina ha scritto:
DROPS,, could you please tell which stitch is the last/edge st. where should I start and where should I end?? Thanks
19.12.2013 - 11:19DROPS Design ha risposto:
Dear Hina, you can start on one of the shoulder seam, and pick sts around to the beg of round. Happy knitting!
19.12.2013 - 13:48Hina ha scritto:
I really don't understand it could you please talk me through it again. i picked up the sts of neckline from back isn't it right?? or should i pick them up from the centre 2 sts on the stitch holder???? Thanks and really sorry for bothering you again and again... Please I m waiting for your reply so I can continue...
19.12.2013 - 08:32DROPS Design ha risposto:
Dear Hina, for neck edge, you pick up sts all around neck (on front pieces + neckline on back piece)+ the 2 sts on mid front and work rib in the round with dec as stated. Happy knitting!
19.12.2013 - 09:03Hina ha scritto:
I really don't understand it could you please talk me through it again. i picked up the sts of neckline from back isn't it right?? or should i pick them up from the centre 2 sts on the stitch holder???? Thanks and really sorry for bothering you again and again...
17.12.2013 - 18:52Hina ha scritto:
Hey i m stuck again, how would I decrease stitches on each sides of neck edge?? It is stated that I should work until 1 st remains before 2 knit sts.?? what would I do before 2 knit sts? should I K2tog those 2 sts??? Please explain all decreases.. Thanx
17.12.2013 - 11:51DROPS Design ha risposto:
Dear Hina, at the end of row you work K2 tog just before last st (edge st) - for neck edge. Start when 3 sts remain at the end of row, work next 2 sts tog and work last edge st. happy knitting!
17.12.2013 - 13:31Hina ha scritto:
Hi i have a question again?? where its mentioned (Repeat dec every other row (i.e. every row from RS) 5 more times and then every 4th row (i.e. every other row from RS) 5-5-5-7-7 times. ) when it says and then every 4th row what is meant by i.e every other row from RS shouldn't it be every 4th row or alternative row from RS?? Please ellaborate and explain? Thanks Hina.
11.12.2013 - 09:00DROPS Design ha risposto:
Dear Hina, "every 4th row" means that you will work *1 row with dec, then work 3 rows without dec* and repeat from *-*, dec are done from RS, so that every 4th row will be every other row from RS (1 row from RS with dec, 1 row from RS without dec). Happy knitting!
11.12.2013 - 09:35Hina ha scritto:
Hi, another question!please tell me after decreasing 6sts from both sides of armholes should i rejoine the yarn to back piece and continue?
03.12.2013 - 08:37DROPS Design ha risposto:
Dear Hina, after binding off 6 sts each side for armhole, continue front and back piece separately. Put sts for front piece onto st holder and join the yarn to back piece to continue as stated with armhole dec. Happy knitting!
03.12.2013 - 09:26Hina ha scritto:
Sorry to bother again, i still have a question after working 98 sts should i work 28 sts to v neck then knitting on needles??is this the pattern asking to do???
30.11.2013 - 19:35DROPS Design ha risposto:
Dear Hina, in first size, you will work the round as follows: work first 32 sts, then work the next 2 sts and put these sts on a st holder, work the remaining 98 sts, turn and work all sts back from WS until the 2 sts on st holder, ie 130 sts. On next row from RS, you will start dec for V-neck dec 1 st at the beg + 1 st at the end of row. Happy knitting!
01.12.2013 - 20:38Hina ha scritto:
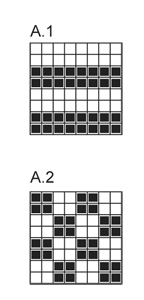
Hi, im knitting this vest for size one when i reached to the diagram i didn't get it, where should i start and how would i connect these two charts A1 and A2. I have tried again and again but I am stuck. please guide me how would I complete the round. when i have completed round 1 according to the diagram there were 4 sts left . what should I do with these 4.
26.11.2013 - 16:58DROPS Design ha risposto:
Dear Hina, you first work diag. A.1 around on all sts 1 time in height, then work following diag. A2 on all sts around until final measurements. Happy knitting!
26.11.2013 - 18:11
|
|||||||
Paul#paulvest |
|||||||
 |
 |
||||||
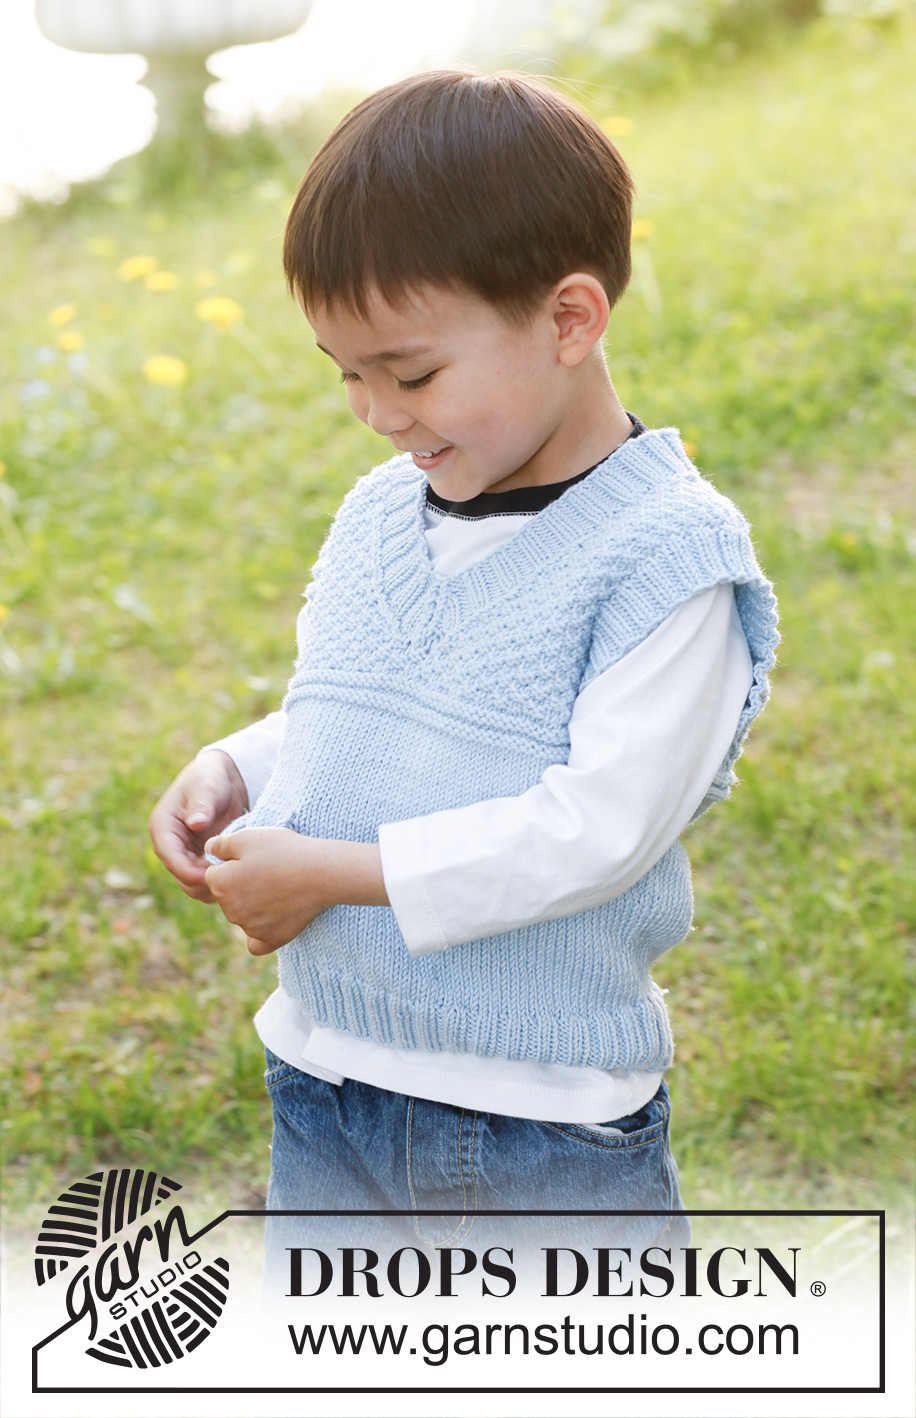
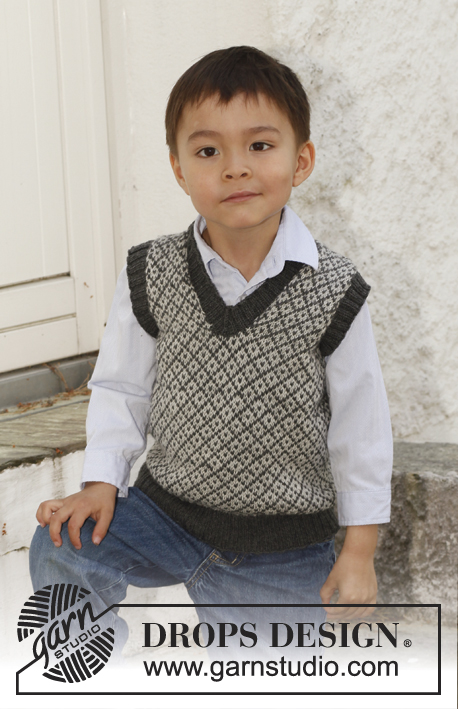
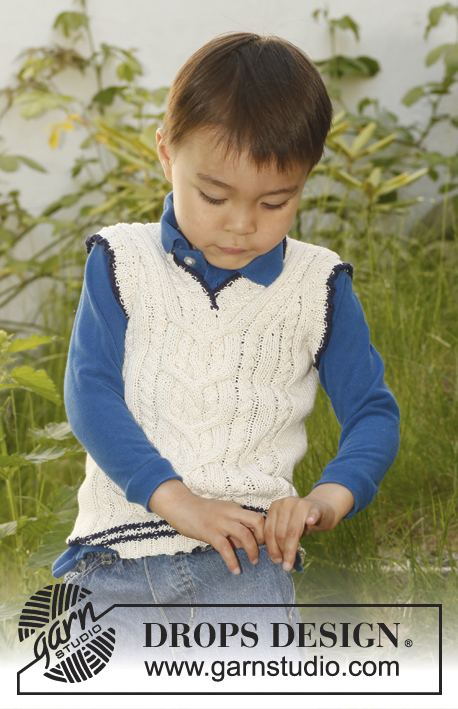
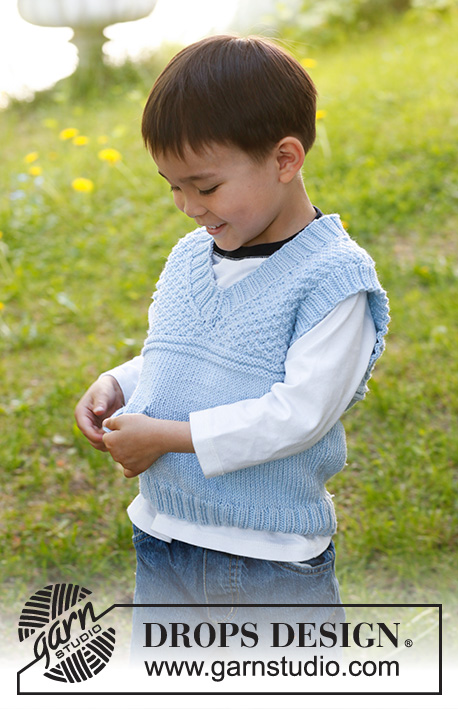
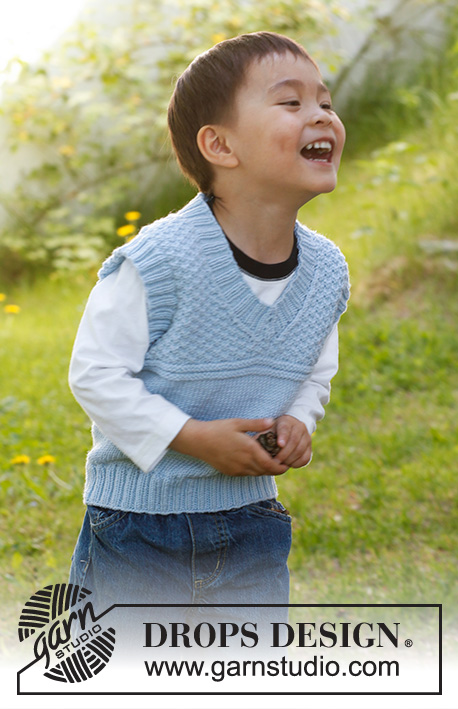
Gilet / smanicato lavorato ai ferri, con scollo a V, in grana di riso doppia, in DROPS Lima. Taglie: Da 3 a 12 anni.
DROPS Children 23-8 |
|||||||
|
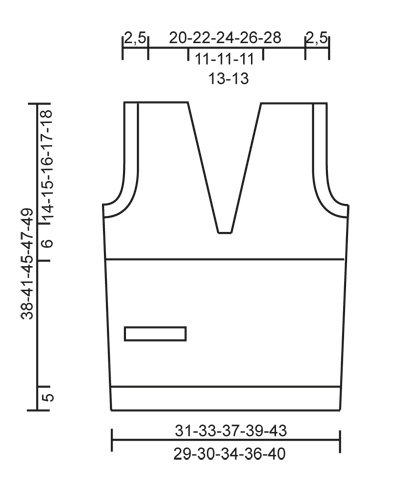
PUNTO LEGACCIO (avanti e indietro sui ferri): Lavorare tutti i ferri a dir. MOTIVO: Vedere i diagrammi A.1e A.2 - I diagrammi mostrano il motivo sul diritto del lavoro. SUGGERIMENTO PER LE DIMINUZIONI 1 (per lo scollo a V): Diminuire a 1 m dal bordo (lavorare sempre questa m a dir). Tutte le diminuzioni vanno fatte sul diritto del lavoro! DIMINUIRE DOPO LA M DEL BORDO COME SEGUE: Passare 1 m a dir senza lavorarla, 1 m dir, accavallare la m passata sulla m lavorata DIMINUIRE PRIMA DELLA M DEL BORDO COME SEGUE: lavorare 2 m insieme a dir. SUGGERIMENTO PER LE DIMINUZIONI 2 (per il collo): Diminuire da ciascun lato delle 2 m a dir al centro davanti sul collo, come segue: lavorare finché non rimane 1 m prima delle 2 m a dir, 2 m insieme a dir, passare 1 m a dir senza lavorarla, 1 m dir, accavallare la m passata sulla m lavorata. ---------------------------------------------------------- DAVANTI & DIETRO: Si lavorano in tondo sui ferri circolari. Avviare 148-156-176-184-204 m sui ferri circolari n° 3 con il filato Lima. Lavorare 1 giro a dir, proseguire a coste = 2 m a dir/ 2 m rov. Quando le coste misurano 5 cm, lavorare 1 giro a dir e ALLO STESSO TEMPO diminuire 28-28-32-32-36 m in modo uniforme = 120-128-144-152-168 m. Proseguire con i ferri circolari n° 4 e lavorare a maglia rasata. ALLO STESSO TEMPO inserire un segno all'inizio del giro e un segno dopo 60-64-72-76-84 m (questi segni indicano i lati). Inserire un segno aggiuntivo al centro sul davanti (quindi dopo 30-32-36-38-42 m). Quando il lavoro misura 6-7-8-9-8 cm, aumentare 1 m da ciascun lato dei due segni ai lati (= 4 m aumentate ). Ripetere questi aumenti ai lati ogni 5½-6-7-7-8 cm per altre 2 volte = 132-140-156-164-180 m. ALLO STESSO TEMPO, quando il lavoro misura 9-10-11-12-12 cm, lavorare 6-7-8-8-8 m dopo il segno al centro sul davanti. Mettere in attesa su un fermamaglie le 16-20-20-24-24 m successive per il bordo della tasca, avviare 16-20-20-24-24 nuove m sui ferri e proseguire in tondo su tutte le m come prima (togliere il segno al centro sul davanti). Quando il lavoro misura 18-20-23-24-25 cm, lavorare seguendo il diagramma A.1. Dopo aver lavorato il diagramma A.1 una volta in verticale, proseguire seguendo il diagramma A.2 fino alla fine del lavoro. ALLO STESSO TEMPO, quando il lavoro misura 22-24-27-28-29 cm, lavorare il giro successivo come segue: lavorare 34-36-40-42-46 m, mettere le ultime 2 m lavorate in attesa su un ferma maglie e lavorare le rimanenti 98-104-116-122-134 m. Proseguire avanti e indietro sui ferri, iniziando dal centro sul davanti. ALLO STESSO TEMPO, al ferro successivo sul diritto del lavoro, diminuire 1 m all’inizio e 1 m alla fine del ferro per lo scollo a V – vedere il SUGGERIMENTO PER LE DIMINUZIONI 1. Ripetere queste diminuzioni ogni 2 ferri (quindi ad ogni ferro sul diritto del lavoro) per altre 5 volte e poi ogni 4 ferri (quindi ogni 2 ferri sul diritto del lavoro) per 5-5-5-7-7 volte. ALLO STESSO TEMPO, quando il lavoro misura 24-26-29-30-31 cm, intrecciare 6 m da ciascun lato per gli scalfi (intrecciare quindi le 3 m che precedono e le 3 m che seguono ciascuno dei 2 segni); finire il davanti e il dietro separatamente. DIETRO: = 60-64-72-76-84 m. Proseguire seguendo il motivo come prima . ALLO STESSO TEMPO intrecciare per gli scalfi all’inizio di ogni ferro da ciascun lato come segue: 3 m per 1 volta, 2 m per 2 volte e 1 m per 1-1-3-3-5 volte = 44-48-52-56-60 m. Proseguire seguendo il motivo con 1 m vivagno a PUNTO LEGACCIO – vedere le spiegazioni sopra - da ciascun lato. Quando il lavoro misura 36-39-43-45-47 cm, intrecciare le 20-20-20-24-24 m centrali per il collo e finire ogni spalla separatamente. Al ferro successivo, intrecciare 2 m per il collo = per la spalla rimangono 10-12-14-14-16 m. Quando il lavoro misura 38-41-45-47-49 cm, intrecciare le m lavorando a dir le m dir e a rov le m rov. DAVANTI DESTRO: Proseguire seguendo il motivo e continuare a diminuire per lo scollo a V come prima. ALLO STESSO TEMPO, intrecciare per lo scalfo all’inizio di ogni ferro a partire dal lato come indicato per il dietro. Terminate tutte le diminuzioni per il collo e per lo scalfo, per la spalla rimangono 10-12-14-14-16 m. Quando il lavoro misura 38-41-45-47-49 cm, intrecciare le m lavorando a dir le m dir e a rov le m rov – assicurarsi che il davanti e il dietro siano della stessa lunghezza. DAVANI SINISTRO: Lavorare come il davanti destro, ma a specchio. CONFEZIONE: Cucire le spalle. BORDO DELLA TASCA: Con i ferri circolari n° 3 riprendere le 16-20-20-24-24 m messe in attesa e lavorare a coste 2 m dir / 2 m rov avanti e indietro sui ferri con 1 m a punto legaccio e 2 m dir da ciascun lato (visto sul diritto del lavoro). Quando il bordo della tasca misura ca 2,5 cm, intrecciare le m senza stringere troppo il filo lavorando a dir le m dir e a rov le m rov. Cucire con attenzione i lati del bordo della tasca al davanti, a punto maglia. Cucire l’apertura nella parte inferiore del bordo della tasca (dove le m sono state messe in attesa), sul rovescio del lavoro. Se si preferisce una tasca, lavorare il bordo come indicato sopra, cucire da ciascun lato, ma non cucire l’apertura nella parte inferiore. Con i ferri circolari n° 4 riprendere le m come segue: 1 m in ognuna delle 16-20-20-24-24 m avviate in corrispondenza dell’apertura della tasca. Lavorare a maglia rasata avanti e indietro sui ferri (si lavora dall’alto verso il basso) finché la tasca non misura ca. 4-5-6-7-7 cm. Intrecciare le m senza stringere troppo il filo. Cucire la tasca sul rovescio del davanti con piccoli punti. BORDO DEGLI SCALFI: Con il ferro circolare corto n° 3, riprendere attorno agli scalfi, sul diritto del lavoro, ca. 65 - 80 m. Lavorare 1 giro a dir e, ALLO STESSO TEMPO, aumentare in modo uniforme in modo da portare il n° delle m a 80-84-88-96-100 m. Lavorare a coste = 2 m dir / 2 m rov finché il bordo dello scalfo non misura ca. 2,5 cm. Intrecciare le m senza stringere troppo il filo, lavorando a dir le m dir e a rov le m rov. Ripetere lungo l’altro scalfo. BORDO DEL COLLO: Con il ferro circolare corto n° 3, riprendere sul diritto del lavoro ca. 90 -112 m (comprese le 2 m messe in attesa sul fermamaglie, al centro sul davanti). Lavorare 1 giro a dir e ALLO STESSO TEMPO aumentare in modo uniforme in modo da portare il n° delle m a 112-120-124-136-140 (non aumentare in corrispondenza delle 2 m al centro davanti). Lavorare a coste = 2 m dir / 2 m rov – assicurarsi che al centro davanti ci siano 2 m dir. ALLO STESSO TEMPO, durante il secondo giro, diminuire 1 m da ciascun lato delle 2 m al centro davanti – vedere il SUGGERIMENTO PER LE DIMINUZIONI 2 . Ripetere queste diminuzioni ogni 2 giri per altre 3 volte. Quando il bordo del collo misura ca. 2,5 cm, intrecciare le m senza stringere troppo il filo, lavorando a dir le m dir e a rov le m rov. |
|||||||
Spiegazioni del diagramma |
|||||||
|
|||||||
 |
|||||||
 |
|||||||
Avete terminato questo modello?Allora taggate le vostre foto con #dropspattern #paulvest o inviatele alla #dropsfan gallery. Avete bisogno di aiuto con questo modello?Troverete 16 video tutorial, una sezione per i commenti/domande e molto altro guardando il modello su www.garnstudio.com © 1982-2026 DROPS Design A/S. Ci riserviamo tutti i diritti. Questo documento, compreso tutte le sue sotto-sezioni, è protetto dalle leggi sul copyright. Potete leggere quello che potete fare con i nostri modelli alla fine di ogni modello sul nostro sito. |
|||||||


Con oltre 40 anni di esperienza nel design di modelli di maglia e uncinetto, DROPS Design offre la più estesa collezione di modelli gratuiti su internet - tradotti in 17 lingue. Ad oggi vi possiamo fornire 324 cataloghi e 12290 modelli - 9561 dei quali sono tradotti in Italiano.
Ci stiamo impegnando molto per darvi il meglio che vi possiamo offrire in termini di maglia e uncinetto, ispirazioni e consigli così come filati di grande qualità ad un prezzo incredibile! Volete utilizzare i nostri modelli per qualcosa d'altro oltre al vostro uso personale? Potete leggere tutto ciò che è consentito nel testo sul Copyright in basso su tutte le pagine dei nostri modelli. Buon lavoro!
Lasciare un commento sul modello DROPS Children 23-8
Noi saremmo felici di ricevere i tuoi commenti e opinioni su questo modello!
Se vuoi fare una domanda, fai per favore attenzione a selezionare la categoria corretta nella casella qui sotto per velocizzare il processo di risposta. I campi richiesti sono indicati da *.