
Categorie popolari
State cercando un filato?


Commenti / Domande (26)
![]() Ella ha scritto:
Ella ha scritto:
Hi, with this part of the patter :” Switch to circular needle size 4.5 mm / US 7 and work in stockinette st while at the same time dec to 96-100-104 (112-116) sts evenly on round”. Does that mean you do all 12 decrease stitches in one round, evenly spaced so every 9 stitches, or decrease every round until I’ve decreased 12. Thanks !
19.06.2023 - 10:35DROPS Design ha risposto:
Hi Ella, your first answer is correct: you do all 12 decrease stitches in one round, evenly spaced so every 9 stitches. Happy knitting!
19.06.2023 - 13:27
![]() Shelley ha scritto:
Shelley ha scritto:
Continuing from previous question....Then it goes on further to say to increase on each side of the 3 middle stitches at both front and the back. Is that stitches 27, 28, and 29 of, say, the front section, and then stitches 83, 84, and 85 of the back section (of the original total of 112 stitches)? Or is it 3 stitches at the beginning of the round marker and then at the 56 (mid-way) marker? So confusingly written - for me, at least.
26.09.2022 - 00:50DROPS Design ha risposto:
Dear Shelley, you should always have 3 sts between the increases, so that the number of sts between markers increases but the increases will be always worked so that there are 3 sts in between (and the stitch with the marker is the middle of these 3 sts). Happy knitting!
26.09.2022 - 11:06
![]() Shelley ha scritto:
Shelley ha scritto:
Thanks for answering my earlier question. I have another. For the size 2, the total stitches after the ribbing section is 112 - divided by 2 is 56. Why have a stitch marker at 55 stitches? Would the beginning of the round marker and a marker after the 56 stitch denote the middle and the first half could be, say, the front, and the second half could be, say, the back? And what's the '3 middle stitches at the back'?!?
26.09.2022 - 00:42DROPS Design ha risposto:
Dear Shelley, you will insert the markers like this: 1 stitch with a marker, 55 sts, 1 stitch with a marker, 55 sts (= 1+55+1+55=112 sts). Then you will increase on mid back starting when 1 stitch remain before the marker mid back, knit 3 (the marker mid back is the middle stitch), increase 1 = you have increased 2 sts, 1 on each side of the 3 sts on mid-back. Happy knitting!
26.09.2022 - 11:05
![]() Shelley ha scritto:
Shelley ha scritto:
After doing the 'Stripes - A' section, are we to continue in the K2-P2 rib in the brown (or main colour) to the 4" mark before switching to the larger needles and continuing in stockinette stitch? It's not clear. As well, would be great to see all the other comments translated in case any other issues are already answered. Thank you.
25.09.2022 - 00:45DROPS Design ha risposto:
Dear Shelley, if you finish the Stripes A section, continue working the rib with the main colour until the garment measures 4" and then, change to larger needles. Happy knitting!
25.09.2022 - 20:03
![]() Sabine Haussmann ha scritto:
Sabine Haussmann ha scritto:
Hallo, ich bin gerade dabei, die Hose zu stricken. Wie ist folgender Satz gemeint: Beidseitig der drei mittleren Maschen an der hinteren Mitte je 1 Masche zunehmen, das 9 x wiederholen. Zunahmen immer beidseitig der drei mittleren Maschen oder versetzt, dass sich ein Dreieck bildet? Vielen Dank für Aufklärung
09.11.2021 - 07:26DROPS Design ha risposto:
Liebe Frau Haussmann, es wird immer jeweils beiseitig von den 3 mittleren Maschen zugenommen, dh in jeder 2. Runde insgesamt 9 oder 10 Mal so stricken: bis diese 3 Maschen stricken, 1 Masche zunehmen, diese 3 Maschen stricken, 1 Masche zunehmen. Viel Spaß beim stricken!
09.11.2021 - 13:10
![]() Ramona ha scritto:
Ramona ha scritto:
Guten Tag, ich möchte die Hose gerne für meine Tochter nähen die bald geboren wird. Sie soll über der Windel getragen werden. Dazu muss sie gefettet werden damit sie dicht wird. ich habe gelesen, dass das nicht mit allen Garnen geht. Gilt dies für Drops Lima? ich habe auch gesehen dass fertige Wollhosen oft doppelt gestrickt sind, wäre das hier nötig? Das würde doch sehr dick werden ... Ich danke ihnen sehr für ihre Hilfe und freue mich auf das Stricken! Gruß !
05.08.2021 - 09:24DROPS Design ha risposto:
Liebe Ramona, solche Erfahrung haben wir nicht, wenden Sie sich bitte an Ihrem DROPS Laden, vielleicht kann man Ihnen dort helfen? Oder fragen Sie mal andere Strickerinnen in unserer DROPS Workshop. Hier wird die Hose einfädig (= mit 1 Faden Lima) gestrickt - beachten Sie, daß Ihre Maschenprobe stimmt - mehr lesen Sie hier. Viel Spaß beim stricken!
05.08.2021 - 14:18
![]() Sandaas Laila ha scritto:
Sandaas Laila ha scritto:
På denne oppskriften skal det øke i skrittet bare bare , på andre tilsvarende oppskrifter både bak og på en bare foran, hva er riktig egentlig
21.12.2019 - 12:47DROPS Design ha risposto:
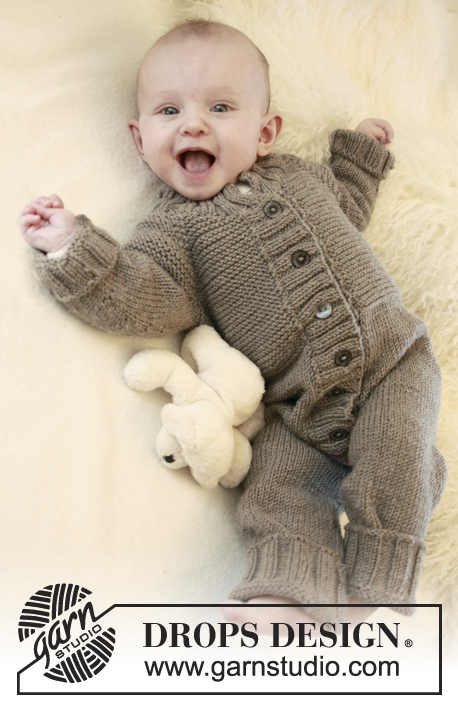
Hej Sandaas, Der er mange måder at strikke bukser på. Hvis du følger denne opskrift, så kommer bukserne til at se ud som på billedet. God fornøjelse!
15.01.2020 - 13:41
![]() Dina Cassandra Svendsen Myrling ha scritto:
Dina Cassandra Svendsen Myrling ha scritto:
Hei, har strikket to bukser etter denne oppskriften til to små barn. de som mottok buksene forteller at det må være en feil på oppskriften jeg har fulgt da den blir for liten på rumpen, å derfor ikke plass til en baby med bleie på. har dere testen denne strikken på baby med bleie?
03.02.2019 - 20:45
![]() Sonja ha scritto:
Sonja ha scritto:
Im zweiten Satz steht, dass man auf 104 Maschen durch Abnehmen anpassen soll. In wievielen Runden sollen die Maschen abgenommen werden? Innerhalb einer Runde? Vielen Dank und Grüße :-), Sonja
27.08.2015 - 23:03DROPS Design ha risposto:
Ja, das erfolgt in einer einzigen Rd. Sie nehmen in 1 Rd so viele M gleichmäßig verteilt ab, dass Sie 104 M auf der Nadel haben, also 12 M abnehmen (von 116 M auf 104 M).
02.09.2015 - 10:19
![]() Rebecca ha scritto:
Rebecca ha scritto:
Dere bør endre et par ord i oppskriften siden flere enn meg har lurt på det samme. At det står "benet", er utydelig ifht om det menes mål frå livet ned, som de fleste ville kalt for "arbeidet," ikke benet. Om det menes lengden fra skrittet til nederste kanten, ville jeg kalt det for benet. Stripemønsteret nederst for størrelse 2 3/4: Hvis jeg strikker mønsteret fullt ut, blir arbeidet lengre enn 59 cm totalt fra livet. Skal man strikke det andre stripemønsteret her i et av kommentarene?
24.08.2015 - 22:46
|
|
Little Willam#littlewillampants |
|
|
|
|
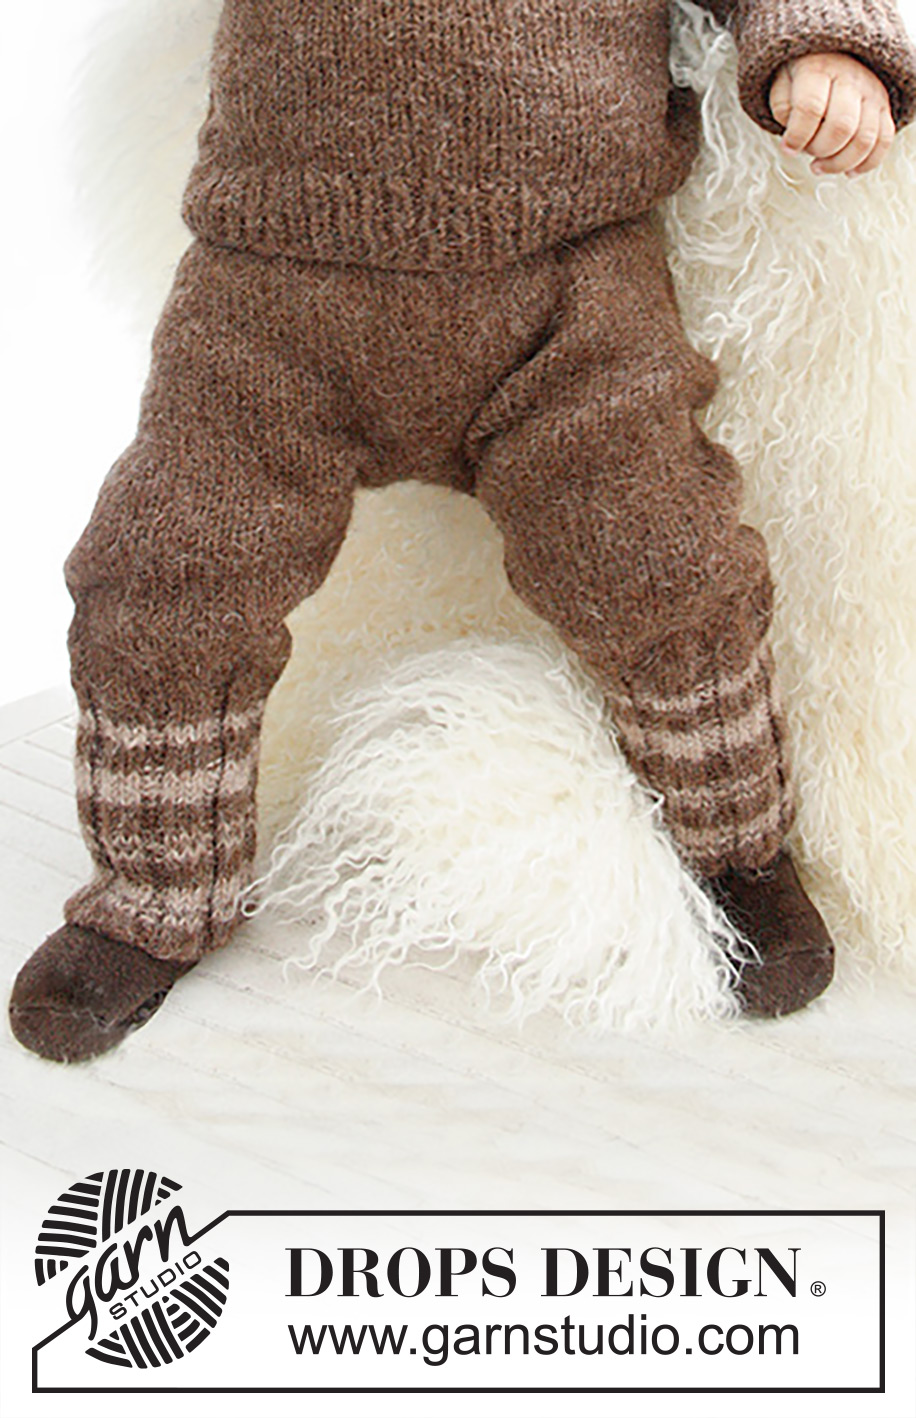
Pantaloni lavorati ai ferri con strisce per neonati e bambini in DROPS Lima.
DROPS Baby 21-31 |
|
|
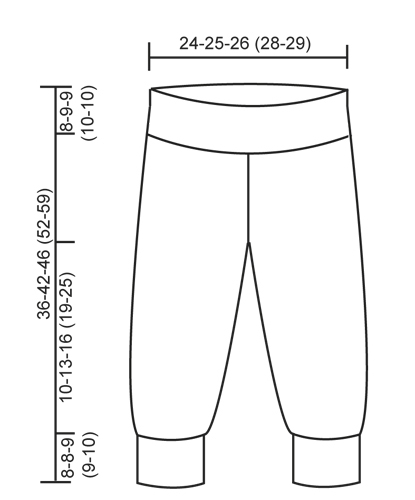
-------------------------------------------------------- STRISCE-A: 2 giri marrone chiaro, 3 giri marrone, 3 giri marrone chiaro, 2 giri marrone, 1 giro marrone chiaro, 3 giri marrone, 4 giri marrone chiaro, 1 giro marrone, 2 giri marrone chiaro. STRISCE-B: 4 giri marrone, 2 giri marrone chiaro, 4 giri marrone, 4 giri marrone chiaro, 4 giri marrone, 1 giro marrone chiaro, 1 giro marrone, 1 giro marrone chiaro, 4 giri marrone, 3 giri marrone chiaro, 1 giro marrone, 1 giro marrone chiaro, 2 giri marrone. SUGGERIMENTO PER LE DIMINUZIONI: Diminuire come segue prima del segnapunti: lavorare 2 m. insieme a dir. Diminuire come segue dopo il segnapunti: passare 1 m. a dir., 1 dir., accavallare la m. passata sopra quella appena lavorata. -------------------------------------------------------- PANTALONI: Lavorati in tondo dalla vita in giù. Con i ferri circolari misura 3,5 mm e il filato marrone avviare 108-112-116 (128-132) m. Lavorare a coste = 2 dir./2 rov. a STRISCE-A – leggere la spiegazione sopra. Lavorare fino a quando il lavoro misura 8-9-9 (10-10) cm. Passare ai ferri circolari misura 4,5 mm e lavorare a m. rasata e allo stesso tempo diminuire a 96-100-104 (112-116) m. in modo uniforme sul giro. Inserire un segnapunti nella m. centrale davanti e un segnapunti nella m. centrale dietro dei pantaloni (= 47-49-51 (55-57) m. tra le m. con i segnapunti). Continuare in tondo a m. rasata – FARE ATTENZIONE ALLA TENSIONE DEL LAVORO – Quando il lavoro misura 11-13-14 (16-17) cm, aumentare 1 m. a ogni lato delle 3 m. centrali del dietro – aumentare riprendendo la m. dal f. precedente e lavorare a dir. questa m. Ripetere gli aumenti a giri alterni per un totale di 9-9-9 (10-10) volte = 114-118-122 (132-136) m. Sul giro successivo intrecciare le 3 m. centrali sul davanti e le 3 m. centrali sul dietro (cioè la m. con il segnapunti e 1 m. per ogni lato di questa m.) e finire ogni gamba in modo separato. Il lavoro misura circa 18-20-21 (23-24) cm. Trasferire le 54-56-58 (63-65) m. per un gamba su un ferro ausiliario e le 54-56-58 (63-65) m. per l’altra gamba sui ferri a doppia punta misura 4,5 mm. GAMBA: Continuare la gamba m. rasata in tondo – inserire un segnapunti all’inizio del giro = interno della gamba. Quando la gamba misura 2-2-2 (3-3) cm, diminuire 1 m. per ogni lato del segnapunti – LEGGERE IL SUGGERIMENTO PER LE DIMINUZIONI! Ripetere le diminuzioni ogni 2-3-3½ (4-5½) cm per un totale di 5 volte = 44-46-48 (53-55) m. Passare ai ferri a doppia punta misura 3,5 mm quando i pantaloni misurano 28-34-37 (43-49) cm. Lavorare 1 giro a m. rasata e ALLO STESSO TEMPO aumentare a 48-48-54 (54-60) m. in modo uniforme. Quindi lavorare a coste: 3 dir./3 rov. in tondo su tutte le m. secondo le STRISCE-B – leggere la spiegazione sopra. Quando la gamba misura 18-22-25 (28-35) cm (i pantaloni dovrebbero misurare 36-42-46 (52-59) cm dalla vita), intrecciare SENZA STRINGERE con dir. su dir. e rov. su rov. Lavorare l’altra gamba nello stesso modo. CONFEZIONE: Cucire le aperture tra le gambe. |
|
 |
|
Avete terminato questo modello?Allora taggate le vostre foto con #dropspattern #littlewillampants o inviatele alla #dropsfan gallery. Avete bisogno di aiuto con questo modello?Troverete 10 video tutorial, una sezione per i commenti/domande e molto altro guardando il modello su www.garnstudio.com © 1982-2026 DROPS Design A/S. Ci riserviamo tutti i diritti. Questo documento, compreso tutte le sue sotto-sezioni, è protetto dalle leggi sul copyright. Potete leggere quello che potete fare con i nostri modelli alla fine di ogni modello sul nostro sito. |


Con oltre 40 anni di esperienza nel design di modelli di maglia e uncinetto, DROPS Design offre la più estesa collezione di modelli gratuiti su internet - tradotti in 17 lingue. Ad oggi vi possiamo fornire 324 cataloghi e 12290 modelli - 9561 dei quali sono tradotti in Italiano.
Ci stiamo impegnando molto per darvi il meglio che vi possiamo offrire in termini di maglia e uncinetto, ispirazioni e consigli così come filati di grande qualità ad un prezzo incredibile! Volete utilizzare i nostri modelli per qualcosa d'altro oltre al vostro uso personale? Potete leggere tutto ciò che è consentito nel testo sul Copyright in basso su tutte le pagine dei nostri modelli. Buon lavoro!
Lasciare un commento sul modello DROPS Baby 21-31
Noi saremmo felici di ricevere i tuoi commenti e opinioni su questo modello!
Se vuoi fare una domanda, fai per favore attenzione a selezionare la categoria corretta nella casella qui sotto per velocizzare il processo di risposta. I campi richiesti sono indicati da *.