
Categorie popolari
State cercando un filato?


Commenti / Domande (37)
![]() Jacqueline Moore ha scritto:
Jacqueline Moore ha scritto:
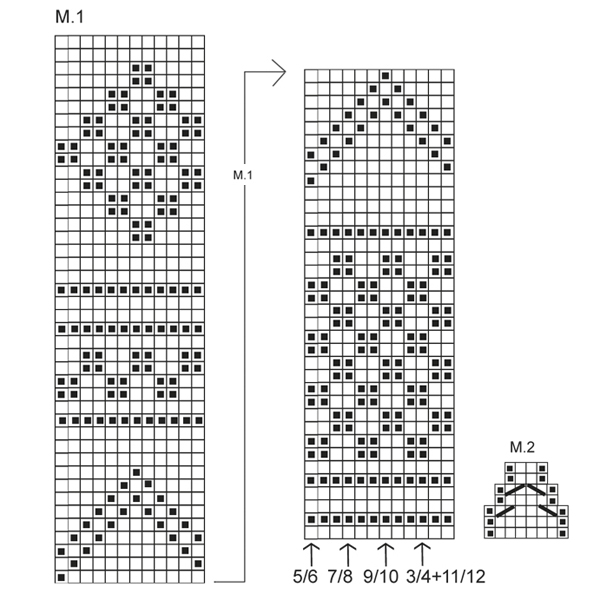
I love this pattern but am having difficulty understanding the chart. I am knitting size 7/8 and about to start chart M.1 with 156 stitches. I will start at the 9th stitch on first round. Does that mean I knit 4 stitches then purl 152 to the end of the round? Or do I knit the 1st round, purl the 2nd, knit the 3rd and 4th, purl the 5th, knit the 6th and then start round 7 on the 9th stitch? Thank you.
01.12.2019 - 18:10DROPS Design ha risposto:
Dear Mrs Moore, in size 7/8, start working with 9th st in diagram and work the last 4 sts; then repeat M.1 (= 12 sts) a total of 12 times = over the next 144 sts; and finish with the first 8 stitches in diagram = 4+144+8= 156 sts. Happy knitting!
02.12.2019 - 10:21
![]() Ekaterina ha scritto:
Ekaterina ha scritto:
Dear Drops! I'm working Back piece row 28 on M1 with the arrow. How should I continue if I have 54 sts in order to have the pattern mid front?Should I work 1K, 11P on row 28, then on row 29 -1 P, 9 K, 1P, 1K?
08.11.2019 - 17:01DROPS Design ha risposto:
Dear Ektaterina, if you are working with a different tension or another size, you would have to adjust the pattern how you rather would like it to be and center the part of the pattern you'd like (check the example in the pattern to help you). Happy knitting!
11.11.2019 - 09:43
![]() Ekaterina ha scritto:
Ekaterina ha scritto:
Much obliged for your kind help!
07.10.2019 - 16:42
![]() Ekaterina ha scritto:
Ekaterina ha scritto:
"= start with 9th stitch in size 7/8, then work diagram to the end, then repeat diagram from 1st stitch" Dear Drops! Do you mean I have to repeat the right part of M.1 twice?
07.10.2019 - 15:36DROPS Design ha risposto:
Dear Ekaterina, in size 7/8 you first work the 4 last stitches in diagram (from the stitch with the arrow to the left/end of diagram), then repeat the 12 sts of diagram from 1st stitch (from the right towards the left) and finish round with the first 8 stitches in diagram (so that the pattern is nicely centered) : 4sts+ 12stsx12 repeats+ 8sts= 156 sts. Work then the first part of M.1 (with the arrows at the bottom), and when you have worked to the last row of this diagram, work now the 2nd part of diagram (the diagram on the left side). Happy knitting!
07.10.2019 - 15:55
![]() Ekaterina ha scritto:
Ekaterina ha scritto:
Dear Drops! Could you help me with the following: M.1 -Should I begin it with the smaller part for 36 rows and then continue with the bigger one for 42 rows? What does the big arrow from M.1to M.1indicate? And one more question: I knit for size 7/8 - should I consider the 9th stitch as the first one for this size?
07.10.2019 - 14:24DROPS Design ha risposto:
Dear Ekaterina, M.1 has been splitted into 2 parts to make it more visible, start working M.1 from the bottom part with the arrows (= start with 9th stitch in size 7/8, then work diagram to the end, then repeat diagram from 1st stitch), and when this part has been worked in height, continue with 2nd part of diagram (the one on the left side). Happy knitting!
07.10.2019 - 15:00
![]() Jocelyne Theberge ha scritto:
Jocelyne Theberge ha scritto:
Dois-je tricoter les 288 mailles en côtes 2/2 avant de réaliser le M2 ?
08.09.2019 - 09:40DROPS Design ha risposto:
Bonjour Mme Theberge, tricotez M.2 sur toutes les 288 mailles pour former le petit volant du bas du débardeur; quand M.2 est terminé, il reste 144 mailles, continuez en tricotant les mailles comme elles se présentent (1 m env, 2 m end, 1 m env), répétez de (à) jusqu'à ce que l'ouvrage mesure 5 cm. Bon tricot!
09.09.2019 - 08:40Marinkovic ha scritto:
Hi! I need help understanding M2 diagram. Since the number of stitches decreases, what should I do with those that are not needed (e.g. 3rd row is knitted with 8 st per repetition and the 4th row has 6 st per rep)? Do I cast off, knit 2 together or something like that? Jelena
19.10.2018 - 16:39DROPS Design ha risposto:
Dear Mrs Marinkovic, decrease as shown in diagram, ie on 3r row in M.2 work: P1, slip 1 as if to K, K1, psso, K3, K2 tog, P1 = 6 sts remain. On row 5 dec again as shown in diagram; P1, slip 1 as if to K, K1, psso, K2 tog, P1 = 4 sts remain. Happy knitting!
22.10.2018 - 07:48
![]() Agnes Holst Kazuhara ha scritto:
Agnes Holst Kazuhara ha scritto:
Iflg. opskrift skal der lukkes 2 m af til hals. Mine spørgsmål er: Skal disse 2 masker forblive aflukkede, og evt. hvorfor, eller skal de evt. indgå i de masker, man skal strikke op til halskant, - dvs. de 80 - 100 m? Jeg vil være meget taknemmelig for jeres forhåbentlige snarlige hjælp. Mvh Agnes
13.05.2018 - 14:14DROPS Design ha risposto:
Hei Agnes. Ja de 2 maskene skal felles av - Dette for å lage plass til halskantens om skal strikkes opp senere. God fornøyelse.
15.05.2018 - 15:10Nelly ha scritto:
Hola tengo una duda en el patrón SmåDROPS 22-4, cuántos puntos d tienen que montar para iniciar para la talla 3/4, porqué dice 288 pero más adelante dice q 144, cuál es el número correcto? Muchas gracias...
23.03.2017 - 21:17DROPS Design ha risposto:
Hola Nelly. Está correcto. Para el elástico debes montar 288 pts. El diagrama para trabajar el elástico incluye las disminuciones. Al terminar el elástico quedan 144 pts.
27.03.2017 - 20:29
![]() Manon Tholstrup ha scritto:
Manon Tholstrup ha scritto:
Hvordan skal jeg forstå mønstret - i str. 3/4 skal der slås 288 m op på rundpind og når M2/rib er strikket er der 144 m tilbage på rundpind?? Herefter skal der yderligere tages 12 m ind = ialt 132 m på rundpind; dvs. 156 (!) m mindre end slået op (288)?? Mvh
02.04.2015 - 22:49DROPS Design ha risposto:
Hej Manon. I og med du strikker M.2 tager du automatisk ind. 1 gentagelse af M.2 er i förste pind 8 m = 36 gentagelser over 288 m. Med indtagningerne ender du i 7. pind med 4 masker per gentagelse = 144 m tilbage
29.04.2015 - 14:52
|
|||||||||||||
Gretchen#gretchenvest |
|||||||||||||
 |
 |
||||||||||||
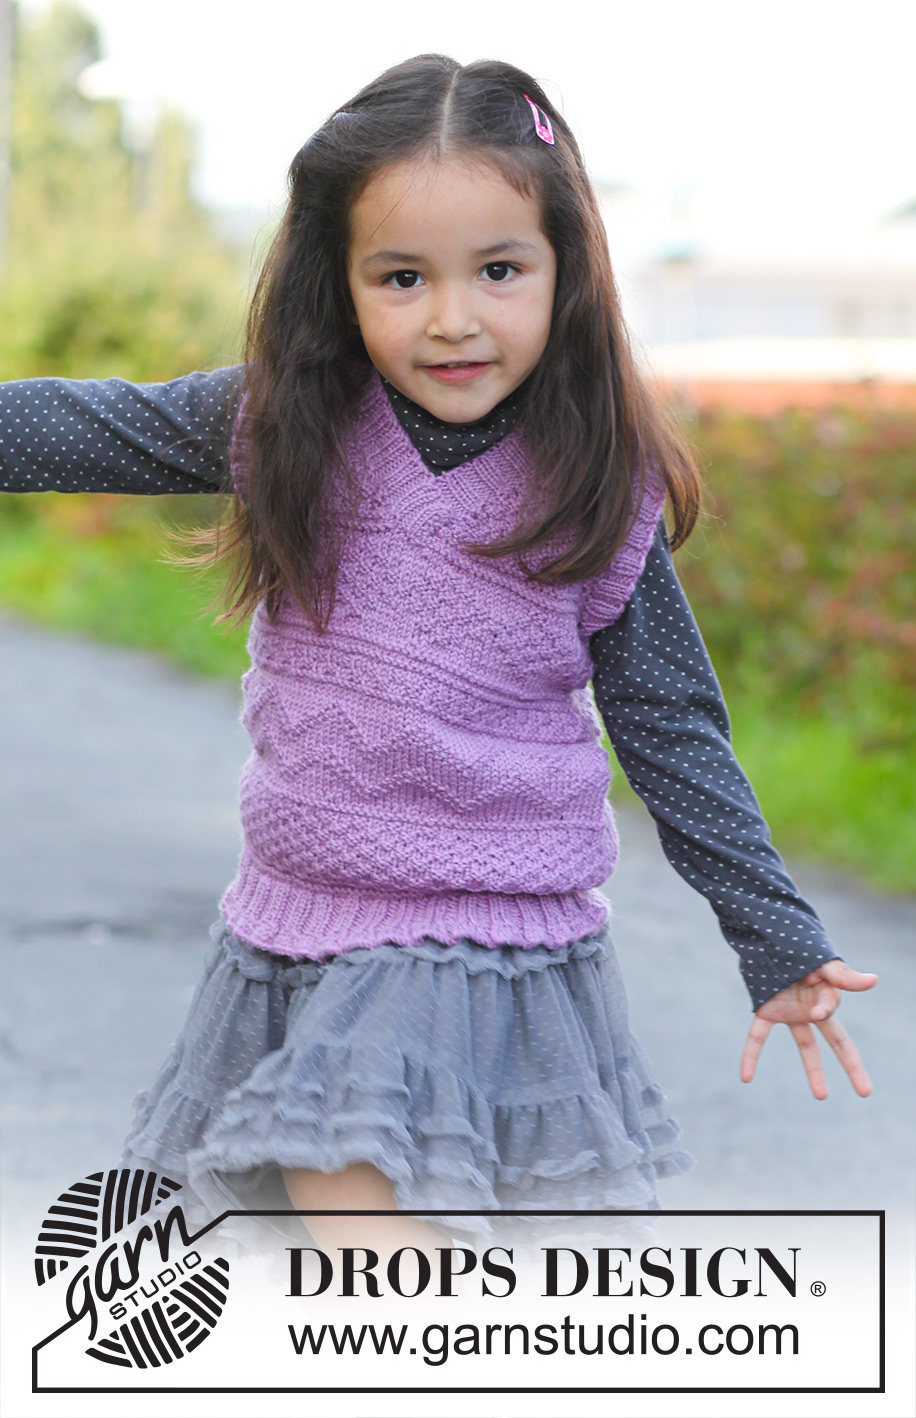
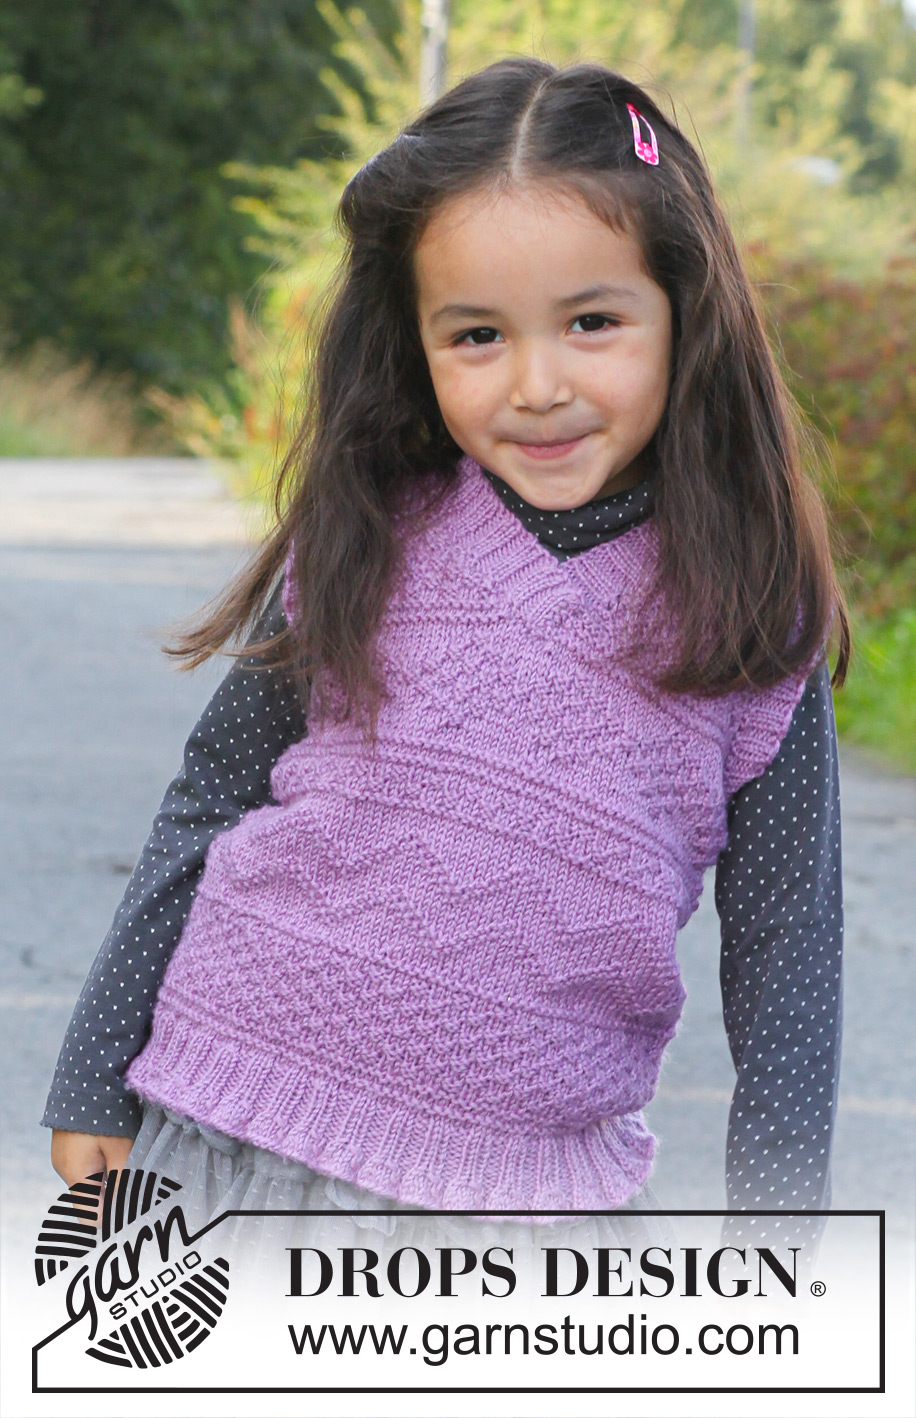
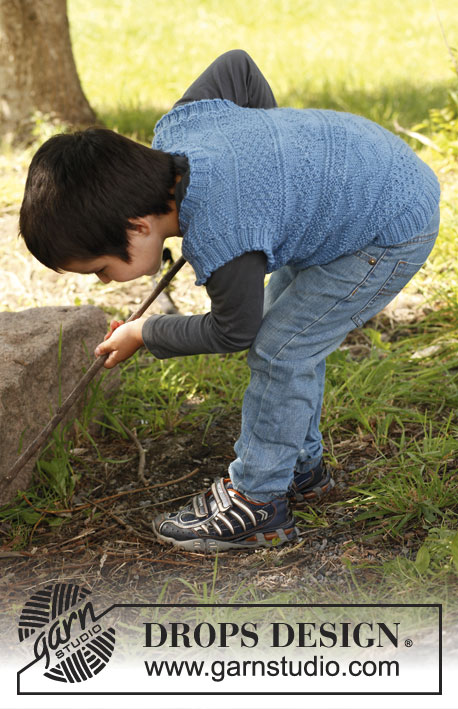
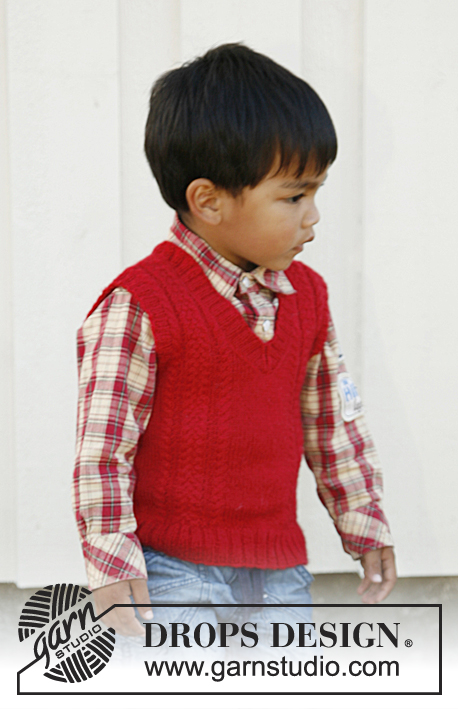
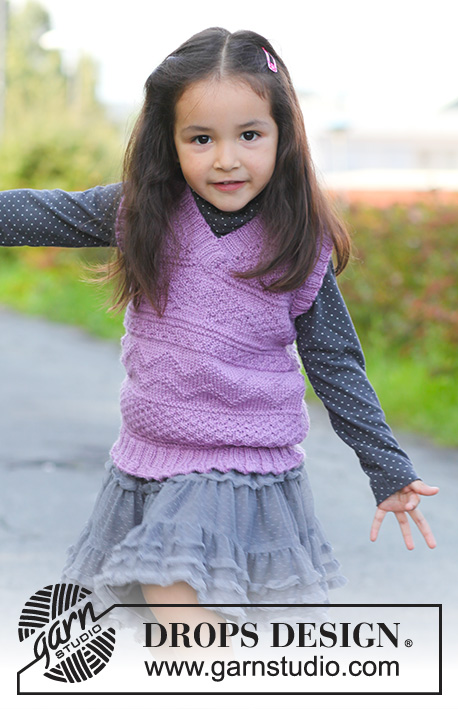
Gilet / smanicato DROPS per bambine in "Karisma", in motivo di tessuto. Taglie dal 3 al 12 anni
DROPS Children 22-41 |
|||||||||||||
|
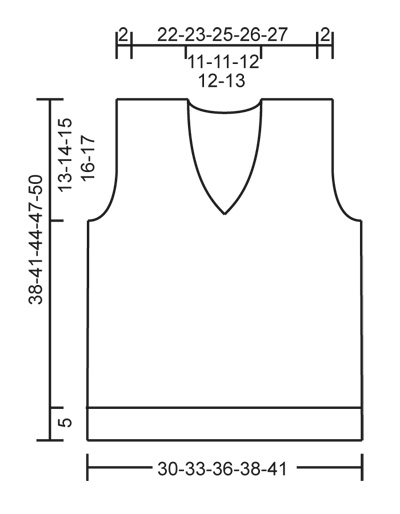
MOTIVO: Vedere diag M.1 e M.2 - tutti i ferri del diag mostrano il motivo sul diritto. --------------------------------------------------------- DAVANTI & DIETRO (CORPO): Si lavora in tondo sui ferri circolare. Avviare 288-312-336-360-384 m con i ferri circolare 3 ed il filato Karisma. Lavorare M.2. Dopo M.2, rimangono 144-156-168-180-192 m sul ferro. Continuare co dir sopra dir e rov sopra il rov. Quando il lavoro misura 5 cm, continuare con i ferri circolari 3,5. Lavorare 1 giro dir, allo stesso tempo, distribuire 12 diminuzioni uniformemente = 132-144-156-168-180 m. Continuare con M.1 fino alla fine – vedere la freccia per la tua taglia per capire dove cominciare nel diagramma (questo è importante perché il motivo sia bello davanti). RICORDATI DELLA TENSIONE DEL LAVORO! Quando il lavoro misura 25-27-29-31-33 cm, lavorare il giro seguente così: Intrecciare 3 m per lo scalfo, lavorare 29-32-35-38-41 m (= davanti sinistro), intrecciare 2 m per lo scollo, lavorare 29-32-35-38-41 m (= davanti destro), intrecciare 6 m per lo scalfo, lavorare 60-66-72-78-84 m (= dietro), intrecciare 3 m per lo scalfo, tagliare il filo. Terminare il davanti e il dietro separatamente. DIETRO: = 60-66-72-78-84 m. Continuare M.1 avanti e indietro sul p - ALLO STESSO TEMPO, intrecciare per gli scalfi all’inizio di ogni f ad ogni lato: 3 m 1 volta, 2 m 0-1-2-2-3 volte e 1 m 3-3-2-3-3 volte = 48-50-54-58-60 m. Quando il lavoro misura 36-39-42-45-48 cm, intrecciare le 20-20-22-22-24 m centrali per lo scollo e terminare ogni spalla separatamente. Intrecciare poi a tutti i ferri lato scollo: 1 m 2 volte = rimangono 12-13-14-16-16 m per la spalla. Intrecciare quando il lavoro misura ca 38-41-44-47-50 cm. DAVANTI SX: = 29-32-35-38-41 m. Intrecciare per lo scalfo come per il dietro – ALLO STESSO TEMPO, intrecciare ogni ferri lato scollo: 1 m 11-11-12-12-13 volte. Quando tutte le diminuzioni sono state fatte, rimangono 12-13-14-16-16 m per la spalla. Intrecciare quando il lavoro misura 38-41-44-47-50 cm. DAVANTI DX: Lavorare com il davanti sx ma al contrario. CONFEZIONE: Cucire le spalle. BORDO DEL COLLO: Si lavora avanti e indietro a partire dal centro davanti. Riprendere ca 80 a 100 m intorno al collo con i ferri circolari 3 - iniziare in mezzo davanti. Girare il lavoro e lavorare 1 f dir sul rovescio, allo stesso tempo, distribuire uniformemente per arrvare a 96-100-108-112-124 m. Continuare poi con le coste così (visto sul dir): 1 m (=lavorare a dir su tutti i f), * 2 m dir, 2 m rov *, ripetere da *-* finché non rimangano 3 m, terminare con 2 m dir e 1 m punto legaccio. Quando il bordo misura ca 2-2½-2½-3-3 cm, intrecciare con dir sopra dir e rov sopra rov. Posizionare il lato sinistro del collo sopra il lato destro e fissare in basso con qualche punto. BORDO DELLE MANICHE: Riprendere ca 70 a 90 m intorno ad uno degli scalfi con i ferri a doppia punta 3. Lavorare 1 giro rov allo stesso tempo, distribuire uniformemente per arrivare a 80-88-92-100-104 m. Lavorare a coste = 2 m dir / 2 m rov per 2 cm, intrecciare con dir sopra dir e rov sopra rov. Procedere nella stessa maniera intorno all’altro scalfo. |
|||||||||||||
Spiegazioni del diagramma |
|||||||||||||
|
|||||||||||||
 |
|||||||||||||
 |
|||||||||||||
Avete terminato questo modello?Allora taggate le vostre foto con #dropspattern #gretchenvest o inviatele alla #dropsfan gallery. Avete bisogno di aiuto con questo modello?Troverete 14 video tutorial, una sezione per i commenti/domande e molto altro guardando il modello su www.garnstudio.com © 1982-2026 DROPS Design A/S. Ci riserviamo tutti i diritti. Questo documento, compreso tutte le sue sotto-sezioni, è protetto dalle leggi sul copyright. Potete leggere quello che potete fare con i nostri modelli alla fine di ogni modello sul nostro sito. |
|||||||||||||


Con oltre 40 anni di esperienza nel design di modelli di maglia e uncinetto, DROPS Design offre la più estesa collezione di modelli gratuiti su internet - tradotti in 17 lingue. Ad oggi vi possiamo fornire 324 cataloghi e 12290 modelli - 9561 dei quali sono tradotti in Italiano.
Ci stiamo impegnando molto per darvi il meglio che vi possiamo offrire in termini di maglia e uncinetto, ispirazioni e consigli così come filati di grande qualità ad un prezzo incredibile! Volete utilizzare i nostri modelli per qualcosa d'altro oltre al vostro uso personale? Potete leggere tutto ciò che è consentito nel testo sul Copyright in basso su tutte le pagine dei nostri modelli. Buon lavoro!
Lasciare un commento sul modello DROPS Children 22-41
Noi saremmo felici di ricevere i tuoi commenti e opinioni su questo modello!
Se vuoi fare una domanda, fai per favore attenzione a selezionare la categoria corretta nella casella qui sotto per velocizzare il processo di risposta. I campi richiesti sono indicati da *.