
Categorie popolari
State cercando un filato?


Commenti / Domande (34)
![]() Glen ha scritto:
Glen ha scritto:
"K2 in nxt sts means, that you should knit 2 knit stitches into the next stitch 8thus increasing one stitch." Can you please show me how to knit 2 stitches into the next stitch and how many stitches will there be after the increase? thanks
12.07.2021 - 22:11DROPS Design ha risposto:
Dear Glen, THIS video will show you how to knit two stitches into one. Happy Stitching!
13.07.2021 - 01:54
![]() Glen ha scritto:
Glen ha scritto:
Thanks. Work now the flounce - * K1 , K2 sts in next st * - what does K2 sts mean? Does it mean knit 2 tog?
12.07.2021 - 16:34DROPS Design ha risposto:
Dear Glen, K2 in nxt sts means, that you should knit 2 knit stitches into the next sthitch 8thus increasing one stitch. Happy Stitching!
12.07.2021 - 17:33
![]() Glen ha scritto:
Glen ha scritto:
Hi, my last 5 sts is in the Wrong side to be slipped on a stitch h older not as mentioned in the Right side to have a total 100sts on the stitch holders each side. please help me to understand where did I go wrong. Thanks
11.07.2021 - 21:54DROPS Design ha risposto:
Dear Glen, at the end of the last row slipping 5 sts on a thread, turn and work the next row from right side over all sts on needle + over the sts slipped on a thread on one side, turn and work the next row over all sts on needle + the sts slipped on a thread in the other side of piece = there are now 296 sts on needle. Work now the flounce. Happy knitting!
12.07.2021 - 07:45
![]() Glen ha scritto:
Glen ha scritto:
Thanks I got another query, I know how to purl the 1st YO but I’m not sure how to purl the second YO after the marker.
10.07.2021 - 15:15DROPS Design ha risposto:
Dera Glen, just prul the second yarnover regurarly too. Happy Stitching!
11.07.2021 - 06:32
![]() Glen ha scritto:
Glen ha scritto:
"Insert a marker in the 121st st and 136th st (14 sts between markers)" - I'm confused because I got 15 sts between 121st st and 136th st instead of 14st between markers.
08.07.2021 - 20:49DROPS Design ha risposto:
Dear Glen, If you put the marker in the 121st stitch and the 136th one, in between (not counting the marked stitches) there will be 122,123, 124, 125..etc, 133, 134, all together 14 stitch. Happy stitching!
08.07.2021 - 21:36
![]() Bernadette Varlet ha scritto:
Bernadette Varlet ha scritto:
Bonjour Madame, Je voudrais tricoter le châle "Rose Smile" et j'aimerais savoir s'il faut faire une maille enroulée à chaque fois que l'on débute un rang raccourci ? Merci pour votre réponse. Bien cordialement
13.10.2017 - 09:42DROPS Design ha risposto:
Bonjour Mme Varlet, vous pouvez utiliser la technique des mailles enveloppées ou simplement la méthode basique des rangs raccourcis. Bon tricot!
13.10.2017 - 09:48
![]() Vera ha scritto:
Vera ha scritto:
Liebes Drops-Team, ich habe eine Frage zu den letzten Sätzen der Strickanleitung. Nach der Aufnahmereihe mit Umschlägen folgt eine linke / Rückseitenreihe, bevor in der letzten Reihe (re) abgekettet wird. Werden in dieser Rückreihe die Maschen (einschließlich Umschläge) links gestrickt und auch wieder zwischen jede Masche Umschläge gemacht (*1M li. 1 Umschlag 1 M links*)?
26.08.2015 - 15:09DROPS Design ha risposto:
Nach den 3 glatt re gestrickten Reihen ist die letzte Hin-Reihe vor dem Abketten eine Reihe mit Zunahmen, also 1 M re, 1 Umschlag im Wechsel. In der darauf folgenden Rück-R stricken Sie alle M re, auch die Umschläge, und ketten GLEICHZEITIG ab. Damit ergibt sich dann der rüschige Rand.
01.09.2015 - 16:00
![]() Rosy ha scritto:
Rosy ha scritto:
Buongiorno, ho iniziato questo lavoro e ho terminato gli otto giri a punto legaccio...il 5 giro (dritto del lavoro) lo devo eseguire a punto rovescio o diritto? i ferri accorciati li devo lavorare su tutti i ferri? le maglie che metto in sospeso, le posso mettere su un unico filo? Ultima cosa...quando lavoro i gettati, devo fare un rovescio ritorto o normale? Grazie mille in anticipo per l'aiuto.
07.08.2015 - 15:40DROPS Design ha risposto:
Buonasera Rosy, dopo gli 8 ferri a m legaccio, deve passare ai ferri n° 5 mm e iniziare a lavorare a m rasata e iniziare a lavorare a ferri accorciati come indicato fino a quando ci sono 100 m su ogni fermamaglie a ogni lato. Può usare un fermamaglie per lato. I gettati vengono lavorati a rovescio sul ferro successivo come indicato nel consiglio per gli aumenti. Buon lavoro!
07.08.2015 - 20:24
![]() Paz ha scritto:
Paz ha scritto:
Gracias lo que sigo sin entender es que 1vueta pto del derecho y aumentos 2 vuelta reves y se tejen los aumentos 3 vuelta tocaria tejer derecho y la 4 vuelta q es en la que dice que se debe aumentar toca en este caso tejer del reves? Es correcto muchas gracias
18.05.2014 - 22:37
|
|
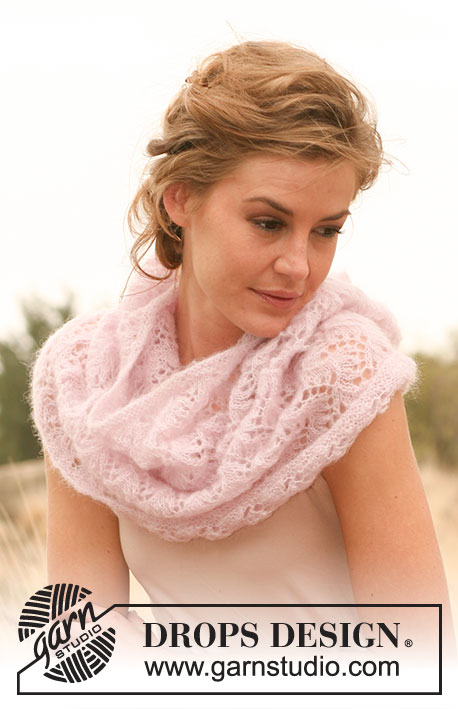
Rose Smiles#rosesmilesshawl |
|
 |
 |
Scialle DROPS con volant in "Merino Extra Fine".
DROPS 127-29 |
|
|
PUNTO LEGACCIO (avanti e indietro sul ferro): Lavorare tutti i ferri a diritto. CONSIGLIO AUMENTI: Aumentare sul diritto del lavoro con 1 gett a ogni lato di 1 m con il segno a maglia rasata così: 1 gett, m con il segno/filo, 1 gett. Lavorare il gett a rov al ferro seguente per creare un buco. FERRI ACCORCIATI: Lavorare a ferri accorciati alla fine di ogni ferro così: lavorare finché non rimangono 5 m sul f, trasferire queste 5 m su un fermamaglie, girare e lavorare il ferro seguente. -------------------------------------------------------- SCIALLE: Si lavora avanti e indietro sul ferro circolare per avere sufficientemente spazio per le maglie. Avviare 256 m sul ferro circolare 4. Lavorare 8 ferri a PUNTO LEGACCIO – ved spieg sopra. RICORDATI LA TENSIONE DELLA MAGLIA! Lasciare 1 segno/filo nella 121° m e nella 136° m (14 m tra ogni segno/filo). Continuare con il ferro circolare 5 a maglia rasata. Leggere tutto il paragrafo prima di continuare! Al ferro seguente sul diritto del lavoro, lavorare a ferri accorciati –ved spieg sopra - (continuare a passare 5 m in attesa sui fili 20 volte ad ogni lato finché non ci siano 100 m sui i fili ad ogni lato). ALLO STESSO TEMPO, aumentare 2 m vicino ad ogni m con il segno/filo – Vedere CONSIGLIO AUMENTI – in totale 4 m in più sul ferro. Ripetere questi aumenti ogni 4 ferri in totale 10 volte (= 34 m tra i fili/segni). Quando le 5 ultime m al lato destro del lavoro sono state messe in attesa su un filo (in totale 100 m sul filo ad ogni lato), lavorare le m in attesa così: (1° f = diritto) lavorare tutte le m che si trovano sul ferro e lavorare le m in attesa dalla parte sinistra del lavoro. Al ferro seguente (= rovescio) lavorare tutte le m in attesa sul filo dalla parte destra del lavoro, ora ci sono 296 m sul f. Al f seguente aumentare per il volant così: *1 m dir, 2 volte a dir la m seguente *, ripetere da *-* tutto il ferro. Lavorare 3 f a maglia rasata. Al f seguente (= diritto) aumentare così: 1 m dir, *1 gett, 1 m dir*, ripetere da *-* tutto il ferro. Intrecciare a diritto al ferro seguente, intrecciare i gett come se fossero maglie. CONFEZIONE: Perché il volant sia più bello, utilizzare un ferro da stiro a vapore leggermente sullo scialle. Utilizzare il vapore a partire dal bordo di avviamento verso l’esterno fino a ca 1 cm del volant (non utilizzare il vapore sul bordo delle m intrecciate). |
|
Avete terminato questo modello?Allora taggate le vostre foto con #dropspattern #rosesmilesshawl o inviatele alla #dropsfan gallery. Avete bisogno di aiuto con questo modello?Troverete 15 video tutorial, una sezione per i commenti/domande e molto altro guardando il modello su www.garnstudio.com © 1982-2026 DROPS Design A/S. Ci riserviamo tutti i diritti. Questo documento, compreso tutte le sue sotto-sezioni, è protetto dalle leggi sul copyright. Potete leggere quello che potete fare con i nostri modelli alla fine di ogni modello sul nostro sito. |
|


Con oltre 40 anni di esperienza nel design di modelli di maglia e uncinetto, DROPS Design offre la più estesa collezione di modelli gratuiti su internet - tradotti in 17 lingue. Ad oggi vi possiamo fornire 324 cataloghi e 12290 modelli - 9561 dei quali sono tradotti in Italiano.
Ci stiamo impegnando molto per darvi il meglio che vi possiamo offrire in termini di maglia e uncinetto, ispirazioni e consigli così come filati di grande qualità ad un prezzo incredibile! Volete utilizzare i nostri modelli per qualcosa d'altro oltre al vostro uso personale? Potete leggere tutto ciò che è consentito nel testo sul Copyright in basso su tutte le pagine dei nostri modelli. Buon lavoro!
Lasciare un commento sul modello DROPS 127-29
Noi saremmo felici di ricevere i tuoi commenti e opinioni su questo modello!
Se vuoi fare una domanda, fai per favore attenzione a selezionare la categoria corretta nella casella qui sotto per velocizzare il processo di risposta. I campi richiesti sono indicati da *.