
Categorie popolari
State cercando un filato?


Commenti / Domande (49)
![]() Eva Rix ha scritto:
Eva Rix ha scritto:
Vil blot fortælle jer, at jeres garnforbrug på 400 g til denne bluse i str. M ikke stemmer - der skal bruges 450 g, altså eet nøgle mere…. Ret irriterende, at jeg nu skal bestille et nøgle yderligere til sidst, hvor farven måske ikke er helt den samme, jeg gemte ikke omslaget, troede opskrift passede. ÆV !
17.10.2022 - 09:10
![]() Keri ha scritto:
Keri ha scritto:
I love you bolero patterns but as a beginner I need something simple. Do you have any suggestions of a simple pattern I could try?
17.03.2022 - 21:50DROPS Design ha risposto:
Dear Keri, you will find all our patterns for boleros here - read the one you like and if you have any questions, please just ask them there, so that we can help you. Happy knitting!
18.03.2022 - 09:35
![]() Maria ha scritto:
Maria ha scritto:
When I add the new 12 stitches either side how do I carry on with the pattern, gather first 3 and then do I start the pattern with purl 3 together or k p k same stitch?
19.01.2022 - 19:54DROPS Design ha risposto:
Dear Maria, depending on the next stitch after the new sts, you will have to calculate how to start the pattern after the 3 sts in garter stitch to maintain pattern as before. Happy knitting!
20.01.2022 - 09:11
![]() Maria ha scritto:
Maria ha scritto:
After the piece measures 9cm and we add the 12 new stitches either side it’s almost impossible to purl 3 together on the new stitches! Any tricks?
19.01.2022 - 17:59DROPS Design ha risposto:
Dear Maria, maybe use a crochet hook to help you? Contact your yarn store, they might have any other idea or tipp for you. Happy knitting!
20.01.2022 - 09:05
![]() Maria ha scritto:
Maria ha scritto:
Hi, I don’t know what to do from: NOW MIRROR PIECE FROM HERE! Any videos that explain that? Thanks
19.01.2022 - 17:40DROPS Design ha risposto:
Dear Maria, just continue as explained in the pattern, ie you will cast off sts instead of casting them on and increase inestead of decrease, just as explained in the pattern. Happy knitting!
20.01.2022 - 09:00
![]() Olga Terekhov ha scritto:
Olga Terekhov ha scritto:
I understand that if " 3 garter sts " at the beginning and end of each row , the edge sts will be K. Thank you.
25.02.2021 - 22:38
![]() Olga Terekhov ha scritto:
Olga Terekhov ha scritto:
Hello, Can you please tell if the edge st should be knitted in P or K? Thank you.
25.02.2021 - 19:57DROPS Design ha risposto:
Dear Mrs Terekhov, you are working back piece with blackberry stitches and 3 stitches in garter stitch on each side, ie there is no extra edge stitches as the one explained in the pattern. You work the stitches as follows: 3 sts in garter st, blackberry stitch until 3 sts remain, 3 sts in garter stitch. Happy knitting!
26.02.2021 - 08:21
![]() Olga Terekhov ha scritto:
Olga Terekhov ha scritto:
Hello. I started to work on schematic. My question is why 9 cm for rib showing only on a cast on row? I would assume that if this rib goes around all bolero the whole piece will measure from top to bottom 83cm for M size ( not 74 cm) . Please let me know where I am mistaking.
17.02.2021 - 19:30DROPS Design ha risposto:
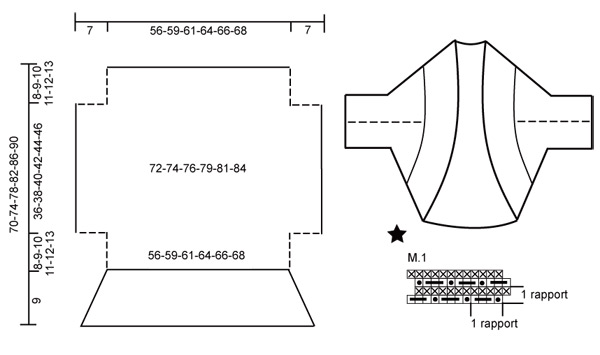
Dear Mrs Terekhov, the rib edge is worked at the end around the whole edge (in stitches from cast on rows + stitches from last row worked) over 9 cm. In size M the whole piece will be 74 cm including the 9 cm on each side: 9 cm rib + (9+38+9 cm main piece worked with blacbkerry stitches) + 9 cm rib = 74 cm. Hope this helps, Happy knitting!
18.02.2021 - 09:16
![]() Sylvia Hofmann ha scritto:
Sylvia Hofmann ha scritto:
Hallo. Was genau ist mit „ Die Arbeit von hier spiegelverkehrt stricken.“ gemeint? Liebe Grüße
31.12.2020 - 12:41DROPS Design ha risposto:
Liebe Frau Hofmann, es bedeudet, daß Sie jetzt die Hälfte gestrickt haben, und nach 44-47-50-53-56-59 cm werden Sie dann die 12 früher angeschlagenen Maschen abketten und dann bis 52-56-60-64-68-72 cm über die restlichen Maschen stricken. Viel Spaß beim stricken!
04.01.2021 - 13:50
![]() Veronique Vigot ha scritto:
Veronique Vigot ha scritto:
Bonjour pouvez vous me dire ce que vous entendez par tricoter le coté en miroir je ne saisi pas bien merci
03.02.2020 - 13:13DROPS Design ha risposto:
Bonjour Mme Vigot, on va tricoter l'autre moitié en sens inverse, suivez simplement les indications suivantes des explications: on rabat les 12 mailles que l'on a monté et on augmentez 24 mailles (au lieu de les diminuer). Bon tricot!
03.02.2020 - 13:45
|
|||||||||||||
Coyote |
|||||||||||||
 |
 |
||||||||||||
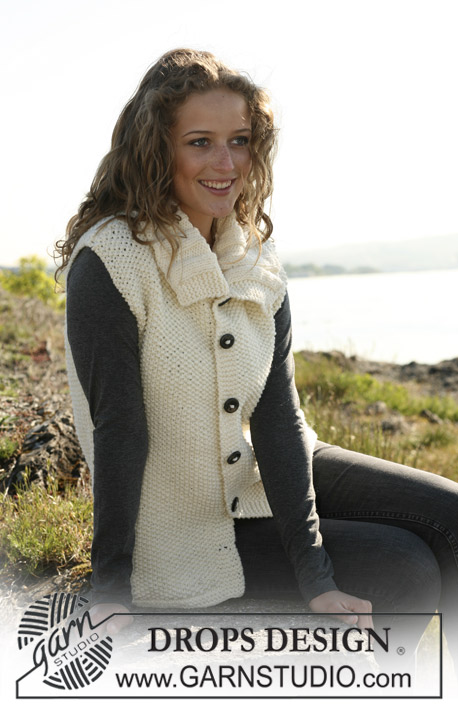
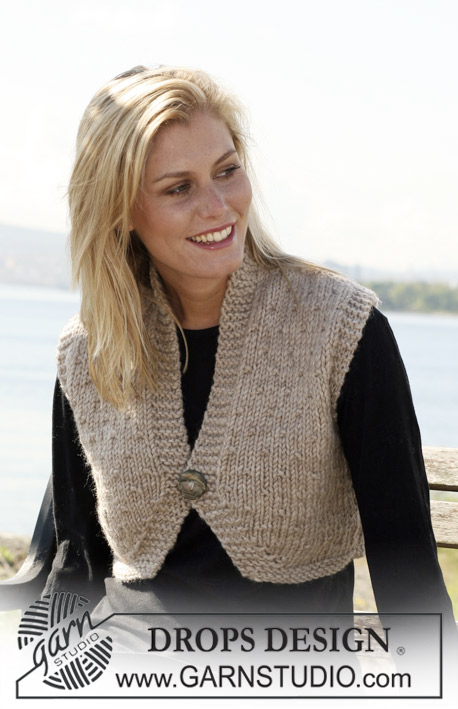
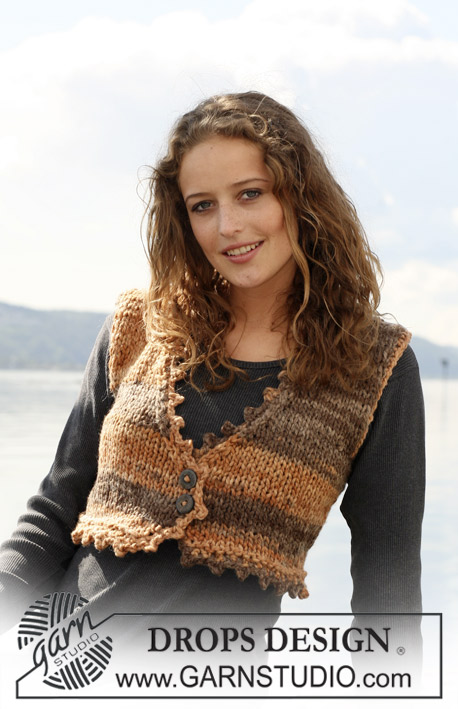
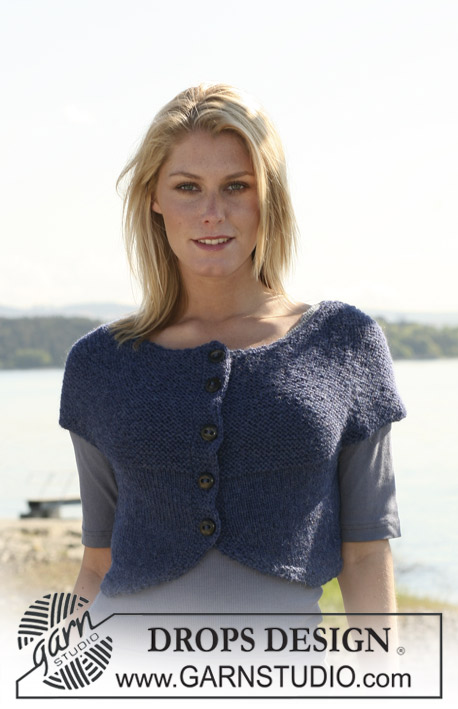
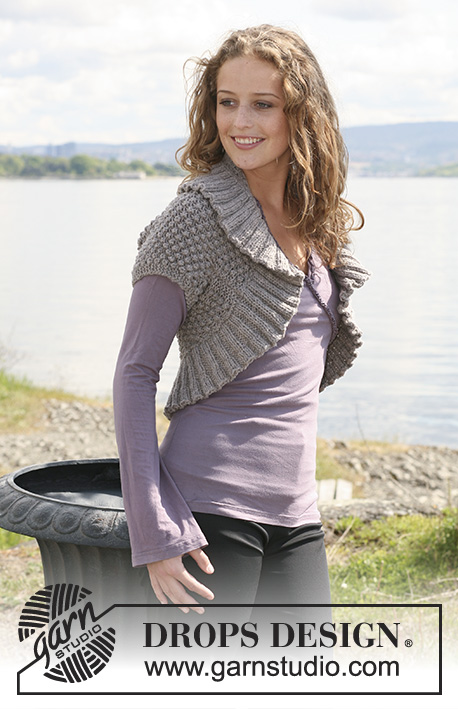
Bolero DROPS lavorato ai ferri a punto mimosa e coste in ”Alaska”. Taglie: S-XXXL.
DROPS 110-28 |
|||||||||||||
|
M LEGACCIO (avanti e indietro sui f): Lavorare tutti i f a dir. PUNTO MIMOSA: Vedere il diagramma M.1. Nota! Il primo ferro del motivo è lavorato dal rovescio del lavoro. SUGGERIMENTO PER GLI AUMENTI: Aumentare 1 m facendo 1 gettato. Sul f successivo lavorare il gettato nel filo dietro della m per evitare un buco. ------------------------------------------------------------- BOLERO: Lavorare il punto mimosa avanti e indietro sui f circolari, poi riprendere altre m per le coste e lavorare le coste in tondo. Avviare 122-126-130-134-138-142 m (compresa 1 m di vivagno a ogni lato) con i f circolari n° 5 mm. Lavorare 3 f dir, ALLO STESSO TEMPO distribuire 24 diminuzioni sul 3° f (lavorare insieme a dir ogni 5° e 6° m) = 98-102-106-110-114-118 m. Continuare come segue: 3 m a M LEGACCIO – leggere sopra – PUNTO MIMOSA – leggere sopra – fino a quando rimangono 3 m, 3 m a m legaccio. Continuare con il punto mimosa in questo modo con 3 m a m legaccio a ogni lato. FARE ATTENZIONE ALLA TENSIONE DEL LAVORO! Quando il lavoro misura 8-9-10-11-12-13 cm avviare 12 nuove m a ogni lato per le maniche = 122-126-130-134-138-142 m. Continuare con il motivo su tutte le m con e m a m legaccio a ogni lato. Inserire un segnapunti quando il lavoro misura 26-28-30-32-34-36 cm. Ora lavorare a specchio da qui. Quando il lavoro misura 44-47-50-53-56-59 cm intrecciare 12 m a ogni lato = 98-102-106-110-114-118 m. Continuare con il punto mimosa con 3 m a m legaccio a ogni lago fino a quando il lavoro misura 52-56-60-64-68-72 cm (aggiustarlo in modo che l’ultimo f sia un f a rov dal diritto del lavoro). Lavorare 3 f dir, ALLO STESSO TEMPO distribuire 24 aumenti in modo uniforme sul 1° f = 122-126-130-134-138-142 m. Passare ai f circolari n° 4,5 mm. Riprendere 122-126-130-134-138-142 m da f di avvio = 244-252-260-268-276-284 m. Ora continuare in tondo su tutte le m. Lavorare 1 giro rov, distribuendo 60-64-64-68-68-72 aumenti in modo uniforme (circa 1 m tra ogni 4° e 5° m) – leggere il SUGGERIMENTO PER GLI AUMENTI = 304-316-324-336-344-356 m. Lavorare 1 giro dir e continuare a coste, 2 m dir/2 m rov su tutte le m. Quando le coste misurano 3 cm aumentare 1 m in ogni sezione a rov (lavorare 2 m nella 1° m a rov) = 380-395-405-420-430-445 m. Ora continuare a coste, 2 m dir/3 m rov fino a quando le coste misurano 6 cm. Ora aumentare 1 m in ogni sezione a dir (lavorare 2 m nell’ultima m dir) = 456-474-486-504-516-534 m. Continuare a coste, 3 m dir/3 m rov fino a quando le coste misurano circa 9 cm. Intrecciare a coste. CONFEZIONE: Cucire i margini dei lati. Cucire sotto il braccio – vedere la linea tratteggiata nello schema delle misure. |
|||||||||||||
Spiegazioni del diagramma |
|||||||||||||
|
|||||||||||||
 |
|||||||||||||
Avete terminato questo modello?Allora taggate le vostre foto con #dropspattern o inviatele alla #dropsfan gallery. Avete bisogno di aiuto con questo modello?Troverete 17 video tutorial, una sezione per i commenti/domande e molto altro guardando il modello su www.garnstudio.com © 1982-2026 DROPS Design A/S. Ci riserviamo tutti i diritti. Questo documento, compreso tutte le sue sotto-sezioni, è protetto dalle leggi sul copyright. Potete leggere quello che potete fare con i nostri modelli alla fine di ogni modello sul nostro sito. |
|||||||||||||


Con oltre 40 anni di esperienza nel design di modelli di maglia e uncinetto, DROPS Design offre la più estesa collezione di modelli gratuiti su internet - tradotti in 17 lingue. Ad oggi vi possiamo fornire 324 cataloghi e 12290 modelli - 9561 dei quali sono tradotti in Italiano.
Ci stiamo impegnando molto per darvi il meglio che vi possiamo offrire in termini di maglia e uncinetto, ispirazioni e consigli così come filati di grande qualità ad un prezzo incredibile! Volete utilizzare i nostri modelli per qualcosa d'altro oltre al vostro uso personale? Potete leggere tutto ciò che è consentito nel testo sul Copyright in basso su tutte le pagine dei nostri modelli. Buon lavoro!
Lasciare un commento sul modello DROPS 110-28
Noi saremmo felici di ricevere i tuoi commenti e opinioni su questo modello!
Se vuoi fare una domanda, fai per favore attenzione a selezionare la categoria corretta nella casella qui sotto per velocizzare il processo di risposta. I campi richiesti sono indicati da *.