
Categorie popolari
State cercando un filato?


Commenti / Domande (158)
![]() Yvonne Walter ha scritto:
Yvonne Walter ha scritto:
Danke erst einmal für die kostenlose Strickanleitung zu dem schönen Pullover!
08.02.2015 - 10:09
![]() Yvonne Walter ha scritto:
Yvonne Walter ha scritto:
Das Kommentarfeld ist so kurz, dass ich meine Fragen in mehreren Teilen stellen werde.
08.02.2015 - 10:08
![]() Yvonne Walter ha scritto:
Yvonne Walter ha scritto:
Hallo
08.02.2015 - 10:07Aline ha scritto:
Hello, I'm working on this sweater right now. I would like to make a hood that is not pointy. I'd like to avoid that "elfin hood"-effect. Is there another Drops sweater model I could use to adapt the hood of this sweater so that it has a nicely rounded hood? I could not find that myself. Could you post a link to such a model? Or, could you give advice on the best way to make a rounded hood?
06.12.2014 - 12:43DROPS Design ha risposto:
Dear Aline, for any individual assistance, remember you can get help from your DROPS store they can give you tips & advices. Happy knitting!
07.12.2014 - 12:40
![]() Sarah ha scritto:
Sarah ha scritto:
Liebes Drops-Team, vielen Dank für die tolle Anleitung! Ich habe eine Verständnisfrage(Ich stricke in Größe M): Zu Beginn des Rückenteils heißt es : Auf beiden Seiten am Anfang der R. wie folgt: 2 M. 0 Mal und 1 M. 2Mal = 42 M. abk Heißt dass ich kette in der 1.&2. R. nicht ab, stricke also alle M, und kette in der 3&4.R. dann auf beiden Seiten 1 M.ab ,oder überspringe ich die R. 1 & 2 und kette gleich beidseits 1 M ab? Danke schon mal für die Antwort, Sarah
16.09.2014 - 21:16DROPS Design ha risposto:
Liebe Sarah, Sie ketten direkt jeweils 1 M ab, ohne noch R ohne Abketten dazwischen zu stricken. Für Größe M existiert die Angabe mit den 2 M sozusagen gar nicht, die dürfen Sie einfach überlesen. :-) Sie ketten dann also insgesamt 4 M ab, d.h. an beiden Seiten jeweils 2 M, d.h. in 4 R je 1 M.
16.09.2014 - 22:03
![]() Lily ha scritto:
Lily ha scritto:
Ik zou dit patroon graag willen breien voor mijn schoondochter, maar dam met garen voor nld 4.(nld 8 vind ze te dik) Werkt het als ik met garen + nld. 4 brei en dan alle steken verdubbel? Krijg ik dan ook de juiste verhoudingen?
24.03.2014 - 13:34DROPS Design ha risposto:
Hoi Lily. Brei een proeflapje en controleer de stekenverhouding. Pas eventueel aan waar nodig
24.03.2014 - 16:27
![]() Anna Meier ha scritto:
Anna Meier ha scritto:
Liebes Drops-Team, ich habe eine Fragewegen des Ärmels: Am Ende der Ärmel Anleitung heißt es, in jeder Reihe sollen 2 Maschen abge- normen werden. Heißt dass 2 Maschen abnehmen, Wenden, 2abnehmen, Mitte stricKen,2 M abnehmen, wenden, 2M abnehmen, Mitte stricken u.s.w? Ichhabe nämlich das Problem dass ich so innerhalb von 8 Runden von 40 M auf O(-6=34,-2x2=30,-2x=28,26,22,18,14=10,=6, alle weg. aber der Ärmel ist viel zu klein fürs Loch...
03.03.2014 - 00:14DROPS Design ha risposto:
Liebe Anna, Sie nehmen nicht am Anfang und am Ende jeder R 2 M ab, sondern ketten nur am Anfang jeder R 2 M ab. Die Anleitung wurde gerade etwas umformuliert, damit das deutlicher wird. Gutes Gelingen!
03.03.2014 - 11:19
![]() Sabine Wlazik ha scritto:
Sabine Wlazik ha scritto:
Liebe Drops Mitarbeiter, ich habe ein Problem bei der Blende Stricken vom Modell 109-1 Denke es ist ein Denkfehler von mir, irgendwie klappt das nicht, wäre es möglich ein Video dafür zu erstellen! Vielen dank Sabine wlazik
26.02.2014 - 15:05DROPS Design ha risposto:
Liebe Sabine, wir geben Ihren Wunsch gerne an unser Video-Team weiter, aber vielleicht wollen Sie uns vorher Ihr Problem kurz beschreiben?
26.02.2014 - 16:47
![]() Isi ha scritto:
Isi ha scritto:
Was bedeutet gegen den Hals abnehmen?
18.02.2014 - 10:14DROPS Design ha risposto:
Liebe Isi, "gegen den Hals" bedeutet am Halsrand. Sie ketten beim Rückenteil ja erst die mittleren M für den Halsausschnitt ab und stricken dann beide Schultern einzeln weiter. In der nächsten R, die am Halsrand beginnt, ketten Sie bei beiden Schulterteilen einfach 1 M am Halsrand für den Halsausschnitt ab. Viel Spaß beim Stricken!
18.02.2014 - 10:27Nancy Basurto ha scritto:
Com levantar los 14 puntos?????? segun el video se hace sobre puntos cerrados como hago en esto?????, si en ningun momento cerre puntos...
10.08.2013 - 01:29DROPS Design ha risposto:
Hola Nancy. No tienes pts cerrados - se recogen sobre los pts de la fila anterior por detrás de los 14 pts de la cenefa derecha.
10.08.2013 - 09:18
|
|
Campfire |
|
 |
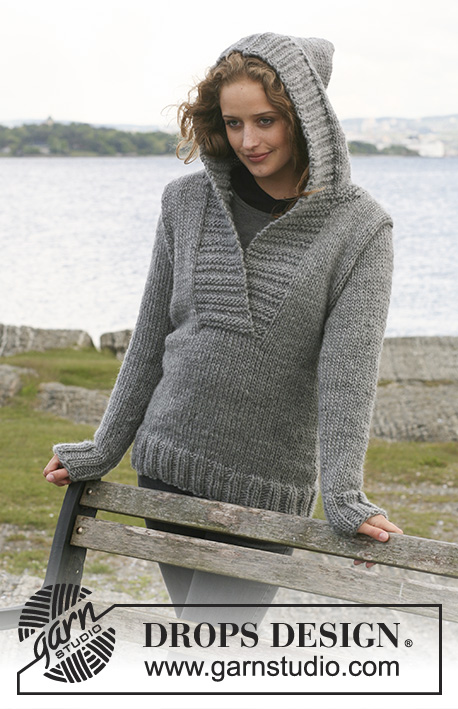 |
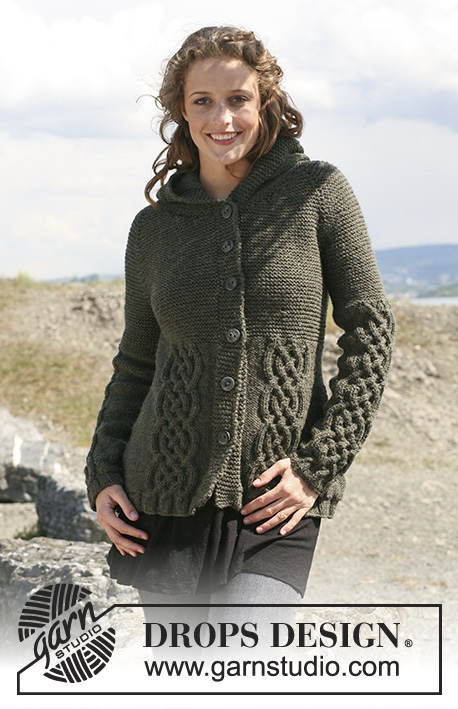
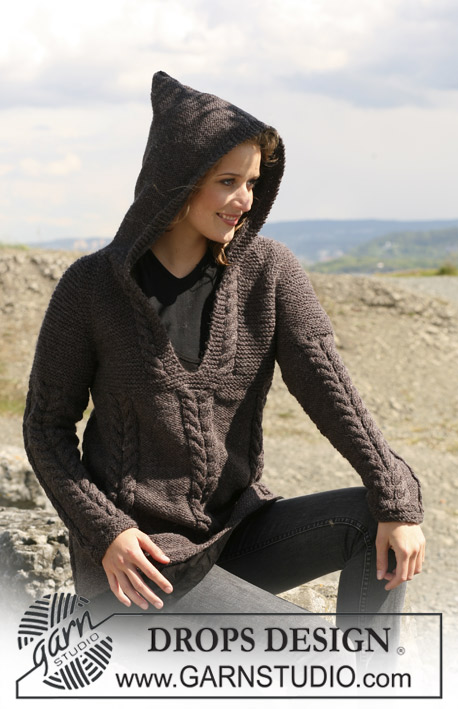
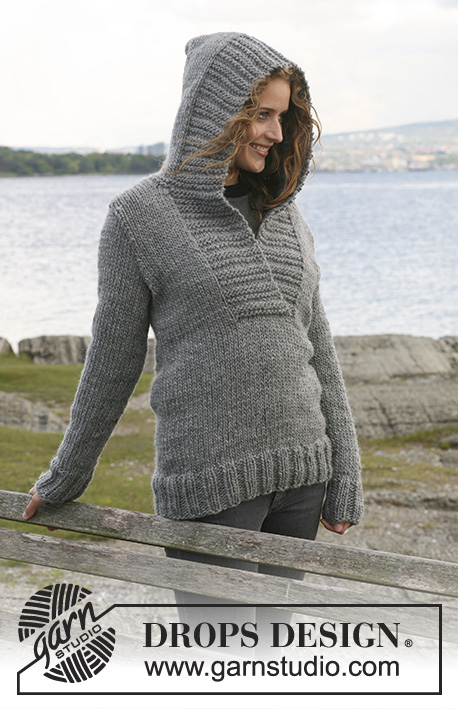
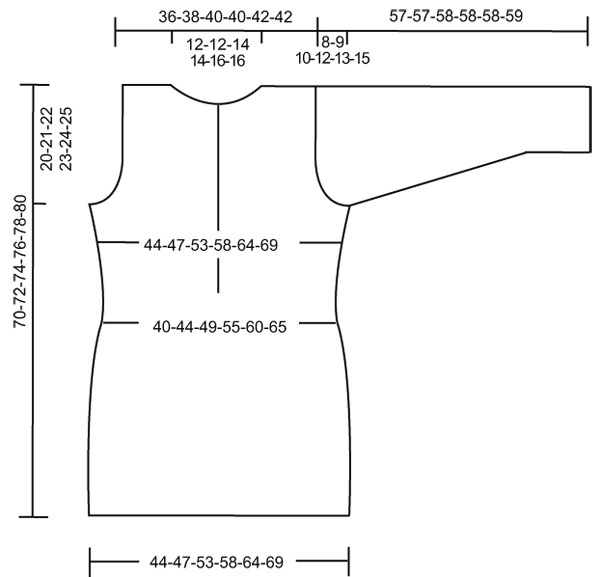
Maglione DROPS lavorato ai ferri con cappuccio in ”Snow”. Taglie: S - XXXL.
DROPS 109-1 |
|
|
BORDI DAVANTI: Iniziando dal diritto del lavoro: * 4 f dir, 2 f rov *, ripetere *-*. Nota! Il davanti sinistro, cioè le m che vengono riprese dietro il davanti destro = il ferro in cui si riprendono le m viene contato come il 1° dei 4 ferri a dir. CORPO: Lavorato in tondo. Avviare 96-104-116-128-140-152 m con i f n° 8 mm con Snow. Lavorare 1 giro rov e continuare a coste, 2 m dir/2 m rov. Quando il lavoro misura 10 cm continuare a m rasata. Inserire 1 segnapunti all'inizio del giro e 1 segnapunti dopo 48-52-58-64-70-76 m (= i lati). FARE ATTENZIONE ALLA TENSIONE DEL LAVORO! Quando il lavoro misura 15-16-17-18-19-20 cm diminuire 1 m a ogni lato di entrambi i segnapunti (= 4 diminuzioni per giro). Ripetere le diminuzioni quando il lavoro misura 30-31-32-33-34-35 cm = 88-96-108-120-132-144 m (= 44-48-54-60-66-72 m sul dietro e sul davanti). Quando il lavoro misura 33-34-35-36-37-38 cm, tagliare il filo. Ora continuare come segue: iniziare dopo le 15-17-20-23-26-29 m dal 1° segnapunti. Lavorare 14 m per il bordo davanti – leggere sopra – e a m rasata sulle 74-82-94-106-118-130 m successive. Ora riprendere 14 nuove m dietro le m del bordo davanti = 102-110-122-134-146-158 m. Continuare avanti e indietro sui f con 14 m per il bordo davanti a ogni lato. ALLO STESSO TEMPO quando il lavoro misura 36-37-38-39-40-41 cm aumentare 1 m a entrambi i lati di tutti i segnapunti (= 4 aumenti per giro). Ripetere l'aumento quando il lavoro misura 46-47-48-49-50-51 cm = 110-118-130-142-154-166 m. Quando il lavoro misura 50-51-52-53-54-55 cm intrecciare 6 m a ogni lato (cioè 3 m a ogni lato del segnapunti) per lo scalfo = 98-106-118-130-142-154 m. Ora finire i davanti e il dietro in modo separato. DIETRO: = 42-46-52-58-64-70 m. Intrecciare per modellare lo scalfo a ogni lato all'inizio di ogni f: 2 m 0-0-1-2-3-4 volte e 1 m 1-2-2-3-3-4 volte = 40-42-44-44-46-46 m. Quando il lavoro misura 68-70-72-74-76-78 cm intrecciare le 12-12-14-14-16-16 m centrali per il collo e diminuire 1 m sulla scollatura sul f successivo = 13-14-14-14-14-14 m rimaste su ogni spalla. Intrecciare quando il lavoro misura 70-72-74-76-78-80 cm. DAVANTI DESTRO: = 28-30-33-36-39-42 m. Intrecciare per modellare lo scalfo come descritto per il dietro = 27-28-29-29-30-30 m. Quando il lavoro misura 60-62-64-66-68-70 cm trasferire 14 m verso il centro davanti su un fermamaglie e ora diminuire per modellare la scollatura a f alterni come segue: 1 m 0-0-1-1-2-2 volte = 13-14-14-14-14-14 m rimaste sulla spalla. Intrecciare quando il lavoro misura 70-72-74-76-78-80 cm. DAVANTI SINISTRO: Come il davanti destro, ma a specchio. MANICA: Lavorata in tondo con i f a doppia punta. Avviare 28-28-28-32-32-32 m con i f n° 8 mm. Inserire 1 segnapunti all'inizio del giro. Lavorare 1 giro rov e continuare a coste, 2 m dir/2 m rov. Quando il lavoro misura 8 cm continuare a m rasata, ALLO STESSO TEMPO distribuire 2-2-0-4-2-2 diminuzioni sul 1° giro = 26-26-28-28-30-30 m. Quando il lavoro misura 10 cm aumentare 1 m a entrambi i lati del segnapunti ogni 6-5-5-3,5-3,5-2,5 cm per un totale di 7-8-8-10-10-12 volte = 40-42-44-48-50-54 m. Quando il lavoro misura 49-48-48-46-45-44 cm - Nota! Meno per le taglie più grandi a causa dell'arrotondamento della manica più lungo e della maggiore ampiezza delle spalle – intrecciare 3 m a entrambi i lati del segnapunti per lo scalfo, e ora continuare avanti e indietro sui f. Intrecciare per modellare l'arrotondamento della manica a ogni lato all'inizio di ogni f: 2 m 1 volta e 1 m 2-3-4-5-6-7 volte, poi 2 m a ogni lato fino a quando il lavoro misura 56-56-57-57-57-58 cm, intrecciare 3 m a ogni lato 1 volta e intrecciare le m rimaste. Il lavoro misura circa 57-57-58-58-58-59 cm. CAPPUCCIO: Riprendere circa 60-65 m attorno alla scollatura (comprese le m sul fermamaglie) con i f n° 8 mm con Snow. Lavorare 4 f a m legaccio con i bordi davanti come prima. ALLO STESSO TEMPO distribuire 5 aumenti in modo uniforme (non aumentare sulle m del bordo davanti) sull'ultimo ferro = 65-70 m. Continuare a m rasata con 14 m per i bordi davanti a ogni lato come prima fino a quando il cappuccio misura 35-35-36-36-37-37 cm. Intrecciare. Piegare il cappuccio e cucire in cima dal diritto del lavoro. CONFEZIONE: Attaccare le maniche. |
|
 |
|
Avete terminato questo modello?Allora taggate le vostre foto con #dropspattern o inviatele alla #dropsfan gallery. Avete bisogno di aiuto con questo modello?Troverete 21 video tutorial, una sezione per i commenti/domande e molto altro guardando il modello su www.garnstudio.com © 1982-2026 DROPS Design A/S. Ci riserviamo tutti i diritti. Questo documento, compreso tutte le sue sotto-sezioni, è protetto dalle leggi sul copyright. Potete leggere quello che potete fare con i nostri modelli alla fine di ogni modello sul nostro sito. |
|


Con oltre 40 anni di esperienza nel design di modelli di maglia e uncinetto, DROPS Design offre la più estesa collezione di modelli gratuiti su internet - tradotti in 17 lingue. Ad oggi vi possiamo fornire 324 cataloghi e 12290 modelli - 9561 dei quali sono tradotti in Italiano.
Ci stiamo impegnando molto per darvi il meglio che vi possiamo offrire in termini di maglia e uncinetto, ispirazioni e consigli così come filati di grande qualità ad un prezzo incredibile! Volete utilizzare i nostri modelli per qualcosa d'altro oltre al vostro uso personale? Potete leggere tutto ciò che è consentito nel testo sul Copyright in basso su tutte le pagine dei nostri modelli. Buon lavoro!
Lasciare un commento sul modello DROPS 109-1
Noi saremmo felici di ricevere i tuoi commenti e opinioni su questo modello!
Se vuoi fare una domanda, fai per favore attenzione a selezionare la categoria corretta nella casella qui sotto per velocizzare il processo di risposta. I campi richiesti sono indicati da *.