
Categorie popolari
State cercando un filato?


Commenti / Domande (28)
![]() Beatrice Zionts ha scritto:
Beatrice Zionts ha scritto:
Clarification on my previous comment: Still confused on the 189 sts-to achieve this I would have to not only pick up sts but also increase to reach 189. Is that correct? Also the stitch count on the M2 is 9 sts and 11 on the M1 for a total of 20 sts. There is a discrepancy of 1 stitch-won't this throw the pattern off?
14.01.2019 - 05:33DROPS Design ha risposto:
See answer below :)
14.01.2019 - 13:08
![]() Beatrice Zionts ha scritto:
Beatrice Zionts ha scritto:
I think the hat pattern needs to be corrected, my pattern says to pick up 189 sts around whereas I am reading in comments that it should be 89 sts. Also don't understand the stitch counts on the first round of M2 has 9 sts not the 19 so this throws off the whole pattern. Please explain and thank you.
13.01.2019 - 18:09DROPS Design ha risposto:
Dear Mrs Zionts, pattern is correct, you start the crown of the hat with 189 sts working (M.2 (= 8 sts = cable over 6 sts + 1 st on each side of the cable), 19 sts stocking st) a total of 7 times in the round. At the same time, decrease as expained until there are 7 sts on needle. Happy knitting!
14.01.2019 - 12:00Helen Patterson ha scritto:
Hello, I am a little confused with the instructions for decreasing on the hat I.e. Decrease ...on every 3rd and 4th round alternately, a total of 13 times. I do not understand how you arrive at 13 decreases. Could you please help me with this. Thank you, Helen
05.02.2016 - 20:04DROPS Design ha risposto:
Dear Mrs Patterson, please click to read more how to dec there. Happy knitting!
08.02.2016 - 10:36
![]() Stella Storgaard ha scritto:
Stella Storgaard ha scritto:
Jeg ser, i den danske version af opskriften på denne hue, at der skal samles 189 m op i højre side. Jeg formoder det er en trykfejl eller skal der blot stå 89 m?? Mvh S. Storgaard
11.01.2016 - 10:53
![]() Katrin ha scritto:
Katrin ha scritto:
Am Ende der Anleitung für den Kragen steht auch die Zeichenerklärung für das Diagramm - gut versteckt ;)
17.05.2015 - 08:48DROPS Design ha risposto:
Liebe Katrin, die Anleitung ist schon alt und stammt noch aus "vordigitaler" Zeit, daher erscheint die Übersetzung nicht wie üblich direkt beim Diagramm. Aber es wird gleich ein bisschen besser abgesetzt, sodass man den Diagrammtext besser findet. Viel Spaß beim Stricken und gutes Gelingen!
17.05.2015 - 10:58
![]() Katrin ha scritto:
Katrin ha scritto:
In der deutschen Anleitung fehlt die deutsche Beschreibung im Diagramm. Vielleicht könnten Sie es noch übersetzen. Vielen Dank.
17.05.2015 - 08:44DROPS Design ha risposto:
Liebe Katrin, die Übersetzung wurde nun übersichtlicher gestaltet und im Zuge dessen auch in weiteren Teilen neu übersetzt und überarbeitet, insbesondere die Handschuhe. Wenn Sie sich die Anleitung ausgedruckt haben, sollten Sie also besser einen neuen Ausdruck verwenden.
17.05.2015 - 12:50
![]() Mesnier Agnès ha scritto:
Mesnier Agnès ha scritto:
Les explications ne sont pas précises.... pour le bonnet Monter 20 m. et tricoter M1..mais M1 comporte 11 m. M2 : à droite de la torsade il y a 1 m. point de riz à gauche il y a 2m.? Je me suis aperçu de ce problème lorsque mon bonnet était terminé. Je n'ai pas envie de le défaire, peut être m'offrez-vous 3 pelotes Karisma écru ? merci de votre réponse
10.12.2014 - 13:55DROPS Design ha risposto:
Bonjour Mme Mesnier, au début du bonnet, on monte 20 m et on tricote les 20 m de M1 (M1 = encadré en bas, c'est-à-dire tout le diagramme). M2 = l'encadré en haut, soit 8 m seulement. Bon tricot!
10.12.2014 - 14:13Mona Mina ha scritto:
Iran learn
15.01.2014 - 08:55Francoise Moulin ha scritto:
E ne trouve pas les explications pour ce bonnet, seulement pour les gants et le col....
12.11.2013 - 05:56DROPS Design ha risposto:
Bonjour Mme Mouliln, les explications du bonnet sont les premières au-dessus des gants (la mention "Bonnet") a été rajoutée pour une meilleure compréhension. Bon tricot!
12.11.2013 - 09:04
![]() Carolyn Gould ha scritto:
Carolyn Gould ha scritto:
Although the main part of these instruction have translated into English, the diagram instruction M1 and M2 have not been translated. I would very much appreciate receiving an English version for knitting the cables. Many thanks.
13.02.2013 - 23:13DROPS Design ha risposto:
Dear Mrs Gould, missing translation has been updated. Thank you. Happy knitting!
14.02.2013 - 09:32
|
|||||||||||||
DROPS Extra 0-96 |
|||||||||||||
 |
 |
||||||||||||
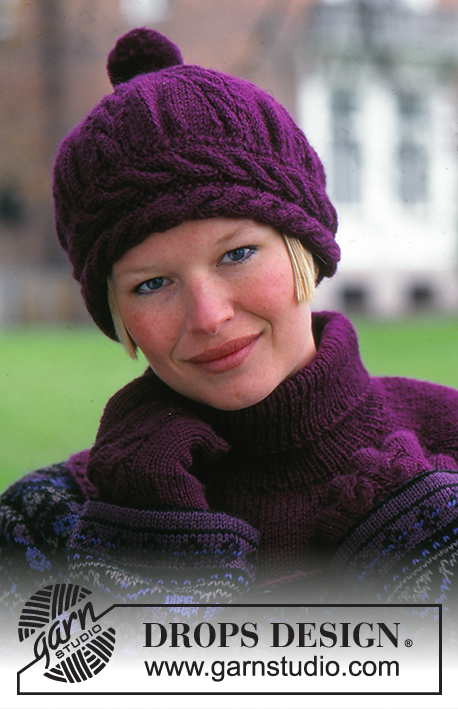
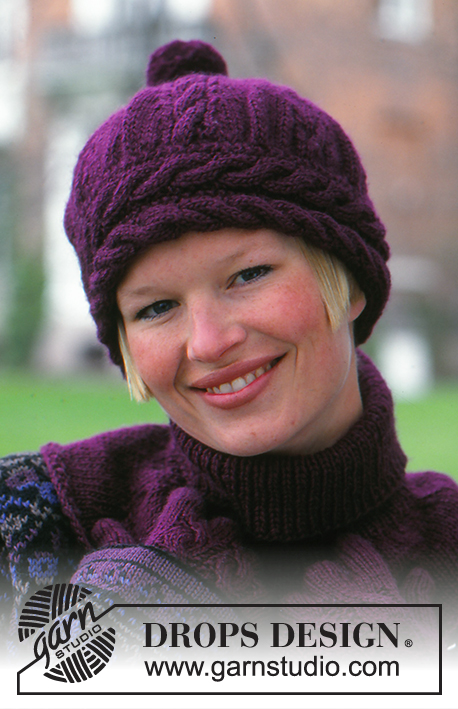
Cappello, scaldacollo e guanti DROPS in "Karisma Superwash".
DROPS Extra 0-96 |
|||||||||||||
|
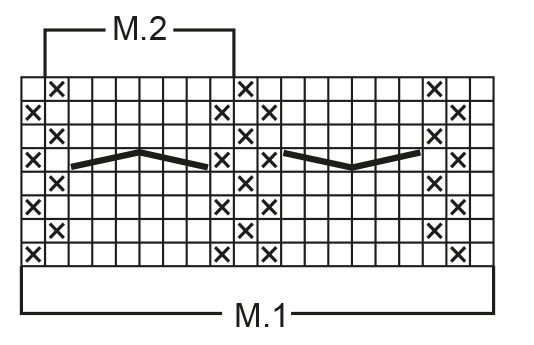
CAPPELLO: Motivo: Vedere il diagramma. Il diagramma mostra il motivo dal diritto del lavoro. Avviare 20 m con i f n° 4 mm e lavorare M.1 avanti e indietro sui f per 54 cm. Intrecciare. Cucire per formare un anello. Riprendere 189 m sui f a doppia punta n° 4 mm dopo la m di vivagno sul diritto del lavoro di M.1. Lavorare il 1° giro come segue: * M.2, 19 m a m rasata *, ripetere *-*, allo stesso tempo diminuire 1 m a ogni lato di tutti i diagrammi M.2 ogni 3 e 4 giri in modo alternato per un totale di 13 volte (quando il non rimangono m vicino a M.2 diminuire le m in M.2) = 7 m rimaste. Tagliare il filo, farlo passare attraverso le m rimaste e affrancare. Fare un pompom con un diametro di circa 5 cm e attaccarlo in cima al cappello. GUANTI: Coste: *1 m dir, 1 m rov *, ripetere *-*. M. a grana di riso: 1° f: * 1 m dir, 1 m rov *, ripetere *-*. 2°f : dir su dir e rov su rov. Ripetere il 2° f. Avviare 54-58 m con i f a doppia punta n° 2,5 mm e lavorare 2 cm a m a grana di riso e poi 2 cm a coste, allo stesso tempo distribuire 10 diminuzioni in modo uniforme sull’ultimo f a coste = 44-48 m. Lavorare il f successivo come segue: 3-4 m a m rasata, M.2, M.2, 3-4 m a m rasata (= 22-24 m sul sopra della mano), 1 m a m rasata (= m del pollice, inserire un segnapunti in questa m), 21-23 m a m rasata (= palmo della mano). Ora misurare il lavoro da qui! Quando il lavoro misura 3 cm dal segnapunti aumentare 1 m a ogni lato della m del pollice ogni 4-3 giri per un totale di 5-6 volte = 54-60 m – lavorare le m aumentate a m rasata. Ora trasferire le 11 m centrali vicino per il pollice su un fermamaglie e avviare 1 nuova m dietro queste sul giro successivo = 44-50 m. Continuare fino a quando il lavoro misura 10-11 cm dal segnapunti, ora smettere con M.2 e finire il lavoro a m rasata. Lavorare le dita come segue: Mignolo: trasferire 4-6 m del sopra della mano e 4-5 m del palmo della mano sui f e riprendere 1 m verso l’anulare = 9-12 m sul f. Lavorare 5-6 cm a m rasata, allo stesso tempo diminuire 1 m sul 1° giro. Dopo 5-6 cm lavorare 2 m insieme a dir per tutto il giro, tagliare il filo, farlo passare attraverso le m rimaste e affrancare. Ora lavorare 3 giri su tutte le m prima di lavorare l’anulare. Anulare: trasferire 6-6 m del sopra della mano e 6-7 m del palmo della mano sui f e riprendere 1 m verso il medio = 14-15 m sul f. Lavorare 6-7 cm a m rasata, allo stesso tempo diminuire 2 m sul 1° giro. Dopo 6-7 cm lavorare 2 m insieme a dir per tutto il giro, tagliare il filo, farlo passare attraverso le m rimaste e affrancare. Medio: come l’anulare, ma lavorare 7-8 cm a m rasata. Indice: trasferire 6-6 m del sopra della mano e 6-7 m del palmo della mano sui f e riprendere 1 m verso il medio = 13-14 m sul f. come l’anulare. Pollice: riprendere 12-14 m (comprese le m sul fermamaglie) attorno al pollice e lavorare 6-6,5 cm a m rasata, lavorare 2 m insieme a dir. per tutto il giro, tagliare il filo e farlo passare attraverso le m rimaste. Cucire le aperture tra le dita. SCALDACOLLO: Coste: *1 m dir, 1 m rov *, ripetere *-*. Avviare 112 m con i f circolari n° 3,5 mm e lavorare 14 cm a coste – leggere sopra. Inserire un segnapunti in ogni 16° m = 7 segnapunti, e continuare a m rasata. Ora misurare il lavoro da qui! Quando il lavoro misura 2 cm dai segnapunti aumentare 1 m a ogni lato di tutti i segnapunti e ripetere gli aumenti quando il lavoro misura 4 e 6 cm = 154 m. Quando il lavoro misura 8 cm dai segnapunti, lavorare 3 f a coste e intrecciare. Traduzione dei simboli del diagramma: = 1 m dir = 1 m rov = trasferire 3 m su un ferro ausiliario sul davanti del lavoro, 3 m dir, 3 m dir dal f ausiliario. = trasferire 3 m su un ferro ausiliario sul dietro del lavoro, 3 m dir, 3 m dir dal f ausiliario. |
|||||||||||||
Spiegazioni del diagramma |
|||||||||||||
|
|||||||||||||
 |
|||||||||||||
Avete terminato questo modello?Allora taggate le vostre foto con #dropspattern o inviatele alla #dropsfan gallery. Avete bisogno di aiuto con questo modello?Troverete 21 video tutorial, una sezione per i commenti/domande e molto altro guardando il modello su www.garnstudio.com © 1982-2026 DROPS Design A/S. Ci riserviamo tutti i diritti. Questo documento, compreso tutte le sue sotto-sezioni, è protetto dalle leggi sul copyright. Potete leggere quello che potete fare con i nostri modelli alla fine di ogni modello sul nostro sito. |
|||||||||||||


Con oltre 40 anni di esperienza nel design di modelli di maglia e uncinetto, DROPS Design offre la più estesa collezione di modelli gratuiti su internet - tradotti in 17 lingue. Ad oggi vi possiamo fornire 324 cataloghi e 12290 modelli - 9561 dei quali sono tradotti in Italiano.
Ci stiamo impegnando molto per darvi il meglio che vi possiamo offrire in termini di maglia e uncinetto, ispirazioni e consigli così come filati di grande qualità ad un prezzo incredibile! Volete utilizzare i nostri modelli per qualcosa d'altro oltre al vostro uso personale? Potete leggere tutto ciò che è consentito nel testo sul Copyright in basso su tutte le pagine dei nostri modelli. Buon lavoro!
Lasciare un commento sul modello DROPS Extra 0-96
Noi saremmo felici di ricevere i tuoi commenti e opinioni su questo modello!
Se vuoi fare una domanda, fai per favore attenzione a selezionare la categoria corretta nella casella qui sotto per velocizzare il processo di risposta. I campi richiesti sono indicati da *.