
Categorie popolari
State cercando un filato?

































Commenti / Domande (12)
 Wanda ha scritto:
I am beginning the start at the neck edge with an 3.5mm size interchangeable needle, but the cord is much longer than 16 inch. Will I be able to join in the round or should I use a straight 3.5 needle. This is my first time using one of your patterns. Thank you
19.10.2026 - 18:48
Sylwia ha scritto:
I have a question about the raglan part. In round 3 there is a "increase after 2nd and 4th marker and before 3rd and 1st marker" - shouldn't it be the other way around? Because the front piece is between the 1st and 2nd marker and back piece is between the 3rd and 4th marker. So in my understanding I should increase after 1st marker and before 2nd, aswell as after 3rd and before 4th marker, to increase the front and back piece. Am I correct?
13.08.2026 - 13:51DROPS Design ha risposto:
Dear Sylvia, the rounds start by the right sleeve, so right sleeve is after 1st marker and before 2nd marker, front piece after 2nd marker and before 3rd marker, left sleeve after 3rd marker and before 4th marker and back piece is after 4th marker and before 1st marker. You will then increase for front piece after 2nd marker and before 3rd marker and for back piece after 4th marker and before 1st marker. Happy knitting!
13.08.2026 - 16:01
 Marta ha scritto:
-Nella prima parte del modello (sprone), gli aumenti vengono calcolati su 88 maglie anziché 92? -nell’ultima parte degli aumenti, il risultato finale non è 236 aumenti totali per la taglia XS?
27.07.2026 - 18:07DROPS Design ha risposto:
Buonasera Marta, le maglie alla fine dello sprone per la taglia XS sono 236. Buon lavoro!
30.07.2026 - 23:25
 Barbara ha scritto:
Ik las al een paar keer in jullie instructies: plaats de steekmarkeerder IN de steek. Maar hoe doe je dat precies zodat de marker mee naar boven gaat per naald? Ik vind hier nergens info of video’s over?
25.07.2026 - 03:40DROPS Design ha risposto:
Dag Barbara,
Je kunt een steekmarkeerder in de steek hangen en daar laten zitten en dan steeds na een paar naalden een stukje hoger zetten. Het gaat erom dat je voor jezelf weet welke steek het is. Er staat inderdaad geen video bij hoe je de markeerder in een steek plaatst, maar in plaats van de steek om de naald te schuiven kun je hem in een steek zetten, net zoals je een veiligheidspeld ergens in zetten daar een paar naalden laten zitten.
26.07.2026 - 16:43
 Lara ha scritto:
Do you have to move the stitch marker in the raglan stitch up one row on each row? Thank you!
04.07.2026 - 19:48DROPS Design ha risposto:
Dear Lara, the stitch markers have to follow the piece as you work. Since the marker is inside a stitch this time you will need to remove and put back the marker in the next round as you work the stitch with the marker. Happy knitting!
05.07.2026 - 23:10
 Yvette ha scritto:
I am confused about stitches increase for Raglan, pattern indicated round 1- increase on each side of every raglan stitch, what exactly means? Does it mean increasing one stitch before and after the marker ? But from the tutorial video showing it increasing stitch 2 sts before marker and 2 sts after marker, could you please explain it which is the correct way for increasing stitches for this section . Thanks in advance .
22.05.2026 - 23:22DROPS Design ha risposto:
Dear Yvette, sometimes the marker is inserted inside stitches, while other times it's inserted between stitches. When inserted between stitches, we don't increase right before and after the marker, because you could form a big hole. Instead, we usually separate the increases by a few stitches (for example 2 sts before and 2 sts after the marker) so that the increases are neater. These stitches on each side of the marker, before or after the increases, form the raglan-line, so we can put a different number of stitches in between the increases depending on the desired raglan-line. On the other hand, in this pattern the marker in inside a stitch so, even if you increase on each side of the marker, the yarn over won't form a big hole (there will be a stitch between them) so you can work the increases like this. Happy knitting!
26.05.2026 - 01:22
 Sylvia ha scritto:
J'aimerais savoir si ce modèle à les manches longues où arrêt un peu plus haut ,juste au dessus du poignet, car pour moi c'est ainsi ? Merci
17.05.2026 - 11:36
Sylvia ha scritto:
J'aimerais savoir si ce modèle à les manches longues où arrêt un peu plus haut ,juste au dessus du poignet, car pour moi c'est ainsi ? Merci
17.05.2026 - 11:35DROPS Design ha risposto:
Bonjour Sylvia, les manches de ce pull sont longues, retrouvez la longueur pour chaque taille dans le schéma - n'hésitez pas à ajuster à la longueur qui vous convient. Bon tricot!
18.05.2026 - 11:32
 Monika ha scritto:
Ich habe die 21 cm schon lange erreicht bevor ich die Raglan-Zunahmen zu Ende gestrickt habe, kann das sein oder habe ich etwas falsch gestrickt?
14.05.2026 - 18:02DROPS Design ha risposto:
Liebe Monika, vielleicht stimmt Ihre Maschenprobe in der Höhe nicht ganz genau, da (23 Zunahmen in jeder 2. Runde) mit 22 Reihen = 10 cm sollen ca 21 cm messen, dann stricken Sie am besten die Raglanzunahmen öfter (in der Höhe) damit sie bei 21 cm fertig sind. Viel Spaß beim Stricken!
15.05.2026 - 10:12
Dianne ha scritto:
I can not make sense about where to place the raglan markers. You say to only put the markers in a knit stitch, but the count does not add up. Where do I start counting from? The beginning of round? Do I put a marker there? then after that 19 stitches puts a marker in a purl stitch. Then it says to put a marker in the next stitch which would be a knit stitch. I am confused, Could you please explain it more simply? Thank you
18.04.2026 - 22:52DROPS Design ha risposto:
Dear Dianne, rib pattern started with K1, so you insert the 1st marker in this 1st stitch, then count 19 sts = (P1, K1) x 9 = 18 sts rib + P1 = 19 sts for sleeve, insert marker in next stitch which is a K stitch from the rib. Hope it can help. Happy knitting!
20.04.2026 - 09:58
|
|
Summer Living Sweater#summerlivingsweater |
|
 |
 |
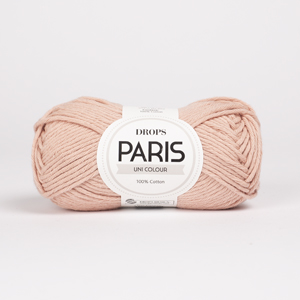
Maglione lavorato ai ferri in DROPS Paris. Lavorato dall’alto in basso con raglan e maglia rasata. Taglie: XS – XXXL.
DROPS 267-25 |
|
|
--------------------------------------------------------- TECNICHE IMPIEGATE: ---------------------------------------------------------- RAGLAN: Aumentare 1 maglia facendo 1 gettato, sul giro successivo lavorare i gettati come spiegato sotto: PRIMA DELLE MAGLIE DEL RAGLAN (= gettati ritorti verso destra): Spostare il gettato dal ferro sinistro a quello destro a rovescio, rimetterlo sul ferro sinistro nel verso opposto inserendo il ferro sinistro da dietro (il gettato ora è ritorto). Lavorare il gettato a diritto nel filo davanti della maglia - per evitare un buco. DOPO LE MAGLIE DEL RAGLAN (= gettati ritorti verso sinistra): Lavorare il gettato a diritto nel filo dietro per evitare un buco. SUGGERIMENTO PER LE MANICHE: Quando si riprendono le maglie sotto le maniche, si potrebbe creare un piccolo buco nel punto di passaggio tra le maglie sul corpo e le maniche. Questo buco può essere chiuso riprendendo il filo tra 2 maglie – lavorare questo filo insieme alla 1° maglia tra il corpo e la manica per chiudere il buco. SUGGERIMENTO PER LE DIMINUZIONI: Diminuire 1 maglia a ogni lato del segnapunti come segue: Lavorare fino a quando rimangono 3 maglie prima del segnapunti, 2 maglie insieme a diritto, 2 maglie diritto (il segnapunti è al centro di queste 2 maglie), passare 1 maglia a diritto senza lavorarla, 1 maglia diritto, accavallare la maglia passata sopra quella appena lavorata (= 2 maglie diminuite). ---------------------------------------------------------- INIZIO DEL LAVORO: ---------------------------------------------------------- MAGLIONE – BREVE RIASSUNTO DEL LAVORO: Il modello prevede sia l’uso di ferri circolari corti sia l’uso di ferri circolari lunghi; iniziare con la lunghezza che si adatta al numero di maglie e cambiare quando necessario. Lavorare il bordo del collo e lo sprone in tondo con i ferri circolari, dal dietro della spalla destro e dall’alto in basso. Alla fine dello sprone, dividere il lavoro per il corpo e le maniche. Lavorare il corpo dall’alto in basso in piano con i ferri circolari, con le maniche in sospeso. Lavorare le maniche in tondo dall’alto in basso. BORDO DEL COLLO: Avviare 92-96-100-104-108-112-116 maglie con i ferri circolari n° 3,5 mm con DROPS Paris. Lavorare 1 giro diritto. Lavorare 4 giri a coste (= 1 maglia diritto/1 maglia rovescio). L’inizio del giro è sulla spalla destra sul dietro. Inserire 1 segnapunti dopo le prime 33-34-35-36-37-38-39 maglie sul giro (= circa centro davanti), misurare il lavoro da qui. SPRONE: Ora inserire 4 segnapunti nel lavoro senza lavorare le maglie, inserire i segnapunti in una maglia. Queste maglie vengono chiamate maglie del raglan e vengono lavorate a maglia rasata. Inserire il 1° segnapunti nella 1° maglia, contare 19 maglie (= manica), inserire il 2° segnapunti nella maglia successiva, contare 25-27-29-31-33-35-37 maglie (= davanti), inserire il 3° segnapunti nella maglia successiva, contare 19 maglie (= manica), inserire il 4° segnapunti nella maglia successiva, rimangono 25-27-29-31-33-35-37 maglie sul ferro dopo l’ultimo segnapunti (= dietro). Passare ai ferri circolari n° 5 mm e lavorare a maglia rasata e aumentare per il RAGLAN – leggere la spiegazione sopra, come segue: GIRO 1: lavorare a maglia rasata e aumentare per il raglan a ogni lato di ogni maglia del raglan (= 8 aumenti). GIRO 2: lavorare a maglia rasata, ricordarsi di lavorare i gettati come spiegato in RAGLAN. Lavorare il 1° e 2° GIRO 3-1-6-7-6-5-5 volte (= 6-2-12-14-12-10-10 giri lavorati) = 116-104-148-160-156-152-156 maglie sui ferri. Ricordarsi di mantenere la corretta tensione del lavoro! Continuare a maglia rasata e aumenti per il raglan come segue: GIRO 1: Lavorare a maglia rasata e aumentare per il raglan a ogni lato di ogni maglia del raglan (= 8 aumenti). GIRO 2: Lavorare a maglia rasata. GIRO 3: Lavorare a maglia rasata e aumentare per il raglan sul davanti e dietro, cioè aumentare dopo il 2° e 4° segnapunti e prima del 3° e 1° segnapunti – non aumentare le maglie sulle maniche (= 4 aumenti). GIRO 4. Lavorare a maglia rasata. Lavorare i FERRI 1-4 10-12-10-11-13-15-16 volte (= 40-48-40-44-52-60-64 giri lavorati = 10-12-10-11-13-15-16 aumenti fatti sulle maniche e 20-24-20-22-26-30-32 aumenti fatti sul davanti /dietro) = 236-248-268-292-312-332-348 maglie. Tutti gli aumenti per il raglan sono finiti, sono stati lavorati 23-25-26-29-32-35-37 aumenti in totale sul davanti/dietro e 13-13-16-18-19-20-21 aumenti sulle maniche. Lavorare a maglia rasata senza aumenti, fino a quando il lavoro misura circa 21-23-24-27-29-32-34 cm dal segnapunti al centro davanti. Ora dividere lo sprone per il corpo e le maniche. DIVISIONE PER IL CORPO E LE MANICHE: ALLO STESSO TEMPO sul giro successivo dividere lo sprone per il corpo e le maniche come segue: lavorare e tenere la 1° maglia sul ferro (questa maglia appartiene al dietro), mettere le 45-45-51-55-57-59-61 maglie successive in sospeso per la manica, avviare 10-12-14-16-18-20-20 nuove maglie sul ferro (= a lato al centro sotto la manica), lavorare 73-79-83-91-99-107-113 maglie a maglia rasata (= davanti), mettere le 45-45-51-55-57-59-61 maglie successive in sospeso per la manica, avviare 10-12-14-16-18-20-20 nuove maglie sul ferro (= a lato al centro sotto la manica), lavorare le ultime 72-78-82-90-98-106-112 maglie a maglia rasata (= 73-79-83-91-99-107-113 maglie in totale sul dietro). Finire il corpo e le maniche in modo separato. CORPO: = 166-182-194-214-234-254-266 maglie. Lavorare a maglia rasata fino a quando il lavoro misura 36-38-40-42-43-45-47 cm dal segnapunti al centro davanti. Passare ai ferri circolari n° 3,5 mm, lavorare a coste (= 1 maglia diritto/1 maglia rovescio) e ALLO STESSO TEMPO aumentare 16-18-20-22-24-26-28 maglie in modo uniforme sul 1° giro = 182-200-214-236-258-280-294 maglie. Quando le coste misurano 4-4-4-4-5-5-5 cm, intrecciare con diritto su diritto e rovescio su rovescio. Il maglione misura 40-42-44-46-48-50-52 cm dal segnapunti al centro davanti e circa 46-48-50-52-54-56-58 cm dalla cima della spalla. MANICHE: Riportare le 45-45-51-55-57-59-61 maglie delle maniche in sospeso sui ferri circolari n° 5 mm e inoltre riprendere 1 maglia in ognuna delle 10-12-14-16-18-20-20 maglie avviate sotto la manica – leggere il SUGGERIMENTO PER LE MANICA = 55-57-65-71-75-79-81 maglie. Inserire 1 segnapunti al centro delle nuove maglie sotto la manica. Lavorare a maglia rasata in tondo sul ferro – ALLO STESSO TEMPO quando la manica misura 1 cm dalla divisione, diminuire al centro sotto la manica – leggere il SUGGERIMENTO PER LE DIMINUZIONI e diminuire come segue: diminuire 2 maglie 2 volte a giri alterni, poi diminuire 2 maglie 2-2-5-7-8-9-9 volte ogni 4-4-4-3½-3-2½-2½ cm = 47-49-51-53-55-57-59 maglie sul ferro. Lavorare fino a quando la manica misura 39-37-37-34-32-29-27 cm dalla divisione. Passare ai ferri a doppia punta n° 3,5 mm e lavorare a coste (= 1 maglia diritto/1 maglia rovescio) e ALLO STESSO TEMPO aumentare 9-9-9-11-11-11-11 maglie in modo uniforme sul 1° giro = 56-58-60-64-66-68-70 maglie. Quando le coste misurano 6-6-6-6-7-7-7 cm, intrecciare con diritto su diritto e rovescio su rovescio. La manica misura circa 45-43-43-40-39-36-34 cm dalla divisione. |
|
 |
|
Avete terminato questo modello?Allora taggate le vostre foto con #dropspattern #summerlivingsweater o inviatele alla #dropsfan gallery. Avete bisogno di aiuto con questo modello?Troverete 17 video tutorial, una sezione per i commenti/domande e molto altro guardando il modello su www.garnstudio.com © 1982-2026 DROPS Design A/S. Ci riserviamo tutti i diritti. Questo documento, compreso tutte le sue sotto-sezioni, è protetto dalle leggi sul copyright. Potete leggere quello che potete fare con i nostri modelli alla fine di ogni modello sul nostro sito. |
|




Con oltre 40 anni di esperienza nel design di modelli di maglia e uncinetto, DROPS Design offre la più estesa collezione di modelli gratuiti su internet - tradotti in 17 lingue. Ad oggi vi possiamo fornire 333 cataloghi e 12536 modelli - 9810 dei quali sono tradotti in Italiano.
Ci stiamo impegnando molto per darvi il meglio che vi possiamo offrire in termini di maglia e uncinetto, ispirazioni e consigli così come filati di grande qualità ad un prezzo incredibile! Volete utilizzare i nostri modelli per qualcosa d'altro oltre al vostro uso personale? Potete leggere tutto ciò che è consentito nel testo sul Copyright in basso su tutte le pagine dei nostri modelli. Buon lavoro!
Lasciare un commento sul modello DROPS 267-25
Noi saremmo felici di ricevere i tuoi commenti e opinioni su questo modello!
Se vuoi fare una domanda, fai per favore attenzione a selezionare la categoria corretta nella casella qui sotto per velocizzare il processo di risposta. I campi richiesti sono indicati da *.