
Categorie popolari
State cercando un filato?


Commenti / Domande (11)
![]() Dorothea ha scritto:
Dorothea ha scritto:
Hallo, normaalgesproken is een voorpand bovenaan lager dan het achterpand. Hier wordt op dezelfde hoogte na de kraag verder gebreid. Is dat goed en past de trui dan wel goed?
08.06.2025 - 19:33DROPS Design ha risposto:
Dag Dorothea,
Klopt, er is geen verschil tussen voorpand en achterpand qua hoogte bij de hals. Dit is wel vaker zo en de trui past goed.
09.06.2025 - 09:16
![]() Debbie G ha scritto:
Debbie G ha scritto:
Thank you for your last detailed explanation. That helped a lot. I would've never figured it out without your help!
19.03.2025 - 00:08
![]() Debbie G ha scritto:
Debbie G ha scritto:
Hi, I'm confused. I went to my local shop and they are a confused as well. We don't understand your increase totals. Can I ask the question another way? If so --Am I correct in assuming rows 1-4 will basically repeat? Maybe can you provide more detail row, by row for 4 rows, with total stitch count at the end of each row? I don't want to frog this project because I love the sweater design! I also have left my email address if you'd rather email me.
16.03.2025 - 23:25DROPS Design ha risposto:
Dear Debbie, first round: increase 8 stitches (2 stitches for each sleeve, 2 stitches for the front piece, 2 stitches for the back piece). 2nd round: No increases. 3rd round: like 1st round. 4th round: like 2nd round. Work like this until you have worked a total of 2 to 7 (depending on the size) increase rounds. Now, you increase for the back/front as before but for the sleeve once every 4th round: First round: increase 8 stitches as before. 2nd round: no increases. 3rd round: increase 2 stitches for front piece, 2 stitches for the back piece (= 4 stitches increased). 4th round: No increases. Repeat these 4 rounds 9 times in total. Happy knitting!
16.03.2025 - 23:57
![]() DEBBIE G ha scritto:
DEBBIE G ha scritto:
Follow on to Rania's question. When I calculate the # stitches for the increases from 88 stitches (size SM), I end up with too many st. I'm figuring: R1: Incr F&B raglan (Total 92 st). R2: Incr 0. R3: Incr F&B raglan (96 st.). R4: Incr Sleeve raglan + F&B (104 st) and so on. 18x for F&B and 9 for Sleeves would take me 36 rows with a total of 232 st. This is way off from the pattern. Help!
13.03.2025 - 17:44DROPS Design ha risposto:
Dear Debbie, at the beg you get 17 sts for front & back piece and increase then for raglan a total of 2 sts 2 times then 2 sts 18 times= 57 sts ; for sleeves there are 13 sts + 2 sts 2 times + 2 sts 4 times = 35 sts, so that you have 57 x 2 (front and back pieces) + 35 x2 (sleeves) + 3 sts x 4 (raglan sts) = 196 sts in total. Note that you will increase 18 times 2 times on back /front pieces but at the same time only 9 times on sleeves: R1 increase 8 sts: as before back/front and sleeves, R3: increase sts: back/front only.Happy knitting!
14.03.2025 - 07:25
![]() DEBBIE G ha scritto:
DEBBIE G ha scritto:
Sorry, I hit SEND too fast. To add on to my question. That would mean at the end of the round, since it's 2 stitches of the raglan, I should P1 K1 the last 2 stitches, correct?
12.03.2025 - 01:51DROPS Design ha risposto:
Dear Debbie, see previous answer, the 3 raglan stitches should be all knitted, but should match the (K1, P1, K1) worked on neck before. Happy knitting!
13.03.2025 - 14:12
![]() DEBBIE G ha scritto:
DEBBIE G ha scritto:
I think my question was answered. To be sure: I need to increase AFTER the first stitch in the round and then BEFORE the last 2 stitches at the end of the round. Furthermore, am i to understand that for the 3 raglan stitches I should be doing a K1 P1 K1? If that's the case, it would be easier if the pattern was written that way rather than as a notation.
12.03.2025 - 01:47DROPS Design ha risposto:
Dear Debbie, that's right you will increase for sleeve after the first stitch of the round and increase at the end of back piece before the last 2 stitches. The 3 raglan stitches are knitted but they should match (K1, P1, K1) from rib on neck before. Happy knitting!
13.03.2025 - 14:09
![]() Debbie G ha scritto:
Debbie G ha scritto:
I'm on the Yoke and did the first row of increases. Next the pattern says to increase on both sides of the 3 raglan stitches. In my calculation that would = 6 stitches increased. But the pattern says 8 st increased and I can't figure out where the other 2 stitches come from. Please advise
12.03.2025 - 01:04
![]() Judith ha scritto:
Judith ha scritto:
In der Beschreibung zur Passe ist angegeben dass ich an 3 Stellen 3 Raglanmaschen zu stricken habe. Ist dann denn richtig? Muss nicht ein Pullover 4 Raglanlinien haben, so dass man an 4 Stellen je 3 Raglanmaschen stricken müsste. Ich bin leider noch Anfänger und halte mich daher an die Anleitung. Würde mich über eine Antwort freuen
26.11.2024 - 14:52DROPS Design ha risposto:
Liebe Judith, am Anfang der Runde stricken Sie die 1. Masche von diesen 3 Raglan-Maschen und am Ende der Reihe stricken Sie die 2 letzten von den 3 Raglanmaschen, so beginnen die Runden ca in der Mitte von den Raglanmaschen so sind es insgesamt 4 Mal 3 Raglanmaschen. Viel Spaß beim Stricken!
26.11.2024 - 16:44
![]() Antonella Serio ha scritto:
Antonella Serio ha scritto:
Sorry, war ein Denkfehler von mir. Die Anleitung ist richtig ! FG
03.11.2024 - 00:19
![]() Serio Antonella ha scritto:
Serio Antonella ha scritto:
Hallo, wenn nach den ersten 28 Maschen 1 Markierer angebracht wird, ist der Rundenbeginn bei mir an der linken hinteren Schulter und nicht wie in der Anleitung vermerkt an der rechten hinteren Schulter. Liegt bei mir ein Denkfehler vor oder muss die Anleitung korrigiert werden? Vielen lieben Dank für eine hoffentlich schnelle Antwort. Herzlichst, Antonella Serio
02.11.2024 - 18:49
|
|
Nimbus Haze#nimbushazesweater |
|
 |
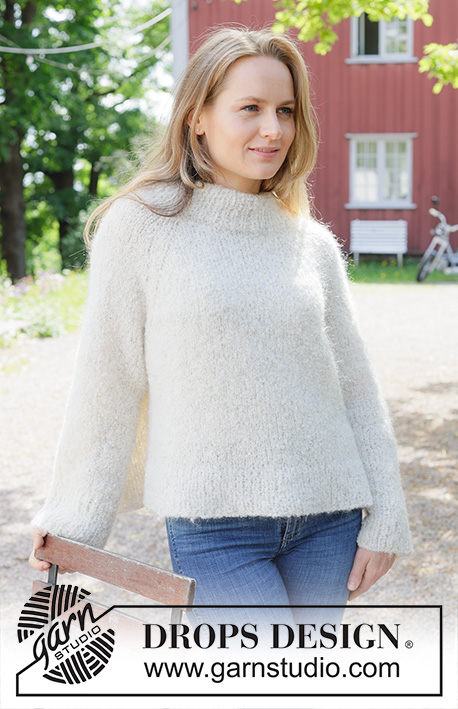 |
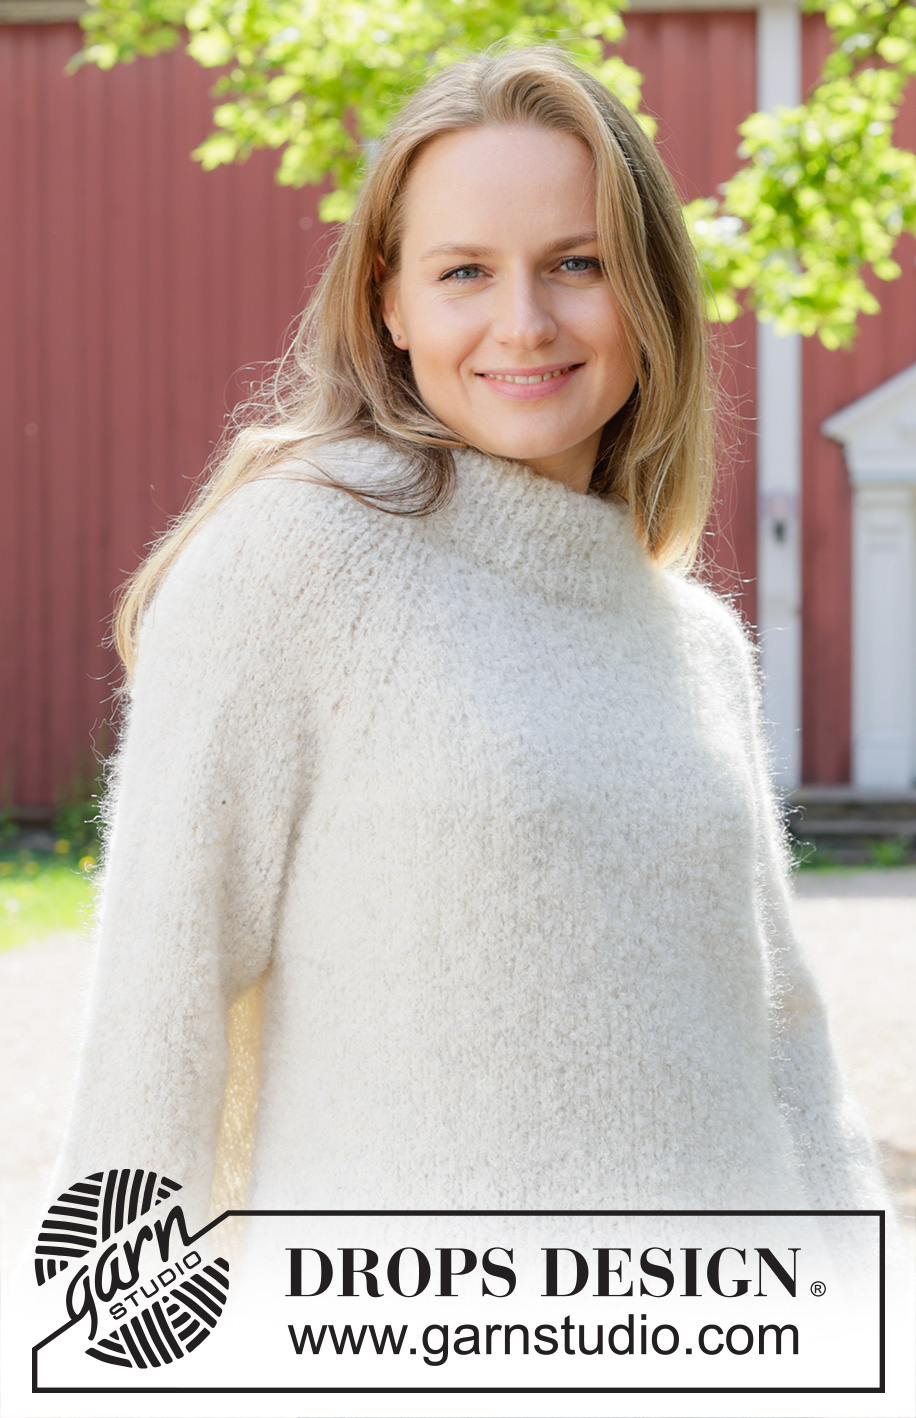
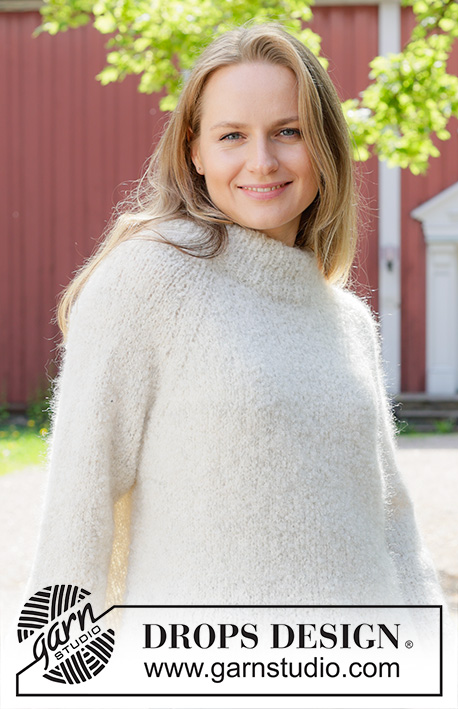
Maglione lavorato ai ferri DROPS Alpaca Bouclè e DROPS Kid-Silk. Lavorato dall’alto in basso con raglan, e spacchi laterali. Taglie: S - XXXL.
DROPS 252-33 |
|
|
------------------------------------------------------- TECNICHE IMPIEGATE: ------------------------------------------------------- COSTA/MAGLIA LEGACCIO (avanti e indietro): Lavorare tutti i ferri a diritto, cioè lavorare a diritto dal diritto del lavoro e a diritto dal rovescio del lavoro. 1 costa in altezza = 2 ferri diritto. RAGLAN: Aumentare 1 maglia facendo 1 gettato, sul giro successivo lavorare il gettato a diritto ritorto per evitare buchi. Poi lavorare le nuove maglie a maglia rasata. SUGGERIMENTO PER LE DIMINUZIONI (applicato al centro sotto la manica): Diminuire 1 maglia a ogni lato del segnapunti come segue: Lavorare fino a quando rimangono 3 maglie prima del segnapunti, lavorare 2 maglie insieme a diritto, 2 maglie diritto (il segnapunti è tra queste 2 maglie), passare 1 maglia a diritto senza lavorarla, 1 maglia diritto, accavallare la maglia passata sopra quella appena lavorata. ------------------------------------------------------- INIZIO DEL LAVORO: ------------------------------------------------------- MAGLIONE – BREVE RIASSUNTO DEL LAVORO: Il modello prevede sia l’uso di ferri circolari corti sia l’uso di ferri circolari lunghi; iniziare con la lunghezza che si adatta al numero di maglie e cambiare quando necessario. Lavorare il bordo del collo e lo sprone in tondo, con i ferri circolari, dal dietro della spalla destro e dall’alto in basso. Alla fine dello sprone, dividere il lavoro per il corpo e le maniche. Lavorare il corpo dall’alto in basso, in tondo, con i ferri circolari, con le maniche in sospeso. Poi lavorare le maniche in tondo, dall’alto in basso. Piegare il bordo del collo verso il rovescio del lavoro e affrancare. BORDO DEL COLLO: Avviare 72-76-80-80-88-92 maglie con i ferri circolari n° 7 mm con DROPS Alpaca Bouclè e DROPS Kid-Silk (= 2 capi). Passare ai ferri circolari n° 5 mm (l’avvio con un ferro più grande permette di ottenere un bordo di avvio elastico). Lavorare a coste in tondo (= 1 maglia diritto/1 maglia rovescio) per 14 cm. Piegare in seguito il bordo del collo verso il rovescio del lavoro e affrancare per formare un bordo con un’altezza di circa 7 cm. L’inizio del giro è sul dietro della spalla destro. Inserire 1 segnapunti dopo le prime 26-27-28-28-30-31 maglie sul giro (= circa centro davanti), misurare il lavoro da questo segnapunti. SPRONE: Passare ai ferri circolari n° 7 mm e lavorare in questo modo, lavorare tutte le maglie a maglia rasata: lavorare 1 maglia, aumentare 1 maglia per il RAGLAN – leggere la spiegazione sopra, lavorare 13 maglie a diritto (=manica), aumentare 1 maglia per il raglan, lavorare 3 maglie (= maglie del raglan), aumentare 1 maglia per il raglan, lavorare 17-19-21-21-25-27 maglie (= davanti), aumentare 1 maglia per il raglan, lavorare 3 maglie (= maglie del raglan), aumentare 1 maglia per il raglan, lavorare 13 maglie (= manica), aumentare 1 maglia per il raglan, lavorare 3 maglie (= maglie del raglan), aumentare 1 maglia per il raglan, lavorare 17-19-21-21-25-27 maglie (= dietro), aumentare 1 maglia per il raglan, lavorare 2 maglie. NOTA! Lavorare le 3 maglie in ogni linea del raglan con 1 maglia diritto, 1 maglia rovescio, 1 maglia diritto dalle coste. Lavorare a maglia rasata e in tondo e ALLO STESSO TEMPO aumentare per il raglan a ogni lato delle 3 maglie del raglan a giri alterni 2-3-6-6-7-7volte in totale = 88-100-128-128-144-148 maglie (= 8 aumenti su ogni giro di aumenti). Ricordarsi di mantenere la tensione del lavoro! Poi continuare ad aumentare come segue: Aumentare per il raglan a giri alterni sui davanti e dietro, ma sulle maniche aumentare solo ogni 4 giri (= in modo alternato 4 e 8 aumenti), ripetere questi aumenti 18-18-16-18-18-18 volte in totale sul davanti e dietro e 9-9-8-9-9-9 volte sulle maniche. Dopo l’ultimo aumento ci sono 196-208-224-236-252-256 maglie sul ferro. Lavorare fino a quando il lavoro misura circa 25-26-28-30-31-32 cm dal segnapunti al centro davanti. Ora dividere il lavoro per il corpo e le maniche. DIVISIONE PER IL CORPO E LE MANICHE: ALLO STESSO TEMPO, sul giro successivo dividere lo sprone per il corpo e le maniche come segue: mettere in sospeso le prime 37-39-43-45-47-47 maglie per la manica, avviare 6-6-8-10-12-16 maglie (a lato al centro sotto la manica), lavorare 61-65-69-73-79-81 maglie a maglia rasata (= davanti), mettere in sospeso le 37-39-43-45-47-47 maglie successive per la manica, avviare 6-6-8-10-12-16 maglie (= a lato al centro sotto la manica), lavorare a maglia rasata le ultime 61-65-69-73-79-81 maglie (= davanti). Finire il corpo e le maniche in modo separato. CORPO: = 134-142-154-166-182-194 maglie. Inserire 1 segnapunti a ogni lato del corpo, al centro delle 6-6-8-10-12-16 maglie avviate sotto ogni manica e spostare i segnapunti durante il lavoro, usare i segnapunti durante la divisione per gli spacchi a ogni lato. Lavorare in tondo a maglia rasata fino a quando il lavoro misura 39-41-43-44-46-48 cm dal segnapunti al centro davanti. Ora dividere il lavoro per lo spacco a ogni lato del corpo, dividerlo all’altezza dei segnapunti mettendo in sospeso le maglie del dietro e lavorare le maglie del davanti in piano come spiegato sotto. DAVANTI: = 67-71-77-83-91-97 maglie. Sul ferro successivo (= diritto del lavoro) iniziare le coste e ALLO STESSO TEMPO aumentare 16-18-18-20-22-24 maglie in modo uniforme sul ferro = 83-89-95-103-113-121 maglie, lavorare come segue: Passare ai ferri circolari n° 5 mm, lavorare 2 maglie a MAGLIA LEGACCIO – leggere la spiegazione sopra, lavorare a coste (= 1 maglia diritto/1 maglia rovescio – ricordarsi degli aumenti) fino a quando rimangono 3 maglie, 1 maglia diritto e 2 maglie a maglia legaccio. Quando le coste misurano 8-8-8-9-9-9 cm intrecciare. Il maglione misura 47-49-51-53-55-57 cm dal segnapunti al centro davanti e circa 52-54-56-58-60-62 cm dalla cima della spalla. DIETRO: Lavorare come per il davanti. MANICHE: Riportare le 37-39-43-45-47-47 maglie delle maniche in sospeso a un lato del lavoro sui ferri circolari n° 7 mm e inoltre riprendere 1 maglia in ognuna delle 6-6-8-10-12-16 maglie avviate sotto la manica = 43-45-51-55-59-63 maglie. Inserire un segnapunti al centro delle 6-6-8-10-12-16 maglie sotto la manica – il giro inizia all’altezza del segnapunti. Lavorare a maglia rasata in tondo – ALLO STESSO TEMPO quando la manica misura 3 cm dalla divisione, diminuire al centro sotto la manica – leggere il SUGGERIMENTO PER LE DIMINUZIONI e diminuire come segue: diminuire 2 maglie ogni 14-9-5½-4½-3-2½ cm per un totale di 3-4-6-7-9-10 volte = 37-37-39-41-41-43 maglie. Lavorare fino a quando la manica misura 36-35-33-32-31-30 cm dalla divisione. Passare ai ferri a doppia punta n° 5 mm e lavorare a coste (= 1 maglia diritto/1 maglia rovescio), ALLO STESSO TEMPO aumentare 7-7-7-9-9-9 maglie in modo uniforme sul 1° giro = 44-44-46-50-50-52 maglie. Quando le coste misurano 6 cm, intrecciare. La manica misura circa 42-41-39-38-37-36 cm dalla divisione. CONFEZIONE: Piegare le coste in cima al collo verso l’interno del capo. Affrancare le coste per ottenere un bordo del collo doppio. Per evitare che il bordo del collo risulti tirato e spunti verso l’esterno, è importante mantenere la cucitura elastica. |
|
 |
|
Avete terminato questo modello?Allora taggate le vostre foto con #dropspattern #nimbushazesweater o inviatele alla #dropsfan gallery. Avete bisogno di aiuto con questo modello?Troverete 32 video tutorial, una sezione per i commenti/domande e molto altro guardando il modello su www.garnstudio.com © 1982-2026 DROPS Design A/S. Ci riserviamo tutti i diritti. Questo documento, compreso tutte le sue sotto-sezioni, è protetto dalle leggi sul copyright. Potete leggere quello che potete fare con i nostri modelli alla fine di ogni modello sul nostro sito. |
|


Con oltre 40 anni di esperienza nel design di modelli di maglia e uncinetto, DROPS Design offre la più estesa collezione di modelli gratuiti su internet - tradotti in 17 lingue. Ad oggi vi possiamo fornire 324 cataloghi e 12290 modelli - 9561 dei quali sono tradotti in Italiano.
Ci stiamo impegnando molto per darvi il meglio che vi possiamo offrire in termini di maglia e uncinetto, ispirazioni e consigli così come filati di grande qualità ad un prezzo incredibile! Volete utilizzare i nostri modelli per qualcosa d'altro oltre al vostro uso personale? Potete leggere tutto ciò che è consentito nel testo sul Copyright in basso su tutte le pagine dei nostri modelli. Buon lavoro!
Lasciare un commento sul modello DROPS 252-33
Noi saremmo felici di ricevere i tuoi commenti e opinioni su questo modello!
Se vuoi fare una domanda, fai per favore attenzione a selezionare la categoria corretta nella casella qui sotto per velocizzare il processo di risposta. I campi richiesti sono indicati da *.