
Popular categories
Looking for a yarn?


Comments / Questions (53)
![]() Hege Linvåg Aas wrote:
Hege Linvåg Aas wrote:
Hei Jeg har gjort siste økning på diagram A3, gjorde dette på en omgang med rettstrikk (166m), men når jeg nå skal fortsette på mønstret og ta bort merketrådene, går ikke mønstret opp på bakstykket, det blir forskjøvet. Hva er det jeg har missforstått, siden det blir feil.
27.01.2013 - 23:52DROPS Design answered:
Du skal sørge for at du strikker maskene på samme måde som du gjorde tidligere. Så forskyder du ikke maskene
01.05.2013 - 17:12
![]() BEAUCHOUX SYLVIE wrote:
BEAUCHOUX SYLVIE wrote:
Je suis entrain de tricoter ce modele et je n'arrive pas à comprendre l-explication suivante dos et devant lorsque l'on met les 2 marqueurs faut il tricoter en point fantaisie A3 entre les 2 marqueurs donc sur 76 mailles (pour moi)ou sur les autres mailles et en jersey sur 76 mailles. merci pour votre réponse
26.01.2013 - 07:17DROPS Design answered:
Bonjour Madame Beauchoux, vous allez placer vos marqueurs et tricoter ainsi (taille M): tric. la 1ère m du tour à l'end et placer un marqueur sur cette m, tricotez 76 m en point fantaisie A3, 1 m end = 78ème du tour = 2ème marqueur, 76 m en point fantaisie A3. Bon tricot !
26.01.2013 - 10:18
![]() Gudrun Röhricht wrote:
Gudrun Röhricht wrote:
Das Erscheinungsbild des Lochmusters A1 in Runden gestrickt sieht gar nicht gut aus.Man sieht lang gespannte Fäden, aber gar keine richtigen Löcher. Dabei habe ich den Umschlag nicht zu locker gemacht. Was muss ich tun, damit das Musterbild besser wird?
02.01.2013 - 09:42DROPS Design answered:
Liebe Gudrun, das ist aus der Ferne sehr schwer zu beurteilen. Haben Sie mit dem Originalmaterial gearbeitet? Dann sollte sich nach unserer Anleitung das fotografierte Strickbild ergeben.
02.01.2013 - 14:25
![]() Camilla wrote:
Camilla wrote:
Jeg er kommet igang med den :-) Har strikket dia A1. Glæder mig til den er færdig.
05.09.2012 - 08:57
![]() Katharina Klusmann wrote:
Katharina Klusmann wrote:
Oh, entschuldigung. Unerfahrenheit mit dem Internet auf dem Handy!
25.08.2012 - 18:37
![]() Katharina Klusmann wrote:
Katharina Klusmann wrote:
Hallo, bei den Diagrammen ist von Hin -/ und Rückreihen die Rede. Wenn man in Runden strickt, sind das aber eigentlich ja nur Hinreihen. Bei A1 z.B. soll man dort leere Kästchen rechts stricken und die Sterne immer links, oder hat es was zu bedeuten mit der Beschriftung in der Legende? Vielen Dank
25.08.2012 - 18:36DROPS Design answered:
Danke für den Hinweis, da hatte sich in der Legende ein dummer Fehler eingeschlichen: die Sterne werden li in der Hin-R (bzw. in der Runde) gestrickt. Und ja, bei diesem Modell gibt es eingentlich (bis auf die verkürzten R im Rippenmuster) keine Rückreihen.
28.08.2012 - 17:01
![]() Katharina Klusmann wrote:
Katharina Klusmann wrote:
Hallo, bei den Diagrammen ist von Hin -/ und Rückreihen die Rede. Wenn man in Runden strickt, sind das aber eigentlich ja nur Hinreihen. Bei A1 z.B. soll man dort leere Kästchen rechts stricken und die Sterne immer links, oder hat es was zu bedeuten mit der Beschriftung in der Legende? Vielen Dank
25.08.2012 - 18:35Ran wrote:
So pretty
06.08.2012 - 21:23
![]() CorinneD wrote:
CorinneD wrote:
J'adore ! vivement les explications !
19.07.2012 - 15:51
![]() Maria wrote:
Maria wrote:
Rigtig flot :))) vil meget gerne lave denne..
05.07.2012 - 14:31
|
||||||||||||||||
Cleo#cleosweater |
||||||||||||||||
|
|
||||||||||||||||
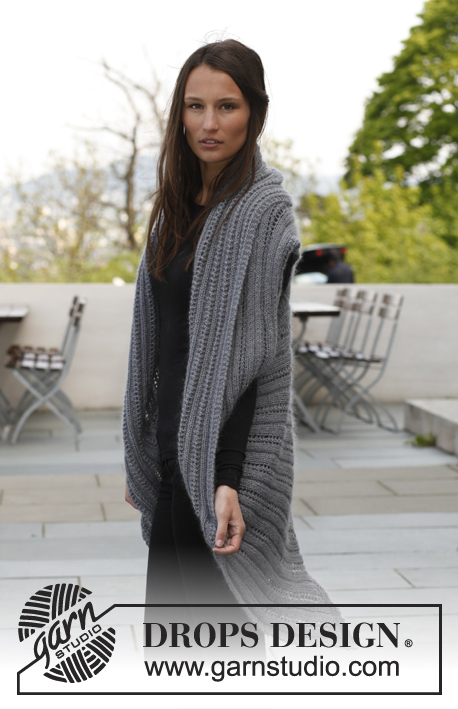
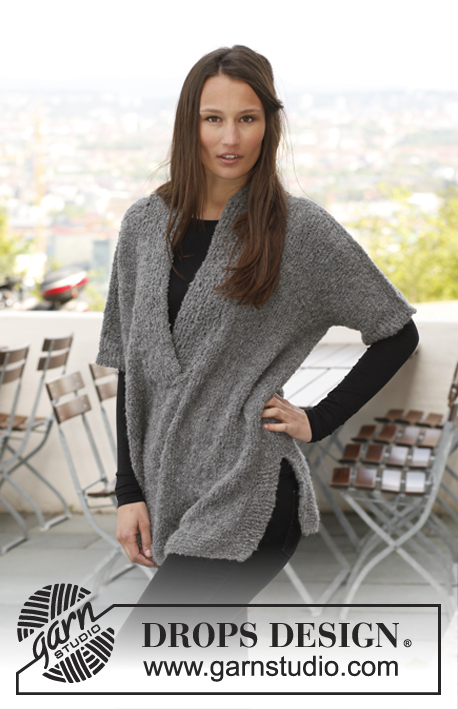
Knitted DROPS jumper with round yoke and lace pattern in ”BabyAlpaca Silk”. Size: S - XXXL.
DROPS 141-18 |
||||||||||||||||
|
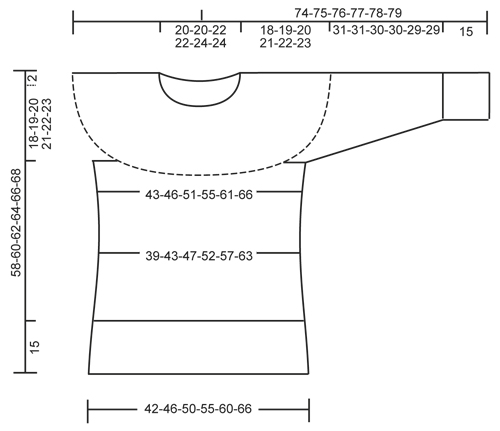
PATTERN: See diagrams A.1 to A.3. Diagrams show all rows seen from RS. KNITTING TIP: Because of the different lace patterns on this jumper combined with stocking st, the knitting tension in every border vary. Make sure to keep the knitting tension in every border. ---------------------------------------------------------- BODY: READ KNITTING TIP! Cast on 258-288-312-342-372-408 sts on circular needle size 3 mm with BabyAlpaca Silk. K 1 round. Then work rib (= K 2/P 4). When rib measures 5 cm, work pattern according to diagram A.1 (make sure that K sts in pattern fits over K sts in rib). When piece measures 15 cm, K 1 round while AT THE SAME TIME dec 56-68-72-78-84-92 sts evenly = 202-220-240-264-288-316 sts. Work diagram A.2. After A.2 work in stocking st. When piece measures 21 cm, K 1 round while AT THE SAME TIME dec 14 sts evenly = 188-206-226-250-274-302 sts. Work diagram A.2 again while AT THE SAME TIME dec 46-52-56-64-68-76 sts evenly on the last round = 142-154-170-186-206-226 sts. Insert 2 markers in the piece as follows; insert 1 marker in 1st st on round and 1 marker in the 72nd-78th-86th-94th-104th-114th st on round (= 70-76-84-92-102-112 sts between the 2 sts with markers). Work pattern according to diagram A.3 but K sts with markers. When piece measures 24 cm, inc 1 st on each side of sts with markers – K the inc sts until they fit the pattern, K the sts that do not fit the pattern + sts with markers on every round. Repeat inc every 4-4-4-5-5-5 cm 2 more times = 154-166-182-198-218-238 sts (remove the markers in the sides). When piece measures 33-34-34-35-35-36 cm - adjust after 1 round with holes, K 1 round while AT THE SAME TIME inc 52-54-62-66-74-78 sts evenly = 206-220-244-264-292-316 sts. Work diagram A.2 while AT THE SAME TIME inc 58-68-74-78-86-92 sts evenly on the last round = 264-288-318-342-378-408 sts – insert 1 new marker in each side (= 132-144-159-171-189-204 sts on front and back piece). Now work pattern according to diagram A.1. When piece measures 38-39-40-41-42-43 cm, cast off 12 sts in each side (i.e. 6 sts on each side both of markers) = 120-132-147-159-177-192 sts remain on front and back piece. Put piece aside and work the sleeves. SLEEVE: Cast on 66-72-72-72-78-78 sts on double pointed needles size 3 mm with BabyAlpaca Silk. K 1 round. Then work rib (= K 2/P 4). When rib measures 5 cm, work pattern according to diagram A.1 (make sure that K sts in pattern fits over K sts in rib). When piece measures 15 cm, K 1 round while AT THE SAME TIME dec 10-14-12-10-16-14 sts evenly = 56-58-60-62-62-64 sts. Insert 1 marker in 1st st on round. READ ALL OF THE FOLLOWING SECTION ON SLEEVE BEFORE CONTINUING! PATTERN: Now work diagram A.2. After A.2 work in stocking st. When piece measures 21 cm, work diagram A.2 again while AT THE SAME TIME dec 14 sts evenly on last round. Work pattern according to diagram A.3. When piece measures 41-41-39-39-37-37 cm, K 1 round while AT THE SAME TIME inc 14-14-14-18-18-18 sts evenly. Work diagram A.2 while AT THE SAME TIME on last round inc 18-18-18-22-22-22 sts evenly. Then work pattern according to diagram A.1 – make sure that 2 K sts are mid on top of sleeve and then count outwards to the side where the pattern should beg. INC MID UNDER SLEEVE: AT THE SAME TIME when piece measures 16-19-16-15-19-17 cm, inc 1 st on each side of st with marker mid under sleeve (= 2 sts inc) – work the inc sts in pattern but K the sts when they do not fit the pattern until they do. Repeat inc every 2-1½-1½-1½-1-1 cm, 13-15-17-18-21-23 more times (= 28-32-36-38-44-48 sts inc). When piece measures 46-46-45-45-44-44 cm (shorter measurements in the larger sizes because of longer sleeve cap and broader shoulder width), A.1 at the top of sleeve measures approx. the same as A.1 at the top of body = 5-5-6-6-7-7 cm. All dec and inc are now done and there are 102-108-114-126-132-138 sts on needle. Now cast off 12 sts mid under sleeve = 90-96-102-114-120-126 sts remain on sleeve. Put piece aside and knit another sleeve. YOKE: Slip sleeves on to same circular needle as body where armholes were cast off = 420-456-498-546-594-636 sts. K 1 round while AT THE SAME TIME dec 96-104-114-124-136-144 sts evenly (K approx. every 3rd and 4th st tog) = 324-352-384-422-458-492 sts. Insert 1 marker – NOW MEASURE PIECE FROM HERE. Work diagram A.2. After A.2 continue in stocking st. When piece measures 5-5-5-6-6-6 cm from marker, K 1 round while AT THE SAME TIME dec 52-64-76-88-100-110 sts evenly = 272-288-308-334-358-382 sts. Work A.2 while AT THE SAME TIME dec 62-72-82-90-98-106 sts evenly on the last round = 210-216-226-244-260-276 sts. Work pattern according to diagram A.3. When piece measures 12-13-14-15-16-17 cm from marker - adjust after one round with holes, K 1 round while AT THE SAME TIME dec 42-46-50-56-62-68 sts evenly = 168-170-176-188-198-208 sts. Work diagram A.2 while AT THE SAME TIME inc 48-46-46-34-30-20 sts evenly on the last round = 216-216-222-222-228-228 sts. Now work pattern according to diagram A.1. When piece measures 16-17-18-19-20-21 cm, work rib (= K 2/P 4) - adjust so that K sts in rib are over K sts in pattern. After 1 cm rib, dec 4 P sts to 3 P sts (P the first 2 sts tog) = 180-180-185-185-190-190 sts. Insert 1 marker mid front. Cut the thread and beg round mid back. Now work an elevation in back of neck as follows (continue in rib): Work until 18 sts remain before marker at the front, turn piece, tighten thread and work until 18 sts remain before marker in the other side. Turn, tighten thread and work until 30-30-30-30-36-36 sts remain before marker mid front, turn, tighten thread and work until 30-30-30-30-36-36 sts remain before marker in the other side. Continue back and forth like this by turning 12-12-12-12-18-18 sts earlier every time in each side until a total of 8 rows with elevation have been worked. Turn and work until mid back. Then continue rib in the round over all sts while AT THE SAME TIME dec all 3 P sts to 2 P sts on 1st round = 144-144-148-148-152-152 sts. After 1 more cm, dec all 2 K sts to 1 K st = 108-108-111-111-114-114 sts. When piece measures 18-19-20-21-22-23 cm from marker, measured mid front (piece measures approx. 58-60-62-64-66-68 cm from bottom edge and up), loosely cast off with K over K and P over P. ASSEMBLY: Sew the openings under the sleeves. |
||||||||||||||||
Diagram explanations |
||||||||||||||||
|
||||||||||||||||
 |
||||||||||||||||
 |
||||||||||||||||
Have you finished this pattern?Tag your pictures with #dropspattern #cleosweater or submit them to the #dropsfan gallery. Do you need help with this pattern?You'll find 9 tutorial videos, a Comments/Questions area and more by visiting the pattern on garnstudio.com. © 1982-2026 DROPS Design A/S. We reserve all rights. This document, including all its sub-sections, has copyrights. Read more about what you can do with our patterns at the bottom of each pattern on our site. |
||||||||||||||||


With over 40 years in knitting and crochet design, DROPS Design offers one of the most extensive collections of free patterns on the internet - translated to 17 languages. As of today we count 324 catalogues and 12245 patterns translated into English (UK/cm). 12245
We work hard to bring you the best knitting and crochet have to offer, inspiration and advice as well as great quality yarns at incredible prices! Would you like to use our patterns for other than personal use? You can read what you are allowed to do in the Copyright text at the bottom of all our patterns. Happy crafting!
Post a comment to pattern DROPS 141-18
We would love to hear what you have to say about this pattern!
If you want to leave a question, please make sure you select the correct category in the form below, to speed up the answering process. Required fields are marked *.