
Popular categories
Looking for a yarn?


Comments / Questions (208)
![]() Nathalie wrote:
Nathalie wrote:
Suite de ma question : vous indiquez "à chaque fois que l'on a tricoté A2 et A4 en hauteur on a assez de mailles pour 2 A3 de plus en largeur " mais cela fait 20 mailles, et A3 n'en fait que 24 ou 21 ? Et où ajouter ces deux nouveaux motifs de A3 ? Je vous avoue que ce pull est le plus compliqué de tous ceux que j'ai déjà tenté et réussi avec les explications habituelles, là je ne trouve rien de bien clair ! Merci.
16.04.2025 - 16:34DROPS Design answered:
Bonjour Nathalie, lorsque vous avez terminé les diagrammes, vous avez augmenté 8 mailles dans chaque A.2 et 8 mailles dans chaque A.4. Au rang suivant, tricotez ainsi: A.2 (= 2 m), puis A.3 sur les 8 m suivantes (les 8 dernières mailles du A.2 précédent), tricotez A.3 come avant jusqu'à ce qu'il reste 2 m et terminez par A.4 (vous avez tricoté A.3 sur les 8 premières mailles du A.4 précédent) = vous avez maintenant 2 fois A.3 en plus en largeur par rapport à la 1ère fois que vous avez tricoté les diagrammes. Bon tricot!
22.04.2025 - 10:23
![]() Nathalie wrote:
Nathalie wrote:
Bonjour, J'ai lu et relu les précédentes questions et malgré tout je fais et défais depuis plusieurs fois... Je fais une taille M, et après le premier rang de l'empiècement pouvez-vous me dire s'il faut toujours répéter seulement les 3 premières de A3 comme indiqué après A3 entier, en sachant que ces points ne figurent pas dans les diagrammes ? Merci de votre aide !
16.04.2025 - 16:30DROPS Design answered:
Bonjour Nathalie, après le 1er rang, il ne reste que 2 mailles au début de chaque A.3 (le nombre de mailles de cette partie varie de 3 à 2 en fonction des rangs); au 3ème rang, vous ferez 1 jeté entre ces 2 mailles endroit, puis au 5ème rang, vous reprenez le motif en diminuant 1 maille. Vous formez ainsi une sorte de petite torsade - comme dans cette vidéo. Bon tricot!
22.04.2025 - 10:21
![]() Rhea wrote:
Rhea wrote:
Is there or will there be a cardigan version of this pattern?
11.04.2025 - 06:04DROPS Design answered:
Dear Rhea, there is currently only the sweater version of this pattern. Happy knitting!
11.04.2025 - 09:24
![]() Inge wrote:
Inge wrote:
Dat begrijp ik maar dan klopt het nog niet Ik heb 2 plaatsen, bij de hersenen van 13 steken waar ik 3 averecht moet breien ipv 2
09.04.2025 - 18:52DROPS Design answered:
Dag Inge,
Als het goed is, is het aantal steken dat je na de scheiding op de naald hebt staan deelbaar door de steken in het telpatroon. Als je op die twee plekken (waarschijnlijk onder oksel) te veel steken hebt, dan zou ik die 2 steken samen breien zodat het weer uitkomt met het patroon.
13.04.2025 - 13:55
![]() Inge wrote:
Inge wrote:
Ik brei maat M. Zojuist de verdeling tussen lijf en mouwen gemaakt en 2x 13 steken er tussen op gezet. Ga verder met patroon in het rond zegt het patroon. Maar ik zit nu in de knoop met de raglan. Door de raglan zijn er links en rechts 3 averechtse steken en krijg ik het patroon niet kloppend. Wat doe ik verkeerd?
06.04.2025 - 19:28DROPS Design answered:
Dag Inge,
Je negeert nu de steken van de raglan en je zet alleen patroon A.3 voort op het lijf.
09.04.2025 - 10:42
![]() Karina wrote:
Karina wrote:
Hej Garnstudio Jeg har strikket denne bluse to gange. Første gang med Nord og Kid Silk og anden gang med Baby Merino og Kid Silk. Begge trøjer passede fint inden vask og blokning, men anden trøje - den, der er strikket i Baby Merino og Kid Silk, er vokset meget, så den er alt for stor. Er der noget jeg kan gøre for at få trøjen ind i den størrelse, som den havde inden den blev vasket? Mvh. Karina
30.03.2025 - 20:28DROPS Design answered:
Hei Karina. Baby Merino skal vaskes "hardt" i forhold til Kid-Silk. Pass på når den vaskes at den ikke strekkes når man tar det opp fra vannet for å presse ut vannet. Prøv å vask den en gang til, press ut vannet og legg den til tørk i form. mvh DROPS Design
31.03.2025 - 19:14
![]() Liv wrote:
Liv wrote:
Beim Passe stricken habe ich durch die Umschläge und Raglan Zunahmen wie angegeben insgesamt 16 Maschen zugenommen. Allerdings hebt man durch die ersten drei Maschen aus A3 ja auch insgesamt 18 Maschen ab. Dann komme ich nur auf 142 Maschen nach der Passe. Ist das richtig? Die Anleitung sagt ja 160 Maschen…
30.03.2025 - 19:50DROPS Design answered:
Liebe Liv, die Maschenanzahl in A.3 wird stets mit 8 Maschen berechnet, auch wenn es nur 7 Maschen wegen Muster sind. Viel Spaß beim Stricken!
31.03.2025 - 09:17
![]() Anne wrote:
Anne wrote:
Hei, tehdäänkö kaarrokkeen ensimmäisen kerroksen raglanlinjan silmukoiden poiminnat allaolevasta kerroksesta vain ensimmäisellä kerroksella? Ja sen jälkeen lisäykset vain ruutupiirrosten mukaan?
27.03.2025 - 12:59DROPS Design answered:
Kyllä, ensimmäisen lisäyskerroksen jälkeen raglanlisäykset tehdään piirrosten mukaan, eli lisäykset tehdään langankierroin.
27.03.2025 - 18:54
![]() Thea wrote:
Thea wrote:
Hei! Jeg sliter litt med å forstå dette: "plukk opp 1 maske fra omgangen under". Er det en video som viser hvordan man gjør dette? Skal man hekte opp en maske mellom to masker og strikke den for å lage en ny maske liksom?
20.03.2025 - 11:02DROPS Design answered:
Hei Thea, Du plukker opp tråden mellom 2 masker på venstre pinnen og strikker den vridd vrang, slik at du ikke får et hull. God fornøyelse!
21.03.2025 - 07:55
![]() Ingibjörg wrote:
Ingibjörg wrote:
Ég er með stærð S og er búin að fara nákvæmlega eftir uppskriftinni, en fæ hana ekki til að ganga upp. Búin að rekja upp 3x
18.03.2025 - 21:58DROPS Design answered:
Blessuð Ingibjörg. Það eru fitjaðar upp í stærð S 108 lykkjur og aukið er út í stroff alls 36 lykkjur = 144 lykkjur. Síðan eru lykkjur teknar upp hvoru megin við laskalykkjur = 8 lykkjur (144 + 8 = 152 lykkjur). Aukið er út í A.2 alls 4 lykkjur (152 + 4 = 156 lykkjur) og aukið er út í A.4 alls 4 lykkjur (156 + 4 = 160 lykkjur). Vona að þetta hjálpi. Gangi þér vel.
20.03.2025 - 09:40
|
|||||||||||||||||||
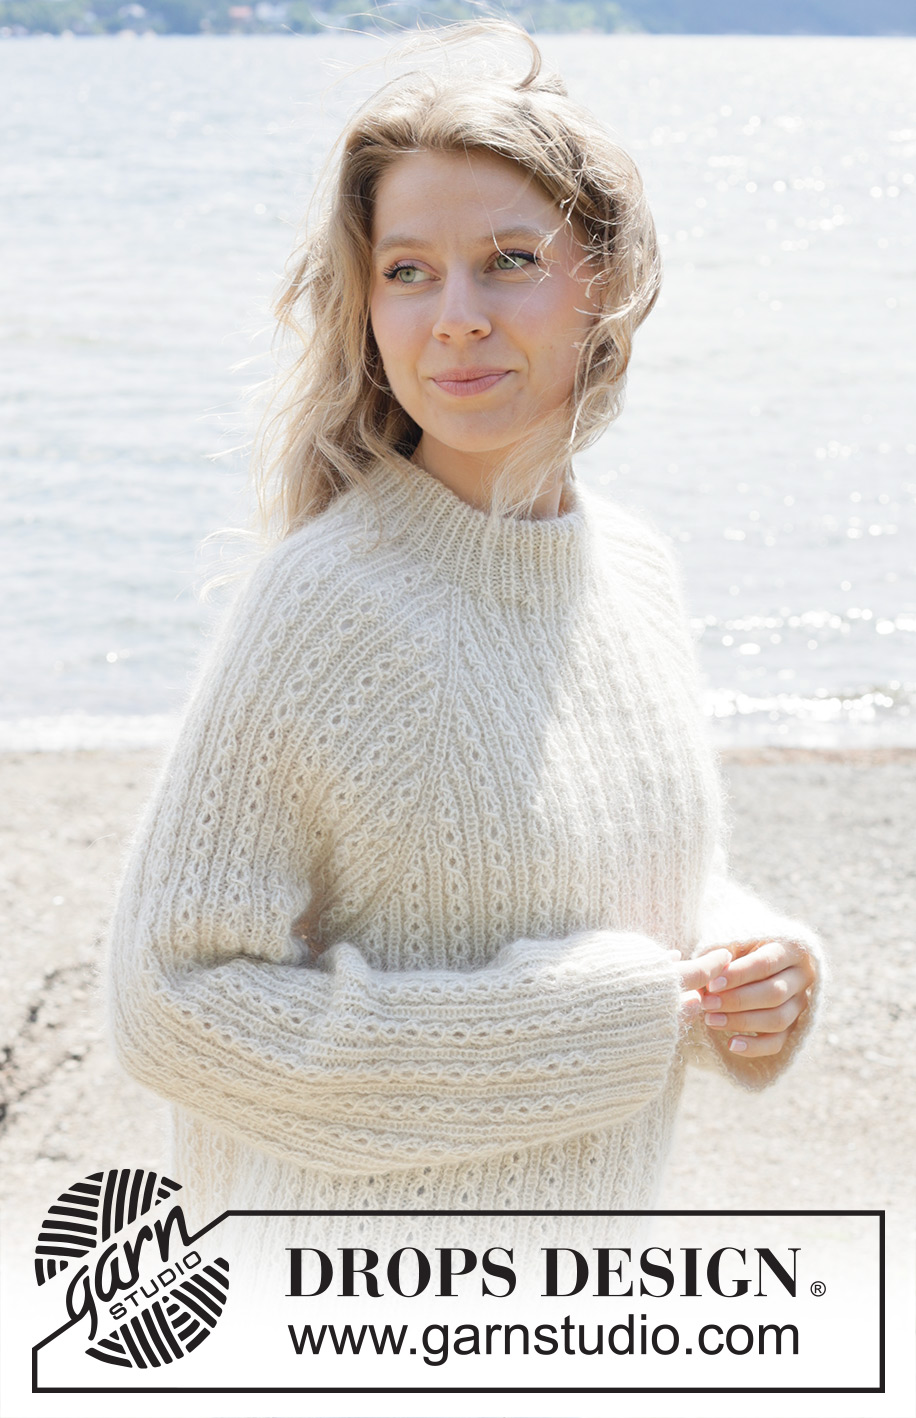
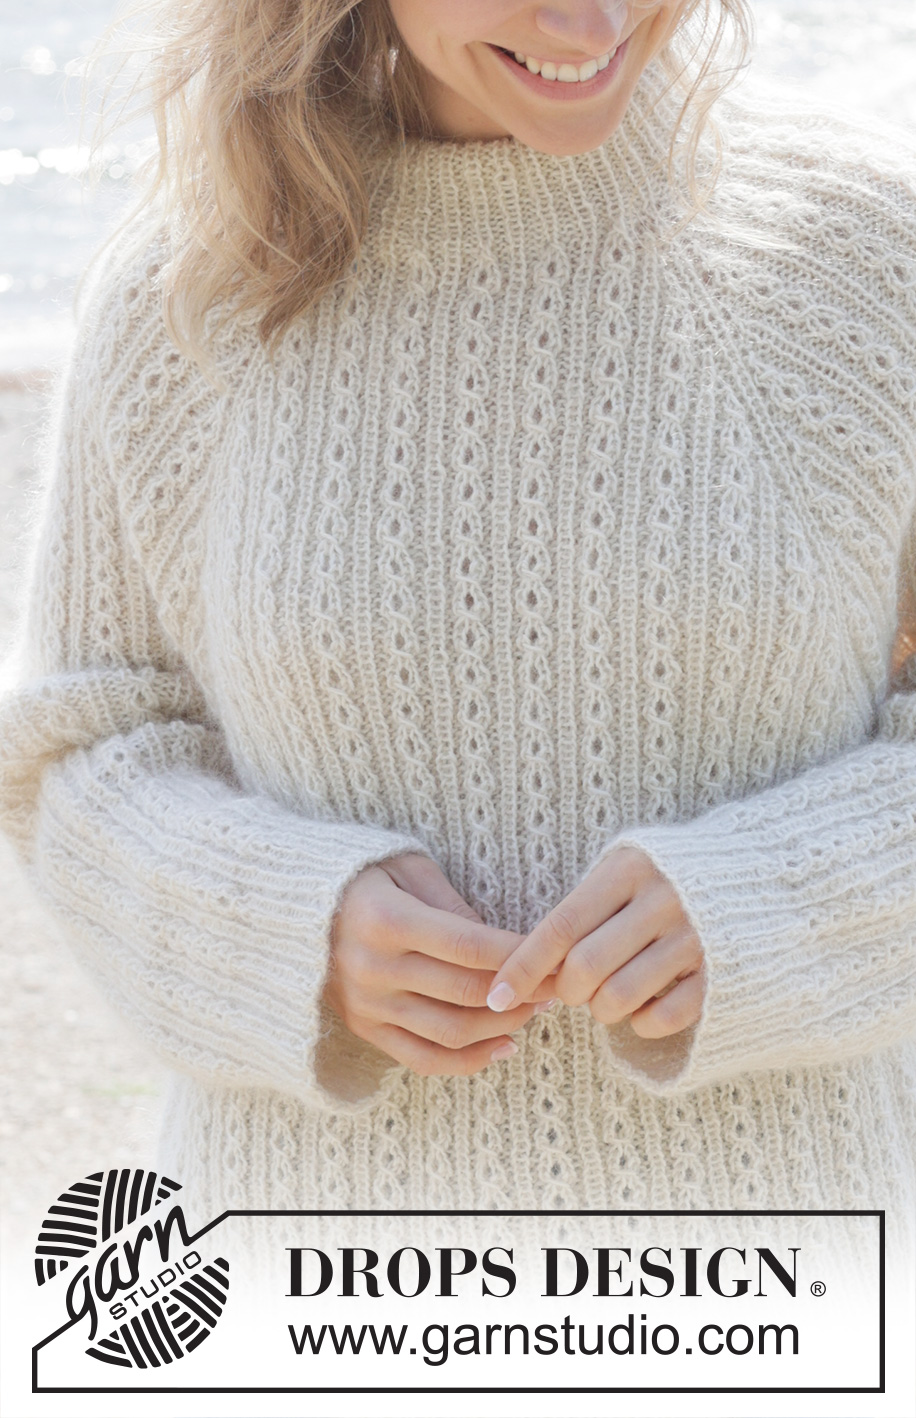
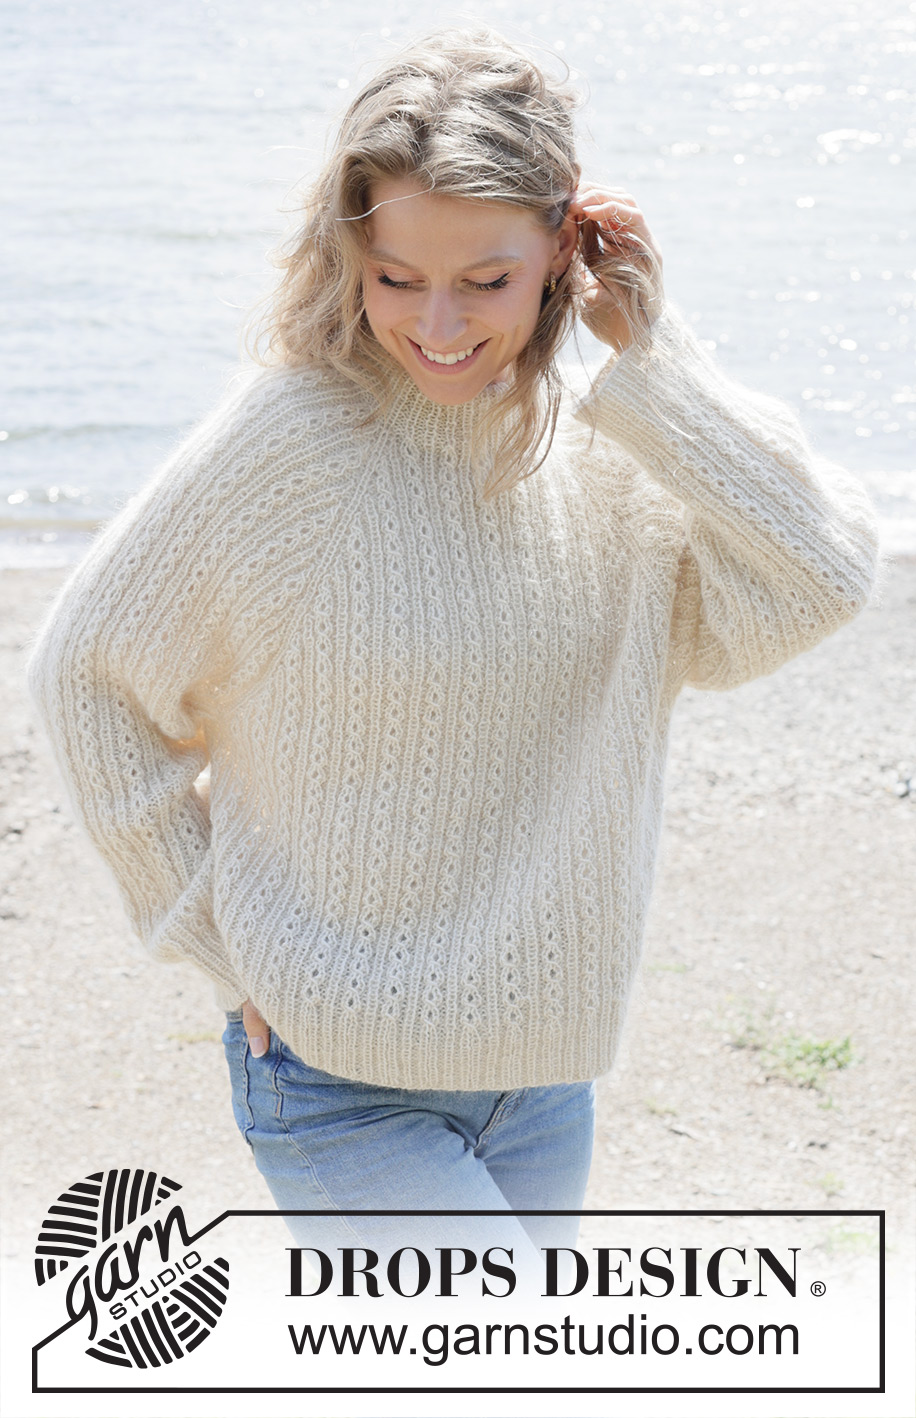
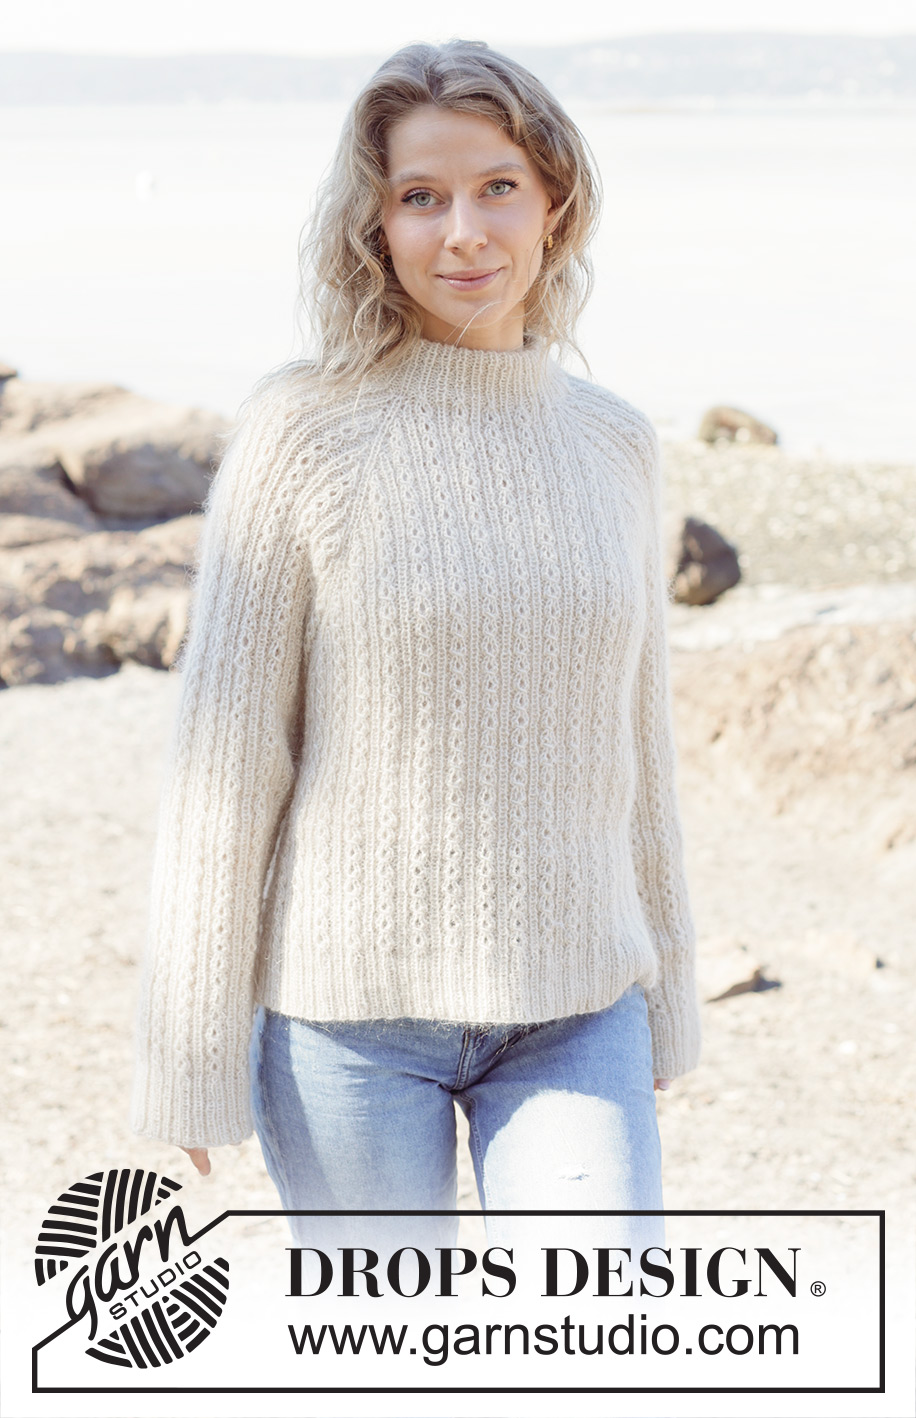
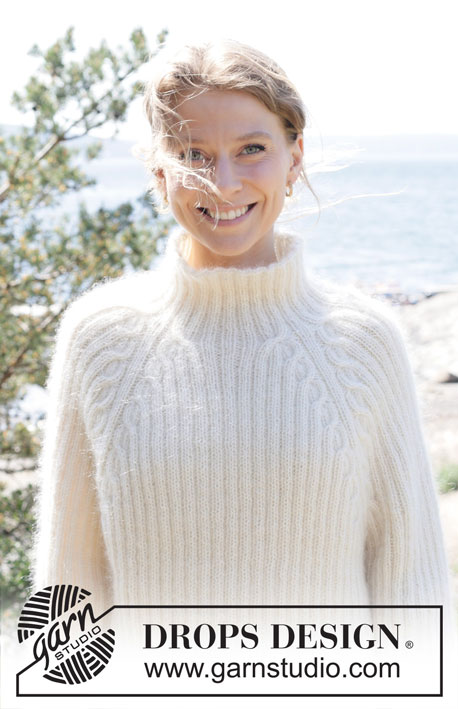
Winter Pearl Sweater#winterpearlsweater |
|||||||||||||||||||
 |
 |
||||||||||||||||||
Knitted jumper in DROPS Alpaca and DROPS Kid-Silk. The piece is worked top down with double neck, raglan and cables. Sizes S - XXXL.
DROPS 255-1 |
|||||||||||||||||||
|
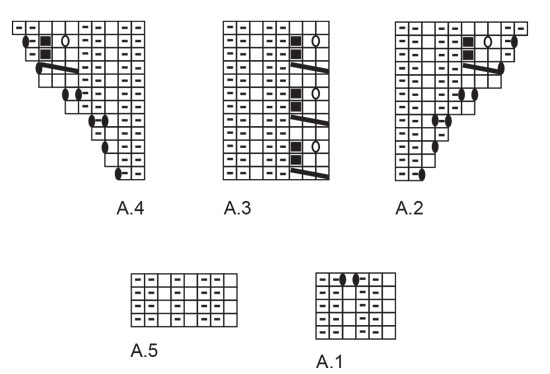
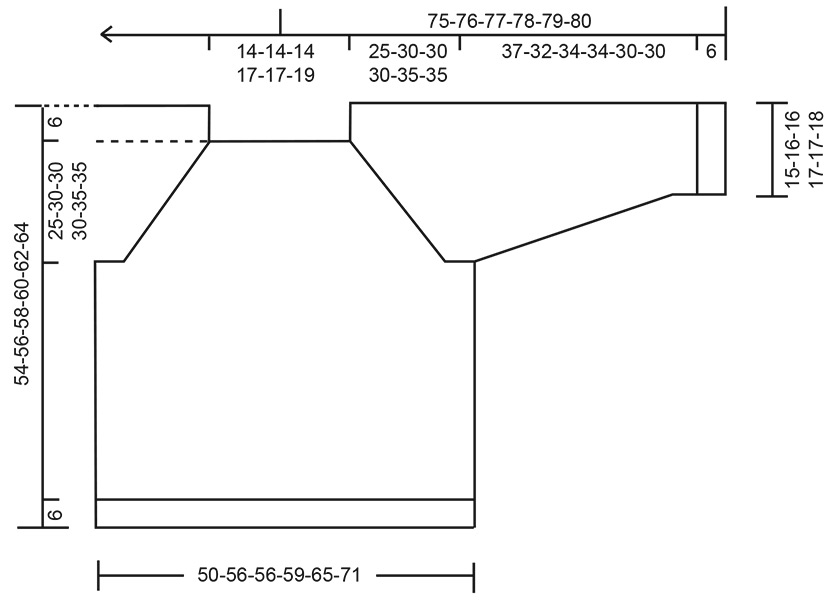
------------------------------------------------------- EXPLANATIONS FOR THE PATTERN: ------------------------------------------------------- PATTERN: See diagrams A.1 to A.5. A.3 is always counted as 8 stitches. RAGLAN: Increase for raglan before/after 1 purled + 1 knitted + 1 purled stitch (= raglan-line). The increased stitches are worked into the pattern. The increases are marked in the diagrams. DECREASE TIP (for sleeves): Decrease by purling 2 together on each side of 1 knitted stitch (= 2 decreased stitches). The stitches which do not fit into a complete cable are knitted. ----------------------------------------------------- START THE PIECE HERE: ------------------------------------------------------- JUMPER – SHORT OVERVIEW OF THE PIECE: The pattern uses both long and short needles; start with the length which fits the number of stitches and change when necessary. The neck and yoke are worked in the round with circular needle, top down and from the right back shoulder. When the yoke is finished, it is divided for the body and sleeves and the body continued in the round, while the sleeves wait. The sleeves are worked top down, in the round. The neck is folded double and fastened to the inside. DOUBLE NECK: Cast on 108-108-108-120-120-132 stitches with circular needle size 3 mm and 1 strand of each quality (= 2 strands). Work rib according to A.1 in the round. Repeat the first 4 rounds of A.1 until the rib measures 9-9-9-11-11-11 cm; the neck is later folded double. Change to circular needle size 4.5 mm and work the last round in A.1 (yarn overs knitted twisted on the next round) = 144-144-144-160-160-176 stitches. Insert 1 marker after the first 52-52-52-57-57-61 stitches (approx. mid-front); the piece is measured from here. YOKE: Continue in the round as follows: Pick up 1 stitch from the previous round (all picked-up stitches are purled twisted), knit 1 ( = raglan-line), pick up 1 stitch from the previous round, work A.2, A.3 across the next 24 stitches, work the first 3 stitches in A.3, A.4 (= sleeve), pick up 1 stitch from the previous round, knit 1 (= raglan-line), pick up 1 stitch from the previous round, work A.2, A.3 across the next 32-32-32-40-40-48 stitches, work the first 3 stitches in A.3, A.4 (= front piece), pick up 1 stitch from the previous round, knit 1 (= raglan-line), pick up 1 stitch from the previous round, work A.2, A.3 across the next 24 stitches, work the first 3 stitches in A.3, work A.4 (= sleeve) pick up 1 stitch from the previous round, knit 1 (= raglan-line), pick up 1 stitch from the previous round, work A.2, A.3 across the next 32-32-32-40-40-48 stitches, work the first 3 stitches in A.3, A.4 (= back piece). NOTE! Make sure the pattern matches the rib. The increases for raglan are marked in the diagrams, you have picked up 8 extra stitches = 160-160-160-176-176-192 stitches. RAGLAN: Increase as shown in the diagrams, increasing on each side of 1 purled + 1 knitted + 1 purled stitch in each raglan-line. Each time A.2 and A.4 are finished in height, there is room for 2 more repeats of A.3 in width. Continue with pattern and increases until A.2, A.3 and A.4 have been worked a total of 3-4-4-4-5-5 times in height. There are 344-408-408-424-488-504 stitches. Now increase only on the front and back pieces; the increases on the sleeves are finished. Work 2 more repeats in height with increases as shown in A.2 and A.4 on the front and back pieces, continuing the pattern on the sleeves without further increases. There are 408-472-472-488-552-568 stitches. Continue working without further increases until the yoke measures 25-30-30-30-35-35 cm from the marker mid-front. DIVIDE FOR BODY AND SLEEVES: Work the next round as follows: Work the first 2 stitches (belong to back piece), place the next 81-97-97-97-113-113 stitches on a thread for the sleeve, cast on 13-13-13-13-13-21 stitches (in side under sleeve), work 123-139-139-147-163-171 stitches (front piece), place the next 81-97-97-97-113-113 stitches on a thread for the sleeve, cast on 13-13-13-13-13-21 stitches (in side under sleeve), work the remaining 121-137-137-145-161-169 stitches (back piece). BODY: = 272-304-304-320-352-384 stitches. Continue the pattern in the round until the piece measures 42-44-46-48-50-52 cm from the marker mid-front. Change to circular needle size 3 mm and work rib according to A.5 for 6 cm, make sure you have knit 1, purl 1, knit 1 across the cables and knit over knit and purl over purl otherwise. Cast off. The jumper measures approx. 48-50-52-54-56-58 cm from the marker and 54-56-58-60-62-64 cm from the shoulder. SLEEVES: Place the 81-97-97-97-113-113 sleeve-stitches from the thread on one side of the piece on circular needle size 4.5 mm and knit up 1 stitch in each of the 13-13-13-13-13-21 stitches cast on under the sleeve + 1 extra stitch on each side = 96-112-112-112-128-136 stitches. Insert a marker-thread mid-under sleeve. Continue the pattern from the yoke, in the round. When the sleeve measures 4 cm, decrease 2 stitches under the sleeve – read DECREASE TIP. Decrease like this every 4-2-2-2½-1-1 cm a total of 8-14-13-11-18-20 times = 80-84-86-90-92-96 stitches. Continue working until the sleeve measures 37-32-34-34-30-30 cm. Change to double pointed needles size 3 mm. Work rib as shown in A.5 for 6 cm, make sure you have knit 1, purl 1, knit 1 across the cables and knit over knit and purl over purl otherwise. Cast off. The sleeve measures approx. 43-38-40-40-36-36 cm from the division. ASSEMBLY: Fold the neck double to the inside and sew down. Make sure the seam is elastic to avoid the neck being tight. |
|||||||||||||||||||
Diagram explanations |
|||||||||||||||||||
|
|||||||||||||||||||
 |
|||||||||||||||||||
 |
|||||||||||||||||||
Have you finished this pattern?Tag your pictures with #dropspattern #winterpearlsweater or submit them to the #dropsfan gallery. Do you need help with this pattern?You'll find 24 tutorial videos, a Comments/Questions area and more by visiting the pattern on garnstudio.com. © 1982-2026 DROPS Design A/S. We reserve all rights. This document, including all its sub-sections, has copyrights. Read more about what you can do with our patterns at the bottom of each pattern on our site. |
|||||||||||||||||||


With over 40 years in knitting and crochet design, DROPS Design offers one of the most extensive collections of free patterns on the internet - translated to 17 languages. As of today we count 324 catalogues and 12290 patterns translated into English (UK/cm). 12290
We work hard to bring you the best knitting and crochet have to offer, inspiration and advice as well as great quality yarns at incredible prices! Would you like to use our patterns for other than personal use? You can read what you are allowed to do in the Copyright text at the bottom of all our patterns. Happy crafting!
Post a comment to pattern DROPS 255-1
We would love to hear what you have to say about this pattern!
If you want to leave a question, please make sure you select the correct category in the form below, to speed up the answering process. Required fields are marked *.