
Popular categories
Looking for a yarn?


Comments / Questions (208)
![]() Nina wrote:
Nina wrote:
Hej! Fråga på 3 första m i v 1 och 2 i A3: Skall jag lyfta 1 maska, sticka 2 räta och därefter lyfta lösa maskan över dem = 1 m kvar. Då undrar jag över 2 räta m i varv 2? Eller (varv 1) skall 1 maska tas av stickan, 2 m stickas tills rät och därefter sätta tillbaka lösa maskan = 2 m
07.06.2025 - 11:46DROPS Design answered:
Hej Nina. Du lyfter en maska över till högra stickan, stickar 2 räta maskor, sedan drar du den lyfta maskan över de två maskor du stickade. Du har då minskat 1 maska, och av de 3 maskorna har du nu alltså 2 maskor kvar. Mvh DROPS Design
09.06.2025 - 12:12
![]() Jeanett wrote:
Jeanett wrote:
Skal der i raglandelen tages ud på hver omgang ?
04.06.2025 - 09:54DROPS Design answered:
Hej Jeanett, raglan udtagningerne er tegnet ind i diagrammerne og er på hver 2. omgang :)
04.06.2025 - 15:04
![]() Ulrike wrote:
Ulrike wrote:
Hallo, Frage zur Passe: Die Höhe von 3 Musterblöcken A2 A3 und A4 beträgt bereits 30 cm noch vor den weiteren Zunahmen an Rücken- und Vorderteil. Angegeben in der Anleitung sind weitere 2 Rapporte zu arbeiten bis die Teilung erfolgt. Ich bitte um Erklärung. Komme hier nicht weiter. Dankeschön! Beste Grüße Ulrike
03.06.2025 - 20:16DROPS Design answered:
Siehe Unten :)
04.06.2025 - 07:58
![]() Ulrike wrote:
Ulrike wrote:
Passe: Das Stricken von 3x des Musters A3 in der Höhe misst bereits 30 cm laut Maschenprobe 24 Reihen sind gleich 10cm. Laut Anleitung sollen weitere Rapporte in die Höhe gestrickt werden. Die Teilung erfolgt dann erst , wenn der Raglan viel zu lang ist. Hat sich hier ein Fehler eingeschlichen? Ich komme hier nicht weiter. Beste Grüße Ulrike Franke
03.06.2025 - 17:44DROPS Design answered:
Liebe Ulrike, A.2 bis A.4 sind insgesamt 12 Reihen, wenn die Diagrammen 3 Mal in der Höhe gestrickt wurden, haben Sie insgesamt 36 Reihen gestrickt, dh ca 15 cm mit 24 Reihen = 10 cm. Viel Spaß beim Stricken!
04.06.2025 - 07:56
![]() Gina wrote:
Gina wrote:
Terribly poor raglan description! As clear as mud! Having read it ten times, absolutely no idea where to increase.
27.05.2025 - 12:26
![]() Marie-thé wrote:
Marie-thé wrote:
Bonjour, Je viens de tricoter 4 fois ( A2,A3 et A4), les augmentations des manches sont terminées. Pouvez-vous m'expliquer comment voir sur le diagramme à quoi correspondent les augmentations du dos et du devant? Et comment continue-t-on le point fantaisie des manches sans faire les augmentons ( par exemple le rang 5 comprend 2 jetés, que deviennent-ils? Merci beaucoup pour vos retours précieux!
25.04.2025 - 17:34DROPS Design answered:
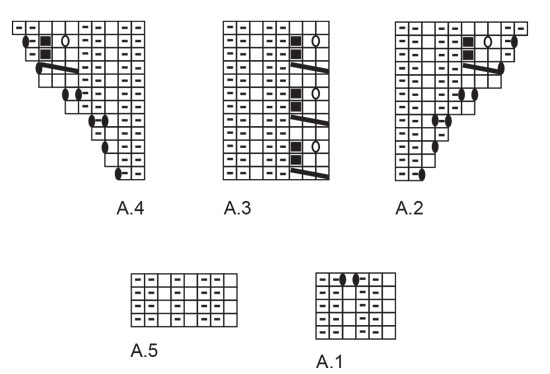
Bonjour Marie-Thé, les augmentations des raglans figurent dans les diagrammes A.2 (début dos, devant et manches) et A.4 (fin dos, devant et manches); les diagrammes montrent également comment tricoter les nouvelles mailles au rang suivant, au 1er rang de A.2/A.4 on a 2 m env + 1 jeté (avant/après ces 2 m env); au 2ème rang, on tricote le jeté torse à l'endroit; au 5ème rang, on fait 1 jeté, 1 m env, 1 jeté, 1 m end, 2 m env dans A.2, au 6ème rang on tricote 1 m end, 2 m env, 1 m end, 2 m env et dans A.4, 5ème rang: 2 m env, 1 m end, 1 jeté, 1 m env, 1 jeté, au 6ème rang: 2 m env, 1 jeté, 2 m env, 1 m end. Tricotez les jetés torse pour éviter les trous. Bon tricot!
28.04.2025 - 07:30
![]() Marie-thé wrote:
Marie-thé wrote:
Bonjour , Je relis votre réponse faite à Nathalie concernant le raglan" chaque fois qu'on a tricoté A2 et A4 en hauteur on a assez de mailles pour tricoter 2 motifs A3 en plus". Votre réponse ne m'éclaire pas. Je reste bloquée même si j'ai assez de mailles, ça ne correspond pas au motif. Pourriez-vous expliquer autrement cette partie du raglan? Merci beaucoup !
24.04.2025 - 17:53DROPS Design answered:
Bonjour Marie-Thé, lorsque vous avez tricoté A.2 en hauteur, vous avez augmenté 8 m, soit le nombre de mailles pour un motif de A.3, au rang suivant, vous allez tricoter A.2 au-dessus des 8 premières mailles du A.2 précédent et A.3 au-dessus des 8 m suivantes = 1 fois A.3 en plus. De même avec A.4: quand A.4 est terminée vous avez augmenté 8 m, la fois suivante que vous le tricotez, vous tricotez A.3 au-dessus des 8 premières mailles du A.4 précédent = 1 motif de A.3 en plus, et vous terminez par les 2 mailles de A.4 au-desssus des 2 dernières mailles du A.4 précédent = vous avez ainsi augmenté 2 motifs de 8 m en plus pour A.3 entre A.2 et A.4. Bon tricot!
25.04.2025 - 07:30
![]() Miris wrote:
Miris wrote:
Bonjour, pour éviter le feutrage, puis-je envisager d'assembler Drops Nord au lieu de Drops Alpaca avec Kid silk ? Les 2 "laines" donneront-elles un aspect et contact aussi douillets que la proposition initiale ? Bien cordialement.
23.04.2025 - 14:45DROPS Design answered:
Bonjour Mme Miris, vous pouvez tout à fait remplacer Alpaca par Nord, mais notez que pour éviter le feutrage, c'est surtout au niveau de l'entretien qu'il faudra faire attention, en respectant les consignes indiquées ici en plus de celles des nuanciers, vous ne devriez pas avoir de surprise. Votre magasin aura fort probablement encore d'autres astuces à vous communiquer, même par mail ou téléphone. Bon tricot!
23.04.2025 - 16:11
![]() Marie-thé wrote:
Marie-thé wrote:
Ça veut dire que les diagramme s A2 et A4 se lisent de la droite vers la gauche? Et pour A3, dans quel sens se lit le diagramme? De la droite vers la gauche aussi? Où se trouve la maille endroit du raglan sur le diagramme? Ou bien où devrait-elle être? Merci d'avance pour votre réponse
22.04.2025 - 10:58DROPS Design answered:
Bonjour Marie-Thé, les diagrammes se lisent effectivement tous de bas en haut et de droite à gauche (car on tricote en rond, donc tous les rangs/tours de droite à gauche). Retrouvez plus d'infos sur les diagrammes ici. Les mailles des raglans ne figurent pas dans les diagrammes, notez que vous devez augmenter 1 m avant + 1 m après cette maille endroit au tout 1er tour de l'empiècement, vous avez ainsi 3 mailles pour chaque raglan (= à tricoter: 1 m env, 1 m end, 1 m env) à la transition des manches et du dos/devant. Bon tricot!
22.04.2025 - 17:17
![]() Marie-Thé wrote:
Marie-Thé wrote:
Bonjour, Je viens de commencer le modèle Winter Pearl Sweater, chez Drops.J'ai fait le 1er rang sans trop de problème.Mais, je bloque pour le 2eme rang de l'empiècement. Je ne comprends pas comment s'enchaînent les 3 grilles (A2, A3 et A4) et où sont indiquées sur ces diagrammes les augmentations du raglan (comme indiqué dans le paragraphe "raglan").Est-il possible d'avoir de l'aide de votre part pour déchiffrer ces explications?Bien cordialement,Marie-thé
17.04.2025 - 13:43DROPS Design answered:
Bonjour Marie-Thé, n'hésitez pas à ajouter des marqueurs au début de chaque diagramme, ainsi chaque zone sera bien délimitée; les augmentations du raglan se font au début de A.2 et à la fin de A.4; vous allez ainsi augmenter 1 ou 2 mailles selon les tours. Lorsque les diagrammes sont terminés, vous avez augmenté 8 m dans chaque A.2/A.4 soit 2 motifs supplémentaire de A.3 à répéter entre les prochains A.2 et A.4 en hauteur. Bon tricot!
22.04.2025 - 10:44
|
|||||||||||||||||||
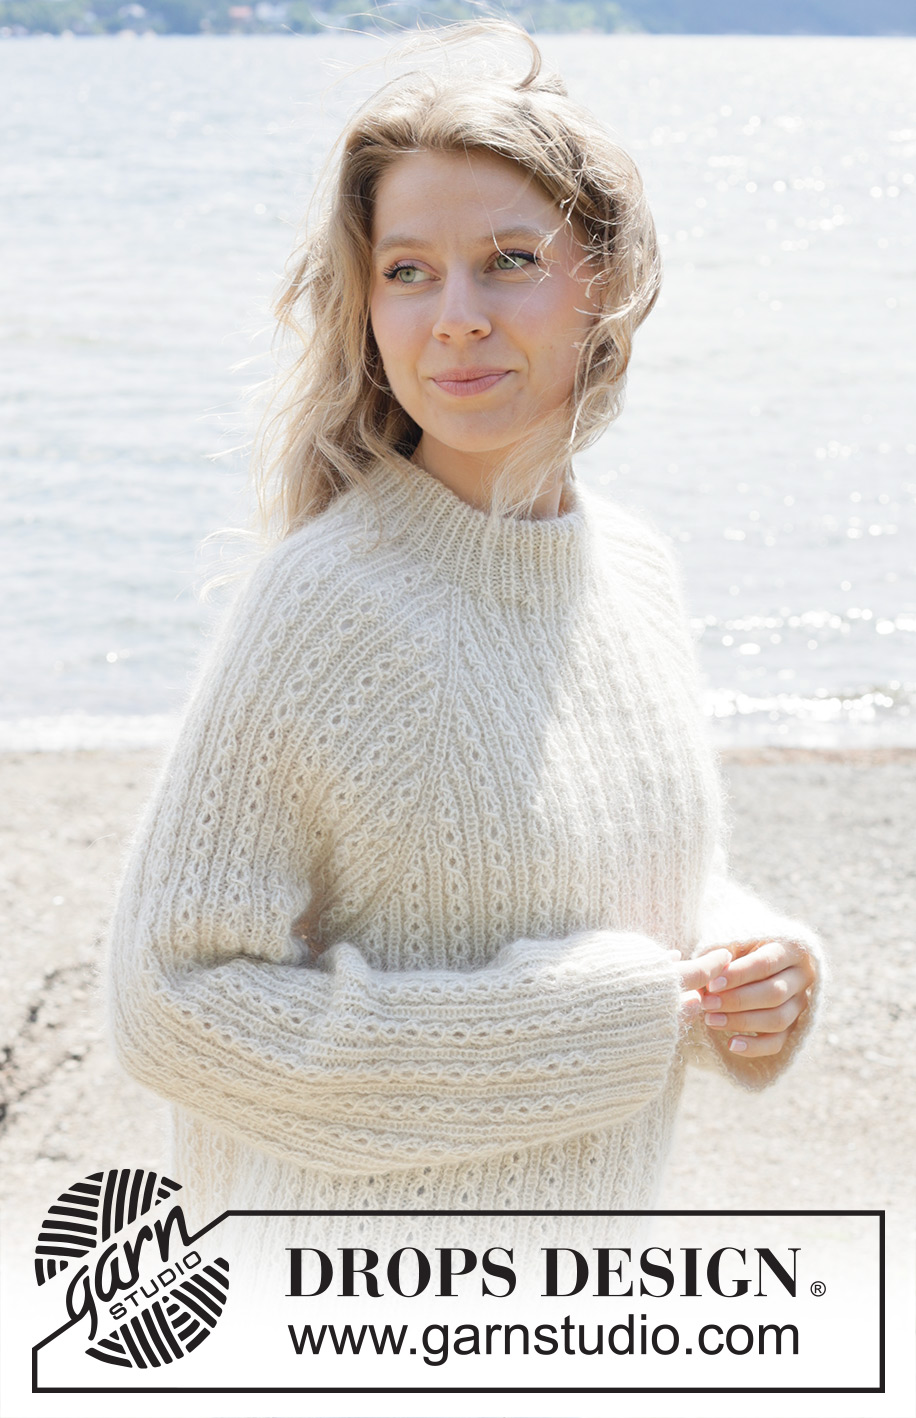
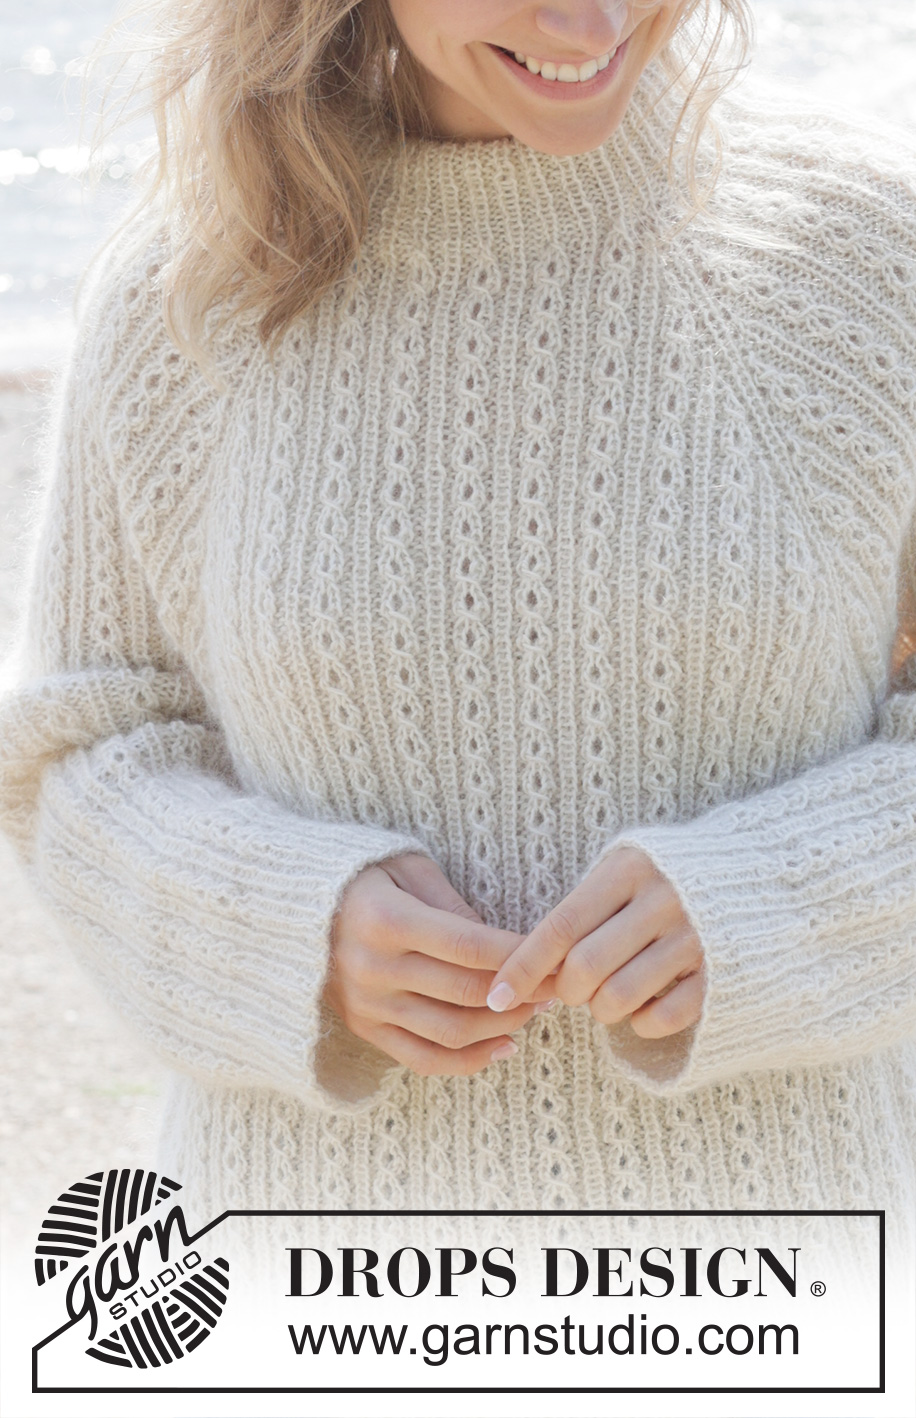
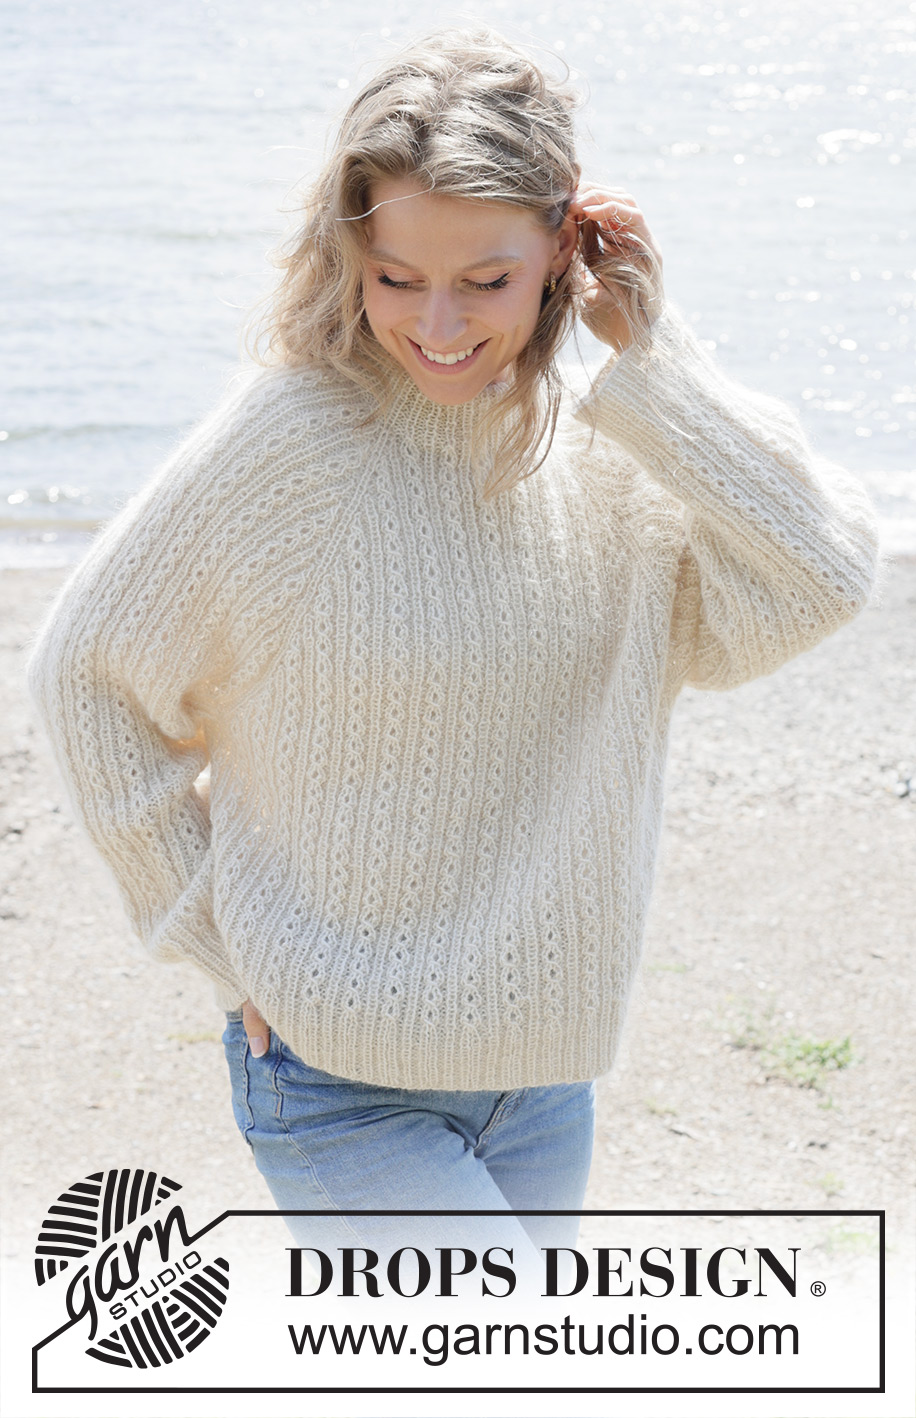
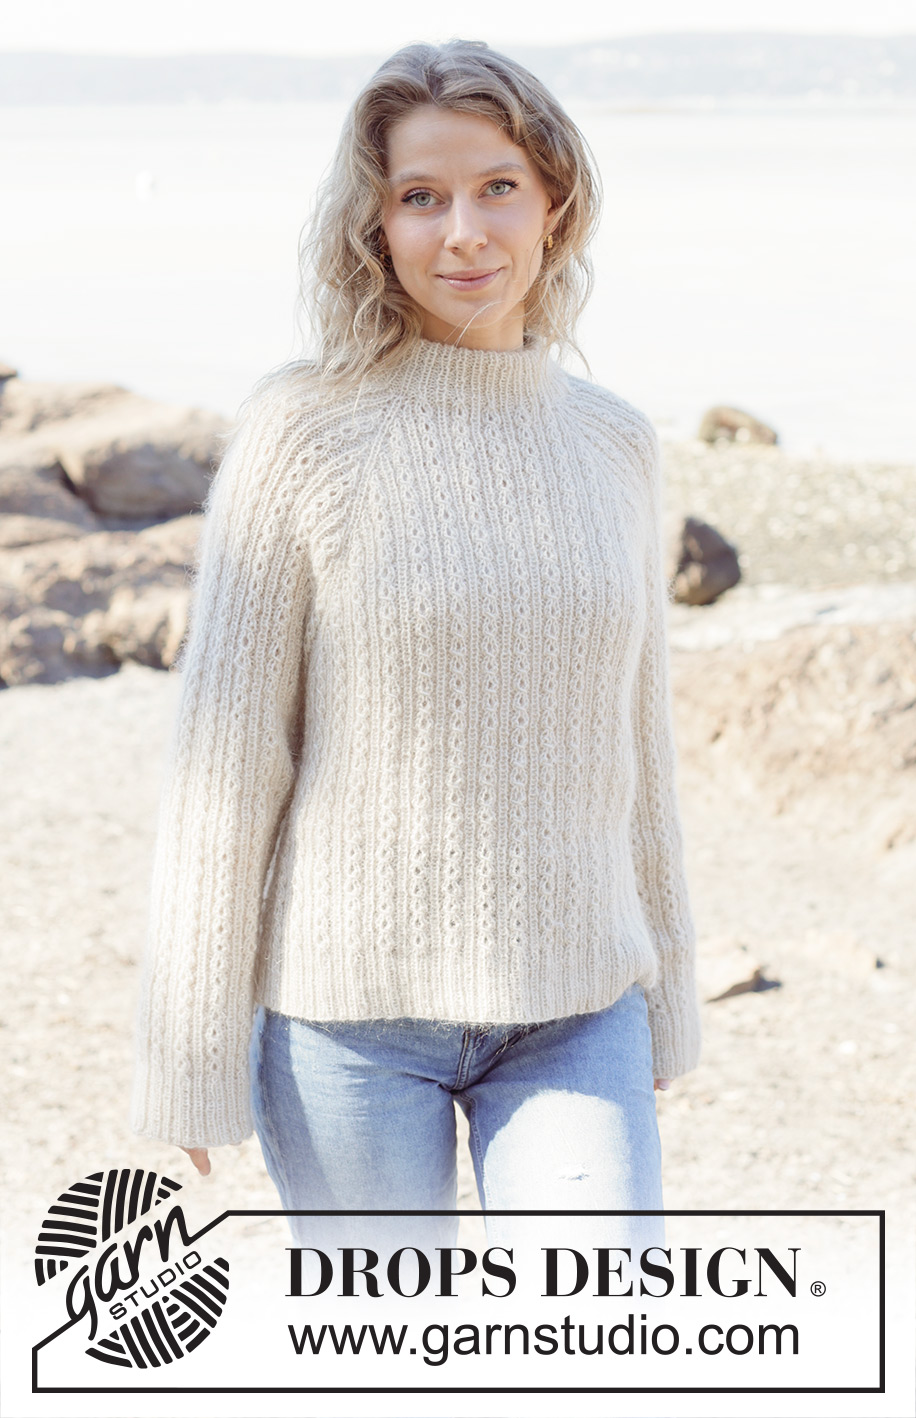
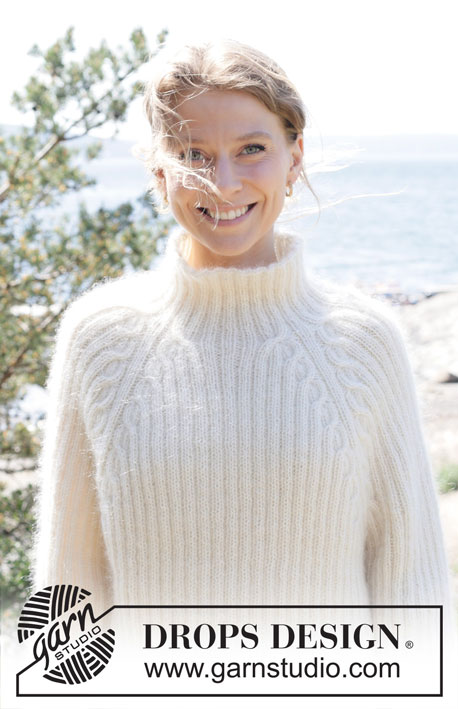
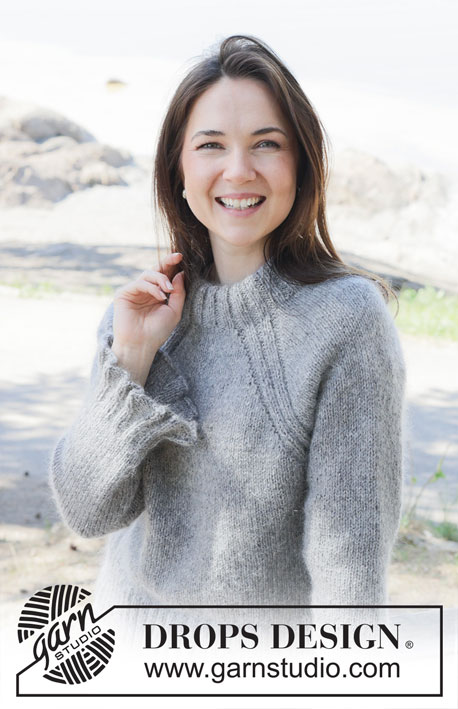
Winter Pearl Sweater#winterpearlsweater |
|||||||||||||||||||
 |
 |
||||||||||||||||||
Knitted jumper in DROPS Alpaca and DROPS Kid-Silk. The piece is worked top down with double neck, raglan and cables. Sizes S - XXXL.
DROPS 255-1 |
|||||||||||||||||||
|
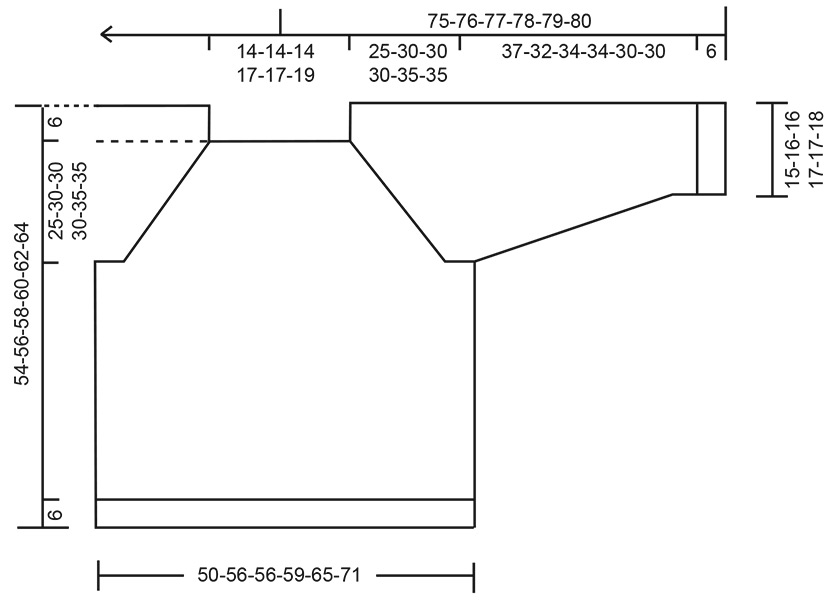
------------------------------------------------------- EXPLANATIONS FOR THE PATTERN: ------------------------------------------------------- PATTERN: See diagrams A.1 to A.5. A.3 is always counted as 8 stitches. RAGLAN: Increase for raglan before/after 1 purled + 1 knitted + 1 purled stitch (= raglan-line). The increased stitches are worked into the pattern. The increases are marked in the diagrams. DECREASE TIP (for sleeves): Decrease by purling 2 together on each side of 1 knitted stitch (= 2 decreased stitches). The stitches which do not fit into a complete cable are knitted. ----------------------------------------------------- START THE PIECE HERE: ------------------------------------------------------- JUMPER – SHORT OVERVIEW OF THE PIECE: The pattern uses both long and short needles; start with the length which fits the number of stitches and change when necessary. The neck and yoke are worked in the round with circular needle, top down and from the right back shoulder. When the yoke is finished, it is divided for the body and sleeves and the body continued in the round, while the sleeves wait. The sleeves are worked top down, in the round. The neck is folded double and fastened to the inside. DOUBLE NECK: Cast on 108-108-108-120-120-132 stitches with circular needle size 3 mm and 1 strand of each quality (= 2 strands). Work rib according to A.1 in the round. Repeat the first 4 rounds of A.1 until the rib measures 9-9-9-11-11-11 cm; the neck is later folded double. Change to circular needle size 4.5 mm and work the last round in A.1 (yarn overs knitted twisted on the next round) = 144-144-144-160-160-176 stitches. Insert 1 marker after the first 52-52-52-57-57-61 stitches (approx. mid-front); the piece is measured from here. YOKE: Continue in the round as follows: Pick up 1 stitch from the previous round (all picked-up stitches are purled twisted), knit 1 ( = raglan-line), pick up 1 stitch from the previous round, work A.2, A.3 across the next 24 stitches, work the first 3 stitches in A.3, A.4 (= sleeve), pick up 1 stitch from the previous round, knit 1 (= raglan-line), pick up 1 stitch from the previous round, work A.2, A.3 across the next 32-32-32-40-40-48 stitches, work the first 3 stitches in A.3, A.4 (= front piece), pick up 1 stitch from the previous round, knit 1 (= raglan-line), pick up 1 stitch from the previous round, work A.2, A.3 across the next 24 stitches, work the first 3 stitches in A.3, work A.4 (= sleeve) pick up 1 stitch from the previous round, knit 1 (= raglan-line), pick up 1 stitch from the previous round, work A.2, A.3 across the next 32-32-32-40-40-48 stitches, work the first 3 stitches in A.3, A.4 (= back piece). NOTE! Make sure the pattern matches the rib. The increases for raglan are marked in the diagrams, you have picked up 8 extra stitches = 160-160-160-176-176-192 stitches. RAGLAN: Increase as shown in the diagrams, increasing on each side of 1 purled + 1 knitted + 1 purled stitch in each raglan-line. Each time A.2 and A.4 are finished in height, there is room for 2 more repeats of A.3 in width. Continue with pattern and increases until A.2, A.3 and A.4 have been worked a total of 3-4-4-4-5-5 times in height. There are 344-408-408-424-488-504 stitches. Now increase only on the front and back pieces; the increases on the sleeves are finished. Work 2 more repeats in height with increases as shown in A.2 and A.4 on the front and back pieces, continuing the pattern on the sleeves without further increases. There are 408-472-472-488-552-568 stitches. Continue working without further increases until the yoke measures 25-30-30-30-35-35 cm from the marker mid-front. DIVIDE FOR BODY AND SLEEVES: Work the next round as follows: Work the first 2 stitches (belong to back piece), place the next 81-97-97-97-113-113 stitches on a thread for the sleeve, cast on 13-13-13-13-13-21 stitches (in side under sleeve), work 123-139-139-147-163-171 stitches (front piece), place the next 81-97-97-97-113-113 stitches on a thread for the sleeve, cast on 13-13-13-13-13-21 stitches (in side under sleeve), work the remaining 121-137-137-145-161-169 stitches (back piece). BODY: = 272-304-304-320-352-384 stitches. Continue the pattern in the round until the piece measures 42-44-46-48-50-52 cm from the marker mid-front. Change to circular needle size 3 mm and work rib according to A.5 for 6 cm, make sure you have knit 1, purl 1, knit 1 across the cables and knit over knit and purl over purl otherwise. Cast off. The jumper measures approx. 48-50-52-54-56-58 cm from the marker and 54-56-58-60-62-64 cm from the shoulder. SLEEVES: Place the 81-97-97-97-113-113 sleeve-stitches from the thread on one side of the piece on circular needle size 4.5 mm and knit up 1 stitch in each of the 13-13-13-13-13-21 stitches cast on under the sleeve + 1 extra stitch on each side = 96-112-112-112-128-136 stitches. Insert a marker-thread mid-under sleeve. Continue the pattern from the yoke, in the round. When the sleeve measures 4 cm, decrease 2 stitches under the sleeve – read DECREASE TIP. Decrease like this every 4-2-2-2½-1-1 cm a total of 8-14-13-11-18-20 times = 80-84-86-90-92-96 stitches. Continue working until the sleeve measures 37-32-34-34-30-30 cm. Change to double pointed needles size 3 mm. Work rib as shown in A.5 for 6 cm, make sure you have knit 1, purl 1, knit 1 across the cables and knit over knit and purl over purl otherwise. Cast off. The sleeve measures approx. 43-38-40-40-36-36 cm from the division. ASSEMBLY: Fold the neck double to the inside and sew down. Make sure the seam is elastic to avoid the neck being tight. |
|||||||||||||||||||
Diagram explanations |
|||||||||||||||||||
|
|||||||||||||||||||
 |
|||||||||||||||||||
 |
|||||||||||||||||||
Have you finished this pattern?Tag your pictures with #dropspattern #winterpearlsweater or submit them to the #dropsfan gallery. Do you need help with this pattern?You'll find 24 tutorial videos, a Comments/Questions area and more by visiting the pattern on garnstudio.com. © 1982-2026 DROPS Design A/S. We reserve all rights. This document, including all its sub-sections, has copyrights. Read more about what you can do with our patterns at the bottom of each pattern on our site. |
|||||||||||||||||||


With over 40 years in knitting and crochet design, DROPS Design offers one of the most extensive collections of free patterns on the internet - translated to 17 languages. As of today we count 324 catalogues and 12290 patterns translated into English (UK/cm). 12290
We work hard to bring you the best knitting and crochet have to offer, inspiration and advice as well as great quality yarns at incredible prices! Would you like to use our patterns for other than personal use? You can read what you are allowed to do in the Copyright text at the bottom of all our patterns. Happy crafting!
Post a comment to pattern DROPS 255-1
We would love to hear what you have to say about this pattern!
If you want to leave a question, please make sure you select the correct category in the form below, to speed up the answering process. Required fields are marked *.