
Popular categories
Looking for a yarn?




























Comments / Questions (29)
 Karen wrote:
Hello, I have worked the pattern to 35cm and have started the striped pattern. Following your advice to Christina below I have stopped increasing and now both my edges are knitting up straight and not getting wider on one side as the photograph appears to do. I am using Drops Fabel and knitting to the tension suggested, yet my blanket does seam to be getting wider as In the photograph. Am I doing something wrong? Thank you for your help.
28.11.2020 - 17:27DROPS Design answered:
Dear Karen, it looks llike the answer below was wrong - sorry for that, after the piece measures 35 cm you start stripes but you continue working as before (= increase on each side) until piece measures 85 cm (= width of piece) - this video might help you to understand how this kind of blankets are worked (remember to work the stripes as in the pattern). Happy knitting!
30.11.2020 - 08:43
 Christina wrote:
I’m sorry to bother you again, but I have another question. When the piece measures 85 cm I begin the decrease/increase. Does that 85 cm include the first 35 when I was increasing at the beginning, or is it 85 cm beyond the first 35? Thank you!
11.04.2020 - 18:50DROPS Design answered:
Dear Christina, 85 cm means from the beginning (includes the first 35). Happy knitting!
12.04.2020 - 18:25
Christina wrote:
Am I supposed to stop increasing when the piece reaches 35 cm and continue with the striping without increasing? Thanks for your help!
25.03.2020 - 04:09DROPS Design answered:
Hi Christina, Yes, you stop increasing when the piece measures 35 cm and continue working the stripes without further increases. Happy knitting!
25.03.2020 - 07:56
Jen Ann wrote:
Hello, What are the average total rows of this piece using a US 7 Circular Needles? Blessings
02.02.2020 - 03:42DROPS Design answered:
Dear Mrs Ann, this will depend on your tension in height - in this kind of pattern measurements are more important than number of rows. Happy knitting!
03.02.2020 - 10:01
 Martinet wrote:
Bonsoir Après les 35 cm indiqués pour les côtés, est ce que l’on Co toi je les augmentations de la même manière jusqu’à atteindre 85 cm ? Merci d’autre part je souhaite la faire plus large et plus longue, me suffit il de continuer à augmenter jusqu’à la largeur que je souhaite et ensuite commencer l’alternance diminution/augmentation ?
24.11.2019 - 18:58DROPS Design answered:
Bonjour Mme Martinet, on continue comme avant (on augmente 1 m de chaque côté) jusqu'à ce que la largeur de la couverture mesure 85 cm; à 35 cm, on commence simplement les rayures. Si vous voulez une couverture plus large, continuez à augmenter jusqu'à la largeur souhaitée pour la couverture - cette vidéo peut vous aider à adapter - rappelez-vous qu'il vous faudra plus de laine. Bon tricot!
25.11.2019 - 10:18
 Nathalie élément wrote:
Je ne vois pas les explications pour la section qui est uniquement de couleur naturel au début du travail... pouvez-vous m'indiquer svp?
25.07.2019 - 18:08DROPS Design answered:
Bonjour Nathalie, tout le debut est en naturel: "Monter 3 m avec l'aiguille circulaire 4.5 en naturel et tricoter 1 côte au POINT MOUSSE – voir ci-dessus, EN MÊME TEMPS, augmenter 1 m au début de chaque rang (à la fois sur l'endroit et sur l'envers) en faisant 1 jeté à 1 m point mousse du bord. Au rang suivant, tricoter le jeté torse à l'end pour éviter les trous. Répéter ces augmentations au début de chaque rang jusqu'à ce que l'ouvrage mesure 35 cm le long des 2 côtés". Bon tricot!
25.07.2019 - 18:33
RAULET wrote:
Bonjour Pour ce modèle la laine est utilisée en double ou pas ? tricot avec numéro 4.5 alors que la laine est avec un numéro 3 . Merci de votre réponse.
07.01.2019 - 21:09DROPS Design answered:
Bonjour Mme Raulet, on tricote ici volontairement avec des aiguilles plus large pour obtenir la texture souhaitée. Chacune tricotant différemment, vérifiez bien votre tension et ajustez la taille des aiguilles si besoin, vous devez avoir 20 m x 40 rangs au point mousse avec 1 seul fil = 10 x 10 cm. Bon tricot!
08.01.2019 - 08:58
 Dorthe Kemp wrote:
Heg vil gerne strikke dette tæppe, men bare en 1/2 gang større. Vil det kunne lade sig gøre ved at øge længde og bredde med 50% eller skal det gøres på en anden måde. Hvor meget ekstra garn skal der til. Tak for hjælpen. Med venlig hilsen Dorthe
29.10.2018 - 10:41
Marion wrote:
Bonjour, pour la 1ère rayure, après 7xA1, il faut tricoter en naturel sur 2,5cm. Faut-il les mesurer le long de la bordure (comme il est indiqué pour mesurer la longueur totale de l'ouvrage) ou en hauteur, tout "droit", de manière classique? Merci pour votre aide. Marion
22.07.2018 - 15:36DROPS Design answered:
Bonjour Marion, les mesures se font le long du côté. Bon tricot!
23.07.2018 - 08:12
 Rósa Mjöll Ragnarsdóttir wrote:
Hæ mjög skemmtilegt mynstur og falleg litasamsetning. Ég er samt ekki alveg að skilja mynstrið. Ef það á að prjóna A. 1 7x eru það þá ekki fjórir prjónar í einu A. 1 mynstri?
05.05.2018 - 19:45DROPS Design answered:
Eitt A.1 mynstur = 1 umferð bláa lónið og 1 umferð natur
31.05.2018 - 09:54
|
|||||||||||||
Under The Sea#underthesea |
|||||||||||||
 |
 |
||||||||||||
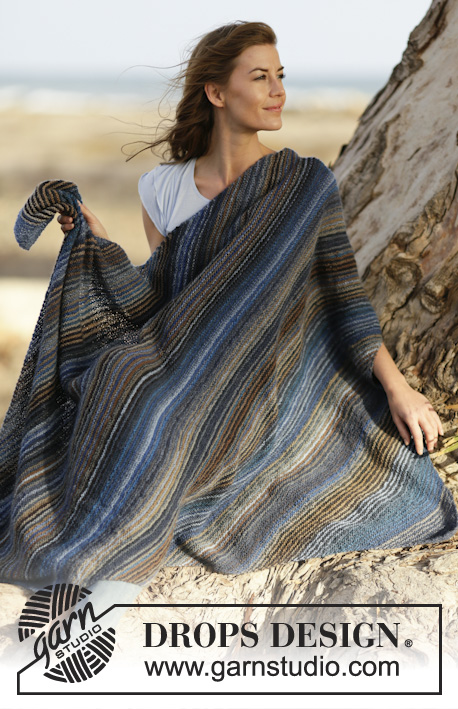
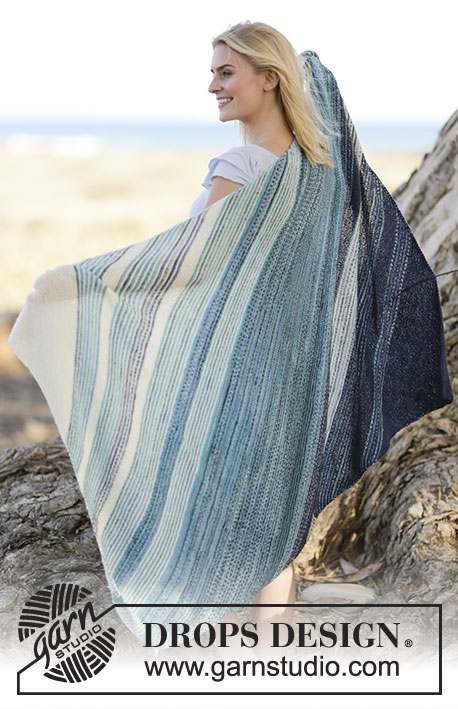
Knitted DROPS blanket in garter st with stripes in ”Fabel”.
DROPS 161-16 |
|||||||||||||
|
GARTER ST (back and forth): K all rows. 1 ridge = 2 rows K. PATTERN: See diagrams A.1-A.5. The entire piece is worked in garter st. STRIPES: Work A.1 7 times vertically, continue with off white for 2½ cm. Work A.1 6 times vertically, A.2 4 times vertically, then continue with off white for 2 cm. Work A.1 8 times vertically, work 1 ridge with blue lagoon, then work A.3 4 times vertically. Work A.1 7 times vertically, work 1 ridge with blue lagoon, continue with A.3 for 31 cm. Work A.4 4 times vertically, then work A.3 4 times vertically. Work A.5 4 times vertically, then continue with blue for 4 cm. Work A.2 8 times vertically, continue with A.5 for 10 cm, then continue with blue for 4 cm. Work A.5 for 5 cm. Then work with blue until finished measurements. ---------------------------------------------------------- BLANKET: Work entire blanket in garter st from corner to corner. Cast on 3 sts on circular needle size 4.5 mm with off white and work 1 ridge in GARTER ST – see explanation above, AT THE SAME TIME inc 1 st at beg of every row (both from RS and WS) by making 1 YO inside 1 edge st in garter st. On next row K YO twisted to avoid holes. Repeat inc at beg of every row until piece measures 35 cm along both sides (NOTE: Measure always along the side throughout the piece). REMEMBER THE KNITTING TENSION Then work PATTERN and STRIPES - see explanation above. AT THE SAME TIME when piece measures 85 cm, dec 1 st at beg of row from RS by K the 2 outermost sts inside 1 edge st twisted tog. AT THE SAME TIME at the end of same row (i.e. at the end of row from RS) inc 1 new st by making 1 YO inside 1 edge st, turn and K back without dec/inc (K YOs twisted). Repeat dec at beg of row and inc at the end of row every other row upwards (i.e. on every row from RS - no of sts is constant), until piece measures 135 cm along the longest side on blanket. Now dec 1 st at beg of every row by K 2 sts tog inside 1 edge st. Repeat dec at beg of every row (both from RS and WS) until 5 sts remain on row. Work next row from RS as follows: K 1, slip 1 st as if to K, K 2 tog, psso, K 1. Turn piece, K back and then cast off the last 3 sts. |
|||||||||||||
Diagram explanations |
|||||||||||||
|
|||||||||||||
 |
|||||||||||||
Have you finished this pattern?Tag your pictures with #dropspattern #underthesea or submit them to the #dropsfan gallery. Do you need help with this pattern?You'll find 8 tutorial videos, a Comments/Questions area and more by visiting the pattern on garnstudio.com. © 1982-2026 DROPS Design A/S. We reserve all rights. This document, including all its sub-sections, has copyrights. Read more about what you can do with our patterns at the bottom of each pattern on our site. |
|||||||||||||






With over 40 years in knitting and crochet design, DROPS Design offers one of the most extensive collections of free patterns on the internet - translated to 17 languages. As of today we count 333 catalogues and 12525 patterns translated into English (UK/cm). 12525
We work hard to bring you the best knitting and crochet have to offer, inspiration and advice as well as great quality yarns at incredible prices! Would you like to use our patterns for other than personal use? You can read what you are allowed to do in the Copyright text at the bottom of all our patterns. Happy crafting!
Post a comment to pattern DROPS 161-16
We would love to hear what you have to say about this pattern!
If you want to leave a question, please make sure you select the correct category in the form below, to speed up the answering process. Required fields are marked *.