
Popular categories
Looking for a yarn?


Comments / Questions (13)
![]() HANNA PETTERSSON wrote:
HANNA PETTERSSON wrote:
Hej, Finns det en bild på "dorms slipper" på hur den ser ut innan man syr ihop den? Det skulle underlätta om jag kunde se hur stickningen ska se ut medan jag håller på så jag vet att jag är på rätt väg. Mvh.
26.10.2025 - 15:50DROPS Design answered:
Hei Hanna. Beklager, det har vi ikke. mvh DROPS Design
10.11.2025 - 10:37
![]() Susanne Richter wrote:
Susanne Richter wrote:
Stämmer era angivelser, är detta ett mönster för nybörjare, väldigt otydligt vad det gäller "tån" Det är något som inte stämmer.
10.01.2021 - 21:12DROPS Design answered:
Hei Susanne. Hva er det du mener ikke stemmer? De resterende 12-14-18 maskene = tå/ disse maskene henviser til nedre del av sokken, altså "tå-området". Skriv gjerne mer spesifisert hva du mener er utydelig. mvh DROPS design
18.01.2021 - 13:06
![]() Nury Zapata wrote:
Nury Zapata wrote:
Que significa "rem"
13.07.2019 - 23:21DROPS Design answered:
Hola Nury. Rem = rematar, cerrar todos los puntos en un fila para terminar la labor y esconder los hilos.
14.07.2019 - 12:42
![]() Mireille Cote wrote:
Mireille Cote wrote:
Hi Rose, I have made the first part: medium size, and made the rows knitting all the stitches, and the back & forth short row until it measured 3 1/2". I bound off the 32 stitches on the right side, & 30 remain on the needle. As I bound off on the right side, I bound off at the end where the short rows are. Is it right? I'm at a loss. Help!
09.12.2015 - 06:30DROPS Design answered:
Dear Mrs Cote, if you bound off the first 32 sts from RS (opposite side of toe), that's correct, this is the opening for foot. Continue over the remaining sts and cast on 32 sts at the end of row from WS (over the sts you previously bound off). Happy knitting!
09.12.2015 - 10:11
![]() Bente L. wrote:
Bente L. wrote:
Jeg har kommet så langt at jeg har lagt opp masker igjen etter at jeg felte av + strikket de resterende. Det har ikke vært så veldig enkel oppskrift å følge. Når det står at jeg skal fortsette frem og tilbake med forkortede pinner som før, betyr det at jeg skal fortsette med det som står mellom ** først i oppskriften? Altså dette: "* Strikk 6 p rett frem og tilbake over alle m. Strikk rett frem til merketråden, snu og strikk rett tilbake *. "
16.08.2015 - 16:40DROPS Design answered:
Hej Bente ja det stemmer du strikker de forkortede pinde på nøjagtig samme måde som du gjorde tidligere i opskriften. God fornøjelse!
01.12.2015 - 12:02
![]() Rose wrote:
Rose wrote:
February 22, 2014: difficult to understand if short rows are knitted to form only the heel of the slipper?Can someone please clarify? Thank you
22.02.2014 - 21:45DROPS Design answered:
Dear Rose, short rows are worked to form toe of slipper: "work back and forth with short rows as follows (Row 1 = RS): *Work 6 rows back and forth over all sts. K until marker, turn and K back* Repeat from *-* until piece measures 8-9-10 cm", ie you will work more rows on the first sts (towards heel) and less rows on the last sts (towards toe). Happy knitting!
24.02.2014 - 10:43
![]() Vanessa wrote:
Vanessa wrote:
Weiter die verkürzten Reihen hin und zurück stricken (1. R. = Vorderseite): * 6 R. über alle M. hin und zurück stricken, bis zur Markierung und zurück stricken*. Könnten Sie bitte dies näher erklären? und: müsste davor noch ein Satz stehen? Danke im Voraus
08.10.2012 - 22:48DROPS Design answered:
Liebe Vanessa, es fehlt nichts: Sie stricken jeweils 6 Reihen über alle Maschen und dann eine verkürzte Reihe. Haben Sie schon unseren Instruktionsvideo zu den verkürzten Reihen angeschaut? Gutes Gelingen!
09.10.2012 - 07:13
![]() Maria Thunberg wrote:
Maria Thunberg wrote:
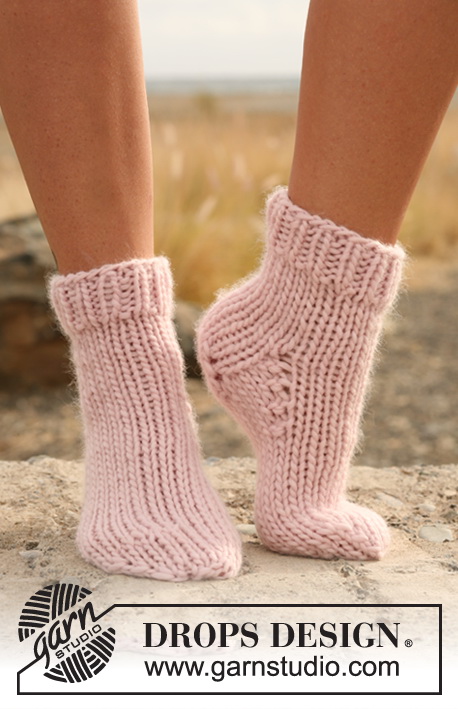
Hej, blir inte klok på beskrivningen, ska avmaskningen vara på det breda stället och dom tre cm (största storleken) på det smala stället på sockan? Hade tänkt sticka en fin rosa socka med spets upptill men det mönstret var ännu värre att tyda. Glöm inte att skriva mönstren så även en ovan ska kunna gå på dom - lätt att glömma när man är duktig stickare och skriver mönster. M v h Maria som är stickkunnig
20.06.2012 - 11:21DROPS Design answered:
Hej, när du har lagt upp 70 m och stickat 6 räta varv, skall du börja med förkortade varv mot tån. Lycka till!
20.06.2012 - 14:26
![]() Annette wrote:
Annette wrote:
Alldeles utmärkt mönster, enkelt att följa!!
06.05.2012 - 10:35
![]() Eva Andersson wrote:
Eva Andersson wrote:
Det måste vara fel i stick beskrivningen, den går inte att följa. Jag har även haft hjälp av mkt vana stickerskor. Utifrån bilden kunde vi gissa men bättre vore att börja med tån sen lägga upp mer för hela foten och stickarunt och sen avsluta med tån. Då behövs bara söm på hälen och ihodragning för tån.
13.01.2012 - 07:46
|
|
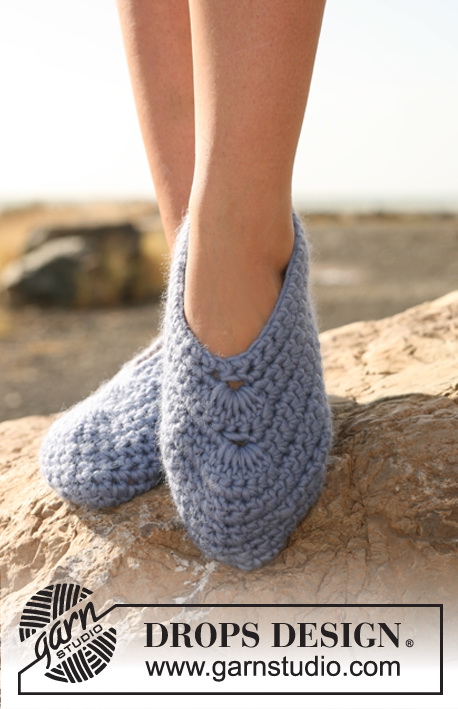
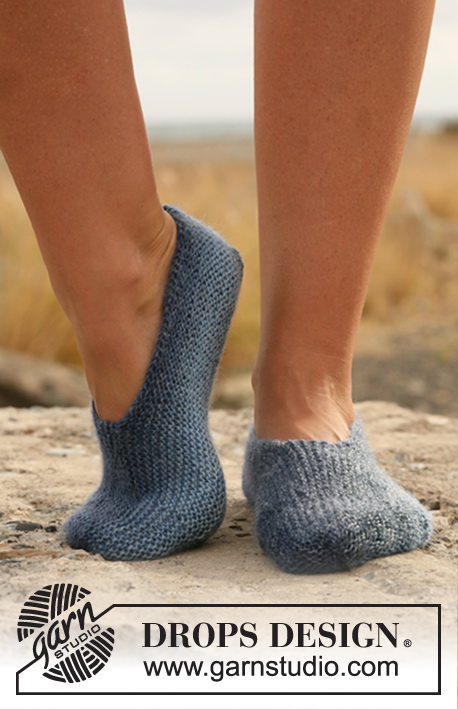
Dorm Slippers#dormslippers |
|
 |
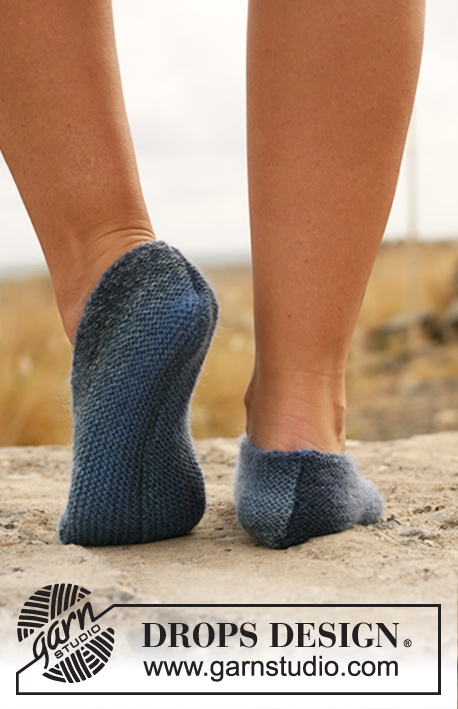 |
Knitted DROPS slippers in garter st in "Delight".
DROPS 129-35 |
|
|
SLIPPER: The slipper is worked back and forth on needle. The entire slipper is worked in garter st, i.e. K all rows. Cast on 56-62-70 sts on needles size 2.5 mm with Delight. Insert a marker after 44-48-52 sts seen from RS (the remaining 12-14-18 sts = toe). Continue to work back and forth with short rows as follows (Row 1 = RS): *Work 6 rows back and forth over all sts. K until marker, turn and K back*. NOTE: Tighten the thread a little extra on each turn to avoid holes. Repeat from *-* until piece measures 8-9-10 cm on the longest side. On the next row from RS, cast off the first 28-32-36 sts = 28-30-34 sts remain on needle. Continue back and forth with short rows over these sts until piece measures approx. 2-2½ -3 cm from where the sts where cast off (measured at the longest). Now cast on 28-32-36 new sts at the end of the next row from WS = 56-62-70 sts. Continue back and forth with short rows as before until piece measures 8-9-10 cm from the new sts. Cast off loosely. ASSEMBLY: Pull a thread through the front loop of every edge st on the toe, tighten and fasten the thread. Start at the end of the toe and sew the slipper tog edge to edge in the front loop of the sts under the foot and continue up the back of the heel to avoid a chunky seam. Fasten the thread tightly. |
|
Have you finished this pattern?Tag your pictures with #dropspattern #dormslippers or submit them to the #dropsfan gallery. Do you need help with this pattern?You'll find 8 tutorial videos, a Comments/Questions area and more by visiting the pattern on garnstudio.com. © 1982-2026 DROPS Design A/S. We reserve all rights. This document, including all its sub-sections, has copyrights. Read more about what you can do with our patterns at the bottom of each pattern on our site. |
|


With over 40 years in knitting and crochet design, DROPS Design offers one of the most extensive collections of free patterns on the internet - translated to 17 languages. As of today we count 324 catalogues and 12290 patterns translated into English (UK/cm). 12290
We work hard to bring you the best knitting and crochet have to offer, inspiration and advice as well as great quality yarns at incredible prices! Would you like to use our patterns for other than personal use? You can read what you are allowed to do in the Copyright text at the bottom of all our patterns. Happy crafting!
Post a comment to pattern DROPS 129-35
We would love to hear what you have to say about this pattern!
If you want to leave a question, please make sure you select the correct category in the form below, to speed up the answering process. Required fields are marked *.