
Leder du efter et garn?


Kommentarer / Spørgsmål (23)
![]() Leeanne skrev:
Leeanne skrev:
Addtnl. info for my last comments: I was confused by the first sentence in the short rows instructions stating to do 6 rows over all stitches. I thought that was part of the directions and the piece started with 6 rows before starting the short row repeat cycle but that is incorrect. This sentence is just telling you that there are 6 rows included in the short row instruction cycle that are not, in fact, short rows – 6 full rows and 2 short rows (not in that order) are listed in the row cycle.
06.09.2025 - 15:15
![]() Leeanne skrev:
Leeanne skrev:
(Cont. from previous two comments) next row starts with R3 and finishes with L3 and last row starts with L4 and finishes with R4. Then you start the cycle again with the first short row. So yes, the short row cycle is short row, full row, short row, full row, full row, full row, full row, full row as the pattern states (1 SR followed by 1 full row followed by 1 SR followed by 5 full rows). There are no edges in which you are not doing a picot edge instruction which allows for an even 8 row cycle
06.09.2025 - 15:08
![]() Leeanne skrev:
Leeanne skrev:
(continued from my previous comment) work the L2 row to the first marker and turn to work back to the “beginning” of the left side row, ending with L3, turn and start a new row with L4, working all the way across, ending with R4, (all the remaining rows in the cycle go all the way across – no more short rows) next row begins with R1 and goes all the way across to the last 4 stitches, ending in L1, turn and start with L2 and go all the way across to finish with R2, (cont. in next comment)
06.09.2025 - 15:03
![]() Leeanne skrev:
Leeanne skrev:
For anyone that needs it, here is the cycle of rows, combining picot edge with short rows instructions (it helps to draw this out on paper): start with right side 1 (R1) and work a short row (to first marker only, not all the way across), turn and work back to the beginning and knit the last four with R2, turn to start next row beginning with R3 and knit all the way across, ending this row with L1, then start the second short row with L2, (continued in next comment)
06.09.2025 - 14:58
![]() Leeanne skrev:
Leeanne skrev:
I figured it out! It is definitely not too complicated but they could have written this pattern differently so it wouldn’t take weeks or trial and error to figure out how to work the short rows in with the picot edge. Maybe we were just making it too complicated. I don’t have enough room to write the pattern in this comment so I’ll start a new one. It is easier to draw your lines and mark each end with the picot line number but I’ll try to write it here in my next comment.
06.09.2025 - 14:55
![]() Leeanne skrev:
Leeanne skrev:
I think I get it! I will test it in the morning and comment again trying to explain it for others if I have it right. My last two comments are wrong for sure. It helps to draw the rows as a picture on paper and mark the ends with the line number.
06.09.2025 - 05:10
![]() Leeanne skrev:
Leeanne skrev:
Revising my last comment: I now have it written as: short row, R1 &L1 on the same row, short row, R2 & L2, short row, R3 & L3, short row, R4 & L4. But this adds up to 8 rows on the sides and only 4 rows in the middle, not 6. Also not sure why the short rows directions refers to the middle stitches as being 70 (for the second size) when it’s only 30 (if excluding 25 on each end) or 72 (if excluding only the outermost 4 on each end).
06.09.2025 - 04:26
![]() Leanne skrev:
Leanne skrev:
The directions for the short rows are difficult to figure out. I’ve been working at this for a few weeks with my MIL, have restarted my project 7 times and we still don’t have it right. So we are alternating between right and left rows 1, 2, etc. when doing full rows? We are not doing any picot edge instructions when doing short rows, correct? To incoorporate the short rows, does it go: left row 1, right row 1, short row, left row 2, right row 2, short row, etc. through all four edge rows?
06.09.2025 - 02:40
![]() Leeanne skrev:
Leeanne skrev:
In addition to my last comment, I’m also confused because it says for garter stitch to knit two rows. The main directions says start with the right Picot edge, then knit the directions for garter stitch for the rest of the row, except for the last four and then knit the directions for the left edge on the last four. How do you knit two rows for the garter stitch directions in between doing the right and left edges?
14.07.2025 - 19:22DROPS Design svarede:
Dear Leeanne, the garter stitch structure is 2 knit rows. So whenever most of the stitches in the row are knitted, both from the right side and the wrong side, the resulting texture will be garter stitch. In the picot edges we are already using garter stitch, since all other stitches except for the 4 stitches on each side for the picot are knitted from the right side and the wrong side. So you just need to work as indicated; the edges will have the picot texture while the remaining stitches are knitted. Happy knitting!
19.07.2025 - 17:47
![]() Leeanne skrev:
Leeanne skrev:
A video of the actual pattern, please! This is so confusing. I’ve now learned how to do picot edges and short rows, but I can’t understand how to do both at the same time. How do you know which row of the picot edge you’re on if you’ve turned around and gone the other direction halfway through a row? And then when you start the next row do you count as if half the row is row 5 and half is row 6 or just continue with the next direction for that edge in sequence, ignoring row numbers?
14.07.2025 - 19:18DROPS Design svarede:
Dear Leeanne, please remember to mark your comments as questions so that we can see them and answer sooner. When you are combining the short rows and the picot edges, count only the rows where you reach the edges; those rows where you turn before reaching the edges are not taken into account for the picot edges on that side. Happy knitting!
19.07.2025 - 17:48
|
|
Berry Kiss#berrykissvest |
|
 |
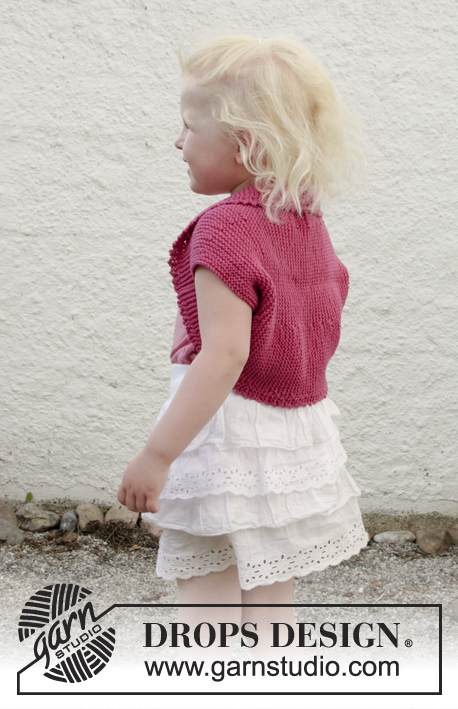 |
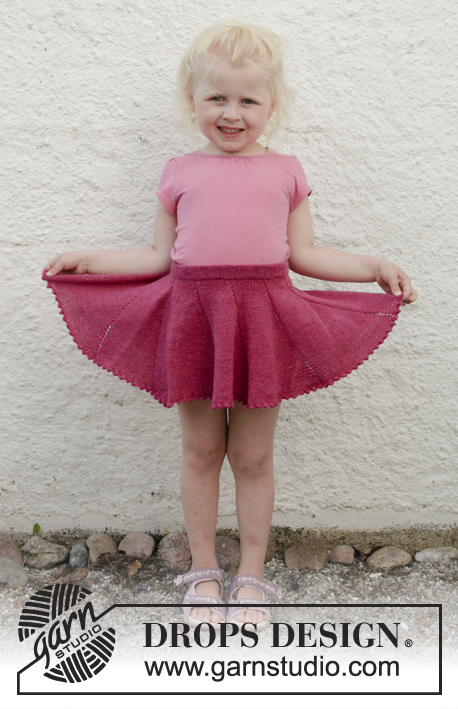
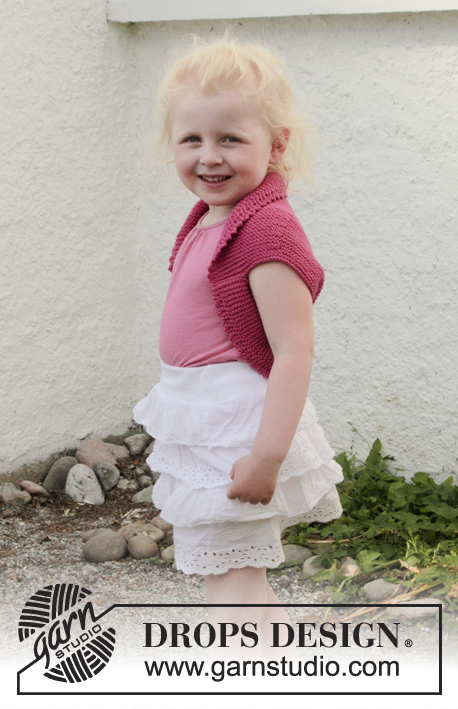
Strikket bolero med forkortede pinde, picotkant og retstrik i DROPS Cotton Merino. Til baby og børn i størrelse 3 - 12 år.
DROPS Children 28-7 |
|
|
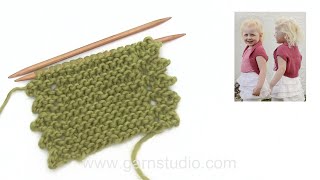
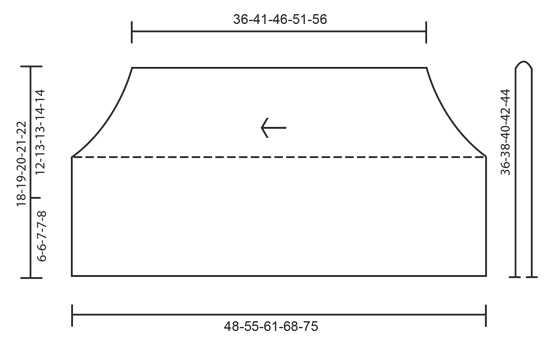
RETSTRIK (strikkes frem og tilbage): Strik ret på hver pind. PICOTKANT (frem og tilbage på pinden): HØJRE SIDE: 1.PIND (= retsiden): Strik ret. 2.PIND (= vrangen): Strik ret til der er 4 masker tilbage, disse strikkes således: 2 ret sammen, slå om, i hver af de 2 sidste masker strikkes der 2 masker = 2 nye masker på pinden. 3.PIND (= retsiden): Tag 1.maske løs af pinden som om den skulle strikkes ret, 1 ret, løft den løse maske over, 1 ret, og løft den bagerste maske på højre pinde over den forreste, 2 masker er nu lukket af - derefter strikkes der ret pinden ud. 4.PIND (= vrangen): Strik ret. Gentag 1. til 4.pind. VENSTRE SIDE: 1.PIND (= retsiden): Strik ret til der er 4 masker tilbage, disse strikkes således: 2 ret sammen, slå om, i hver af de 2 sidste masker strikkes der 2 masker = 2 nye masker på pinden. 2.PIND (= vrangen): Tag 1.maske løs af pinden som om den skulle strikkes ret, 1 ret, løft den løse maske over, 1 ret, og løft den bagerste maske på højre pind over den forreste, 2 masker er nu lukket af - derefter strikkes ret pinden ud. 3.PIND (= retsiden): Strik ret. 4.PIND (= vrangen): Strik ret. Gentag 1. til 4.pind. FORKORTEDE PINDE: Strik 6 pinde over alle masker, * strik 24-25-26-27-28 masker (frem til det første mærke), vend, stram tråden og strik p ud. Strik 1 pind over alle masker, vend, strik 24-25-26-27-28 masker (frem til det andet mærke), vend, stram tråden og strik p ud. Strik 5 pinde over alle masker *, gentag fra *-*. Dvs at der strikkes 6 pinde retstrik over de midterste 66-70-72-80-86 masker og 8 pinde retstrik over maskerne i hver side i hver rapport. -------------------------------------------------------- BOLERO: Arbejdet strikkes sidelæns frem og tilbage på rundpind fra ærmegab til ærmegab. Derefter bukkes boleroen dobbelt og sidesømmene syes. Slå 76-80-84-88-92 masker op med Cotton Merino på rundpind 4. Sæt 1 mærke i arbejdet 24-25-26-27-28 masker ind fra hver side (= 28-30-32-34-36 masker mellem mærkerne). Strik således – fra retsiden: PICOTKANT HØJRE SIDE, RETSTRIK – se forklaring over, over de næste 68-72-76-80-84 masker, PICOTKANT VENSTRE SIDE over de sidste 4 masker. HUSK PÅ STRIKKEFASTHEDEN! Fortsæt med retstrik og picotkant over de yderste 4 masker i hver side, SAMTIDIG strikkes der FORKORTEDE PINDE – se forklaring over! Når arbejdet måler ca 36-41-46-51-56 cm (målt på det korteste) lukkes der løst af. MONTERING: Buk boleroen dobbelt – måleskitsen viser arbejdet når det er bukket. Sy de nederste 6-6-7-7-8 cm sammen yderst i kanten i hver side (= 12-13-13-14-14 cm ærmegab). |
|
 |
|
Har du lavet denne opskrift?Så tagger du dine billeder med #dropspattern #berrykissvest eller send dem til #dropsfan galleriet. Behøver du hjælp med opskriften?Du finder 18 instruktionsvideoer, kommentarer/spørgsmål og mere i opskriften på www.garnstudio.com © 1982-2026 DROPS Design A/S. Alle rettigheder er reserveret. Dette dokument med tilhørende underdokumenter har copyright. Læs mere om hvad du kan gøre med vore opskrifter, nedert i alle vore opskrifter på hjemmesiden. |
|


Med over 40 år i strikke- og hæklebranchen tilbyder DROPS Design en af de mest omfattende kollektioner med gratis opskrifter på internettet - oversat til 17 sprog. Dags dato har vi 324 kataloger og 12290 opskrifter på Dansk.
Vi arbejder hårdt for at kunne tilbyde Dig det bedste man kan få af strik og hækling, inspiration og gode råd men også kvalitetsgarn til fantastiske priser! Vil du bruge vore opskrifter til andet end for privat brug? Du kan læse om hvilke regler som gælder under teksten Copyright nederst på siden i alle vore opskrifter. God fornøjelse!
Kommentere opskrift DROPS Children 28-7
Vi vil gerne høre din mening om denne model!
Hvis du ønsker at stille et spørgsmål, så husk at vælge rigtig kategori i menuen under - det vil give dig hurtigere svar. Obligatoriske felter er markeret med *.