Comments / Questions (8)
![]() Laila wrote:
Laila wrote:
Hallo! Seit einiger Zeit finde ich keine Möglichkeit mehr, eure wunderbaren Anleitungen bei Pinterest hinzuzufügen. Gibt es diese Option nicht mehr, oder ist das kleine rote P nur gut versteckt? Ich wäre sehr glücklich, wenn Ihr mir helfen könntet. Laila
03.10.2024 - 12:43DROPS Design answered:
Liebe Laila, oben neben dem Titel der Anleitung finden Sie einen gebogenen Pfeil und ein Herz. Wenn Sie auf den Pfeil klicken, können Sie Pinterest auswählen. Weiterhin viel Spaß mit unseren Anleitungen! :-)
03.10.2024 - 19:27
![]() Monica wrote:
Monica wrote:
Ønsker i barnestørrelse også 🥰
10.08.2024 - 12:15
![]() Alix wrote:
Alix wrote:
Your Perfect Bib
09.08.2024 - 22:53
![]() Heidi wrote:
Heidi wrote:
Sehr elegant!
09.08.2024 - 11:16
![]() Brenda Bradshaw wrote:
Brenda Bradshaw wrote:
Sea Bib
08.08.2024 - 21:02
![]() Fée Clochette wrote:
Fée Clochette wrote:
Pistachio Heart
08.08.2024 - 20:26
![]() Anja Freund wrote:
Anja Freund wrote:
Passt bestimmt gut unter einen Blazer und nimmt durch die spitze Form nicht so viel Platz weg von der Jacke oder dem Blazer. Gefällt mir sehr 👍
08.08.2024 - 16:43
![]() Iren wrote:
Iren wrote:
V-krave
08.08.2024 - 13:04
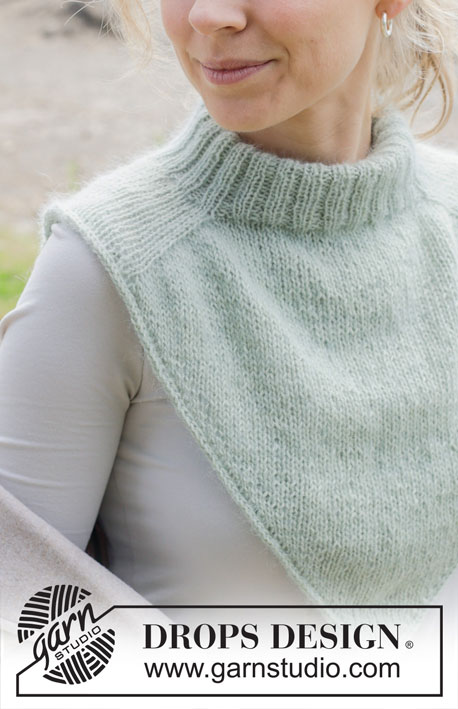
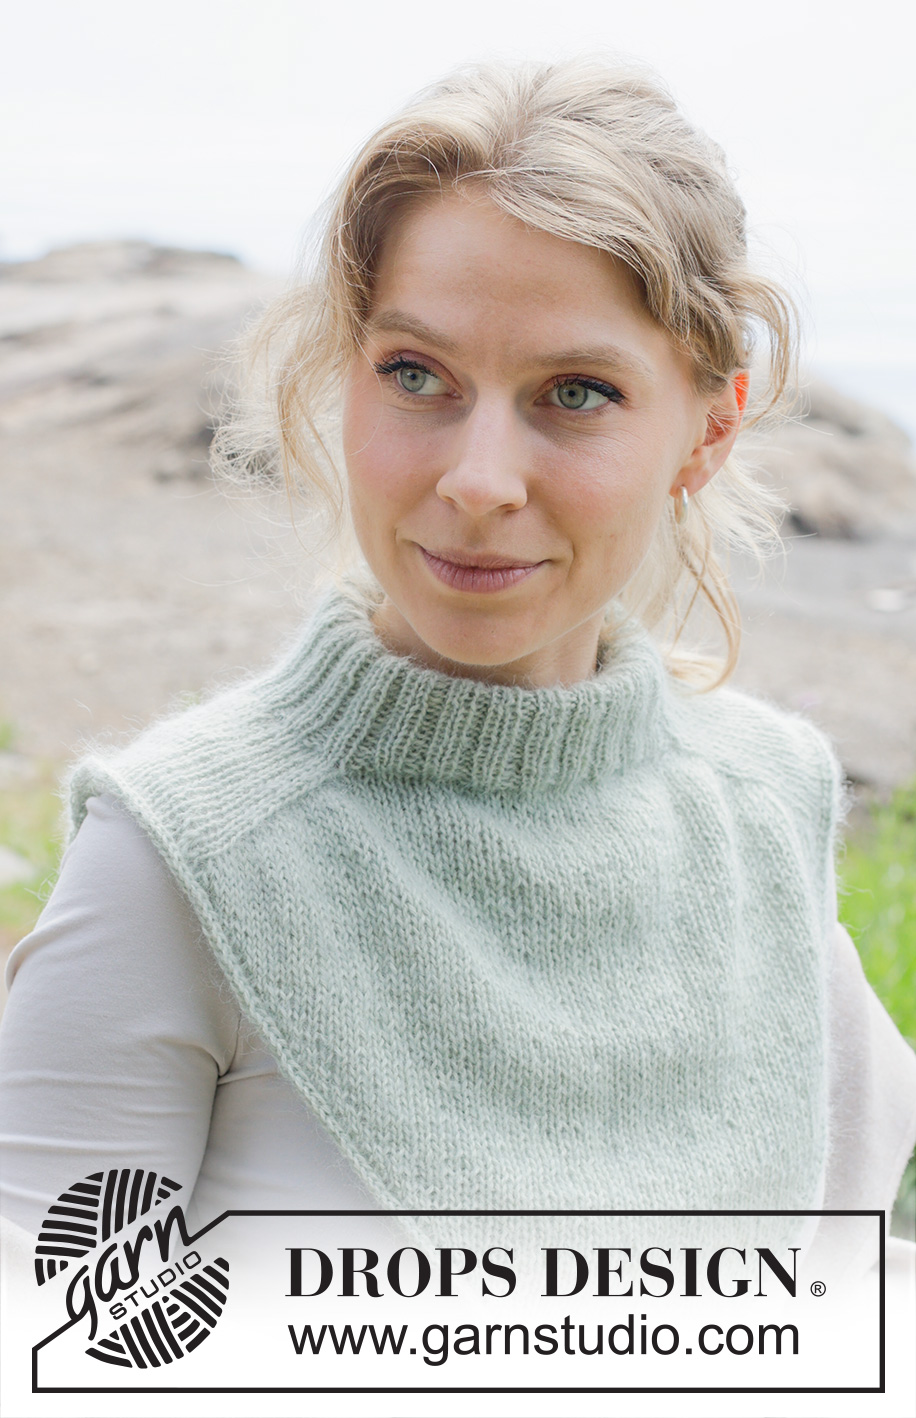
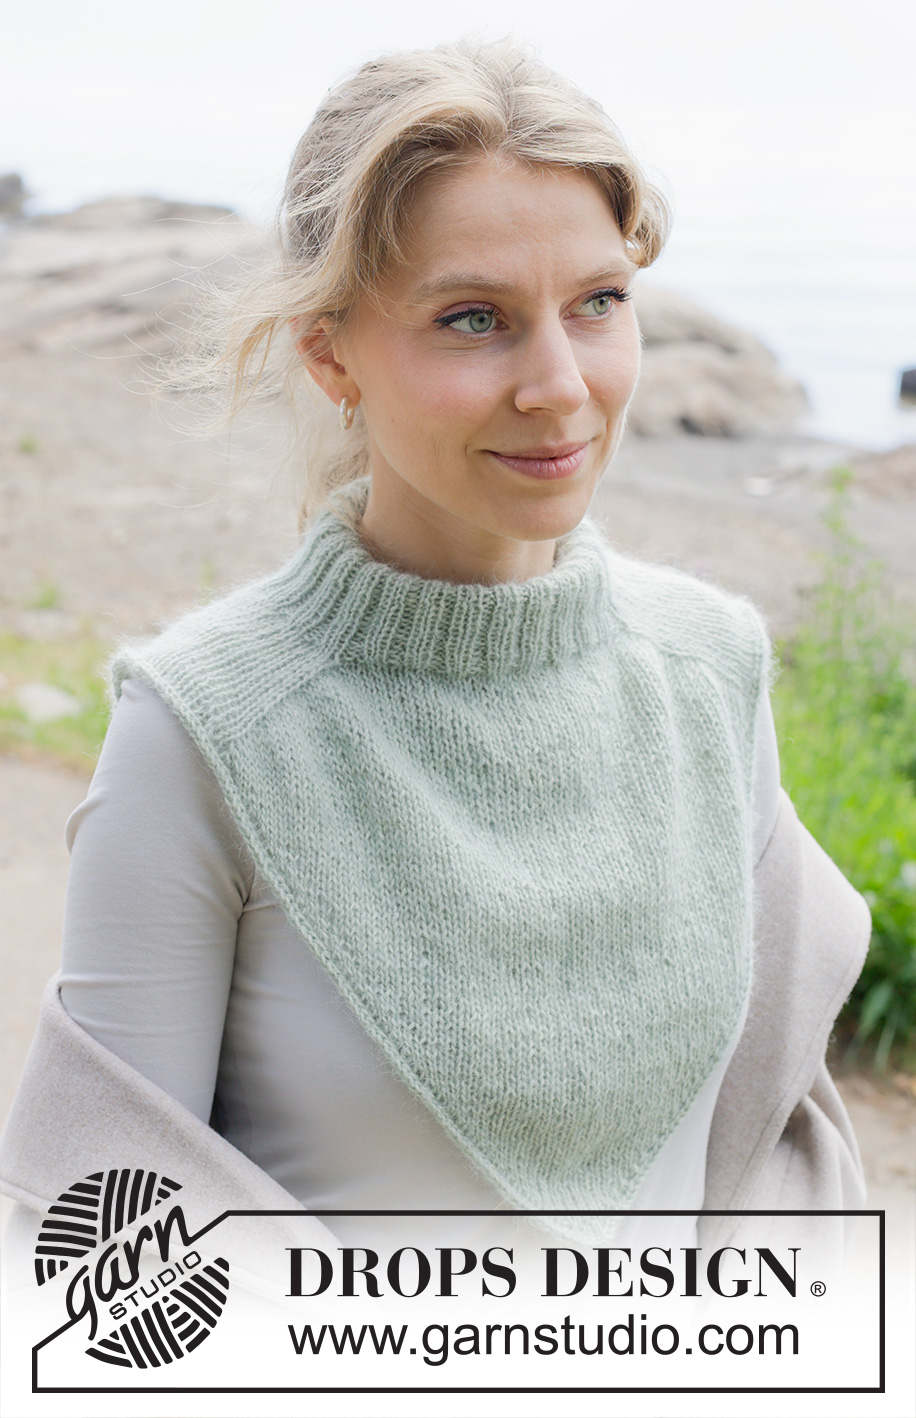
Peppermint Dream#peppermintdreamneckwarmer |
|
 |
 |
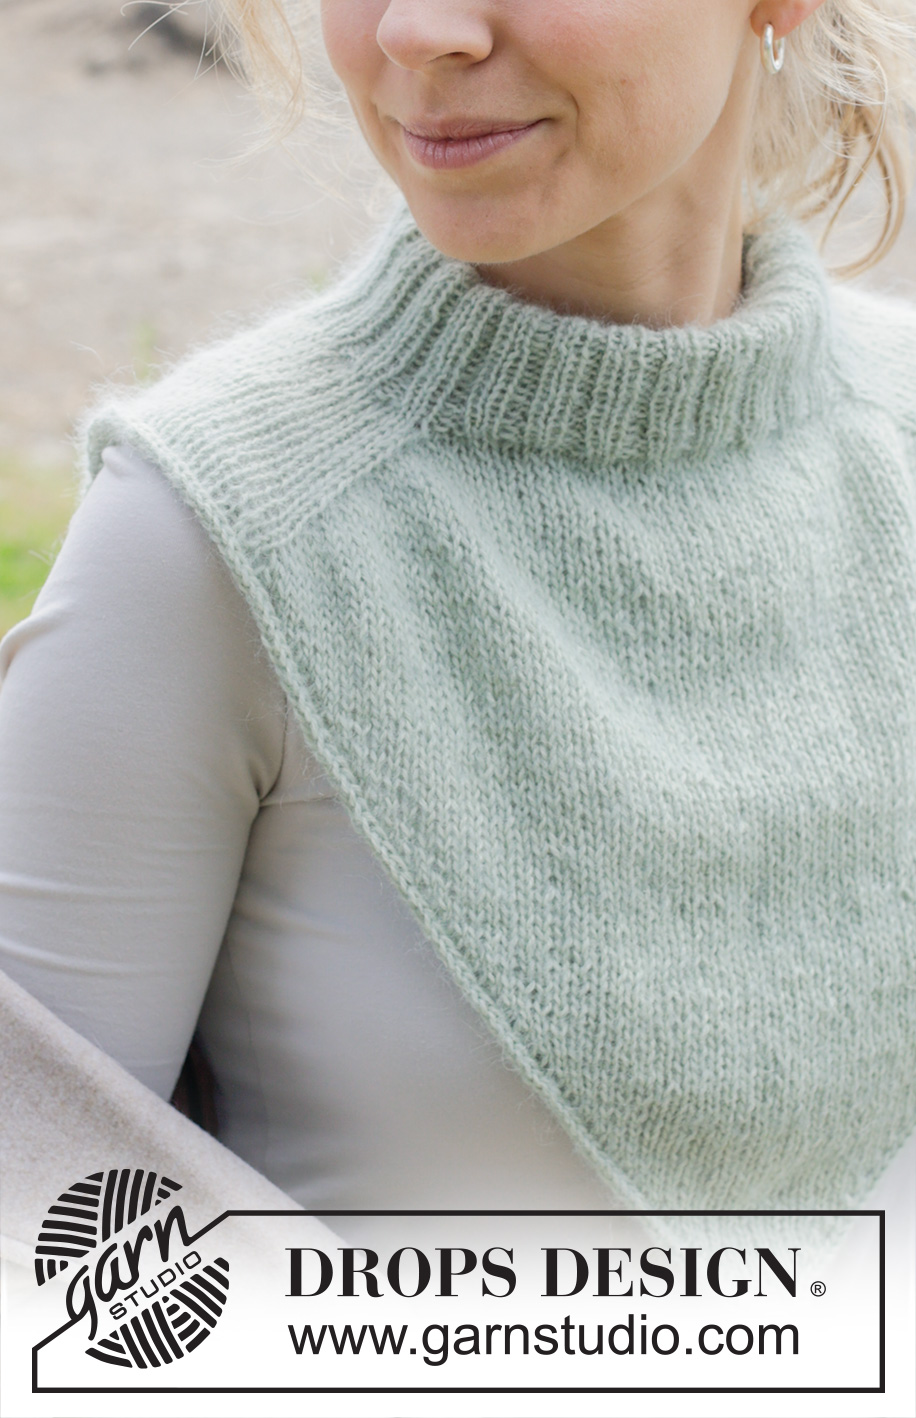
Knitted neck warmer in DROPS Alpaca and DROPS Kid-Silk. Piece is knitted top down with saddle shoulders and i-cord.
DROPS 253-26 |
|
|
---------------------------------------------------------- EXPLANATION FOR THE PATTERN: ---------------------------------------------------------- INCREASE TIP: INCREASE 1 STITCH TOWARDS THE LEFT AFTER MARKER: Use left needle to pick up yarn between 2 stitches from round below, pick up yarn from the back and knit stitch in back loop of stitch. INCREASE 1 STITCH TOWARDS THE RIGHT BEFORE MARKER: Use left needle to pick up yarn between 2 stitches from round below, pick up yarn from the back and knit stitch in front loop of stitch. KNITTING TIP: When working short row there will be a small hole when turning the piece - the hole can be closed by tightening the yarn or using the technique German Short Rows as follows: Slip first stitch purlwise. Place strand over right needle and tighten well at the back (should lead to two loops on needle). These loops are worked together as 1 regular stitch when the edge is worked in the round at the end. ---------------------------------------------------------- START THE PIECE HERE: ---------------------------------------------------------- NECK WARMER - SHORT OVERVIEW OF PIECE: In this pattern needles of different length have been used, begin with fitting length for number of stitches and switch as needed. Work neck edge and yoke in the round on circular needle from back of shoulder, top down. Divide the piece for front piece and back piece and finish each part separately back and forth. When working the back piece, put stitches aside for edge along the way. When the back piece is finished, these edge stitches is put aside on the needle while the front piece is worked on another circular needle. Finish by working an i-cord edge around the entire garment. NECK EDGE: Cast on 96-104 stitches on circular needle size 5 mm with 1 strand DROPS Alpaca and 1 strand DROPS Kid-Silk (= 2 strands). Switch to circular needle size 3.5 mm (cast on on a larger needle to get an elastic cast-on edge). Work rib in the round (= knit 2/purl 2) for 9-9 cm. Insert 1 marker in piece here, measure yoke from this marker. YOKE: Work next round as follows: Switch to circular needle size 5 mm and work in stocking over the first 18-18 stitches (= shoulder stitches), insert 1st marker here. Work in stocking stitch over the next 30-34 stitches while at the same time decreasing 1-1 stitch (= front piece), insert 2nd marker here. Work in stocking stitch over the next 18-18 stitches (= shoulder stitches), insert 3rd marker here. Work in stocking stitch over the last 30-34 stitches while at the same time decreasing 1-1 stitch evenly (= back piece), insert 4th marker here = 94-102 stitches. SADDLE SHOULDER INCREASE: Work in stocking stitch while AT THE SAME TIME increasing 4 stitches on round as follows: Increase AFTER 1st and 3rd marker, and BEFORE 2nd and 4th marker - read INCREASE TIP Increase only on back piece and front piece and number of shoulder stitches stays the same. Increase like this every round 16-16 times in total = 158-166 stitches. Remember to follow the knitting tension! After last increase piece measures approx. 7-7 cm from marker in the neck. On next round (= last round worked in the round), slip shoulder stitches on a thread and divide front piece and back piece. Work 18-18 stitches in stocking stitch and slip them on a thread (= shoulder stitches), work in stocking stitch over the next 61-65 stitches (= front piece), work 18-18 stitches in stocking stitch and slip them on a thread (= shoulder stitches), work in stocking stitch over the next 61-65 stitches (= back piece). Then work front piece and back piece back and forth separately. BACK PIECE: = 61-65 stitches. Now work in stocking stitch back and forth while at the same time working short rows - read KNITTING TIP. Stitches that remain unworked on each side on every row, are used to work the edge around the garment at the end. Leave these stitches on the circular needle, or place the stitches on another needle together with shoulder stitches, but note that if German short row is used the stitches will look like double stitches because of the technique when turning. Work 1 row in stocking stitch from wrong side, then work as follows: ROW 1 (= right side): Slip first stitch purlwise, tighten yarn - remember KNITTING TIP, work in stocking stitch the rest of row, turn. ROW 2: Slip first stitch purlwise, tighten yarn, work in stocking stitch until 1 stitch more remains than on previous turn in this side (i.e. turn when you get to the stitch that was turned and tightened on previous row), and turn. Repeat 2nd ROW so that only 1 stitch (= the middle stitch) remain after 60-64 rows and 30-32 stitches have been put aside for edge in each side = 61-65 stitches for edge. Leave all stitches on hold on circular needle until front piece has been worked. FRONT PIECE: = 61-65 stitches. Slip stitches for front piece on to circular needle size 5 mm, and work the same way as back piece. EDGE: = 158-166 stitches. Now work an edge in the round over all stitches, begin at increase for saddle shoulder on back piece to work over stitches from right shoulder first, then along front piece, over left shoulder and finally along back piece. Use circular needle size 5 mm and work 1st round as follows: Knit 18-18 (= shoulder stitches), * make 1 yarn over, knit 1*, work from *-* over the next 61-65 stitches – remember KNITTING TIP, make 1 yarn over, knit 18-18 (= shoulder stitches), * make 1 yarn over, knit 1*, work from *-* over the next 61-65 stitches, finish with 1 yarn over = 282-298 stitches. Now cast off with i-cord from right side. Begin by cast on 2 stitches on needle at the end of previous round - do not turn piece. Slip the 2 new stitches from right needle on to left needle so that working yarn is 2 stitches in on left needle (the working yarn tightens the piece when working to form a little tube). ROW 1 (= right side): Knit 1, knit the next 2 stitches twisted together. Slip the 2 stitches from right needle back on left needle. Do not turn piece. Repeat ROW 1 until 2 stitches remain on right needle. Slip the 2 stitches from right needle back on left needle. Cast off. Sew a little stitch that binds beginning/end of I-cord together. |
|
Have you finished this pattern?Tag your pictures with #dropspattern #peppermintdreamneckwarmer or submit them to the #dropsfan gallery. Do you need help with this pattern?You'll find 23 tutorial videos, a Comments/Questions area and more by visiting the pattern on garnstudio.com. © 1982-2025 DROPS Design A/S. We reserve all rights. This document, including all its sub-sections, has copyrights. Read more about what you can do with our patterns at the bottom of each pattern on our site. |
|







Post a comment to pattern DROPS 253-26
We would love to hear what you have to say about this pattern!
If you want to leave a question, please make sure you select the correct category in the form below, to speed up the answering process. Required fields are marked *.