
Popular categories
Looking for a yarn?


Comments / Questions (40)
![]() Mathilde wrote:
Mathilde wrote:
Jeg er i gang med økning på raglan lavender puff,. Jeg har fulgt oppskriften nøye, men det må være noe jeg gjør galt for etter å ha økt på hver 8. omgang i fire økeomganger har jeg kommet opp i det antallet jeg skulle vært oppi etter åtte økeomganger. Jeg har økt på hver side av vrangmasken med merke i og fulgt oppskriften deres for neste omgang, men likevel blir det feil. Kan dere hjelpe meg å forstå hva jeg gjør feil😅
14.05.2023 - 00:05DROPS Design answered:
Hei Mathilde. Usikker på hvor det blir feil hos deg, har du strikket et patentkast som en egen maske kanskje? For å hjelpe deg best mulig er det fint om du skrive hvilken str. du strikker? Om du strikker f.eks str. XS starter du med 76 masker, deretter skal du øke 7 ganger på hver 8. omgang med 16 masker = 76+16+16+16+16+16+16+16 = 188 masker. mvh DROPS Design
15.05.2023 - 12:44
![]() Mieke Baras wrote:
Mieke Baras wrote:
Minderingen aan de zijkanten en onder de mouw: “begin na de av st met markeerdraad”. De middelste st van de 5 nieuw opgezette steken ziet eruit als een rechte st ( die als een averecht afgehaalde st en een omslag recht is samengebreid) Klopt dat? Bij mij zien die 5 st er op een even nld zo uit: (1 afgehaalde av st en om samengebreid, 1om, 1 st av afhalen ) x2, eindigen met 1 afgehaalde av st en omslag samengebreid. Is de 2de re samengebreide av afgehaalde st met de omsl de markeersteek?
16.03.2023 - 08:02
![]() Ang wrote:
Ang wrote:
Kann es sein, dass sich hier ein Fehler bei der Maschenzahl Größe XS eingeschlichen hat? es sollten nach dem Bund, und der Abnahme 76 Maschen sein, zählt man jedoch die einzelnen Abschnitte der Markierer zusammen kommt man auf 72... was stimmt den nun? Liebe Grüße
30.11.2022 - 09:08DROPS Design answered:
Liebe Ang, beachten Sie, daß die Markierer jeweils in einer Masche eingesetzt werden, so haben Sie: 13+1+9+1+27+1+9+1+14 = 76 Maschen. Viel Spaß beim stricken!
30.11.2022 - 11:48
![]() Hannah wrote:
Hannah wrote:
For the last second row in the yoke portion, when setting up for the English rib, my round ends with a k1, yo, sl1p, but then the first row of the chart says to yo, sl1p, but that feels awkward and incorrect to have a yo, a slipped stitch, and another yarnover as it’s not following the ribbing pattern. Should I start on the second row of the chart? Please advise
09.11.2022 - 00:54DROPS Design answered:
Dear Hannah, after having worked the round (K1, YO + slip 1p), you have to work the first row in A.1, ie start with (YO + slip 1 p), the transition at the beg of the round might look weird but on the next round it will worked perfectly since the last stitch of the round will be worked tog. with its yarn over - see this video at approx. 02:48 you can see the end of 2nd round and the beg of 3rd round. Happy knitting!
09.11.2022 - 08:32
![]() FRANCINE wrote:
FRANCINE wrote:
Bonjour, j'ai déjà posé cette question mais ne trouve pas ma réponse. Dois-je faire l'échantillon avec des aiguilles No5, 14 m sur 36 rangs ou 17 m sur 32 rang? Moi je l'ai fait avec des aiguilles No 4, 23 m sur 30 rangs. suis-je dans l'erreur? merci
13.05.2022 - 20:26DROPS Design answered:
Bonjour Francine, l'échantillon se réalise avec les aiguilles 5, vous devez avoir 17 mailles x 22 rangs en jersey et 14 mailles x 36 rangs en côtes anglaises avec 1 fil Alpaga + 1 fil Kid-Silk, ce qui compte avant tout c'est le bon échantillon, essayez avec des aiguilles plus grosses, pour augmenter vos chances d'avoir l'échantillon. Retrouvez plus d'infos ici. Bon tricot!
16.05.2022 - 08:10
![]() Elisabeth wrote:
Elisabeth wrote:
Merci pour votre réponse.
10.12.2021 - 19:39
![]() Elisabeth wrote:
Elisabeth wrote:
Bonjour, j'aimerai tricoter ce modèle avec Drops Merino. L'échantillon semble correspondre aux 2 fils ci-dessus (17/22 pour 10 cm). Par contre, je vois qu'il n'appartient pas à la même catégorie de fil... Donc, est-ce possible? Si oui, je vais tricoter la taille XL ou XXL et je vais le faire plus long de 10-15 cm. Quelle quantité de laine dois-je prévoir d'acheter? Bonnes salutations.
09.12.2021 - 21:49DROPS Design answered:
Bonjour Elisabeth, ce pull se tricote avec 2 fils du groupe A (Alpaca + Kid-Silk) mais on peut le tricoter avec 1 fil du groupe C (rappelez-vous juste que la texture sera différente car les fils sont différents et le résultat le sera aussi) - vous trouverez ici comment calculer la nouvelle quantité. Votre magasin saura vous aider si besoin, même par mail ou téléphone. Bon tricot!
10.12.2021 - 08:25
![]() Isabelle wrote:
Isabelle wrote:
Bonjour A 18cms je dois faire 2 diminutions sur le devant. À combien de mailles je dois les faire du marqueur (au centre des 5 mailles sous l’aisselle). Merci beaucoup pour votre aide Bonne journée Isabelle
12.03.2021 - 22:46DROPS Design answered:
Bonjour Isabelle, ces diminutions se font comme expliqué sous DIMINUTIONS (côtés pull et milieu sous les manches):, à 8 cm, vous avez diminué 2 m inclinées à gauche au début du dos, set 2 m inclinées à droite à la fin du dos; vous diminuez maintenant de la même façon mais sur le devant cette fois: 2 mailles inclinées à gauche au début du devant et 2 mailles vers la droite à la fin du devant. Bon tricot!
15.03.2021 - 08:16
![]() Chloé wrote:
Chloé wrote:
Bonjour, Je suis embêtée car après avoir fait "*1 maille endroit, 1 jeté, glisser 1 maille à l'envers*, répéter de *-* jusqu'à la fin du tour.", je me retrouve avec "1 glissé, 1 maille glissée" sur la fin de mon rang et après je dois refaire la même opération pour le début du rang 2. Dois-je faire 2 jetés consécutifs ? Et ensuite, les jetés et glissés suivants, je dois les tricoter en endroit ou en envers ? Merci d'avance pour votre aide ! Chloé
25.02.2021 - 00:50DROPS Design answered:
Bonjour Chloé, effectivement, quand on tricote des côtes anglaises en rond, on a, à un moment donné, 2 jetés qui vont se suivre: on termine le rang 2 par ex avec "1 jeté, 1 m glissée" et on doit commencer le tour suivant par 1 jeté, 1 m glissée, veillez à bien placer votre marqueur de début de tour au bon endroit pour que les jetés ne se confondent pas. Cette vidéo montre comment tricoter des côtes anglaises en rond - au time code 2:48 environ vous verrez la fin du tour 2 puis le début du tour 3. Bon tricot!
25.02.2021 - 07:33
![]() Isabelle wrote:
Isabelle wrote:
Bonjour Tout d'abord un grand merci pour votre aide. Je voudrais faire ce même pull avec une laine moins grosse... Comment puis-je m'y prendre ? Merci beaucoup
22.02.2021 - 09:00DROPS Design answered:
Bonjour Isabelle, ce pull se tricote sur la base de 17 m x 22 rangs jersey = 10 x 10 cm, si vous utilisez une laine plus fine, votre échantillon sera différent et donc les explications ne fonctionneront pas (retrouvez plus d'infos sur l'échantillon ici. Choisissez plutôt un modèle adapté à la laine que vous souhaitez utiliser pour optimiser vos chances pour vous éviter d'avoir à tout recalculer. Bon tricot!
22.02.2021 - 09:51
|
||||||||||
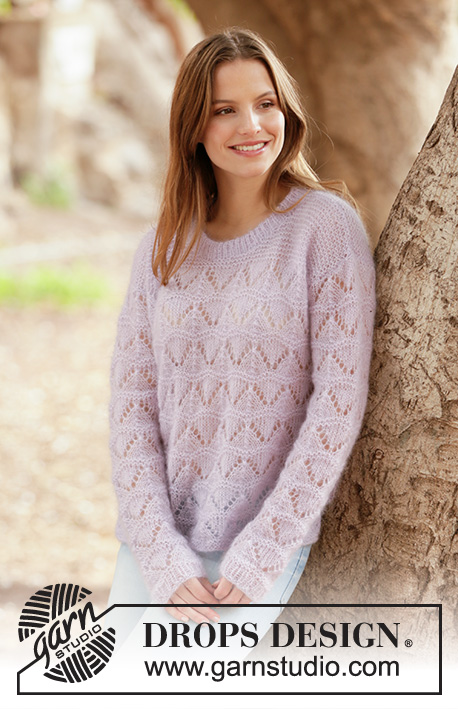
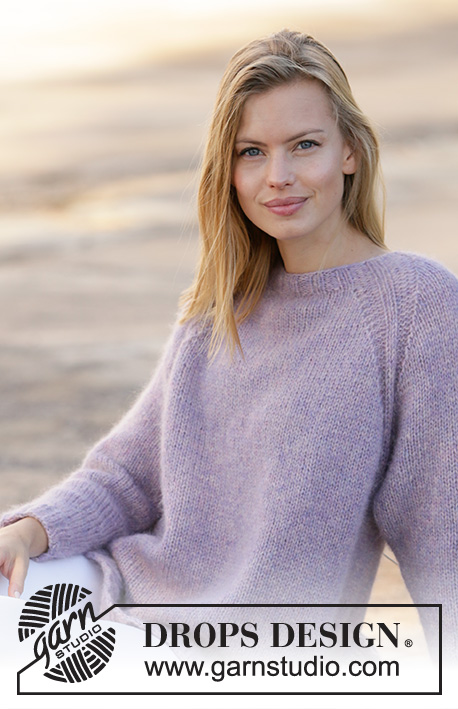
Lavender Puff#lavenderpuffsweater |
||||||||||
 |
 |
|||||||||
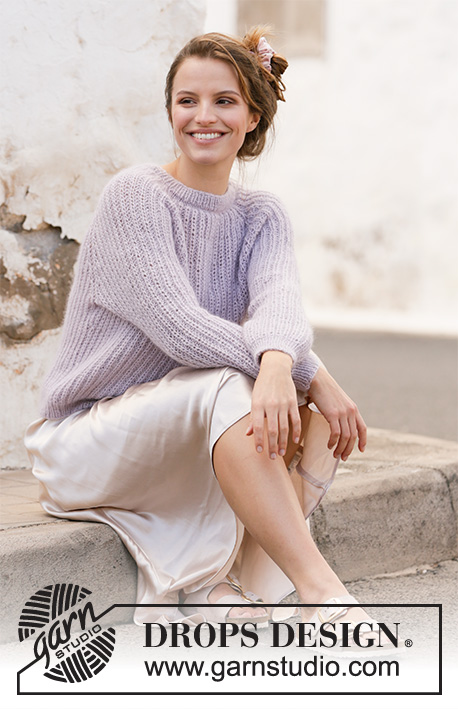
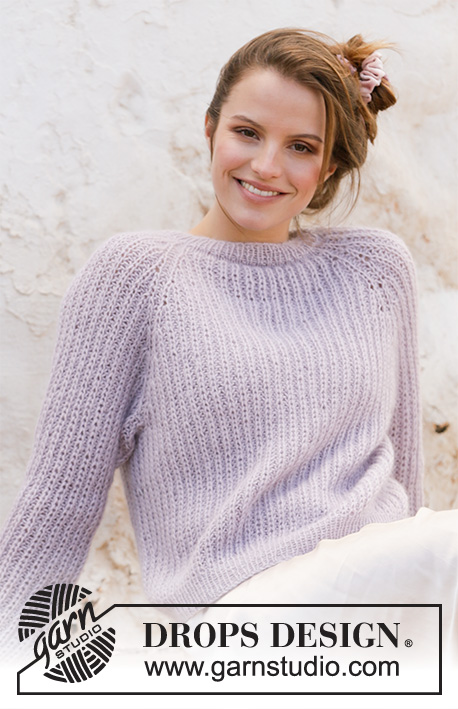
Knitted jumper in DROPS Alpaca and DROPS Kid-Silk. The piece is worked top down with English rib and raglan. Sizes XS - XXL.
DROPS 213-33 |
||||||||||
|
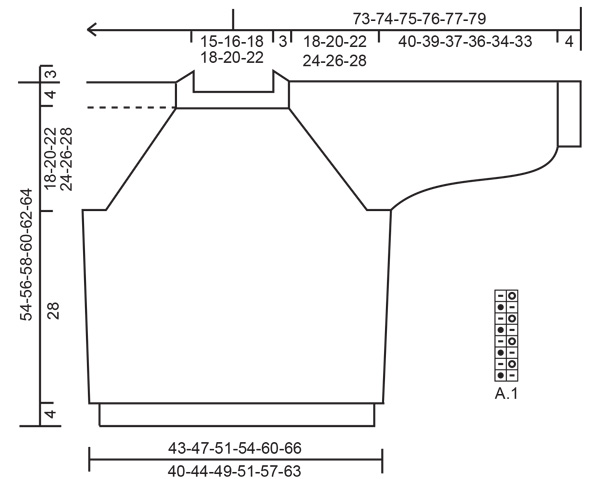
------------------------------------------------------- EXPLANATIONS FOR THE PATTERN: ------------------------------------------------------- PATTERN: See diagram A.1. INCREASE TO RAGLAN: Increase to raglan on each side of the purled stitch with marker (= raglan-stitch), i.e. increase in the knitted stitch and yarn over closest to the raglan-stitch. Increase 2 stitches on each side of all raglan-stitches (= 16 stitches increased on an increase-round). Increase 2 stitches in the knitted stitch by working 3 stitches in the stitch and yarn over as follows: Knit together the stitch and yarn over but do not slip them off the left needle, make 1 yarn over the right needle and knit together the stitch and yarn over 1 more time, then slip the knitted stitch and yarn over off the left needle (= 2 stitches increased). Then work the new stitches in English rib (A.1) but be aware that on the first round after the increase, the purled stitches are purled without yarn overs, as there are no yarn overs for these stitches. DECREASE TIP (for sides of body and mid under the sleeves): Decrease in stitches closest to the purled stitches with markers mid under the sleeve and in the sides of the body. All decreases are worked on a round where the knitted stitches and yarn overs are knitted together! DECREASE 2 STITCHES TOWARDS THE LEFT AS FOLLOWS (i.e. start after the purled stitch with marker): Slip the first knitted stitch and yarn over onto the right needle as if to knit together, knit the next 2 stitches together (i.e. 1 purled + knitted stitch and yarn over), then pass the slipped stitch and yarn-over over the knitted together stitches (= 2 stitches decreased). DECREASE 2 STITCHES TOWARDS THE RIGHT AS FOLLOWS (i.e. start 3 stitches + 2 yarn overs before the purled stitch with marker): Slip the first knitted stitch and yarn over onto the right needle as if to knit together, purl 1, pass the slipped stitch and yarn-over over the purled stitch, slip the stitch back onto the left needle, pass the stitch and yarn-over over the stitch which was slipped back onto the left needle, and finally slip the remaining stitch onto the right needle (= 2 stitches decreased). CASTING-OFF TIP: To avoid the cast-off edge being tight you can cast off with a larger size needle. If the edge is still tight, make 1 yarn over after approx. each 4th stitch at the same time as casting off and the yarn overs are cast off as normal stitches. ------------------------------------------------------- START THE PIECE HERE: ------------------------------------------------------- JUMPER – SHORT OVERVIEW OF THE PIECE: The neck and yoke are worked in the round with circular needle, from mid back and top down. The yoke is divided for body and sleeves and the body is continued in the round with circular needle. The sleeves are worked with short circular needle/double pointed needles, top down. NOTE: All stitch-counts given when working English rib are without the yarn overs, as they are counted together with their respective stitches. NECK: Cast on 78-82-86-88-96-100 stitches with short circular needle size 3.5 mm and 1 strand Alpaca and 1 strand Kid-Silk (= 2 strands). Beginning of round = mid-back. Knit 1 round then work rib in the round (= knit 1 / purl 1) for 3 cm. Knit 1 round where you decrease 2-2-6-4-0-0 stitches evenly spaced = 76-80-80-84-96-100 stitches. Insert 1 marker in the round, then work the yoke as described below. The yoke is measured from the marker. YOKE: Change to circular needle size 5 mm and knit 1 round. The next round is worked as follows: * Knit 1, 1 yarn over, slip 1 stitch as if to purl *, work from *-* to the end of the round. Now insert 4 markers in the piece as described below (without working the stitches). The markers will be used when increasing to raglan. Count 13-15-15-15-17-17 stitches (= ½ back piece), insert 1 marker in the next stitch (= raglan-stitch), count 9-9-9-9-13-13 stitches (= sleeve), insert 1 marker in the next stitch (= raglan-stitch), count 27-29-29-31-33-35 stitches (= front piece), insert 1 marker in the next stitch (= raglan-stitch), count 9-9-9-9-13-13 stitches (= sleeve), insert 1 marker in the next stitch (= raglan-stitch). There are 14-14-14-16-16-18 stitches left for the back piece after the last marker. Now work A.1 in the round. AT THE SAME TIME increase to RAGLAN as described below. REMEMBER THE KNITTING TENSION! RAGLAN: When you have worked 7 rounds of A.1 (and the next round begins with «knit the yarn over and slipped stitch together »), increase to RAGLAN – read description above (= 16 stitches increased on an increase-round). Increase like this every 8th round (i.e. every 4th round with visible English rib stitches in height) a total of 7-8-9-10-11-12 times = 188-208-224-244-272-292 stitches on the needle. Continue with A.1 without further increases until the piece measures 18-20-22-24-26-28 cm from the marker on the neck (the piece measures approx. 22-24-26-28-30-32 cm from the shoulder). Now divide the piece for body and sleeves on the next round as follows: Work 27-31-33-35-39-43 stitches as before (= ½ back piece), place the next 39-43-45-51-57-59 stitches on 1 thread for the sleeve, cast on 5 new stitches on the needle (= in side under the sleeve), work 55-61-67-71-79-87 stitches as before (= front piece), place the next 39-43-45-51-57-59 stitches on 1 thread for the sleeve, cast on 5 new stitches on the needle (= in side under the sleeve) and work the remaining 28-30-34-36-40-44 stitches as before (= ½ back piece). Cut the strand. Body and sleeves are finished separately. THE PIECE IS NOW MEASURED FROM HERE! BODY: = 120-132-144-152-168-184 stitches. Insert 1 marker in the middle of the 5 stitches cast on under each sleeve. Allow the markers to follow your work onwards; they will be used when decreasing in the sides of the body. Start the round at the stitch with the marker and continue with A.1 in the round as before. DECREASE IN SIDES: When the piece measures 8 cm from the division, decrease 2 stitches on the back piece by decreasing 2 stitches in the English rib stitch closest to the purled stitch with the marker on each side – read DECREASE TIP; i.e. decrease 2 stitches towards the left at the beginning of the back piece and 2 stitches to the right at the end of the back piece = 116-128-140-148-164-180 stitches. When the piece measures 18 cm from the division, decrease in the same way on the front piece (i.e. decrease 2 stitches towards the left at the beginning of the front piece and 2 stitches towards the right at the end of the front piece) = 112-124-136-144-160-176 stitches. Continue working until the piece measures 28 cm from the division in all sizes (there is 4 cm left to finished length. You can try the garment on and work to the desired length). Change to circular needle size 3.5 mm and work rib in the round (= knit 1 / purl 1) – on the first round the yarn-overs are knitted together with the knitted stitches. When the rib measures 4 cm, loosely cast off with knit over knit and purl over purl – read CASTING-OFF TIP! The jumper measures approx. 54-56-58-60-62-64 cm from the shoulder down. SLEEVE: Place the 39-43-45-51-57-59 stitches from the thread on the one side of the piece on double pointed needles or short circular needle size 5 mm and knit up 1 stitch in each of the 5 stitches cast on under the sleeve = 44-48-50-56-62-64 stitches. Insert a marker thread in the middle stitch of the 5 stitches cast on under the sleeve. Allow the thread to follow your work onwards; it will be used when decreasing under the sleeve. Work A.1 in the round. AT THE SAME TIME on round 8 (i.e. on the 4th round of visible English rib stitches), decrease 4 stitches mid under the sleeve – read DECREASE TIP (decrease 2 stitches towards the left after the stitch with the marker and decrease 2 stitches towards the right before the stitch with the marker). Decrease like this every 8th-8th-8th-8th-6th-6th round (i.e. every 4th-4th-4th-4th-3rd-3rd round of visible English rib stitches) a total of 2-2-2-3-3-3 times = 36-40-42-44-50-52 stitches. Continue working until the sleeve measures 40-39-37-36-34-33 cm from the division (there is 4 cm left to finished length. You can try the garment on a work to the desired length). NOTE: Shorter measurements in larger sizes due to wider neck and longer yoke. Change to double pointed needles size 3.5 mm. Work rib (= knit 1 / purl 1) – on the first round the yarn overs are knitted together with the knitted stitches. When the rib measures 4 cm, cast off with knit over knit and purl over purl – remember CASTING-OFF TIP! The sleeve measures approx. 44-43-41-40-38-37 cm from the division. Work the other sleeve in the same way. |
||||||||||
Diagram explanations |
||||||||||
|
||||||||||
 |
||||||||||
Have you finished this pattern?Tag your pictures with #dropspattern #lavenderpuffsweater or submit them to the #dropsfan gallery. Do you need help with this pattern?You'll find 16 tutorial videos, a Comments/Questions area and more by visiting the pattern on garnstudio.com. © 1982-2026 DROPS Design A/S. We reserve all rights. This document, including all its sub-sections, has copyrights. Read more about what you can do with our patterns at the bottom of each pattern on our site. |
||||||||||


With over 40 years in knitting and crochet design, DROPS Design offers one of the most extensive collections of free patterns on the internet - translated to 17 languages. As of today we count 324 catalogues and 12290 patterns translated into English (UK/cm).
We work hard to bring you the best knitting and crochet have to offer, inspiration and advice as well as great quality yarns at incredible prices! Would you like to use our patterns for other than personal use? You can read what you are allowed to do in the Copyright text at the bottom of all our patterns. Happy crafting!
Post a comment to pattern DROPS 213-33
We would love to hear what you have to say about this pattern!
If you want to leave a question, please make sure you select the correct category in the form below, to speed up the answering process. Required fields are marked *.