
Popular categories
Looking for a yarn?














Comments / Questions (142)
 Katri wrote:
A question has been asked here several times in different languages i.e. how to proceed with the A6 pattern plus the 2sts from pattern A5. Total being 696 sts at this point, how do you reach the total of 1072 sts at the end? One pattern A6 adding only 4sts and there being in total 40 x A6 pattern, this adds only 160 sts to the 696 sts = 856. Where do the rest over 200 sts come from? Does one add an YO to the 2first sts of A5 pattern on each round and how?
08.04.2018 - 10:32DROPS Design answered:
Dear Katri, you will inc 1 st in each A.5A and 1 st in each A.5C on every other row, ie you will inc (2 sts x 27 inc row = every other row in A.6) x 4 repeats in width = 216 sts inc = there will be a total of 1072 sts after A.6 has been worked 1 time in height (including the sts inc in A.5A and A.5C). Happy knitting!
09.04.2018 - 13:27
 Maria wrote:
Jag förstår inte detta mönster efter varv 2 i A6. Var placerar jag de ökade maskorna i A.5 A / A.5 C fortsättningsvis för att få ihop mönstret korrekt i slutändan? Alltså, hur fortsätter jag varv 3 efter 2 X A.6??? Tacksam för svar.
08.12.2017 - 22:15DROPS Design answered:
Hej, de ökade maskorna i A.5 ska stickas räta.
11.12.2017 - 17:02
 Kerstin Vogel wrote:
Rest von Frage: Muss ich dann 2Ma re 1 U 1 Ma re und dann A6 stricken oder beginne ich immer mit 1Ma re 1U 1 Ma re dann die Maschen re die dazugekommen sind und dann Muster A6 weiter? Vielen Dank schon mal für die Antwort. Mit freundlichen Grüßen Kerstin V.
26.08.2016 - 13:09DROPS Design answered:
Hallo Kerstin, diese Frage wurde auch bei Ihrer anderen Frage beantwortet.
29.08.2016 - 09:27
Kerstin Vogel wrote:
Rest von Frage: Muss ich dann 2Ma re 1 U 1 Ma re und dann A6 stricken oder beginne ich immer mit 1Ma re 1U 1 Ma re dann die Maschen re die dazugekommen sind und dann Muster A6 weiter? Vielen Dank schon mal für die Antwort. Mit freundlichen Grüßen Kerstin V.
21.08.2016 - 18:20
Kerstin Vogel wrote:
Hallo liebes Drops-Team, ich bin jetzt an der Stelle, wenn ich über A5, den Mustersatz A6 stricken soll. Ich stricke 2Ma von A5A (d.h. 1Ma re 1U 1Ma re ) und dann die 17 Maschen des Mustersatzes von A6 und zum Abschluss die 17Ma A6 und dann 1Ma re 1U 1Ma re. Meine Frage ist jetzt, wo stricke ich den Umschlag in der 3. (5.,7., usw.) Runde?
21.08.2016 - 18:19DROPS Design answered:
Liebe Kerstin, der Umschlag wird wie im Diagramm gezeigt gestrickt (er ist ja Teil der 2 M). und die in A.5 zugenommenen Maschen werden rechts gestrickt: "die zugenommenen M in A.5 re stricken".
29.08.2016 - 09:26
Andrea wrote:
Nochmal zum Verständnis meiner letzten Frage... A2 beende ich ja mit der letzten Reihe... Wenn ich Damm wieder neu mit A2 in Größe Xxl starte, passt das Muster ja nicht übereinander? Was tun ?
17.06.2016 - 08:08DROPS Design answered:
Hallo Andrea, die Maschenzahl zwischen den Streifen von A.3 wächst kontinuerlich und in diesem Teilen stricken Sie A.2.
19.06.2016 - 09:32
Andrea wrote:
Hallo liebes Drops Team... Nun muss ich doch nochmal nachfragen 😢 ich habe jetzt die Runde geschlossen und dabei 1x A3 gestrickt... Wie geht es. Und weiter? Ich habe arbeite die große Größe und habe A2 beendet... Der Mustersatz hat ja etliche Maschen... Wenn ich nun A2 neu beginne bei der großen Größe habe ich ja einen viel kleineren Mustersatz und bis A3 sind noch etliche Maschen übrig... Mache ich etwas falsch? Es passt einfach nicht 😞😞 vielen Dank für die Hilfe!!
16.06.2016 - 21:58DROPS Design answered:
Halo Andrea, Sie Antwort zu Ihrer vorherigen Frage.
19.06.2016 - 09:38
Andrea Hauenschild wrote:
Liebes Drops Team, Ich bin jetzt kurz vor dem Start in die Runden. Leider habe ich nicht ganz verstanden, in welcher Musterfeihenfolge ich jetzt weiter arbeiten soll... Können Sie mir bitte helfen? Herzlichen Dank schonmal vorab!!!
15.06.2016 - 17:11DROPS Design answered:
Liebe Andrea, Sie stricken in der Musterfolge weiter, nur über Muster A.1 und A.4 wird nun Muster A.3 gestrickt. Das waren die Mustersätze am Schlitz, die jetzt durch A.3 ersetzt werden.
16.06.2016 - 08:07
 Courveille wrote:
Désolé je me suis mal exprisée, j'en suis à A6 Je dois tricoter 2xA6 faire les 2 première mailles de A5A. Je tricote 1maille et 1 jeté, ou 1 maille, 1 jeté et 1 maille
12.02.2016 - 14:34DROPS Design answered:
Bonjour Mme Courveille, dans ce cas, tricotez les 2 premières m de A.5A (= 1 m end, 1 jeté), puis répétez A.6 comme dans les diagrammes. Les augmentations faites avant A.6 et après A.6 se tricotent en jersey end. Bon tricot!
12.02.2016 - 14:46
Courveille wrote:
Bonjour , quand je tricote A6 , dans les 2 premières maille de A5A et A5C est ce que je dois mettre le jeté entre les 2 mailles, Merci pour votre réponse
12.02.2016 - 09:09DROPS Design answered:
Bonjour Mme Courveille, dans A.5A tricotez ainsi au 1er rang par ex. 1 m end, 1 jeté, 2 m end, 1 jeté, glissez 1 m à l'end, 1 m end, passez la m glissée par-dessus la m tricotée, 7 m end, 2 m ens à l'end, 1 jeté. A.5C se fera en sens inverse: 1 jeté, 1 surjet simple, 7 m end, 2 m ens à l'end, 1 jeté, 2 m end, 1 jeté, 1 m end. Bon tricot!
12.02.2016 - 12:15
|
|||||||||||||||||||
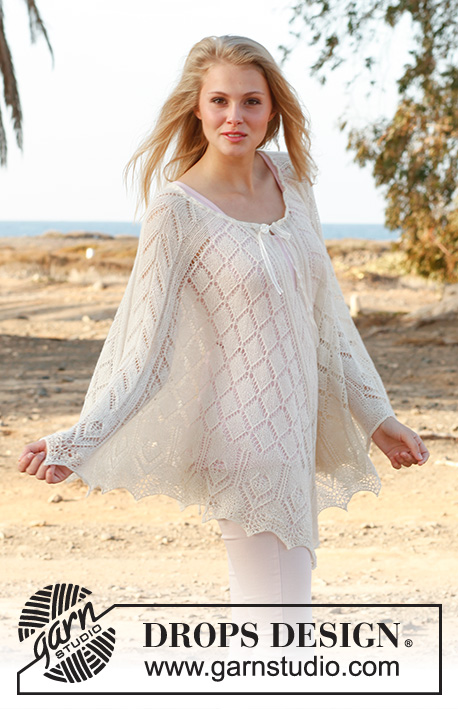
Honeymoon#honeymoonponcho |
|||||||||||||||||||
 |
 |
||||||||||||||||||
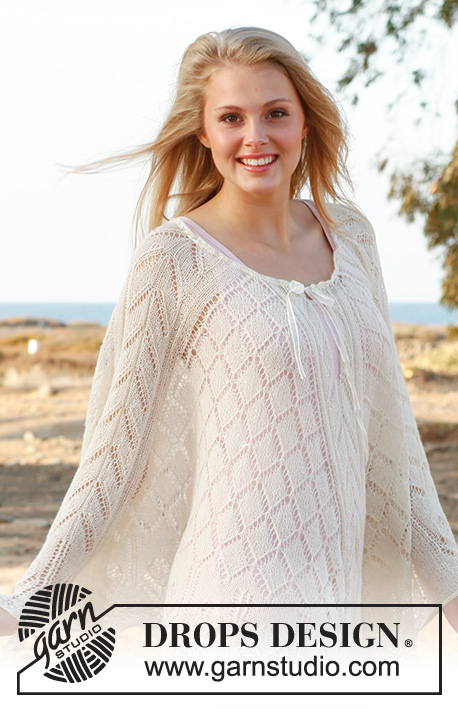
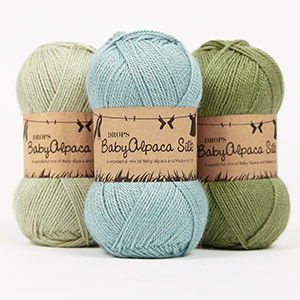
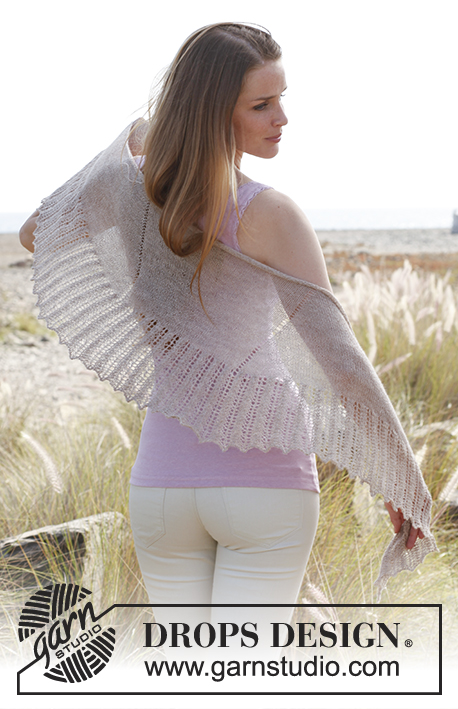
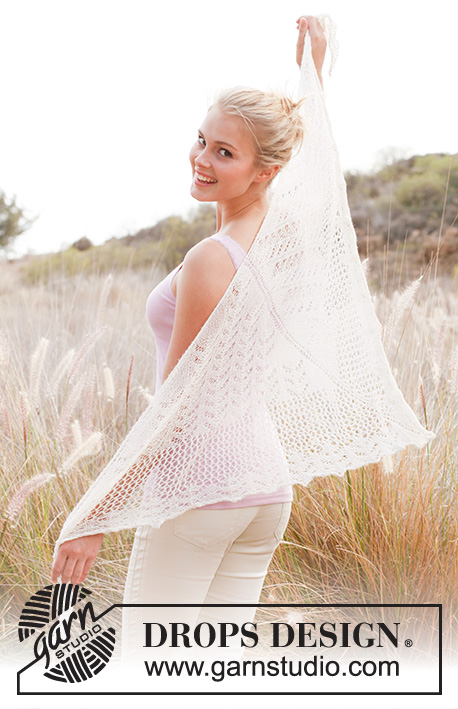
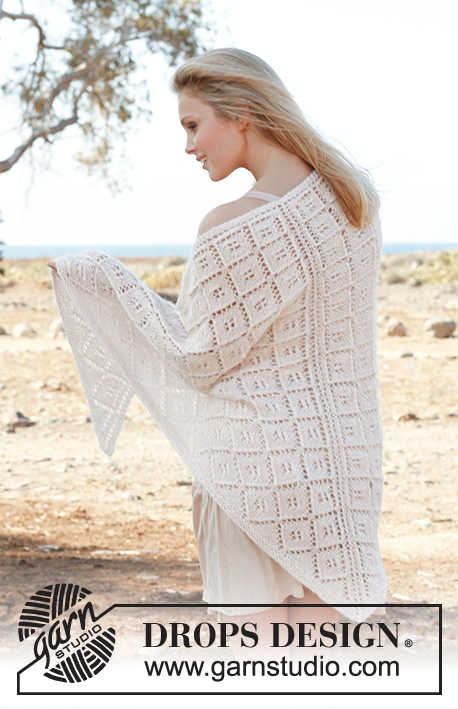
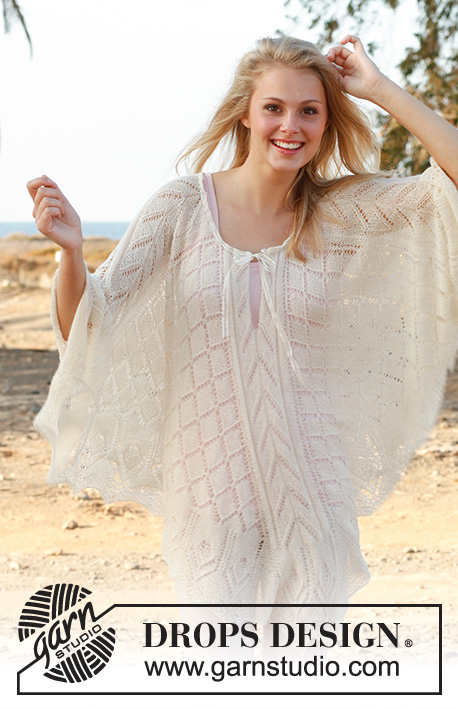
Knitted DROPS poncho with lace pattern in "BabyAlpaca Silk" or "Lace". Size: S - XXXL.
DROPS 146-4 |
|||||||||||||||||||
|
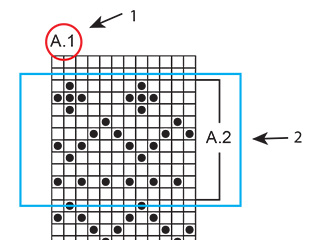
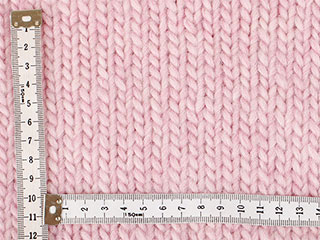
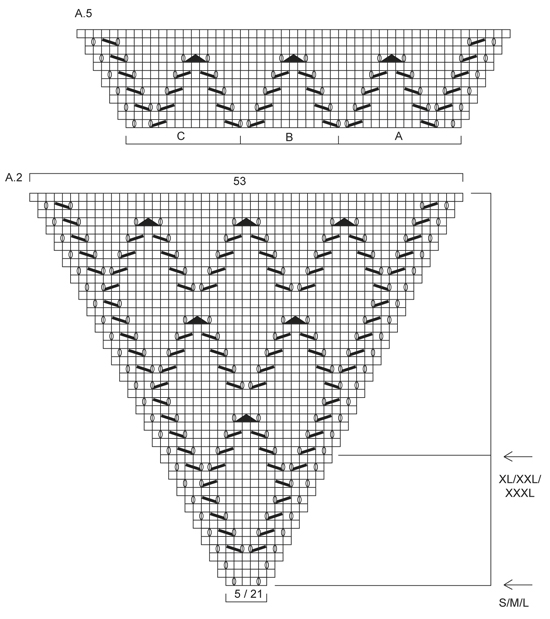
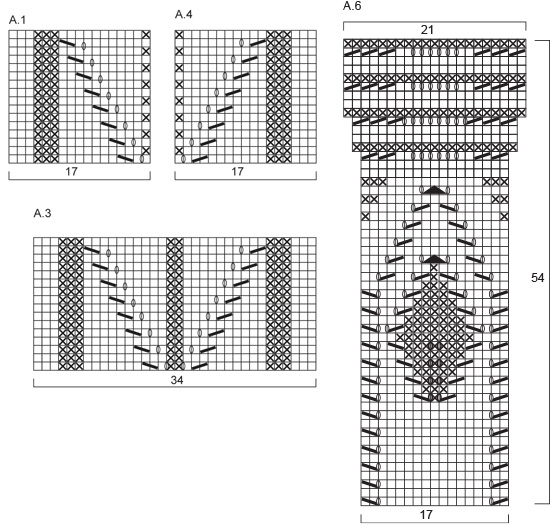
KNITTING TENSION: This garment is to be soaked and stretched to size afterwards. The knitting tension is therefore not that important but to get a sense of whether you are working to loose/tight, 23 sts x 30 rows on needle size 3.5 mm = approx. 10 x 10 cm. ---------------------------------------------------------- GARTER ST (back and forth on needle): K all rows. 1 ridge = 2 rows K. GARTER ST (in the round on circular needle): 1 ridge = * K 1 round and P 1 round *, repeat from *-*. PATTERN: See diagrams A.1 to A.6. Diagrams show all rows in pattern seen from RS. See arrow for your size in Diagram A.2. ---------------------------------------------------------- PONCHO: Piece is worked top down, first back and forth on circular needle and then in the round. This is done to make a vent mid front. Cast on 156-220 sts on circular needle size 3.5 mm (40 cm) with Baby Alpaca Silk or Lace. Work 2 ridges in GARTER ST - see explanation above. Then work as follows: A.1 (= 17 sts), * A.2 (= 5-21 sts), A.3 (= 34 sts) *, repeat from *-* 3 times in total, A.2 (= 5-21 sts), A.4 (= 17 sts). Continue this pattern back and forth until 2 repetitions of A.1/A.4 have been worked vertically, finish when 17 sts remain on needle. This is now the beg of round. Now continue to work in the round over all sts, continue with A.3 over A.1/A.4. Continue this pattern upwards, switch to a longer circular needle when needed. When A.2 has been worked 1 time vertically, there are 348 sts on needle in both sizes. Then work as follows: * A.3, A.5 A, A.5 B 2 times, A.5 C *, repeat from *-* 4 times in total. Every time A.5 has been worked 1 time vertically, there is 1 A.5 B more between every A.5 A and A.5 C. Continue this pattern until a total of 9-8 repetitions of A.3 and 8-8 repetitions of A.5 have been worked vertically = 732 sts on needle in both sizes. K 1 round over all sts, over all A.5 dec 9 sts evenly (= 140 sts remain over every A.5, 696 sts in total.) Then work as follows: * A.6 2 times, continue with the first 2 sts in A.5 A, work A.6 8 times, work the last 2 sts in A.5 C, * repeat from *-* 4 times in total. Continue like this until A.6 has been worked 1 time vertically – K the inc sts in A.5 = 1072 sts. Loosely cast off. BLOCKING: If the poncho is worked in Lace, it needs to be blocked to get the right measurements and shape. If it is worked in Baby Alpaca Silk, lightly stretch or steam it. Place the poncho in lukewarm water until it is soaking wet. Carefully squeeze the water out of the poncho - do not twist the poncho - then roll the poncho in a towel and squeeze to remove more water - the poncho will now only be moist. Place the poncho on a carpet or mattress - carefully stretch it out to size in a nice circle and fasten it with pins. Leave to dry. Repeat the process when the poncho has been washed. Thread a silk ribbon up and down in the ridges on the neck of poncho and tie a bow. |
|||||||||||||||||||
Diagram explanations |
|||||||||||||||||||
|
|||||||||||||||||||
 |
|||||||||||||||||||
 |
|||||||||||||||||||
Have you finished this pattern?Tag your pictures with #dropspattern #honeymoonponcho or submit them to the #dropsfan gallery. Do you need help with this pattern?You'll find 4 tutorial videos, a Comments/Questions area and more by visiting the pattern on garnstudio.com. © 1982-2026 DROPS Design A/S. We reserve all rights. This document, including all its sub-sections, has copyrights. Read more about what you can do with our patterns at the bottom of each pattern on our site. |
|||||||||||||||||||

With over 40 years in knitting and crochet design, DROPS Design offers one of the most extensive collections of free patterns on the internet - translated to 17 languages. As of today we count 333 catalogues and 12549 patterns translated into English (UK/cm).
We work hard to bring you the best knitting and crochet have to offer, inspiration and advice as well as great quality yarns at incredible prices! Would you like to use our patterns for other than personal use? You can read what you are allowed to do in the Copyright text at the bottom of all our patterns. Happy crafting!
Post a comment to pattern DROPS 146-4
We would love to hear what you have to say about this pattern!
If you want to leave a question, please make sure you select the correct category in the form below, to speed up the answering process. Required fields are marked *.