
Popular categories
Looking for a yarn?


Comments / Questions (105)
![]() Sabine wrote:
Sabine wrote:
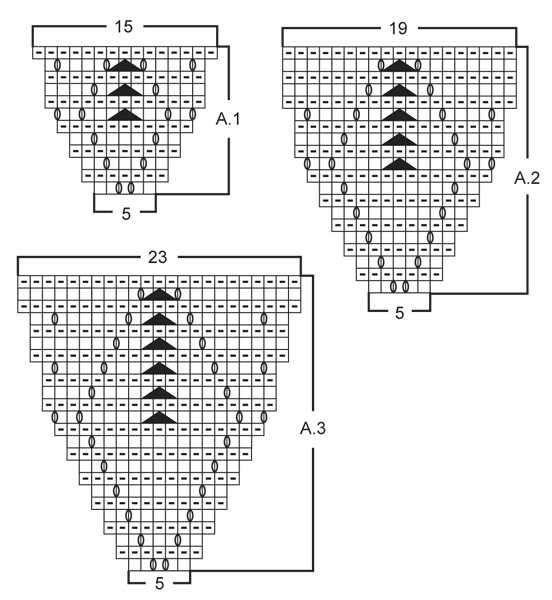
Chade das die Anleitungen hier immer sehr schrwierig zu verstehen sind für mich. Die erst zunahme in den drei diagramm, sind das 2 umschläge direkt hintereinander, ohne masche dazwischen? Ich komme mit den diagramm nicht klar weil das Umschlag symbol genau immer zwischen 2 maschen sitzt. Ich verstehe bzw weiß nicht wie ich dann in den folgenden reihen stricken muss (wieviel maschen zwischen den umschläge sind. Bei reihe 3 von diagramm A.1 sind das 3 maschen zwischen den umschläge oder 1??
27.05.2016 - 13:52DROPS Design answered:
Liebe Sabine, die Umschläge sind nicht direkt hintereinaner, sondern - wie Sie auch schreiben - immer zwischen 2 Maschen. Die Umschläge werden in den folgenden Reihen wie eine Masche gestrickt (im Muster wird ja der Umschlag durch eine Abnahme ausgeglichen, wenn nicht insgesamt zugenommen werden soll).
30.05.2016 - 09:24
![]() Marta wrote:
Marta wrote:
Teneis un diccionario de abreviaturas?
09.04.2016 - 12:14DROPS Design answered:
Hola Marta. En el apartado Tips y Ayuda (en la parte superior de la pagina) hay un glosario de las abreviaturas utilizadas en los patrones.
10.04.2016 - 17:14
![]() Marta wrote:
Marta wrote:
Me encanta el modelo. pero no entiendo absolutamente nada las explicaciones. ¿de verdad es tan complicado? me gustaría hacerlo para mi sobrina
09.04.2016 - 12:11DROPS Design answered:
Hola Marta. ¿Puedes especificar que parte del patrón no tienes claro? Tambíen puedes acudir a la tienda de Drops para que te ayuden.
10.04.2016 - 17:19
![]() Lydia Van Der Vlies wrote:
Lydia Van Der Vlies wrote:
Ik heb het vestje gemaakt in maat XXXL Maar het rugpand was niet goed er kwam bij de minderingen een boggel op de rug verder was het wel mooi hoe kan dit?? Heb het uit gehaald en twijfel of ik het opnieuw ga maken Wie weet hoe dit komt en wat ik er aan kan doen?
13.02.2016 - 16:38DROPS Design answered:
Hoi Lydia. Ik kan je helaas niet mee helpen, het patroon zou correct moeten zijn.
10.03.2016 - 14:10
![]() Regine Mocivnikar wrote:
Regine Mocivnikar wrote:
Ich habe leider ein Problem mit der Rückenabnahme. Nach einigen Zentimetern beginnt sich der Rücken zu wölben, wie bei einer Kapuze. Was mache ich falsch ? Wird nach dem Mustersatz A.1 nach der letzten Reihe, gleich wieder mit der ersten Reihe vom Mustersatz A.1 begonnen, oder macht man eine Zwischenreihe ? Lg. Regine Mocivnikar
10.11.2015 - 22:12DROPS Design answered:
Die Abnahmen machen Sie ja in der Mitte des Rückens (Sie nehmen in der Mitte 2 M ab), zuerst in jeder 2. R, dann in in jeder 4. R. Beim Muster an den Seiten arbeiten Sie Zunahmen. Die Diagramme zeigen alle Hin- und Rück-R. Nachdem Sie A.1 1x in der Höhe gearbeitet haben, beginnen Sie wieder unten, sodass A.1 mittig übereinander zu liegen kommt.
18.11.2015 - 11:16
![]() ROSALBA wrote:
ROSALBA wrote:
Grazie mille....ho capito perfettamente...ma penso che nella spiegazione del modello non sia molto chiaro....buonasera
20.07.2015 - 19:52
![]() ROSALBA wrote:
ROSALBA wrote:
Buonasera....sto realizzando il modello nella taglia M ,ma non capisco bene gli aumenti...se a 22 maglie aggiungo 10 aumenti per lo scollo e 5 per lo scalfo...non potro' mai trovare sul ferro 36 maglie....e in piu' ne dovrei aggiungere altre 3 dopo i 25 cm...Se potessi avere chiarimenti ne sarei felice..Grazie e complimenti x il sito...A presto
20.07.2015 - 17:16DROPS Design answered:
Buonasera Rosalba, quando arriva a 21 cm deve avviare a nuovo 3 m, a questo punto avrà già aumentato 6 volte per il collo (mancano 4 aumenti) e 5 volte per lo scalfo, per cui 22+6+5+3=36 m. A questo punto deve mettere le m in sospeso su un fermamaglie e lavorare il davanti destro: continuerà con gli aumenti per il collo quando lavorerà i davanti insieme. Ci riscriva se non è chiaro. Buon lavoro!
20.07.2015 - 18:58
![]() Sandrine wrote:
Sandrine wrote:
Bonjour, J'ai réalisé ce modèle suite à l'achat du magazine mars 2014, j'ai bien suivi les indication mais au final il est beaucoup trop petit pour moi et fait un gilet long pour ma fille qui s'habille en 4 ans. Je n'ai pas pris la laine indiquée sur les indications, est-ce la raison ??? Je trouve que ça fait une sacré différence. Pourriez-vous m'expliquer pourquoi avant que je ne me lance sur un autre de vos modèles, s'il vous plait
10.08.2014 - 10:53DROPS Design answered:
Bonjour Sandrine, ce modèle est écrit sur la base d'un échantillon de 19 m x 38 rangs au point mousse = 10 x 10 cm - à la fin des explications, vous trouverez un schéma des mesures, ces mesures sont prises à plat, d'un côté à l'autre, prenez un vêtement analogue qui vous va et vérifier les mesures pour trouver votre taille, et surtout, pensez à bien conserver la même tension que pour l'échantillon. Bon tricot!
12.08.2014 - 11:32
![]() Benedetta wrote:
Benedetta wrote:
Grazie per la tempestività' è la chiarezza delle spiegazioni!Adesso ho capito benissimo.buona giornata
23.04.2014 - 08:42
![]() Benedetta wrote:
Benedetta wrote:
Buonasera,io ho lavorato così"ho diminuito2 m.al centro dietro x 16 volte(tot 32 m) e poi ogni 4 ferri 2 m x 10 volte(20 m diminuite).Pero' adesso ho lavorato A3 solo una volta ed ho 228 m.dove ho sbagliato?Grazie è spero di aver spiegato chiaramente il mio problema
22.04.2014 - 21:29DROPS Design answered:
Buonasera Benedetta. Le diminuz sul dietro sono 2 m x 32 volte e 2 m x 10 v. In tutto 84 m. Si ricordi di finire di aumentare per lo scollo a V (4 m su ogni davanti = 8 m in tutto). Terminati i diag A.1 avrà 40 m in più. Dopo A.2, 56 m in più e dopo A.3, 72 m in più. In tutto 228 m. Ci riscriva se ancora in difficoltà. Buon lavoro!
22.04.2014 - 23:26
|
|||||||||||||
Nadine#nadinevest |
|||||||||||||
 |
 |
||||||||||||
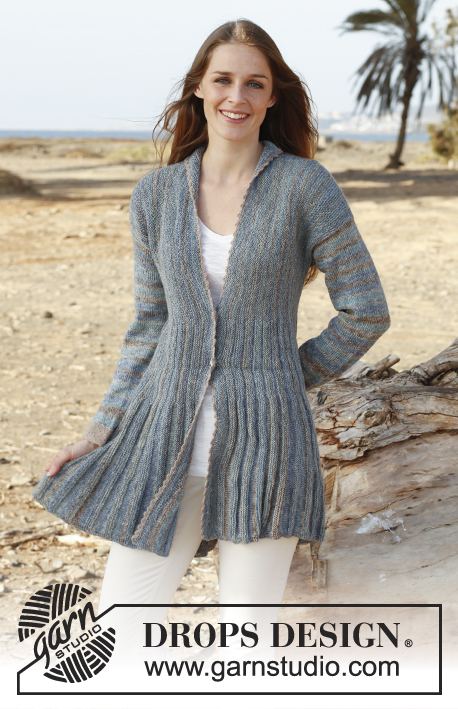
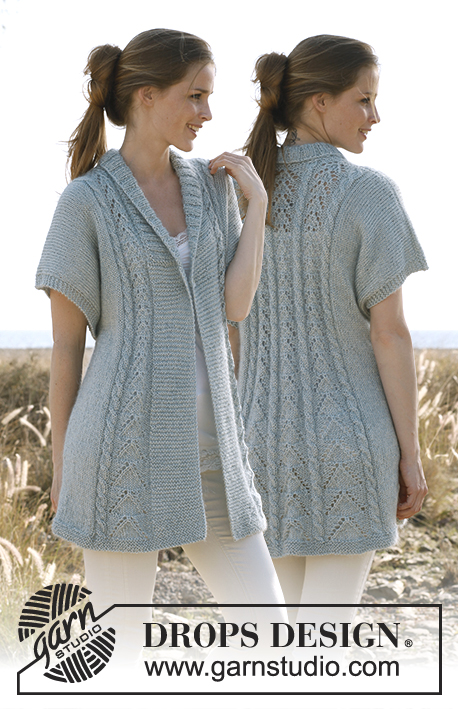
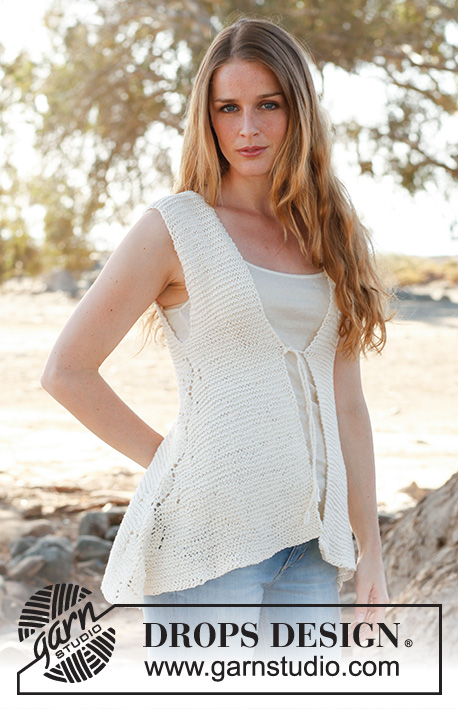
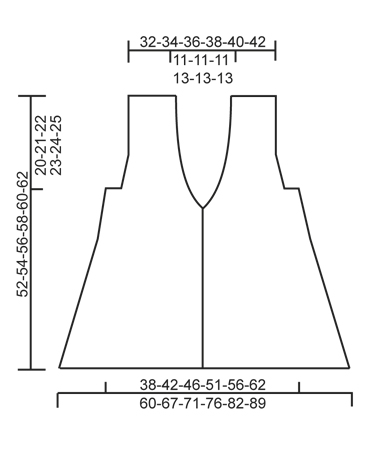
Knitted DROPS asymmetrical vest worked top down with lace pattern in the sides in ”Muskat”. Size: S - XXXL.
DROPS 145-2 |
|||||||||||||
|
GARTER ST (back and forth on needle): K all rows. 1 ridge = 2 rows K. PATTERN: See diagrams A.1 to A.3. Diagrams show all rows in pattern seen from RS. DECREASE TIP (applies to mid back): All dec are done from RS. Beg 2 sts before marker, K 2 tog, slip 1 st as if to K, K 1, psso (= 2 sts dec mid back). MEASURING TIP: All length measurements should be done when piece is flat. -------------------------------------------------------- VEST: The piece is worked top down. Front and back piece is worked back and forth on needle separately down to and with armhole. Then all sts are slipped on the same circular needle. Then the piece is worked back and forth from mid front. LEFT FRONT PIECE: Worked back and forth on circular needle. Cast on 20-22-24-24-26-28 sts on circular needle size 5 mm with Muskat. Work in GARTER ST - see explanation above. REMEMBER THE KNITTING TENSION! When piece measures 6-8-10-6-8-10 cm – READ MEASURING TIP, inc 1 st for v-neck towards mid front by working 2 sts in first st at beg of row (seen from RS). Repeat inc every 2½ cm (i.e. every 5th ridge), 9-9-9-11-11-11 more times (= 10-10-10-12-12-12 inc in total). AT THE SAME TIME when piece measures 11-9-8-8-8-11 cm – READ MEASURING TIP, inc 1 st towards armhole side by working 2 sts in last st on row (seen from RS). Repeat inc every 3-2½-2-2-1½-1 cm, 2-4-6-7-10-13 more times (= 3-5-7-8-11-14 inc in total). When piece measures 20-21-22-23-24-25 cm (inc towards armhole should now be done), cast on 3-3-3-4-4-5 new sts at the end of row towards the side (not towards mid front). Armhole is now done and 6-6-5-7-7-7 sts have been inc for v-neck towards mid front (i.e. 4-4-5-5-5-5 inc remain for v-neck towards mid front). Piece measures approx. 20-21-22-23-24-25 cm and there are 32-36-39-43-48-54 sts. Slip the sts on 1 stitch holder. RIGHT FRONT PIECE: Work as left front piece but inc for v-neck at the end of row (seen from RS) and inc for armhole at beg of row (seen from RS). BACK PIECE: Left shoulder: Cast on 20-22-24-24-26-28 sts on circular needle size 5 mm with Muskat. Work 3 ridges in garter st, beg from RS. Cut the thread and put piece aside. Right shoulder: Cast on 20-22-24-24-26-28 sts on circular needle size 5 mm with Muskat. Work 3 ridges, beg from RS, then cast on 20-20-20-24-24-24 sts at the end of next row from WS = 40-42-44-48-50-52 sts. Work sts from left shoulder on to same circular needle = 60-64-68-72-76-80 sts. Continue to work in garter st back and forth on needle. AT THE SAME TIME when piece measures 11-9-8-8-8-11 cm from shoulder, inc 1 st in first and last st on row. Repeat inc in each side every 3-2½-2-2-1½-1 cm, 2-4-6-7-10-13 more times (= 3-5-7-8-11-14 inc in total in each side). When piece measures 20-21-22-23-24-25 cm (inc in each side should now be done), cast on 3-3-3-4-4-5 new sts at the end of the next 2 rows. Armholes are now done, piece measures approx. 20-21-22-23-24-25 cm and there are 72-80-88-96-106-118 sts on needle. Cut the thread. BODY: Slip sts from right and left front piece on to same circular needle as back piece = 136-152-166-182-202-226 sts. NOW MEASURE PIECE FROM HERE! Insert 2 markers in the piece; in the 32nd-36th-39th-43rd-48th-54th st from each side (= 72-80-88-96-106-118 sts between sts with markers on back piece). AT THE SAME TIME insert 1 marker mid back (i.e. in the middle of the 2 markers in the sides so that there are 36-40-44-48-53-59 sts on each side of this marker). Beg mid front and continue in garter st back and forth for 4-2-3-2-3-3 cm AT THE SAME TIME continue inc for v-neck in each side towards mid front as before. READ ALL OF THE FOLLOWING SECTION BEFORE CONTINUING! Work next row from RS as follows (continue inc for v-neck as before): Work in garter st until 2 sts remain before first st with marker (= in the side), work A.1 (= 5 sts), work in garter st until 2 sts remain before next marker (= mid back), dec 1 st on each side of marker – READ DECREASE TIP (= 2 sts dec), work in garter st until 2 sts remain before next marker (= in the side), work A.1 (= 5 sts) and then work in garter st the rest of row. Continue pattern like this (note the inc in A.1 – see diagram and continue the inc for v-neck until 10-10-10-12-12-12 inc in total have been done in each side towards mid front), AT THE SAME TIME dec 2 sts mid back every other row (i.e. every row from RS), 31-36-36-36-36-38 more times (= 32-37-37-37-37-39 dec in total mid back) and then every 4th row (i.e. every other row from RS) 10-10-10-12-12-12 times in total. When A.1 has been worked 2-3-3-2-2-2 times in total vertically, work A.2 in each side (instead of A.1, continue the other sts as before). When A.2 has been worked 2-2-2-3-3-2 times in total vertically, work A.3 in each side (instead of A.2). When A.3 has been worked 2-2-2-2-2-3 times in total vertically and after last dec mid back, there are 228-254-270-290-310-338 sts on needle and piece measures approx. 32-33-34-35-36-37 cm from where all sts were put tog. K 1 row from RS while AT THE SAME TIME working 1st row in A.3 in each side so that the pattern is finished nicely, then LOOSELY cast off with K from WS. Now piece measures approx. 52-54-56-58-60-62 cm measured straight down from shoulder (the sides are longer because of inc to give extra width and length). ASSEMBLY: Sew shoulder seams. TIES: Cut 2 threads Muskat of approx. 100-120 cm each. Place the 2 threads tog, pull them through next to last st on one front piece (in the transition where inc for v-neck ends). Make a knot in one end of the 2 threads. Twine the threads tog until they resist, fold them double so that they twine. Make a knot at the end. Repeat on the other front piece. Tie the vest tog mid front. |
|||||||||||||
Diagram explanations |
|||||||||||||
|
|||||||||||||
 |
|||||||||||||
 |
|||||||||||||
Have you finished this pattern?Tag your pictures with #dropspattern #nadinevest or submit them to the #dropsfan gallery. Do you need help with this pattern?You'll find 5 tutorial videos, a Comments/Questions area and more by visiting the pattern on garnstudio.com. © 1982-2026 DROPS Design A/S. We reserve all rights. This document, including all its sub-sections, has copyrights. Read more about what you can do with our patterns at the bottom of each pattern on our site. |
|||||||||||||


With over 40 years in knitting and crochet design, DROPS Design offers one of the most extensive collections of free patterns on the internet - translated to 17 languages. As of today we count 324 catalogues and 12290 patterns translated into English (UK/cm).
We work hard to bring you the best knitting and crochet have to offer, inspiration and advice as well as great quality yarns at incredible prices! Would you like to use our patterns for other than personal use? You can read what you are allowed to do in the Copyright text at the bottom of all our patterns. Happy crafting!
Post a comment to pattern DROPS 145-2
We would love to hear what you have to say about this pattern!
If you want to leave a question, please make sure you select the correct category in the form below, to speed up the answering process. Required fields are marked *.