
Popular categories
Looking for a yarn?


Comments / Questions (53)
![]() Mary P wrote:
Mary P wrote:
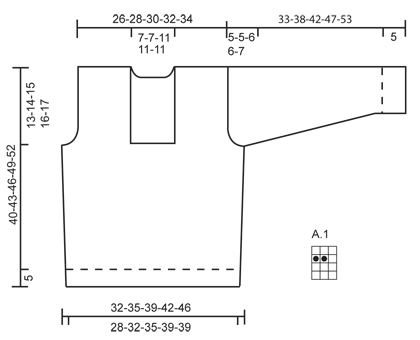
Love the pattern but having trouble with sleeve and determining when to start the bind offs for the sleeve cap. The under sleeve bind of the 6 stitches was done at 28 cm of overall length. The diagram makes me think the cap bind off should have also started at 28cm (33-5=28), is that right? Please explain what the “5-5-6-6-7” apply to. TY
05.04.2026 - 03:52DROPS Design answered:
Dear Mary, the sleeve cap starts at the same height for all sizes but will measure 5 cm in the first 2 sizes, 6 cm in the next 2 sizes and 7 cm in the larger size so that the total length for sleeve will be 33-38-42-47-53 cm. Happy knitting!
08.04.2026 - 10:17
![]() Arja wrote:
Arja wrote:
Het breien van het patroon is tot nu toe goed gelopen, maar nu ik met de sjaalkraag bezig ben stuit ik op een zin in het patroon die ik niet begrijp: 'Meerder 1 st r in elke van de middelste 10-12-12-14-14 recht-delen gezien aan de goede kant (= hals middenachter) = 97-105-117-125-125 st. ' Wat zijn de 'recht-delen'? Ik begrijp dat ik moet meerderen in de rechte steken, maar hoe ga ik dan verder met het boordpatroon 1recht-2 averechts? Wordt het dan 2r + 2 av?
27.07.2025 - 15:55DROPS Design answered:
Dag Arja,
Als het goed is heb je voor de kraag al een stukje in boordsteek gebreid, waarbij je dus afwisselend 1 recht en 2 averecht breit. In deze zin worden de 'recht-delen' de 1 recht bedoeld. Het komt er dus op neer dat je het middelste gedeelte van de boordsteek de wijzigt zodat je dat stuk in 2 recht, 2 averecht breit. Hiertoe meerder je bij de stukken waar je recht hebt gebreid van 1 recht naar 2 recht. Hopelijk heb ik het zo goed uitgelegd. 😊
30.07.2025 - 20:34
![]() Sylvianne Deoca wrote:
Sylvianne Deoca wrote:
Thank you for this beautiful pattern, altogether easy to follow but I don't understand how to increase for the sleeves when you put marker at beginning of the row and inc. On both sides. Can you please explain. Thank you.
09.12.2024 - 15:17DROPS Design answered:
Hi Sylvianne, With the marker at the beginning of the round, you increase 1 stitch at the beginning of the round (make 1 yarn over) and then again at the end of the round. Happy knitting!
10.12.2024 - 06:49
![]() Duband Joëlle wrote:
Duband Joëlle wrote:
Bonjour, pourquoi faites vous des diminutions en bas du pull ? Le schéma montre un corps droit... Merci pour votre réponse. J D.
05.12.2024 - 07:15DROPS Design answered:
Bonjour Mme Duband, dans le schéma, vous retrouvez bien la largeur du bas: 28 à 39 cm puis celle avant de rabattre les mailles des emmanchures (quand les augmentations sont terminées) : 32 à 46 cm. Bon tricot!
05.12.2024 - 08:28
![]() Duband Joëlle wrote:
Duband Joëlle wrote:
Bonjour, je ne comprends pas l’utilité de faire les diminutions au bas du pull et de refaire des augmentations ensuite. Ce pull paraît monter tout droit sur le schéma..... Merci pour votre réponse. J D.
05.12.2024 - 07:11DROPS Design answered:
Bonjour Mme Duband, les diminutions des côtes permettent d'avoir la bonne largeur (on a besoin de davantage de mailles pour les côtes avec les aiguilles 4,5 que pour le point fantaisie avec les aiguilles 5); ensuite on augmente sur les côtés pour la forme du pull (cf schéma) qui sera plus large avant les emmanchures qu'après les côtes. Bon tricot!
05.12.2024 - 08:28
![]() Mariette Razola wrote:
Mariette Razola wrote:
Oklart hur kragen skall stickas. Var börjar/slutar man? Med vänlig hälsning, Mariette
28.10.2024 - 22:07DROPS Design answered:
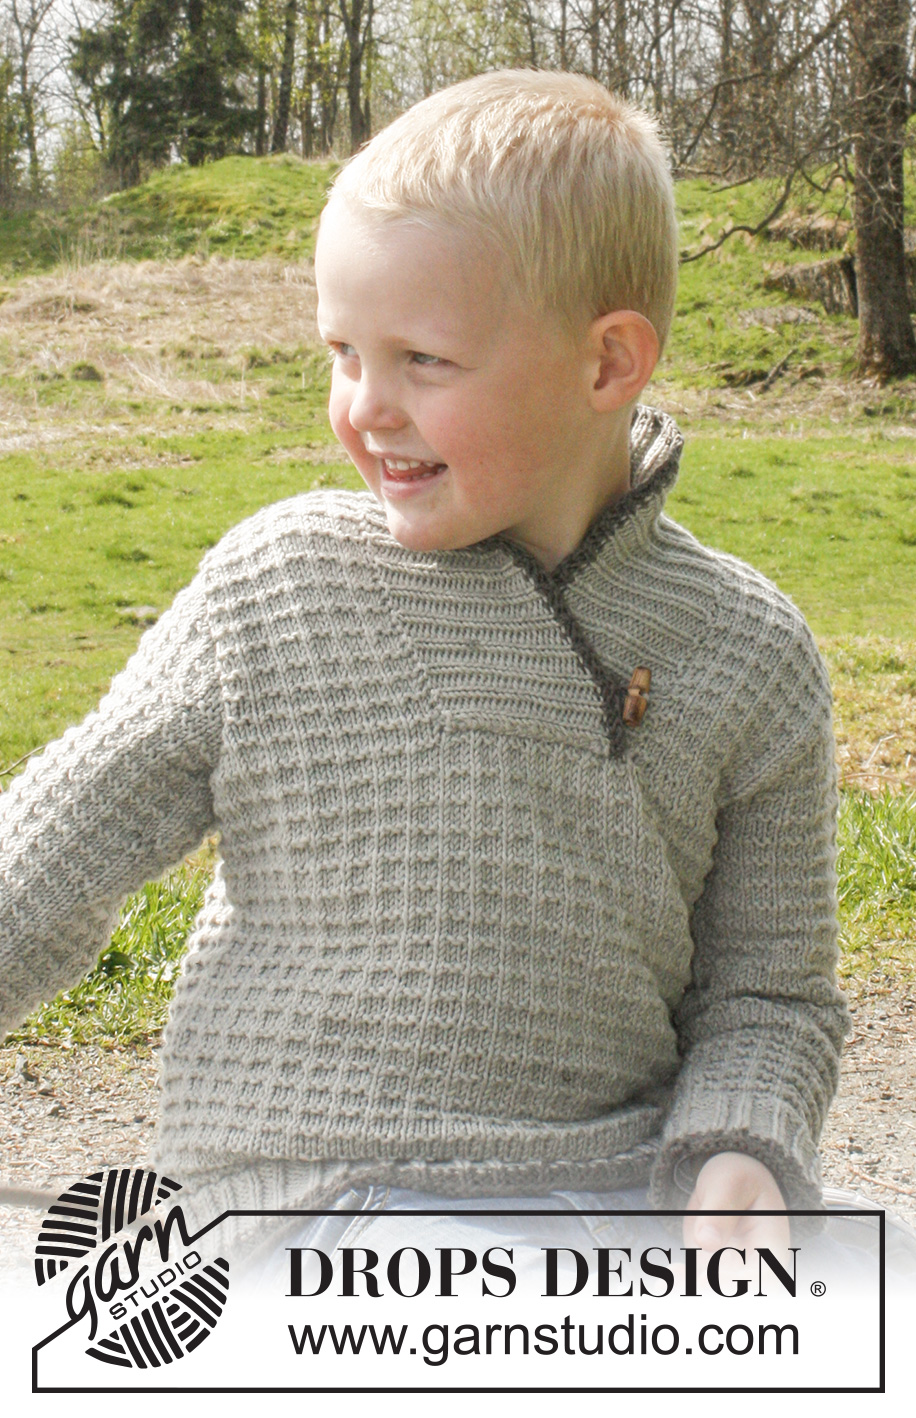
Hej Mariette. Du börjar plocka upp längst sidan på det högra framstycket (alltså vid kanten där du har avmaskat till hals), fortsätter bak i nacken och sen längst sidan på vänster framstycke. Om du ser på bilden tror jag du förstår hur du ska göra. Sen när du stickat kragen så syr du fast den längst ner i halsöppningen vid halsringningen (lägg den omlott som på bilden). Mvh DROPS Design
29.10.2024 - 10:06
![]() Mariette Razola wrote:
Mariette Razola wrote:
Jag förstår inte beskrivningen på schalkragen. Det står Mitt fram på vä sida dvs på hö framstycke. Får inte ihop det.
27.10.2024 - 23:45DROPS Design answered:
Hej Mariette, jo når du har arbejdet foran dig, så er det stykket til venstre vi beskriver først. Men hvis du har tøjet på er det højre forstykke :)
29.10.2024 - 09:50
![]() Anne Nguyen wrote:
Anne Nguyen wrote:
Hi, Please kindly help Right Front Piece binding off question. I pick up 27 sts on RS, do I bind off right RS only and how many stitch each time I need to bind off.
04.01.2023 - 19:36DROPS Design answered:
Dear Mrs Nguyen, in the larger size, you work 27 sts for the right front piece, you will now cast off for the armhole at the beginning of every row from wrong side: 2 sts 2 times and 1 stitch 2 times = 21 sts remain - work until piece measures 52 cm (adjust to back piece) and cast off. Work the 27 sts from left front piece binding off for armhole at the beginning of row from right side 2 sts 2 times and 1 stitch 2 times = 21 sts remain and finish as right front piece. Happy knitting!
05.01.2023 - 10:57
![]() Rhonda wrote:
Rhonda wrote:
The sweater is looking lovely so far but I’m not sure I understand the directions for the increase at the back of the collar! It states to increase 1knit stitch in the middle of 14 knit stitches at the back of the neck. Should I increase 1knit stitch between the 14 middle stitches even if they are purl stitches? Then how do you make the ribbing look like it should continue on. At this point it calls for k 1 and purl 2. After the increase what happens? Thanks Rhonda
02.01.2022 - 23:35DROPS Design answered:
Hi Rhonda, You increase in each knitted section over these stitches so you end up with a short section of new rib (knit 2, purl 2) at the back of the neck. Hope this helps and happy knitting!
03.01.2022 - 07:43
![]() Rhonda wrote:
Rhonda wrote:
Confused about the A1 pattern. Is it knit 1 row, then knit another row, then k 1, P2,k1,P2 across the row. Then Knit the next row and start again?
06.10.2021 - 20:50DROPS Design answered:
Dear Rhonda, you got it right, for knitting the pattern on the round. As the diagram shows the pattern from teh RS, when knitted back and fourth (like at the shoulders) the 2nd and the 4th rows will be purled. Happy Stitching!
06.10.2021 - 22:49
|
|||||||
Jonathan#jonathansweater |
|||||||
 |
 |
||||||
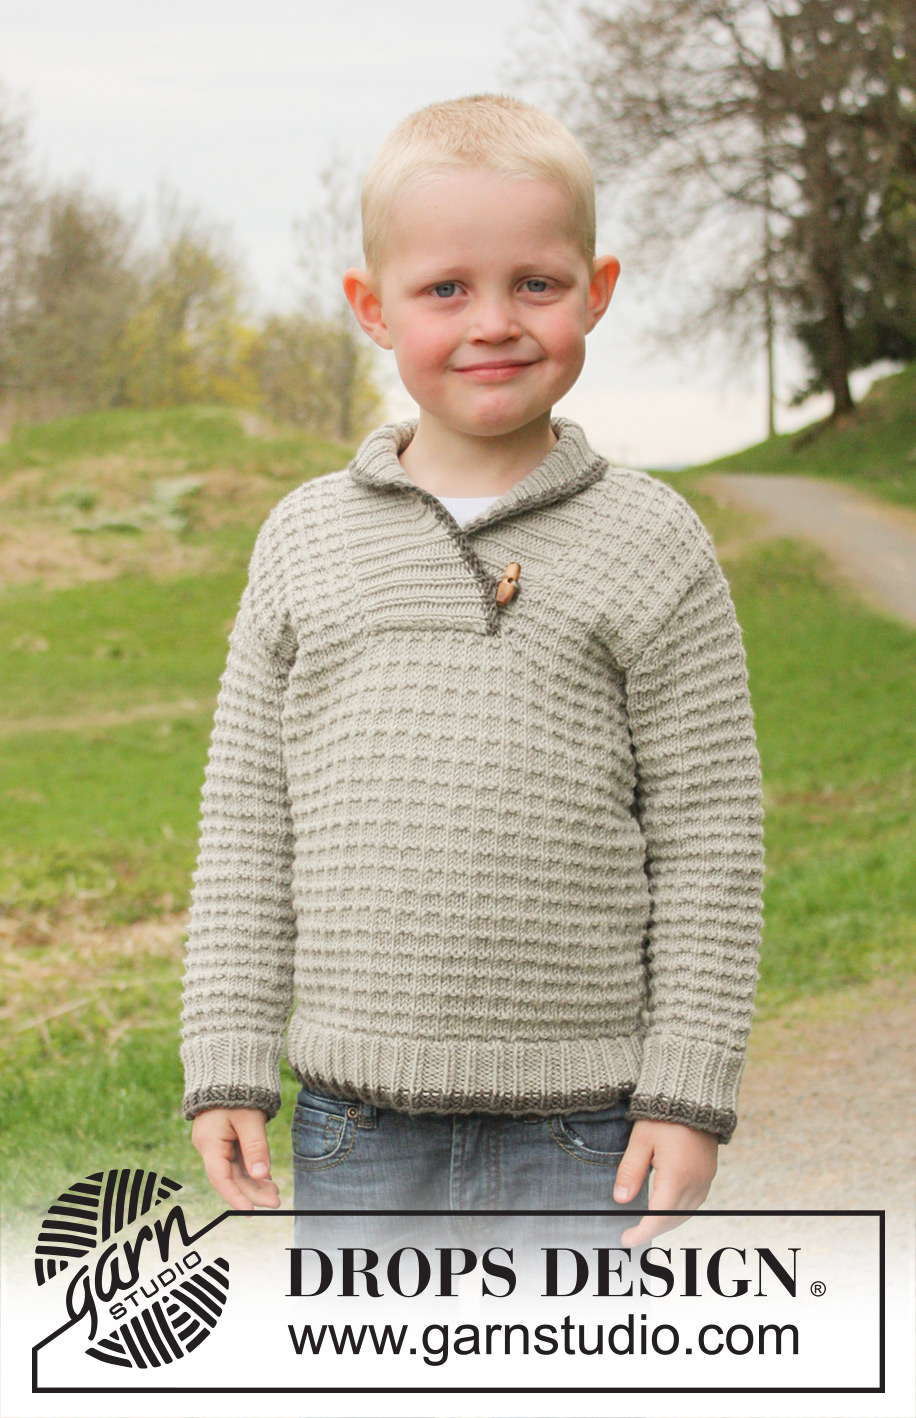
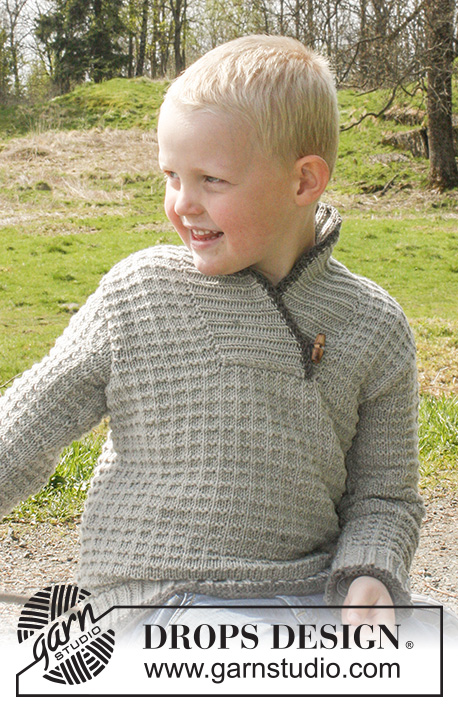
Knitted jumper with textured pattern and shawl collar in DROPS Nepal. Size children 3 to 12 years.
DROPS Children 23-28 |
|||||||
|
PATTERN: See diagram A.1. Diagram shows pattern from RS. INCREASE TIP: Inc 1 st by working 2 sts in the same st. ---------------------------------------------------------- BODY: Worked in the round on circular needle. Cast on 112-126-140-154-154 sts on circular needle size 4.5 mm with dark grey Nepal. K 1 round. Then work next round as follows: * K 1, P 2, K 1, P 3 *, repeat from *-* the entire round. Continue rib like this. AT THE SAME TIME when 2 rounds in rib have been worked, switch to grey and work with grey until finished measurements. When rib measures 5 cm, dec all 3 P sts to 2 P (by P 2 tog) = 96-108-120-132-132 sts. Switch to circular needle size 5 mm and work pattern A.1. When piece measures 6-6-7-7-7 cm, insert 2 markers in the piece; 1 marker at beg of round and 1 marker after 48-54-60-66-66 sts. Now inc 1 st - READ INCREASE TIP - on each side of every marker. Repeat inc every 7-7½-8-9-4½ cm 2-2-2-2-5 more times (= a total of 3-3-3-3-6 inc) = 108-120-132-144-156 sts - NOTE: Work the inc sts in the pattern. When piece measures 27-29-31-33-35 cm work next row as follows: Cast off 3 sts for armhole, work 18-21-21-24-27 sts in pattern as before (= left front piece), cast off the next 12-12-18-18-18 sts for neck, work 18-21-21-24-27 sts (= right front piece), cast off 6 sts for armhole, work 48-54-60-66-72 sts (= back piece) and cast off the 3 remaining sts for armhole. Finish each part separately. BACK PIECE: = 48-54-60-66-72 sts. Continue back and forth with pattern as before - AT THE SAME TIME cast off for armholes at beg of every row in each side as follows: 2 sts 1-1-1-2-2 times and 1 st 1-1-1-2-2 times = 42-48-54-54-60 sts. Work until piece measures 38-41-44-47-50 cm. Now cast off the middle 10-10-16-16-16 sts for neck and finish each shoulder separately. Continue to cast off 1 st on next row from neck = 15-18-18-18-21 sts remain on the shoulder. Continue until piece measures 40-43-46-49-52 cm and cast off. RIGHT FRONT PIECE: = 18-21-21-24-27 sts. Continue back and forth with pattern as before while AT THE SAME TIME casting off for armhole at beg of every row from the side as on back piece = 15-18-18-18-21 sts. Continue pattern until piece measures 40-43-46-49-52 cm and cast off - NOTE: Cast off on same row in pattern as on back piece. LEFT FRONT PIECE: = 18-21-21-24-27 sts. Work as right front piece but reversed. SLEEVE: Cast on 35-35-42-42-42 sts on double pointed needles size 4.5 mm with dark grey. K 1 round. Then work next round as follows: * K 1, P 2, K 1, P 3 *, repeat from *-* the entire round. Continue rib like this. AT THE SAME TIME when 2 rounds in rib have been worked, switch to grey and work with grey until finished measurements. When rib measures 5 cm, dec all 3 P sts to 2 P sts = 30-30-36-36-36 sts. Switch to double pointed needles size 5 mm and work pattern A.1. When piece measures 6 cm, insert a marker at the beg of round. Now inc 2 sts mid under sleeve (i.e. 1 st on each side of marker), repeat inc every 3½-4½-5-4-4½ cm a total of 6-6-6-9-9 times = 42-42-48-54-54 sts - work the inc sts in pattern. When piece measures 28-33-36-41-46 cm, cast off 6 sts mid under sleeve (i.e. cast off 3 sts on each side of marker) and work the sleeve back and forth on needle until finished measurements. Cast off for sleeve cap at beg of every row in each side as follows: 2 sts 1 time and 1 st 1 time. Then cast off 2 sts at beg of every row in each side until piece measures 32-37-41-46-52 cm, then cast off 3 sts at beg of the next 2 rows. Cast off the remaining sts, piece measures approx. 33-38-42-47-53 cm. ASSEMBLY: Sew the shoulder seams. Sew in sleeves. SHAWL COLLAR: Start mid front on the left side of sts cast off for neck (i.e. on right front piece). Knit up on circular needle size 4.5 mm with grey as follows: 27 to 36 sts up to shoulder, then knit up 15 to 21 sts in the back of neck, and finally 27 to 36 sts down along left side of neck dec = 69 to 93 sts (NOTE: Do not knit up where sts were cast off in front of neck). K 1 row from WS while AT THE SAME TIME inc evenly to 87-93-105-111-111 sts. Then work rib as follows (from RS): 1 edge st which is worked K on all rows, * K 1, P 2 *, repeat from *-* until 2 sts remain, finish with K 1 and 1 edge st which is worked K on all rows. Continue rib like this until collar measures approx. 3-3-5-5-5 cm. Now inc 1 K st in each of the middle 10-12-12-14-14 K sts seen from RS (= back of neck) = 97-105-117-125-125 sts. Work rib until collar measures 6-6-10-10-10 cm. Switch to dark grey and work 2 rows in rib as before, then loosely cast off with K over K and P over P. Fold the collar double (right side over left side) at the bottom of neck opening and fasten neatly with stitches to neck line through both layers - outermost edge st in each side on collar are sewn edge to edge in front loop of outermost st towards cast off edge mid front. BUTTON LOOP: Make one loop as follows: Twist 2 strands of 40 cm in gray and fold them double. Attach the strap about 3 cm up from the neckline (about 1 cm from the edge at center front). Pull the strands through the collar on the right front piece(right after the dark gray edge) and fasten the ends on the back. Sew button onto the collar on the left front piece, about 3 cm up from the neckline. |
|||||||
Diagram explanations |
|||||||
|
|||||||
 |
|||||||
Have you finished this pattern?Tag your pictures with #dropspattern #jonathansweater or submit them to the #dropsfan gallery. Do you need help with this pattern?You'll find 8 tutorial videos, a Comments/Questions area and more by visiting the pattern on garnstudio.com. © 1982-2026 DROPS Design A/S. We reserve all rights. This document, including all its sub-sections, has copyrights. Read more about what you can do with our patterns at the bottom of each pattern on our site. |
|||||||


With over 40 years in knitting and crochet design, DROPS Design offers one of the most extensive collections of free patterns on the internet - translated to 17 languages. As of today we count 324 catalogues and 12290 patterns translated into English (UK/cm).
We work hard to bring you the best knitting and crochet have to offer, inspiration and advice as well as great quality yarns at incredible prices! Would you like to use our patterns for other than personal use? You can read what you are allowed to do in the Copyright text at the bottom of all our patterns. Happy crafting!
Post a comment to pattern DROPS Children 23-28
We would love to hear what you have to say about this pattern!
If you want to leave a question, please make sure you select the correct category in the form below, to speed up the answering process. Required fields are marked *.