
Popular categories
Looking for a yarn?


Comments / Questions (11)
![]() Christel wrote:
Christel wrote:
Moeten er voor de sjaal aan het begin en einde van de naald telkens 2 kantsteken gebreid worden ( altijd rechts ) of aan elke kant 1 ?
27.11.2025 - 20:28DROPS Design answered:
Dag Christel,
Ja, inderdaad. Aan elke kant 1 kantsteek in ribbelsteek.
27.11.2025 - 21:28
![]() Raelene wrote:
Raelene wrote:
After knitting the rib pattern of K2, P2, does the pattern follow this sequence: K2, P1, K2, P1, K2 ? I’m not sure what it means by “displace” 1 st to the left??
07.03.2025 - 19:53DROPS Design answered:
Dear Raelene, to displace the pattern you will change the pattern slightly, as if it were a 4-stitch chart and you need to start at a different point. So, over the K2, P2 you would work: P1, K2, P1 (the edge stitches are excluded as the are always knitted). Then, work with this new rib for 3 more rows and change it again, so it would be P2, K2. Continue like this, working 4 rows of every new rib type before changing it up. Happy knitting!
09.03.2025 - 17:45
![]() Sara wrote:
Sara wrote:
Bellissimo p pratico!
13.11.2024 - 08:41
![]() Naima Elmezouar wrote:
Naima Elmezouar wrote:
Bonjour J’ai allongé la bordure accidentellement, j’ai 6 cm de cotes2/2, et j’aimerai savoir comment calculer la hauteur du bonnet. et puis est ce que 30 cm n’est pas trop pour un enfant de 5-6 ans Merci pour votre aide
21.09.2021 - 18:02DROPS Design answered:
Bonjour Mme Elmezouar, la bordure du bonnet est repliée sur l'endroit (comme on le voit sur la photo), vous pourrez replier ainsi ces 6 cm entièrement ou un peu plus (ou bien redéfaites ces 2 cm en trop, au choix). Les diminutions se font sur les 3 derniers cm en hauteur, vous pouvez ainsi ajuster en fonction si vous le voulez. Bon tricot!
22.09.2021 - 07:18
![]() Vanessa wrote:
Vanessa wrote:
Ik begrijp dit niet helemaal "Brei nu alle av st 2 aan 2 av samen " Kan ik een toelichting krijgen?
24.01.2021 - 12:13DROPS Design answered:
Dag Vanessa,
Er wordt mee bedoelt dat je alle averechte steken samenbreit, dus als er 2 averechte steken naast elkaar zitten, brei je die averecht samen.
24.01.2021 - 15:33
![]() Olga Costa wrote:
Olga Costa wrote:
Bonjour. Est-ce que ce bonnet se tricote sur l'envers? Faut-il le retourner à la fin? J'ai presque fini et je vois que le dessin est orienté dans l'autre sens. Merci
08.11.2020 - 11:04DROPS Design answered:
Bonjour Mme Costa, le bonnet se tricote sur l'endroit; en décalant le motif comme indiqué, vous le décalez sur la gauche, et devez donc avoir le même sens que sur la photo, ceci dit, vous pouvez également le retourner sur l'envers ou bien la conserver avec le décalage vers la droite. Bon tricot!
09.11.2020 - 10:57
![]() Janet Becker wrote:
Janet Becker wrote:
I need help with the pattern for the scarf. Can you please send written instructions over an 8 row sequence. I'm having trouble keeping the shift to the left. Thank Janet Becker
28.10.2020 - 06:38DROPS Design answered:
Dear Mrs Becker, work first (seen from RS): *K2, P2* - after 4 cm displace cable and work (seen from RS): *P1, K2, P1*, repeat from *-* for 4 rows - from WS work K over K and P over P - work then for 4 rows (seen from RS, remember to K over K and P over P from WS): *P2, K2*, repeat from *-*, then work for 4 rows: *K1,P2,K1*, and then work for 4 rows *K2,P2*. Repeat these 16 rows. Happy knitting!
28.10.2020 - 08:07
![]() Päivi Aspegren wrote:
Päivi Aspegren wrote:
Hei,ohjeessa on matemaattinen virhe kavennusvaiheessa. Esim. keskikoossa: Aluksi on 96 silmukkaa. Ensimm. kavennuksessa silmukoista jää jäljelle kolme neljäsosaa eli 72 silmukkaa. Tämä on oikein. Mutta sitten toisessa kavennuksessa tästä 72 jää jäljelle 3/4 eli 54 silmukkaa, ei 48 kuten ohjeessa lukee. Yst.terv. Päivi Aspegren
03.10.2020 - 13:58
![]() Gudrun wrote:
Gudrun wrote:
Jag lyckas inte förstå beskrivningen för hur man syr ihop halsdukens ändar. ”Drag en tråd upp och ned genom uppläggningskanten” är inte tillräckligt som vägledning för mig, tyvärr. Jag tittar på bilden och på min färdigstickade halsduk men skulle önska antingen en video, eller åtminstone en tydligare förklaring. Tack på förhand!
05.01.2020 - 19:51
![]() Rous wrote:
Rous wrote:
Bonjour auriez vous un tutoriel pour attaché un ponpon à l'écharpe avec la superficie large de l'écharpe comme le modèle 23/5 que je suis en train de réalisé en vous remerciant de votre aide
21.11.2019 - 15:34DROPS Design answered:
Bonjour Mme Rous, quand l'écharpe est terminée, passez un fil dans les mailles du montage (puis dans les mailles rabattues, autrement dit à chaque extrémité) et serrez, vous pourrez ensuite coudre le pompon comme dans la vidéo pour le bonnet. Bon tricot!
21.11.2019 - 15:50
|
|
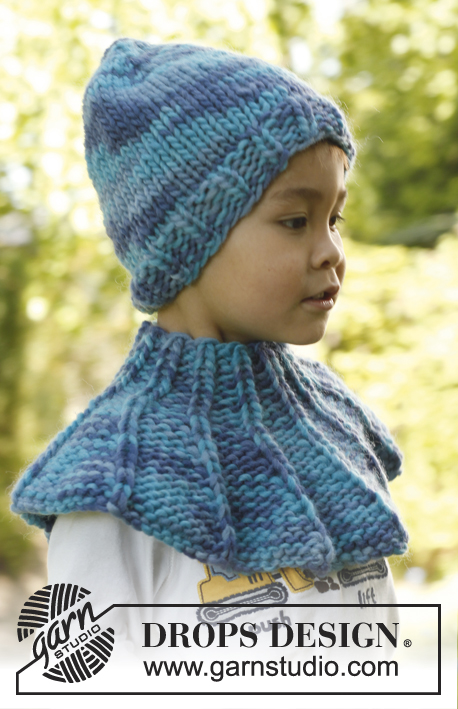
Sea dream#seadreamhat |
|
|
|
|
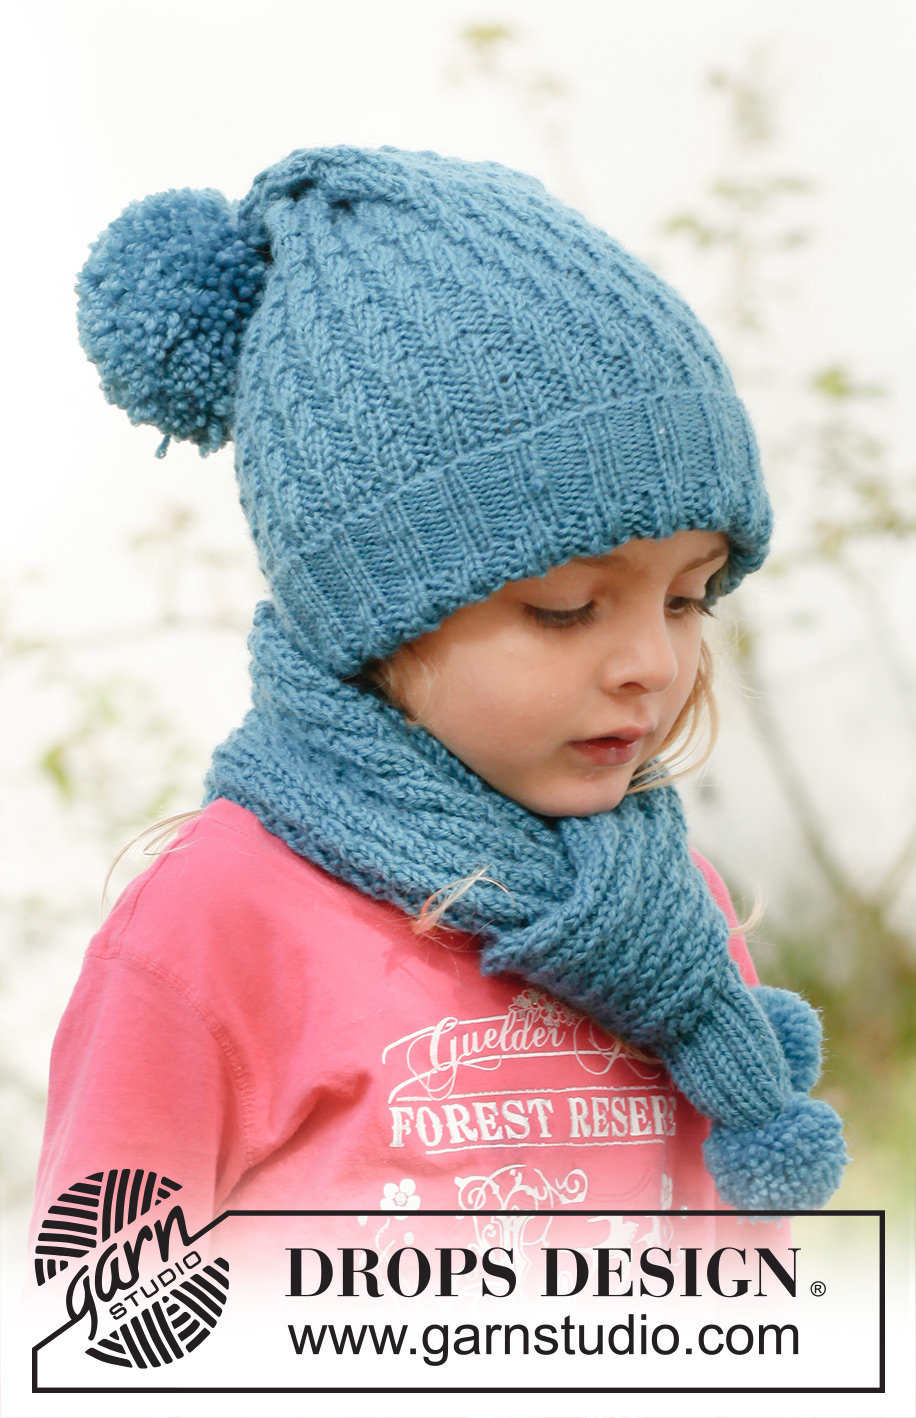
Knitted hat with pompom and scarf with diagonal rib pattern in DROPS Merino Extra Fine. Size children 3 to 12 years.
DROPS Children 23-5 |
|
|
HAT: Cast on 88-96-104 sts on circular needle size 3 mm with Merino Extra Fine. Work rib = K 2/P 2 for 4 cm. Switch to circular needle size 4 mm (switch to double pointed needles when needed). Now work 1 round where the rib is displaced 1 st to the left as follows: Over 2 K, 2 P work 1 P, 2 K, 1 P. * Work 3 rounds with K over K and P over P, displace the rib 1 st to the left on next round (= 4 rounds) *, repeat from *-* until piece measures 27-30-33 cm. Now work all P-sts tog 2 by 2 = 66-72-78 sts. Work 2 rounds with K over K and P over P, then work all K-sts tog 2 by 2 = 44-48-52 sts. Work 2 rounds with K over K and P over P, then K all sts tog 2 by 2 = 22-24-26 sts. Cut the thread and pull it through the remaining sts, tighten tog and fasten. The hat measures approx. 30-33-36 cm vertically. POMPOM: Make a pompom with approx 7-8 cm in diameter and fasten it at the tip of the hat. ---------------------------------------------------------- SCARF: Cast on 26-30-38 sts on needle size 3 mm with Merino Extra Fine. Work rib = K 2/P 2 with 2 edge sts in each side which are worked K on all rows until finished measurements. When rib measures 4 cm, switch to needle size 4 mm. Now work 1 row where the rib is displaced 1 st to the left as follows: Over 2 K, 2 P work 1 P, 2 K, 1 P (edge sts are worked K on every row as before). * Work 3 rows with K over K and P over P, displace the rib 1 st to the left on next row (= 4 rows) *, repeat from *-* until scarf measures approx. 96-116-136 cm – adjust so that rib beg and ends with 2 K inside edge sts in each side (seen from RS). Switch back to needle size 3 mm and work 4 cm rib (= K 2/P 2) with 2 edge sts K in each side. Cast off with K over K and P over P. POMPOM: Make 2 pompoms of approx. 4-5 cm in diameter. Baste a thread up and down through cast on edge on scarf, tighten tog and fasten. Sew one pompom to one end of scarf. Do the same on the other end of scarf. |
|
Have you finished this pattern?Tag your pictures with #dropspattern #seadreamhat or submit them to the #dropsfan gallery. Do you need help with this pattern?You'll find 8 tutorial videos, a Comments/Questions area and more by visiting the pattern on garnstudio.com. © 1982-2026 DROPS Design A/S. We reserve all rights. This document, including all its sub-sections, has copyrights. Read more about what you can do with our patterns at the bottom of each pattern on our site. |


With over 40 years in knitting and crochet design, DROPS Design offers one of the most extensive collections of free patterns on the internet - translated to 17 languages. As of today we count 324 catalogues and 12290 patterns translated into English (UK/cm).
We work hard to bring you the best knitting and crochet have to offer, inspiration and advice as well as great quality yarns at incredible prices! Would you like to use our patterns for other than personal use? You can read what you are allowed to do in the Copyright text at the bottom of all our patterns. Happy crafting!
Post a comment to pattern DROPS Children 23-5
We would love to hear what you have to say about this pattern!
If you want to leave a question, please make sure you select the correct category in the form below, to speed up the answering process. Required fields are marked *.