Comments / Questions (38)
![]() Heidi Masanneck wrote:
Heidi Masanneck wrote:
Hej Drops panel. Er det muligt når man samler masker op rude 3 på rude 1 at undgå at der kommer til at være en vrang side på tæppet? I såfald, hvordan skal jeg gøre dette?? Jeg håber meget på at i kan hjælpe mig Venligst Heidi Masanneck
25.07.2018 - 09:50DROPS Design answered:
Hei Heidi. Det vil alltid bli en forside og en bakside på arbeidet, men siden dette teppet er strikket i riller vil det være mindre synlig her. God fornøyelse
15.08.2018 - 07:39Cristina wrote:
Hallo, thank you but my last question was from squere2 to square 3 where i must pick up The stitches of square 1. I don’t understand if i must cut or non The yarn thank you
16.07.2018 - 16:56DROPS Design answered:
Dear Cristina, I would cut the yarn after square 2 to pick up sts along side of square 1 from RS on square 3. Happy knitting!
17.07.2018 - 09:22Cristina wrote:
Hallo, must i cut The yarn from square 2 to 3 or not? Thank you
16.07.2018 - 15:38DROPS Design answered:
Dear Christina, you don't need to cut the yarn, you can just cast on the 11 sts at the end of 1st square, place a marker if you need to so that stitches are "divided". Happy knitting!
16.07.2018 - 16:12
![]() Maria Del Mar wrote:
Maria Del Mar wrote:
Donde está la lista de los colores que hay que comprar
10.05.2018 - 22:39DROPS Design answered:
Hola María, este patrón se trabaja con Big delight que es multicolor. El efecto de color se hace a partir de un ovillo de un color concreto, no hacen falta distintos colores.
13.05.2018 - 12:49
![]() Trix wrote:
Trix wrote:
Ich habe die Quadrate 1 - 15 gestrickt. Nun weiss ich nicht wie es weiter geht. Ist Quadrat 16 = Quadrat 1, 17 = 2, 18 = 3 usw.? Vielen Dank für die Hilfe, Trix aus der Schweiz
25.09.2017 - 18:45DROPS Design answered:
Liebe Trix, Quadrat 16 wird wie Quadrat 7 gestrickt, dann Quadrate 17, 18, 19 und 20 wie 8 und 9, dann Quadrat 21 wie 10 (wie Reihe 4), dann Quadrat 22 wie 11, Quadrate 23 bis 27 wie 12 bis 13, und Quadrat 28 wie 15. Und immer so wiederholen. Viel Spaß beim stricken!
26.09.2017 - 08:47
![]() Kerstin Becker wrote:
Kerstin Becker wrote:
Ich habe Schwierigkeiten, der Anleitung zu folgen. Ist es Ihnen vielleicht möglich, den Übergang von Quadrat 1 zu Quadrat 2 in einem Video zu veranschaulichen? Bisher ist es mir nicht gelungen das Quadrat 2 auch quadratisch hinzubekommen, wenn ich es so stricke, wie Sie es beschrieben haben.
10.04.2017 - 10:55DROPS Design answered:
Liebe Frau Becker, am Ende 1. Reihe 2. Quadrat die 11 M vom 2. Quadrat + die erste Masche der 1. Quadrat stricken (= 12 M auf dem Nadel), dann wenden, und die 2 ersten Maschen zs stricken und die letzten 10 M stricken (= 11 M), wenden. Am Ende nächster Reihe stricken Sie die 2. M vom 1. Quadrat (= 12 M), wenden und am Anfang nächster Reihe die 2 ersten Maschen zs stricken, und die übrige 10 M stricken (= 11 M). So weiterstricken bis alle M vom 1. Quadrat gestrickt sind. Sie haben immer 12 M am Ende jeder Rück-R und immer wieder 11 M am Ende jeder Hin-R. Viel Spaß beim stricken!
12.04.2017 - 11:55
![]() Gina Von Staden wrote:
Gina Von Staden wrote:
Hallo, ich will will will diese Decke stricken und versuche es seit 5 Tagen. Ich kriege einfach nicht hin, dass eine Seite immer die "gute" ist. Auch wenn ich m. E. der Beschreibung genau folge, sind die Aufnahmen aus einem Rechteck mal von der einen und mal von der anderen Seite. Hilfe, bitte!!! Gina
20.06.2015 - 17:31DROPS Design answered:
Diese Decke hat 2 "gute" Seiten. :-) Wenn Sie sich die Detailaufnahme anschauen, dann sehen Sie, dass die Kanten nicht alle gleich aussehen. Schauen Sie sich doch mal bei den Videos um, vielleicht finden Sie dort noch anschauliche Hilfe zum Auffassen der M. Ich denke aber, Sie machen nichts falsch.
21.06.2015 - 20:00
![]() Lisa Crowe wrote:
Lisa Crowe wrote:
Sorry to ask this but I am really stuck. I understand the diagram going up to square 15 but I can't work out how to continue for the rest of the blanket so it is continuous. Is there a diagram just showing the number count of the squares for the whole blanket, I can work out where to pick up stitches and putting them on a holder but I can't work out the order I knit them?
31.05.2015 - 17:46DROPS Design answered:
Dear Mrs Crowe, just continue following the squares in the same orders you knit the 1-15, ie after 15 work along the diagonal as you worked 7-10, then work as 11-15 and so on until you have the correct number of squares in width/height. Happy knitting!
02.06.2015 - 14:57
![]() Marisa wrote:
Marisa wrote:
No tenéis Video Tutorial de los primeros cuadrados? Gracias
28.09.2014 - 16:04
![]() Heike Sumfleth wrote:
Heike Sumfleth wrote:
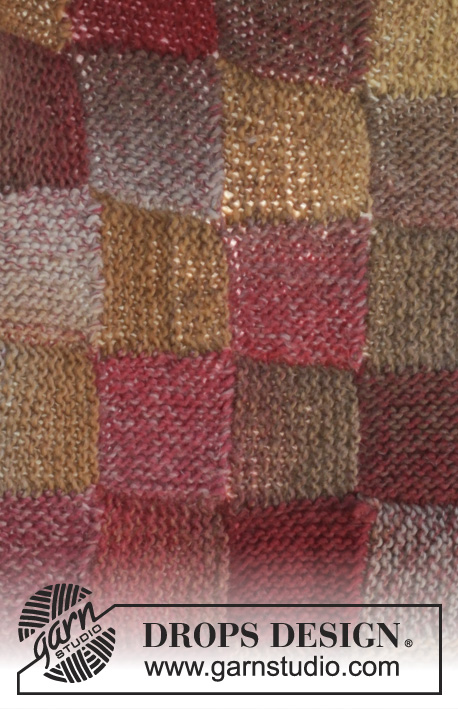
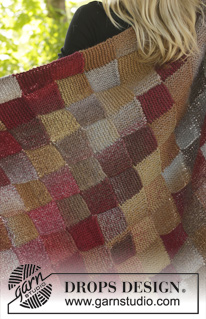
Ich würde gerne die gezeigte Decke stricken. Bin aber etwas verwirrt ob der Farben. Meine auch unifarbene zu erkennen, z.b. das oker oder braun oder weinrot. Ist das Garn so, dass all diese Farben nach und nach erscheinen? Es sieht auch so aus, als würden Unifarben einen Schrägstreifen bilden. Mit freundlichem Gruß Heike Sumfleth
28.09.2014 - 13:25DROPS Design answered:
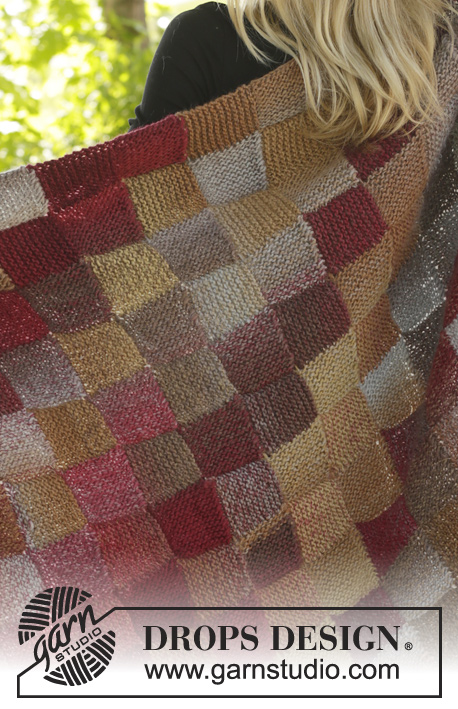
Ja, das Garn ist ein Farbverlaufsgarn, d.h. die Farben erscheinen nacheinander und wiederholen sich in bestimmten Abständen. Dadurch wird auch jede Decke ein Unikat und der Ihnen unifarben erscheinende Schrägstreifen kann bei einer anderen Decke anders aussehen oder länger oder kürzer wirken. Die Quadrate sind ja recht klein, daher kann es sein, dass ein Farbabschnitt für ein Quadrat ausreicht und unifarben wirkt.
28.09.2014 - 16:40
Domino#dominoblanket |
|||||||||||||||||||
 |
 |
||||||||||||||||||
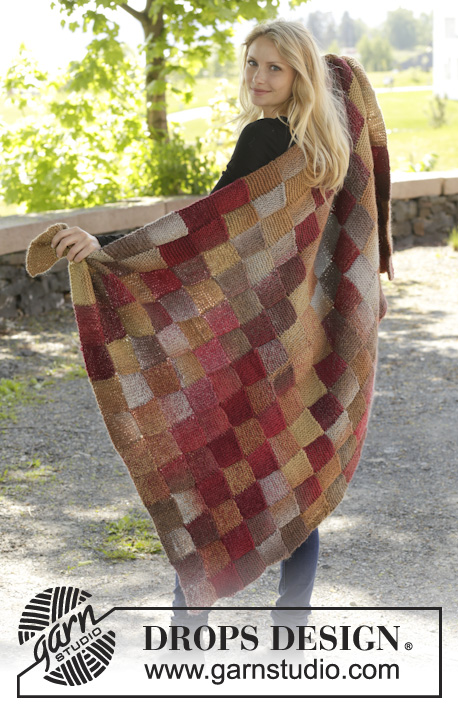
Knitted DROPS blanket with Entrelac pattern in ”Big Delight”.
DROPS 156-56 |
|||||||||||||||||||
|
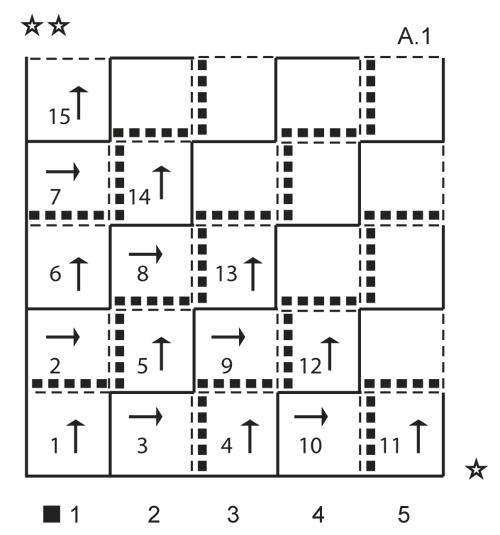
GARTER ST (back and forth on needle): K all rows. 1 ridge = 2 rows K. PATTERN: See A.1 for rows, squares and knitting direction. Diagram shows 1st-5th row of squares. KNITTING TIP: Instead of slipping sts on a stitch holder, sts can be slipped on a long circular needle, or several circular needles as the blanket gets bigger. ---------------------------------------------------------- BLANKET: Worked back and forth on double pointed needles. The entire blanket is worked in GARTER ST - see explanation above. Beg at the bottom in the corner with Square 1 – see diagram A.1. SQUARE 1: Cast on 11 sts on double pointed needles size 6 mm with Big Delight. Work back and forth until piece measures approx. 7 cm (last row is worked from RS). REMEMBER THE KNITTING TENSION! Leave sts on needle. SQUARE 2: Cast on 11 new sts at the end of row from Square 1 on 1 new needle. Work back and forth over these 11 sts – AT THE SAME TIME at the end of every row from WS work 1 st from previous square back on needle, and at beg of every row from RS K tog the first 2 sts. Continue until all sts from Square 1 have been worked - NOTE: Work the last 2 sts K 2 tog = 11 sts on needle (work last row from WS). Slip sts on a stitch holder - READ KNITTING TIP above. SQUARE 3: Pick up 11 sts on 1 new needle along edge on Square 1 from RS. Work back and forth over these sts for approx. 7 cm (last row is worked from WS). Slip sts on a stitch holder. SQUARE 4: Cast on 11 new sts at the end of row from Square 3. Work back and forth over these 11 sts – AT THE SAME TIME at the end of every row from RS work 1 st from Square 3 back on needle, and at beg of every row from WS K tog the first 2 sts. Continue until all sts from Square 3 have been worked - NOTE: Work the last 2 sts from Square 3 K 2 tog = 11 sts on needle (work last row from RS). Slip sts on a stitch holder. SQUARE 5: Pick up 11 sts along edge on Square 3 from RS, work back and forth over these 11 sts – AT THE SAME TIME at the end of every row from RS work 1 st from Square 2 back on needle, and at beg of every row from WS K tog the first 2 sts. Continue until all sts from Square 2 have been worked - NOTE: Work the last 2 sts from Square 2 K 2 tog = 11 sts on needle (work last row from RS). Slip sts on a stitch holder. SQUARE 6: Pick up 11 sts along edge on Square 2 from RS. Work back and forth over these 11 sts for approx. 7 cm (last row is worked from RS). Slip the sts on 1 stitch holder. SQUARE 7: Work as Square 2 (cast on sts at the end of row from Square 6, work with 1 and 1 st from Square 6). SQUARE 8: Pick up 11 sts along edge on Square 6 from WS. Work back and forth over these 11 sts – AT THE SAME TIME at the end of every row from WS work 1 st from Square 5 back on needle, and at beg of every row from RS K tog the first 2 sts. Continue until all sts from Square 5 have been worked - NOTE: Work the last 2 sts from Square 5 K 2 tog = 11 sts on needle (work last row from WS). Slip sts on a stitch holder. SQUARE 9: Work as Square 8 (pick up sts from Square 5, work with 1 and 1 st from Square 4). SQUARE 10: Work as Square 3 (pick up sts from Square 4). SQUARE 11: Work as Square 4 (cast on sts at the end of row from Square 10, work with 1 and 1 st from Square 10). SQUARE 12: Work as Square 5 (pick up sts from Square 10, work with 1 and 1 st from Square 9). SQUARE 13: Work as Square 5 (pick up sts from Square 9, work with 1 and 1 st from Square 8). SQUARE 14: Work as Square 5 (pick up sts from Square 8, work with 1 and 1 st from Square 7). SQUARE 15: Work as Square 6 (pick up sts from Square 7). Continue this pattern until there are 13 squares in width – cast off 11 sts on last square in width instead of casting on new sts, and continue pattern as before. When 21 squares have been worked vertically, cast off the first 11 sts from WS instead of slipping sts on a stitch holder. Work until blanket has 13 x 21 squares. |
|||||||||||||||||||
Diagram explanations |
|||||||||||||||||||
|
|||||||||||||||||||
 |
|||||||||||||||||||
Have you finished this pattern?Tag your pictures with #dropspattern #dominoblanket or submit them to the #dropsfan gallery. Do you need help with this pattern?You'll find 10 tutorial videos, a Comments/Questions area and more by visiting the pattern on garnstudio.com. © 1982-2026 DROPS Design A/S. We reserve all rights. This document, including all its sub-sections, has copyrights. Read more about what you can do with our patterns at the bottom of each pattern on our site. |
|||||||||||||||||||







Post a comment to pattern DROPS 156-56
We would love to hear what you have to say about this pattern!
If you want to leave a question, please make sure you select the correct category in the form below, to speed up the answering process. Required fields are marked *.