
Populære kategorier
Leder du efter et garn?












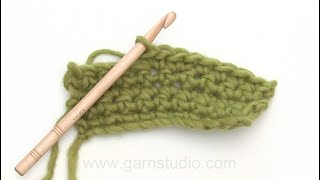


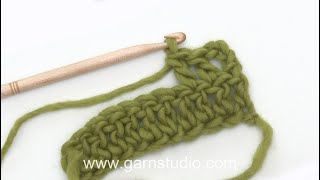



Kommentarer / Spørgsmål (164)
 Christina skrev:
As soon as I posted my last comment/ question the answer appeared below my original question. It definitely wasnt there before cos I looked carefully. Anyway thank you.
28.09.2026 - 22:06
Christina skrev:
Please could someone answer my question from the 23/9 as it doesnt say which size hook to use for the loops. Is it a 3mm or a 5mm. Really this pattern is not at all clear.
28.09.2026 - 22:03DROPS Design svarede:
Hi Christina, We have answered your question and you should have been notified via e mail. If you look at the comments and answers at the bottom of the page, you will see our answer - you work the loops with a 5 mm hook. Regards, Drops Team.
29.09.2026 - 06:12
Christina skrev:
I'm about to crochet the loops but it doesnt say what size hook to use. Is it the 3mm or 5mm hook. I take it that I use a 5mm for the ties in chain stitch as I did for the ties at the neck/shoulder.
23.09.2026 - 22:45DROPS Design svarede:
Hi Christina, Yes, the loops are worked using crochet hook size 5 mm. Regards, Drops Team.
24.09.2026 - 07:29
Christina skrev:
Ok, thanks. I just did slip stitches at the beginning of M2 to get to M3 and also slip stitches at each beginning row of M3 to decrease and for each new shorter row.Your previous reply on 10/9 said to turn when I have done M3. But then when should I do M4? I went straight from M3 to crochet halfway across M4 to the central point and then turned and went crocheted back across M4 and M3. I couldnt see any other way to do it.
23.09.2026 - 22:41
Christina skrev:
Ok, I'll work dble crochet AGAIN along the top of M2 to get to the start of M3 but this will be row 6 of M2. Why doesnt it show this on the graph? But then you say to turn after M3. Dont I have to work M4 after M3 to get to the halfway point. None of this makes any sense to me!
13.09.2026 - 01:17DROPS Design svarede:
Dear Christina, we don't show it in the chart because you can simply cut the thread and rejoin it in M.3. Otherwise, you could also work slip stitches, to avoid cutting the thread but still stitches small enough that it won't look as if M.2 has a 6th row. The M.3 after this first M.2 is worked as before; however, there is an M.3 which is worked before M.2, at the end of the row, previously. For this M.3, instead of working slip stitches, you simply turn the piece and leave unworked the stitches in the final M.2 (as opposed to the initial M.2, which was explained above). Happy crochetting!
14.09.2026 - 00:06
Christina skrev:
Thanks for your reply but I still dont understand. Im at ghe end of row5 so if I work a double crochet in each M2 stitch now, then I will have two rows of double crochet instead of one as shown on the pattern. It clearly says in the instructions that M2 has only 5 rows. How do I get to the start of M3 without doing another M2 row? There's nothing to say in the instructions.
09.09.2026 - 22:18DROPS Design svarede:
Dear Christina, at the beginning of the row you work M.2 = 1 dc in each st to the beg of M.3, then when you have done M.3, just turn leaving the last stitches M.2 unworked at the end of the row and continue with M.3 as shown in the diagram. Happy crocheting!
10.09.2026 - 09:45
Christina skrev:
I dont want to break and rejoin the yarn as that's a bit messy but the pattern doesn't show to do any slip stitches to make my way from the end of M2 to the beginning of row 6 of M3.
08.09.2026 - 01:18
Christina skrev:
I dont want to break and rejoin the yarn as that's a bit messy but the pattern doesn't show to do any slip stitches to make my way from the end of M2 to the beginning of row 6 of M3.
07.09.2026 - 22:52
Christina skrev:
Sorry didnt mean to send it twice. I thought it hadnt been sent
07.09.2026 - 22:49
Christina skrev:
I'm at the end of row 5 of M2. How to I get to the beginning of row 6 of M3 and M4? Do I have to break off the yarn and retie each time or can I slip stitch until I get to the start of M3? Also what do I do when I reach the middle of M4? Do I turn and work back and forth over that half and then crochet the other half separately.
07.09.2026 - 22:44DROPS Design svarede:
Dear Christina, work 1 double crochet (UK crochet terminology - see 2nd symbol under diagram text) in each stitch in M.2 to M.3 - when you reach the middle of M.4 you will finish each part separately, without breaking yarn just work one side to the end then join yarn again to finish the 2nd side. Happy crocheting!
08.09.2026 - 09:24
|
|||||||||||||
Sidney |
|||||||||||||
 |
 |
||||||||||||
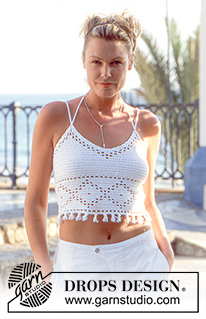
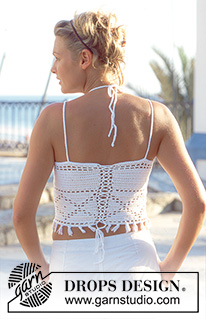
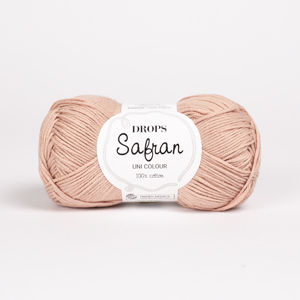
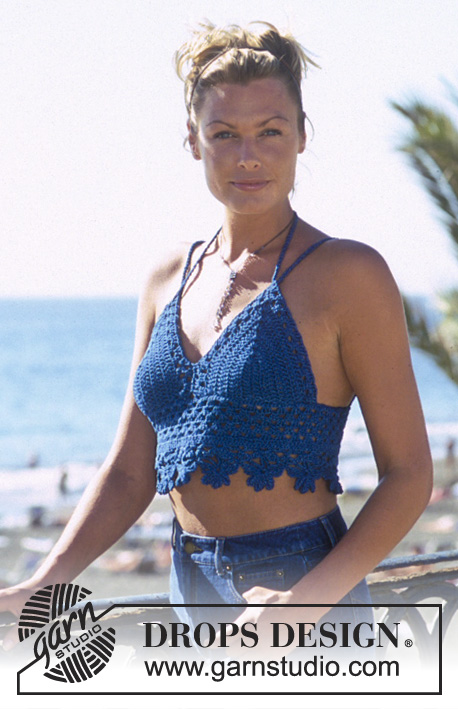
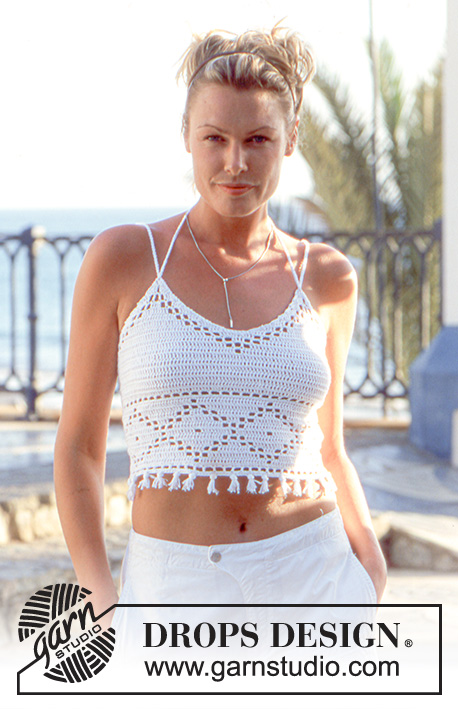
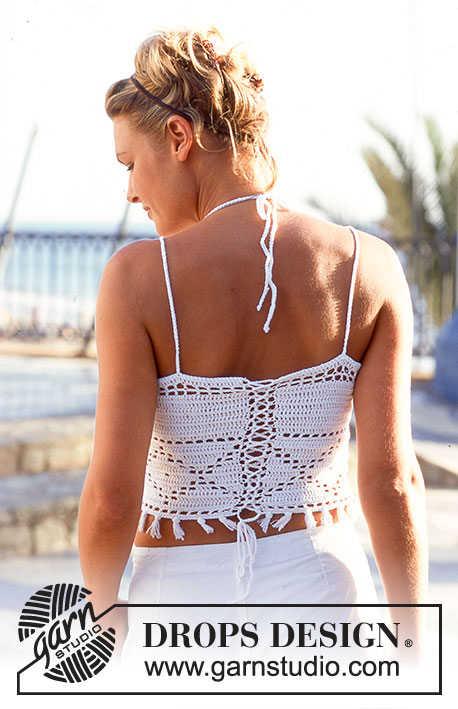
Hæklet DROPS top i "Safran"
DROPS 69-1 |
|||||||||||||
|
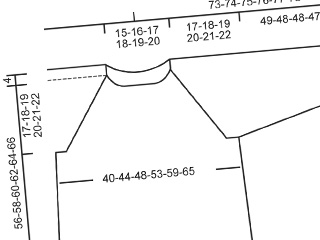
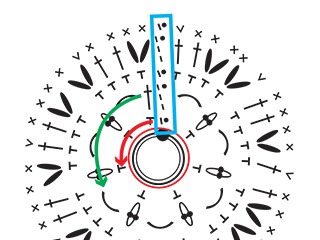
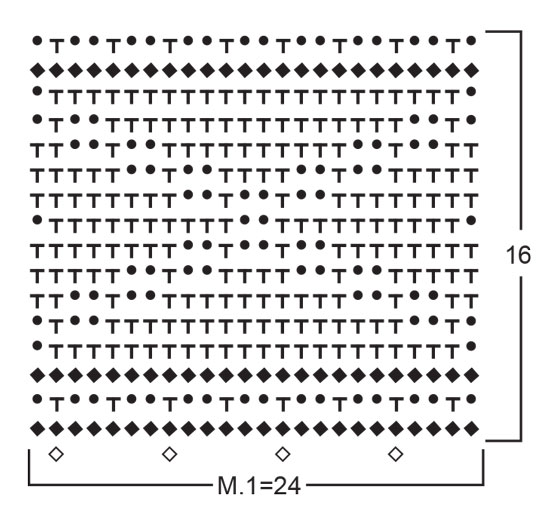
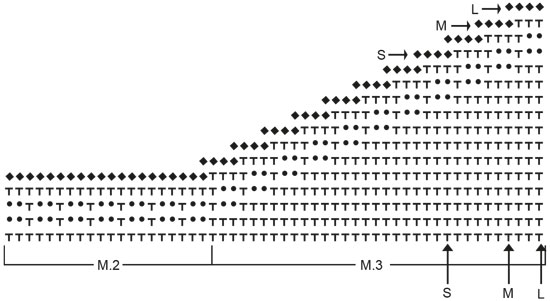
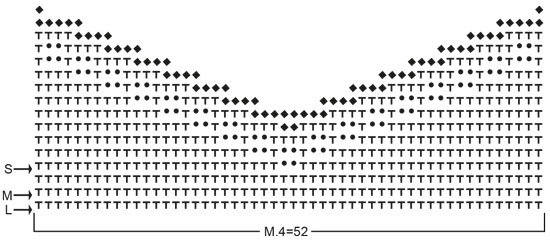
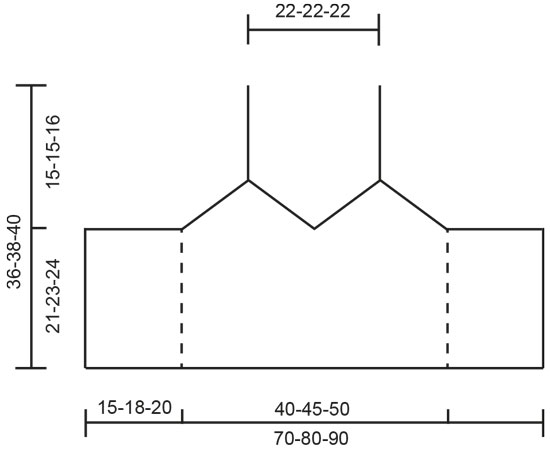
Hæklefasthed: 24 stangm x 12 rækker af mønsteret på nål nr 3 = 10 x 10 cm. Husk hæklenål nr er kun vejledende! Mønster: se diagram - M.1, M.2, M.3 og M.4. Diagram M.1 og M.2 = 1 rapport. M.3 og M.4 hækles som diagrammet viser i de forskellige str. Hækletips: For at vende arb hækles der således: 2 luftm erstatter 1 stangm og 1 luftm erstatter 1 fastm. Top: Hækl 169-193-217 luftm (inkl 1 luftm til at vende med) på nål 3 med Safran. Fortsæt med M.1 - se Hækletips. Husk på hæklefastheden! Efter M.1 hækles der videre med stangm - samtidig på: Str S og M: tages der 4 m ud jævnt fordelt på 1. række efter M.1. Str L: Tages der 2 m ind jævnt fordelt på 1.række efter M.1 = 172-196-214 m. Når der er hæklet ialt 22-24-25 rækker (inkl M.1) måler arbejdet ca 18-20-21 cm. Fortsæt således: Hækl M.2 - start nederst i venstre side af diag og hækl mod højre - over 36-42-48 m, M.3 start nederst i venstre side af diag og hækl mod højre - over de næste 24-30-33 m, M.4 = 52-52-52 m, M.3 start nederst i højre side af diag ved pilen for ønsket str og hækl mod venstre - over 24-30-33 m og M.2 start nederst i højre side af diag og hækl mod venstre - over de sidste 36-42-48 m. Fortsæt diag videre. Efter 5 rækker er M.2 færdig - fortsæt med M.3 og M.4 til diag er færdige. Montering: Stropper: Der hækles stropper således: Start med at hækle ca 9 cm ind øverst på højre side af arb (= på rygstk). Hækl med dobbelt garn på nål nr 5 en luftm-række på ca 90 cm. Træk snoren ind øverst på den forstk-spids som er nærmest. Gentag på den anden side. Længden på toppen kan reguleres ved at snoren bindes i nakken. Trenser: Hækl trenser langs hver side af arb = mod midt bagpå. Start øverst og hækl således: * 1 fastm, 3 luftm, spring 1 cm ned *, gentag fra *-* hele vejen ned. Hækl en luftm-række på ca 150 cm = snor. Træk snoren i trenserne - start øverst og træd således at der dannes kryds nedad ryggen. Frynser: 1 frynse = 4 tråde à 8 cm. Buk trådene dobbelt og sy fast rundt første luftm-række nederst på toppen - se placering i diagram M.1. Der fæstes 28-32-36 frynser. |
|||||||||||||
Diagram forklaring |
|||||||||||||
|
|||||||||||||
 |
|||||||||||||
 |
|||||||||||||
 |
|||||||||||||
 |
|||||||||||||
Har du lavet denne opskrift?Så tagger du dine billeder med #dropspattern eller send dem til #dropsfan galleriet. Behøver du hjælp med opskriften?Du finder 8 instruktionsvideoer, kommentarer/spørgsmål og mere i opskriften på www.garnstudio.com © 1982-2026 DROPS Design A/S. Alle rettigheder er reserveret. Dette dokument med tilhørende underdokumenter har copyright. Læs mere om hvad du kan gøre med vore opskrifter, nedert i alle vore opskrifter på hjemmesiden. |
|||||||||||||

Med over 40 år i strikke- og hæklebranchen tilbyder DROPS Design en af de mest omfattende kollektioner med gratis opskrifter på internettet - oversat til 17 sprog. Dags dato har vi 333 kataloger og 12551 opskrifter på Dansk.
Vi arbejder hårdt for at kunne tilbyde Dig det bedste man kan få af strik og hækling, inspiration og gode råd men også kvalitetsgarn til fantastiske priser! Vil du bruge vore opskrifter til andet end for privat brug? Du kan læse om hvilke regler som gælder under teksten Copyright nederst på siden i alle vore opskrifter. God fornøjelse!
Kommentere opskrift DROPS 69-1
Vi vil gerne høre din mening om denne model!
Hvis du ønsker at stille et spørgsmål, så husk at vælge rigtig kategori i menuen under - det vil give dig hurtigere svar. Obligatoriske felter er markeret med *.