
Leder du efter et garn?


Kommentarer / Spørgsmål (63)
![]() Lore skrev:
Lore skrev:
Cutest little bonnet ever! Easy to follow and beautiful result
04.08.2025 - 05:54
![]() Nannamira skrev:
Nannamira skrev:
Jeg har samme problem som Karolina, den blive høj i stedet for flad. Jeg kan ikke forstå det, for jeg har taget ind på hver anden pind. Hvordan skal jeg opklare dette? Må trevle op og prøve igen.
26.06.2025 - 22:57DROPS Design svarede:
Hei Nannamira. Hvilken str. strikker du? Har du riktig maskeantall når du skal sette de 6 merkene i arbeidet? mvh DROPS Design
30.06.2025 - 14:12
![]() Tracy skrev:
Tracy skrev:
So cute
19.12.2024 - 21:53
![]() Leah skrev:
Leah skrev:
Please help!! Can anyone explain the casing instructions better? Or have a video tutorial. I am not understanding what to do at all and it’s the last piece I have to figure out on this bonnet.
26.01.2024 - 05:14DROPS Design svarede:
Dear Leah, fold the ribbing edge (around face) double from RS and pick up the stitches into both layers along the rib then along the stocking stitch part, along the circle on back of hat, along the stocking stitch part and again in both layers along the rib, then work 2 cm stocking stitch cast off, fold double from RS (purl side is facing) and sew. Happy knitting!
26.01.2024 - 08:20
![]() Leah skrev:
Leah skrev:
Trying to clarify- following the ribbing the next row starting the stockinette section you decrease stitches? Why did you put remember the gauge in the middle of the instructions? What is this supposed to indicate? Not the most clearly written pattern.
22.01.2024 - 07:07
![]() Judith Jenkins skrev:
Judith Jenkins skrev:
I am really having difficulty with the tension. I have gone up to 3mm needles and I have got 8 cm across. It is a very thin fabric so if I go up 2 more needle sizes how will there be any warmth in the bonnet? I have reconciled myself to knitting the bonnet for a 3/4 year old because my 16 month old granddaughter has a head circumference of 48 where you measure for a bonnet or 47 but it will still be too small using 3 mm needles. My tension is usually fairly standard. What is happening here?
07.12.2021 - 21:25DROPS Design svarede:
Dear Mrs Jenkins, this hat is worked with a tension of 26 sts x 34 rows, to get the pattern matching the size you should have this tension. Read more about tension here. Happy knitting!
08.12.2021 - 07:56
![]() Judith Jenkins/ Judy skrev:
Judith Jenkins/ Judy skrev:
Thank you so much for replying straight away. However I always find that I have to re-knit hats smaller and she is a tiny 16 month old who has only just gone into 12 month clothes which are a generous fit on her so I cannot believe that she would need 3 - 4 years. I suppose the ribbing doesn’t need to meet as the bonnet is tied. As the ribbing would need to stretch in order not to be loose would I get away with 12 - 18 months? It must be either 12-18 months or 2 to 3 years.
22.11.2021 - 13:24
![]() Judith Jenkins skrev:
Judith Jenkins skrev:
Please will you look at my previous comment which should have been a question as it is urgent. I lost the first attempt and the second time I didn't c h range it to a question. Thank you
21.11.2021 - 08:50DROPS Design svarede:
Dear Judith, you can see the answer below.
21.11.2021 - 19:16
![]() Judith Jenkins skrev:
Judith Jenkins skrev:
Please could you advise as to size. My granddaughter has a bonnet circumference of 48 cm and a head circumference of 47 cm. The nearest I could get to 10 cm with 26 stitches is 9.1 cm on 3.25mm needles using Drops Fabel. If I knit the 12 - 18 month size it will be smaller than her head circumference suggests. On the other hand it seems unlikely that she would need the 2 - 3 year size as she is small for her age. I want it to fit her this winte r.I don't want to go up another needle size.
21.11.2021 - 08:47DROPS Design svarede:
Dear Judith, the age indicated in the sizes is not important, since the standard sizes may vary between the different countries and it would also depend on each child. If you need a head circumference of 47 cm, with the gauge you have indicated, you would need to knit an even larger size (3/4 years) to obtain the needed circumference. So you would be working the number of stitches for sizes 3/4 but the number of cm for the size 2 years. Happy knitting!
21.11.2021 - 19:15
![]() Maria skrev:
Maria skrev:
Jag har svårt att visualisera hur/var jag ska sticka upp maskorna för dragskon i den uppvikta resåren. Förstår inte hur det ska se ut sen, viker man ner uppviket efter att man stickat upp "dragskon". Det vore fint med en utförligare beskrivning, en bild eller en video. Tack på förhand!
14.04.2020 - 15:48DROPS Design svarede:
Hej Du stickar upp maskor längst hättans nederkant och där du vikt resåren dubbel stickar du upp maskor genom båda lager. Resårkanten fortsätter att vara dubbelvikt som på bilden så den ska inte vikas tillbaka. Mvh DROPS Design
22.04.2020 - 09:54
|
|
Little Miss#littlemissbonnet |
|
 |
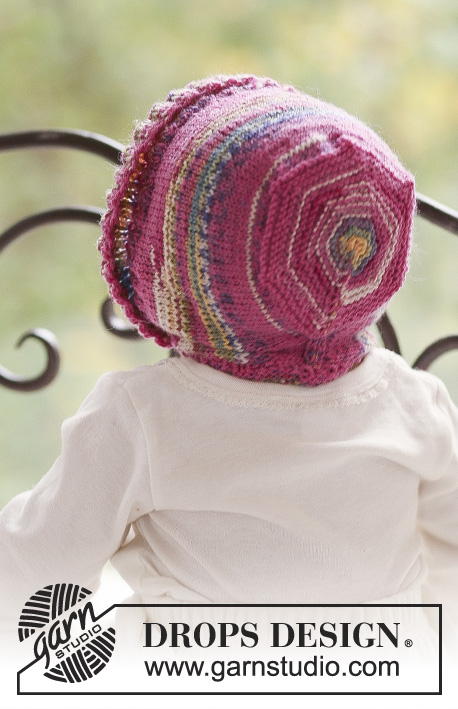 |
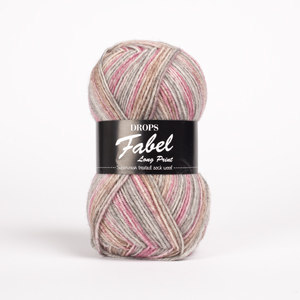
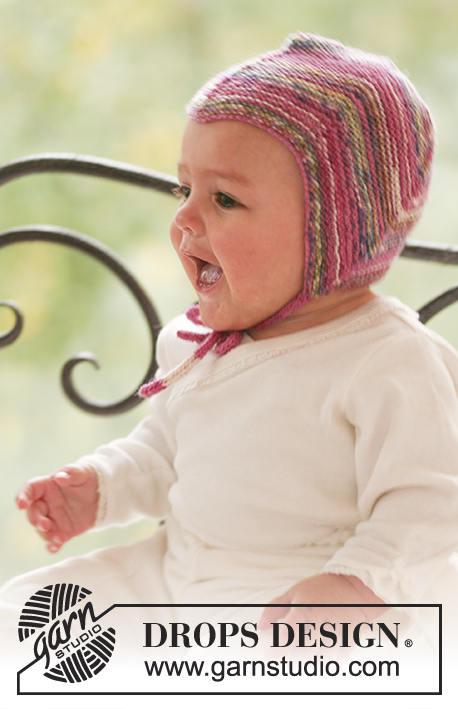
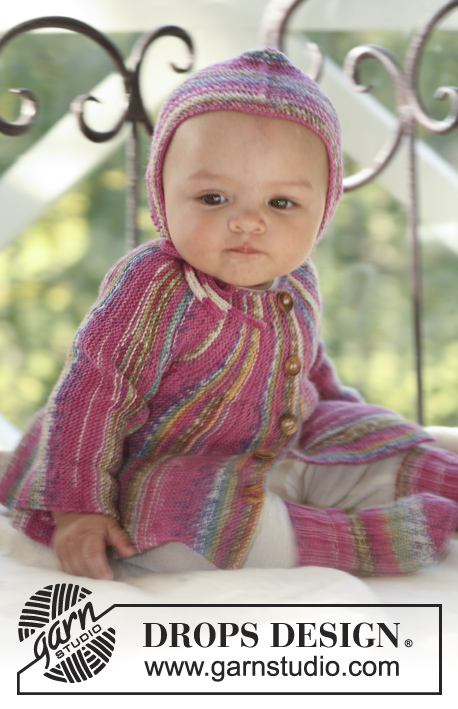
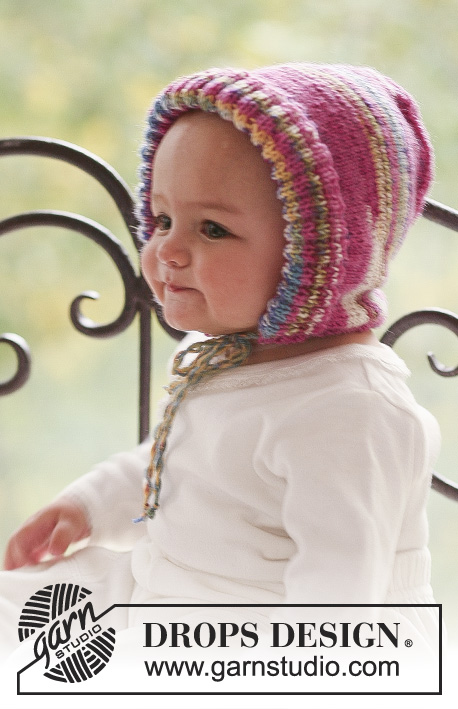
Strikket kyse til baby og børn i DROPS Fabel.
DROPS Baby 18-11 |
|
|
KYSE: Arb strikkes frem og tilbage på p. Slå 104-112-120 (128-136) m op på p 2,5 med Fabel. Strik således (1.p = fra retsiden): 1 kantm i retstrik – SE FORKL OVER, * 2 vr, 2 r *, gentag fra *-*, slut af med 2 vr og 1 kantm i retstrik. Fortsæt Ribben til arb måler 6-8-8 (10-10) cm, nu strikkes der videre i glatstrik med 1 kantm i hver side – SAMTIDIG på 1.p tages der 14-16-18 (20-22) m ind jævnt fordelt = 90-96-102 (108-114) m. HUSK PÅ STRIKKEFASTHEDEN! Når arb måler 14-16-17 (19-20) cm lukkes der 6 m af i beg af næste p fra retsiden, strik p ud og luk 6 m af i beg af næste p fra vrangen, strik p ud = 78-84-90 (96-102) m. Videre sættes der 6 mærker i arb således (set fra retsiden): 1.efter 1 m, de 5 næste med 13-14-15 (16-17) m mellemrum, der er da 12-13-14 (15-16) m tilbage efter sidste m. Fortsæt i retstrik – SE FORKL OVER - SAMTIDIG (fra retsiden) tages der 1 m ind efter hver mærke ved at strikke 2 r sm på hver 2.p til der er 12 m tilbage på p. Strik derefter m sammen 2 og 2. Træk 1 tråd igennem de resterende m, træk sammen og brug tråden til at sy kysen sammen midt bagpå – sy i yderste led af yderste m, sy også i de 6 glatstrikkede m som blev lukket af først. LØBEGANG: Buk Ribben dobbelt mod retsiden. Strik ca 60 til 80 m op med Fabel på p 2,5 i nederkanten af kysen indenfor 1 kantm – ved opslaget strikkes der op gennem begge lag. Strik 2 cm glatstrik, luk løst af. Buk kanten mod retsiden (så den ruller sig naturligt, med vrangen ud), sy kanten fast med små, pæne sting. SNOR: Klip 2 tråde à ca 2 meter, sno dem sammen til de gør modstand, læg snoren dobbelt så den tvinder sig sammen. Bind en knude i hver ende, træk snoren ind i løbegangen. |
|
Har du lavet denne opskrift?Så tagger du dine billeder med #dropspattern #littlemissbonnet eller send dem til #dropsfan galleriet. Behøver du hjælp med opskriften?Du finder 7 instruktionsvideoer, kommentarer/spørgsmål og mere i opskriften på www.garnstudio.com © 1982-2026 DROPS Design A/S. Alle rettigheder er reserveret. Dette dokument med tilhørende underdokumenter har copyright. Læs mere om hvad du kan gøre med vore opskrifter, nedert i alle vore opskrifter på hjemmesiden. |
|


Med over 40 år i strikke- og hæklebranchen tilbyder DROPS Design en af de mest omfattende kollektioner med gratis opskrifter på internettet - oversat til 17 sprog. Dags dato har vi 324 kataloger og 12290 opskrifter på Dansk.
Vi arbejder hårdt for at kunne tilbyde Dig det bedste man kan få af strik og hækling, inspiration og gode råd men også kvalitetsgarn til fantastiske priser! Vil du bruge vore opskrifter til andet end for privat brug? Du kan læse om hvilke regler som gælder under teksten Copyright nederst på siden i alle vore opskrifter. God fornøjelse!
Kommentere opskrift DROPS Baby 18-11
Vi vil gerne høre din mening om denne model!
Hvis du ønsker at stille et spørgsmål, så husk at vælge rigtig kategori i menuen under - det vil give dig hurtigere svar. Obligatoriske felter er markeret med *.