
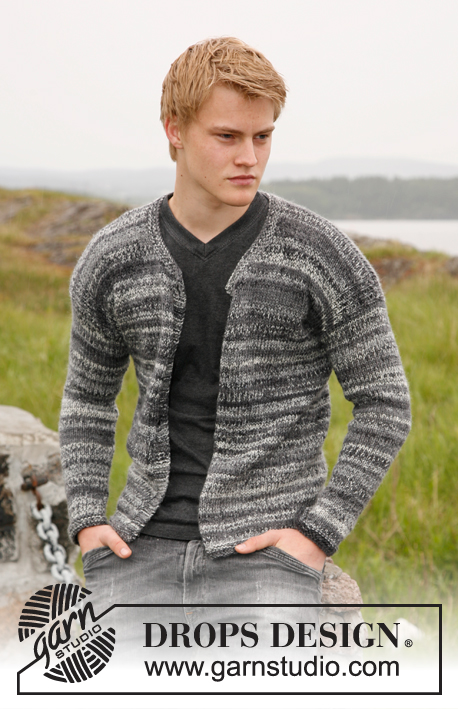
Popular categories
Looking for a yarn?


Comments / Questions (561)
![]() Jatinder wrote:
Jatinder wrote:
I am so sorry to bother you again but I wonder if I may ask for your help in demystifying the sleeve decreases for me please. From what I can see you start by decreasing each side by 3. You then knit as normal ie back and forth and not in the round. However the decreases after that confuse me because it’s quite a lot and the way it looks to me is that you knit up until the 48 sts which are for the shoulders. Best Wishes. Jatinder
28.08.2023 - 21:48DROPS Design answered:
Dear Mrs Jatinder, you are right for the beginning of cast off on top of sleeve, after you have cast off these 6 stitches (3 sts on each side of mid under sleeve), you continue back and forth on needle and cast off at the beg of each row on each side (both from RS and from WS) first 2 sts 2-4-6-7-9-10-12 times then 1 stitch 12-10-8-8-6-6-4 times, so that 48 sts remain. Happy knitting!
29.08.2023 - 09:42
![]() Karen wrote:
Karen wrote:
In the quiery of 21/03/23 by Fion, I am still confused when casting off the 14 castoffs by knitting 2 together than casting 1 off means. Are you actually reducing by 2 stitches on the cast off row or by 1 stitch? By reducing 14 stitches does that mean 7 cast off rows?
31.07.2023 - 21:14DROPS Design answered:
Dear Karen, for the sleeve you will cast off 24 stitches at the beginning of the next row from RS, and at the same time, decrease 14 stitches, in this video, we show how to decrease and cast off at the same time. Happy knitting!
01.08.2023 - 09:09
![]() Nikki wrote:
Nikki wrote:
Hi! In the body piece (M size) it is not clear to me about whether the 9 cm measurement should be taken from the beginning of the garter ST or from the point where the pattern starts. Then, you need to increase 1 stitch on each side of both markers. So if I understood well, I should insert 4 sts in total which will increase the total number of stiches from 256 to 260st (M size)?
10.07.2023 - 18:59DROPS Design answered:
Hi Nikki, The 9 cm are measured from the cast-on edge. And, yes, you increase 1 stitch on each side of both markers, with a total of 4 stitches increased on each increase round. You increase like this every 6 cm a total of 5 times. Happy knitting!
11.07.2023 - 07:19
![]() Carine Georget wrote:
Carine Georget wrote:
Bonjour. Je suis perdue.. J arrive à la fin du dos en L à 61 cm je dois rabattre toutes les mailles mais en même temps je dois diminuer 26 mailles dans le diagramme au dernier rang. M1 M3 M4 je suis au rang 4 à 61 cm je dois aller au 7 ème rang et là là.. Je suis perdue je ne sais ps comment abattre et diminuer en même temps.. Merci beaucoup
10.07.2023 - 18:15
![]() Peta Graham wrote:
Peta Graham wrote:
Hi, I’m nearing the end of this sweater and I’m on the left sleeve. As you’re decreasing on the left. It appears that you’re decreasing from a different pattern stitches then the right side. I’m down to the 17 stiches and I am worried the pattern won’t match at the shoulder meeting point ( due to the decreasing from different sides. I’m worried I’ve done something incorrect and would rather correct it now. Thank you
02.07.2023 - 14:29DROPS Design answered:
Dear Mrs Graham, since you will cast off at the beg of a row from WS for the left sleeve, you might have 1 row difference, but it won't be visible at the end. Happy knitting!
03.07.2023 - 10:38
![]() Camilla wrote:
Camilla wrote:
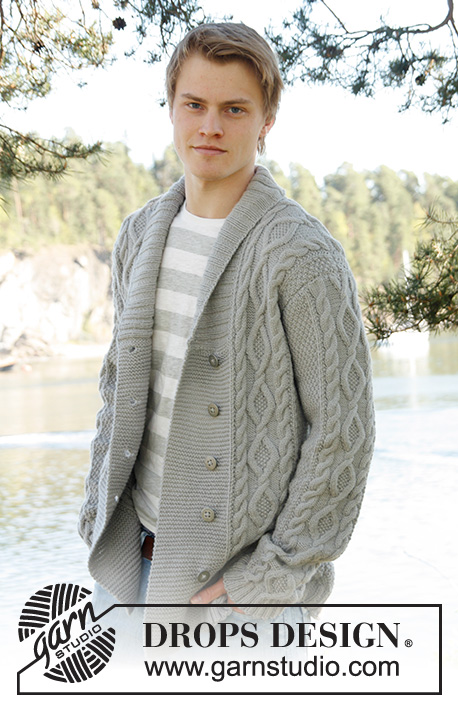
Herre trøje Hvad hedder den snoning der er på ærmet i midten udover Aran Opskrift nr 135-3 Model nr u-593
09.05.2023 - 19:00DROPS Design answered:
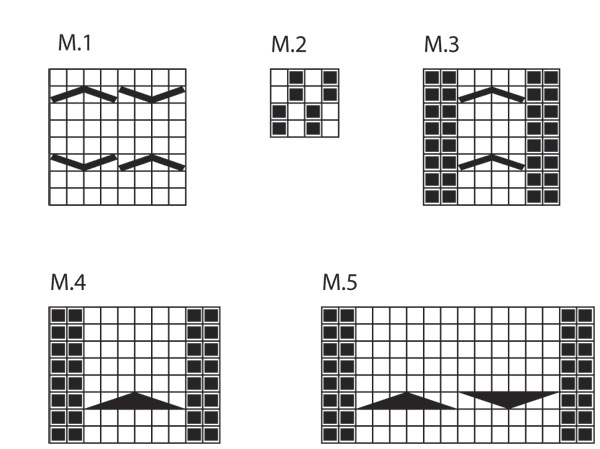
Hej Camilla, den midterste snoning er strikket ifølge diagram M.5 :)
11.05.2023 - 11:33
![]() Borghild Kamban wrote:
Borghild Kamban wrote:
Hej. Jeg skrev d. 11.3. og undrer mig over, at jeg ikke hører fra jer. Jeg kan se på jeres svar, at I generelt svarer meget hurtigt. Jeg spekulerer på om det er mit spørgsmål om skævvridning, der er svært at svare på, eller om min frustration over strikkeprojektet skaber berøringsangst. Jeg synes, det er et meget relevant problem i strikkeprocesser, jeg skriver om. Hvis der er mulighed for at sende en fil, har jeg et billede, som illustrerer problemet tydeligt. VH Borghild
25.03.2023 - 10:22
![]() Fion wrote:
Fion wrote:
I'm making the right sleeve is size medium. What on Earth do these instructions mean: Now cast off on right side of piece, at the beg of every row from RS as follows: 24 sts 1 time (AT THE SAME TIME as 14 of these 24 sts K2 tog before they are cast off), 3 sts 2 times. Should I knit 24, then cast off one stick. Whar is meant bby AT THE SAME TIME. At the same time as what. Do you mean while knitting the 24 stitches I should knot 2 together 14 times. What does 3 sts 2 times mean???
21.03.2023 - 22:47DROPS Design answered:
Hi Fion, You are casting off 1 stitch at the beginning of each row from the right side x 24. On 14 of these cast offs you knit the first 2 stitches together, then cast off 1 stitch. When you are finished with the 1 stitch x 24, you cast off 3 stitches x 2 (again at the beginning of each row from the right side. Hope this helps and happy knitting!
22.03.2023 - 06:48
![]() Borghild Kamban wrote:
Borghild Kamban wrote:
Jeg har strikket på rundpind efter opskriften i karisma. Kroppen er fuldstændig skævvrædet. Faktisk ser arbejdet fuldstændig håbløst ud efter timer og atter timers arbejde. Hvad skal jeg gøre? Jeg har fulgt opskriften ganske nøje, og jeg er rasende. Borghild Kamban
11.03.2023 - 10:04
![]() Susanne Eriksen wrote:
Susanne Eriksen wrote:
Som Trine kan jeg heller ikke forstå st komme igang.. der er flere m når man lægger M 2-3-4-3-1 sammen efter diagrammet…der står strik 44 m men mønsteret dækker 46 m!
28.02.2023 - 18:28DROPS Design answered:
Hej Susanne, hvilken størrelse strikker du, så kan vi hjælpe dig igang?
02.03.2023 - 09:30
|
|||||||||||||||||||
Dreams of Aran#dreamsofaransweater |
|||||||||||||||||||
 |
 |
||||||||||||||||||
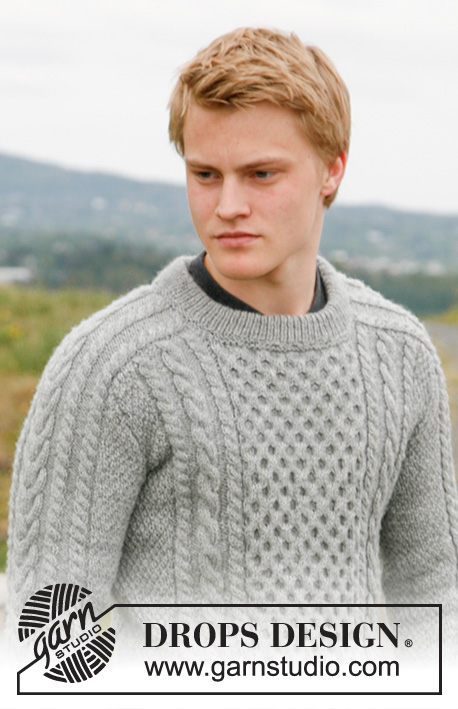
Men's knitted jumper with cables in DROPS Karisma, DROPS Puna or DROPS Merino Extra Fine. Size 13/14 years - XXXL.
DROPS 135-3 |
|||||||||||||||||||
|
GARTER ST (in the round): K 1 round, P 1 round. PATTERN: See diagram M.1 – M.5. Diagrams show the pattern from RS. DECREASING TIP: Work 1 st as in diagram, work 2 sts tog, pass over the first st on needle = 2 dec sts. Dec as follows in the different diagrams M.1 (= 44-44-52-52-52-52-52 sts): 10-10-12-12-12-12-12 sts. M.3 (= 8 sts): 2 sts. M.4 (= 10 sts): 3 sts. M.5 (= 16 sts): 6 sts. -------------------------------------------------------- JUMPER – SHORT OVERVIEW OF THE PIECE: The sleeve is worked upwards, continued onto the shoulder and along the neck, top back. The neck-stitches at the top of the sleeve are decreased towards the front piece and a small section of the sleeve is continued along the top of the back piece and later sewn together mid-back, so the neck is higher at the back than at the front – see Fig.1. -------------------------------------------------------- BODY PIECE: Worked in the round. Cast on 208-230-250-270-290-310-330 sts on circular needle size 3.5 mm with Karisma, Puna or Merino Extra Fine. Work 4 rounds GARTER ST – see above – and continue in rib K1/P1. When piece measures 5 cm work 2 rounds garter st, AT THE SAME TIME inc 20-10-6-6-22-18-18 sts evenly on last round = 228-240-256-276-312-328-348 sts. Insert 2 markers in piece, 1 at beg of round and 1 after 114-120-128-138-156-164-174 sts (= each side). Change to circular needle size 4 mm and work PATTERN as follows – see above: Size 13/14 – L: M.2 on the first 9-12-12-17 sts, M.3, M.4, M.3, M.1 on the next 44-44-52-52 sts, M.3, M.4, M.3, M.2 on the next 18-24-24-34 sts, M.3, M.4, M.3, M.1 on the next 44-44-52-52 sts, M.3, M.4, M.3, M.2 on the last 9-12-12-17 sts. Size XL-XXXL: M.2 on the first 8-12-17 sts, M.3, M.4, M.3, M.4, M.3, M.1 on the next 52-52-52 sts, M.3, M.4, M.3, M.4, M.3, M.2 on the next 16-24-34 sts, M.3, M.4, M.3, M.4, M.3, M.1 on the next 52-52-52 sts, M.3, M.4, M.3, M.4, M.3, M.2 on the last 8-12-17 sts. REMEMBER THE KNITTING TENSION! Continue in pattern like this. AT THE SAME TIME when piece measures 9 cm inc 1 st each side of both markers (work inc sts into M.2 as you go along). Repeat the inc on every 6-8-8-9-9-9-10 cm a total of 5 times = 248-260-276-296-332-348-368 sts. When piece measures 38-47-48-49-50-51-52 cm cast off 6 sts for armhole each side (= 3 sts each side of marker) and complete each piece separately (make sure cable rows are from RS after dividing piece). BACK PIECE: = 118-124-132-142-160-168-178 sts. Continue back and forth on circular needle. Cast off to shape the armhole each side at beg of every row: 2 sts 2-2-2-2-2-3-4 times and 1 st 1-1-2-3-4-4-5 times = 108-114-120-128-144-148-152 sts. Continue in pattern. When piece measures 49-59-61-63-65-67-69 cm (adjust so that next row is row 7 in diagram M.1, M.3 and M.4) cast off, AT THE SAME TIME dec 24-24-26-26-36-36-36 sts in diagram on casting off row – see DECREASING TIP! FRONT PIECE: = 118-124-132-142-160-168-178 sts. Cast off for armhole as described for back piece. When piece measures 46-56-58-60-62-64-66 cm (adjust so that next row is first or 5th row in M.1) cast off the middle 40-40-48-48-48-48-48 sts for neck, AT THE SAME TIME dec 10-10-12-12-12-12-12 sts evenly on the 40-40-48-48-48-48-48 sts on cast off row. Now complete each shoulder separately. Cast off 2 sts on neckline on next row. When piece measures 49-59-61-63-65-67-69 cm (adjust to back piece) cast off, AT THE SAME TIME dec 7-7-7-7-12-12-12 sts in diagram on cast off row. RIGHT SLEEVE: Worked in the round. Cast on 56-58-60-62-64-66-68 sts on double pointed needles size 3.5 mm with Karisma. Work 4 rounds garter st and continue in rib K1/P1 until piece measures 10 cm. Work 2 rounds garter st, AT THE SAME TIME inc 2 sts evenly on last round = 58-60-62-64-66-68-70 sts. Insert a marker at beg of round. Change to double pointed needles size 4 mm and continue in pattern on next round as follows: M.2 on the first 5-6-7-8-9-10-11 sts, M.3 2 times, M.5, M.3 2 times, M.2 on the last 5-6-7-8-9-10-11 sts. Continue in pattern like this. AT THE SAME TIME when piece measures 13-12-13-12-12-14-13 cm inc 1 st each side of marker. Work inc sts into M.2 as you go along. Repeat the inc on every 2-2.5-2-2-2-1.5-1.5 cm a total of 14-15-16-17-18-19-20 times = 86-90-94-98-102-106-110 sts. When piece measures 45-50-50-49-49-48-48 cm cast off 6 sts mid under sleeve (= 3 sts each side of marker) and complete piece back and forth on needle (make sure to have cable row from RS after dividing piece). Cast off for sleeve cap each side at the beg of every row: 2 sts 2-4-6-7-9-10-12 times and 1 st 12-10-8-8-6-6-4 times = 48 sts left on needle for all sizes. Piece measures 55-60-60-60-60-60-60 cm. Now measure piece from here! Continue in pattern on remaining sts until piece measures 12-14-13-15-17-18-19 cm. Now cast off on right side of piece, at the beg of every row from RS as follows: 24 sts 1 time (AT THE SAME TIME as 14 of these 24 sts K2 tog before they are cast off), 3 sts 2 times. Work 3 rows without dec. Cast off 1 st on next row = 17 sts left for all sizes. Continue until piece measures 19-21-22-24-26-27-28 cm. Cast off, AT THE SAME TIME dec 4 sts evenly in diagram on cast off row. The whole sleeve now measures approx 74-81-82-84-86-87-88 cm. LEFT SLEEVE: Like right sleeve, but cast off at the top at the opposite side, i.e. at the beg of every row from WS. ASSEMBLY: Set in sleeves. Sew shoulder sts from body piece to M.3 each side of sleeve (in outer loops of sts). Sew the top of sleeves tog mid back and sew to back piece. NECKLINE: Pick up 94-94-108-108-108-108-108 sts round neckline on small circular needle size 3.5 mm with Karisma, Puna or Merino Extra Fine. Work 4 rounds garter st, AT THE SAME TIME on last row inc 22-22-26-26-26-26-26 sts evenly = 116-116-134-134-134-134-134 sts. Continue in rib K1/P1. When rib measures 8 cm work 2 rounds garter st and cast off. Fold neck double towards WS and fasten, garter st to garter st. |
|||||||||||||||||||
Diagram explanations |
|||||||||||||||||||
|
|||||||||||||||||||

|
|||||||||||||||||||
|
|||||||||||||||||||
Have you finished this pattern?Tag your pictures with #dropspattern #dreamsofaransweater or submit them to the #dropsfan gallery. Do you need help with this pattern?You'll find 18 tutorial videos, a Comments/Questions area and more by visiting the pattern on garnstudio.com. © 1982-2025 DROPS Design A/S. We reserve all rights. This document, including all its sub-sections, has copyrights. Read more about what you can do with our patterns at the bottom of each pattern on our site. |
|||||||||||||||||||


With over 40 years in knitting and crochet design, DROPS Design offers one of the most extensive collections of free patterns on the internet - translated to 17 languages. As of today we count 314 catalogues and 11820 patterns translated into English (UK/cm). 11820
We work hard to bring you the best knitting and crochet have to offer, inspiration and advice as well as great quality yarns at incredible prices! Would you like to use our patterns for other than personal use? You can read what you are allowed to do in the Copyright text at the bottom of all our patterns. Happy crafting!
Post a comment to pattern DROPS 135-3
We would love to hear what you have to say about this pattern!
If you want to leave a question, please make sure you select the correct category in the form below, to speed up the answering process. Required fields are marked *.