
Popular categories
Looking for a yarn?


Comments / Questions (3)
![]() Jan wrote:
Jan wrote:
Beautiful Santa's mailbox, but where to send a wish in it?
06.12.2025 - 19:48
![]() Ingeborg wrote:
Ingeborg wrote:
Denne var kjempegøy. Er og veldig gøy med denne kalenderen, kvart år. Ikkje alltid eg lagar noko, men er inspirerande. God førjulstid
06.12.2025 - 13:23Jan wrote:
I love Christmas calendars. I like to send messages on MSG, but I don\'t know if it\'s private and I can write there. Advent is wonderful.
06.12.2025 - 07:58
|
||||||||||||||||||||||||||||
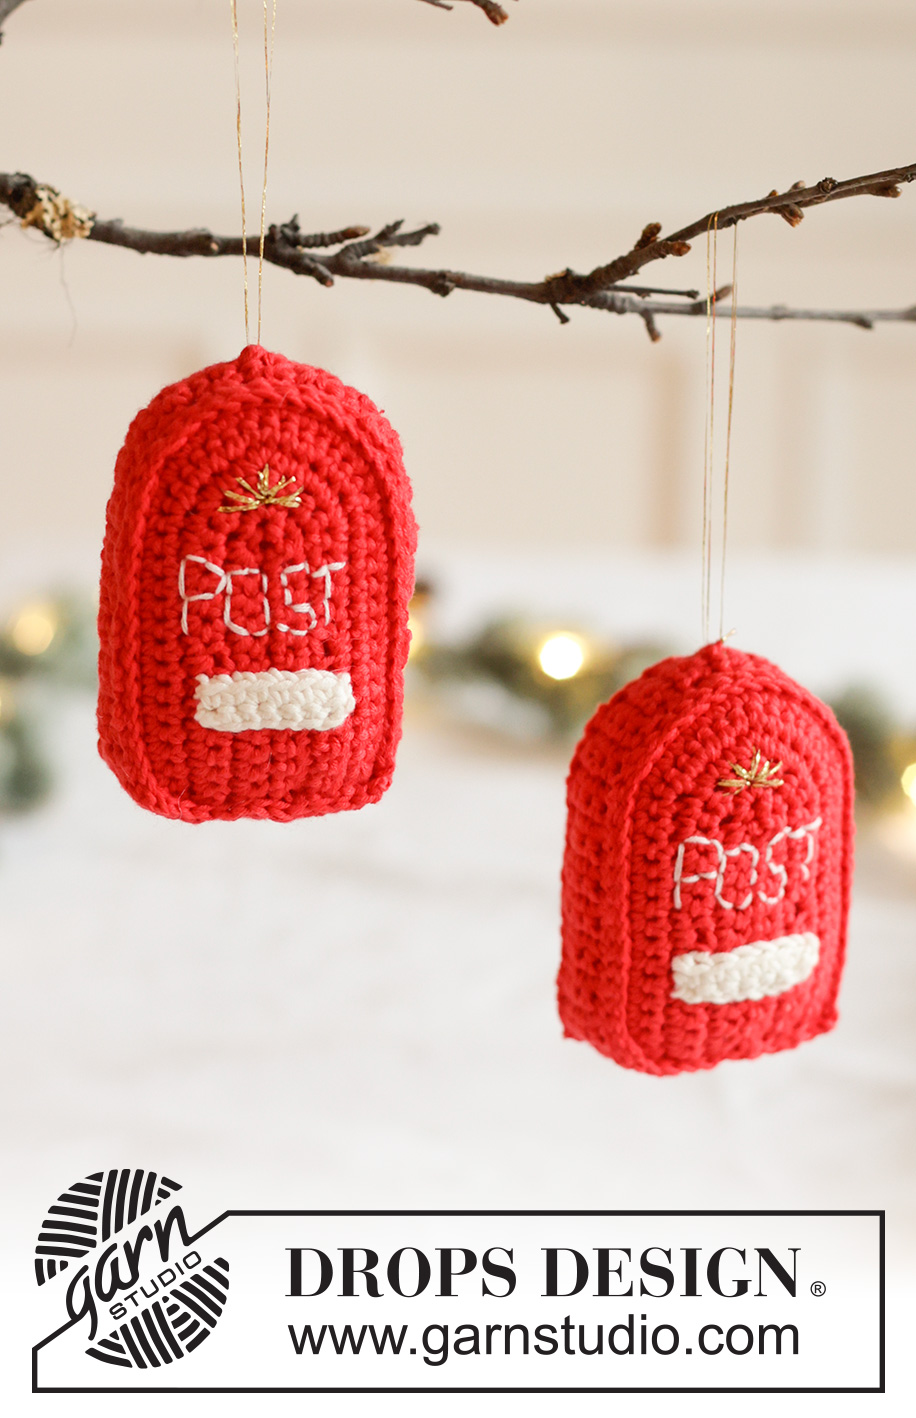
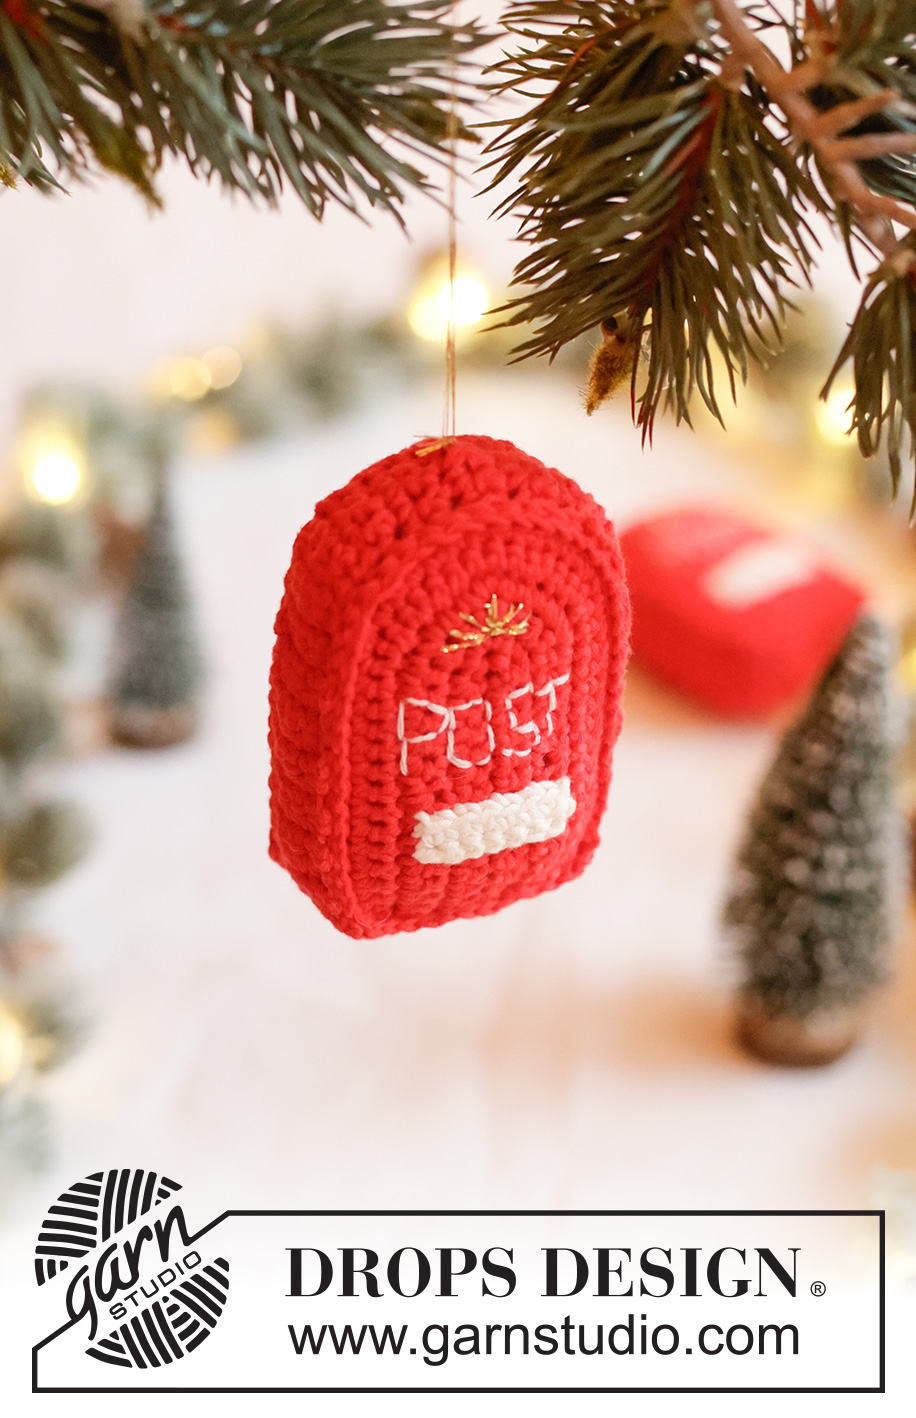
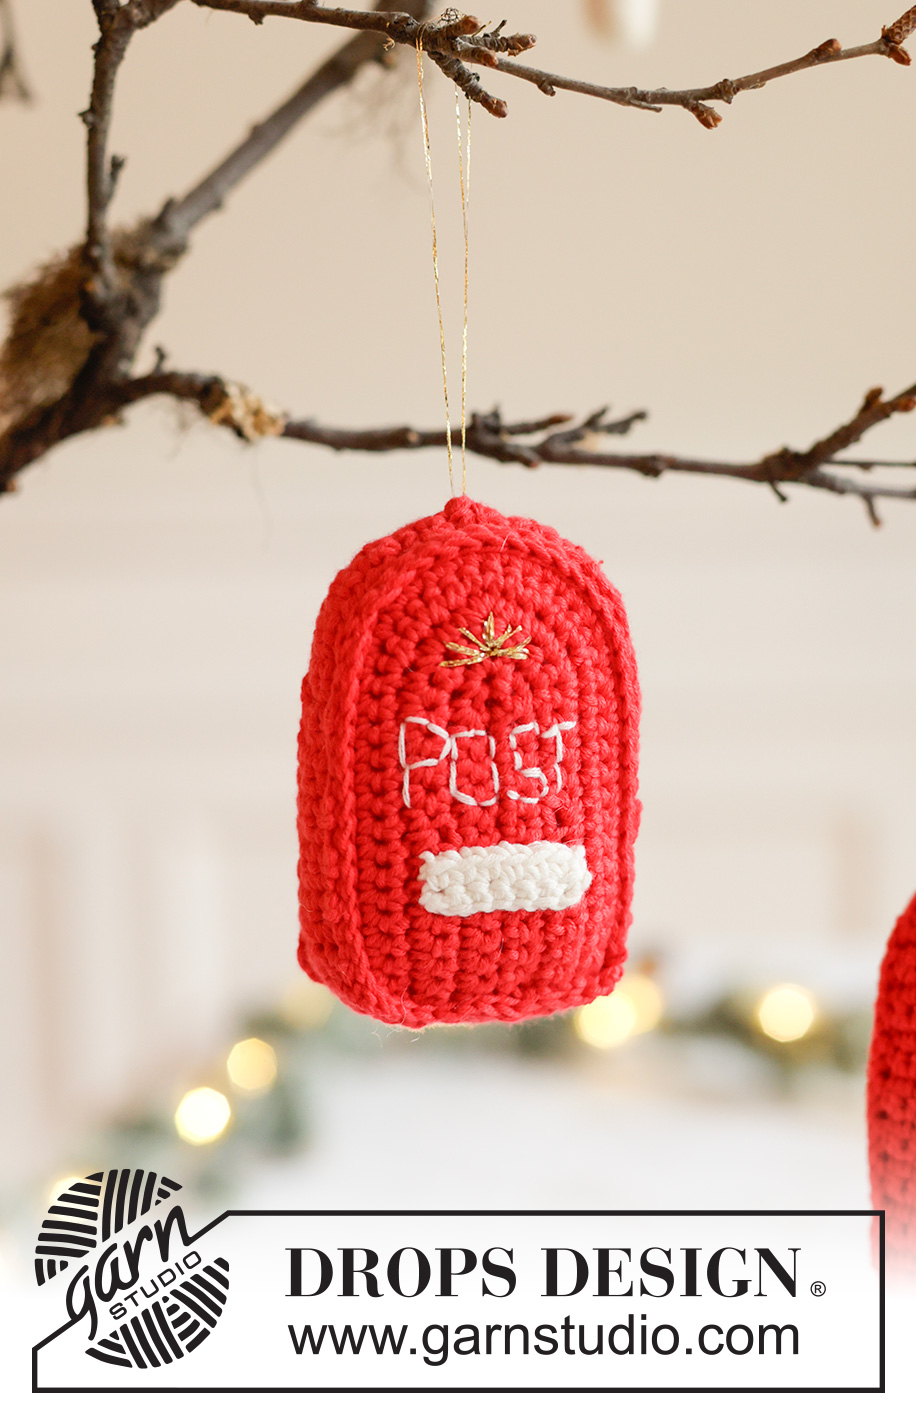
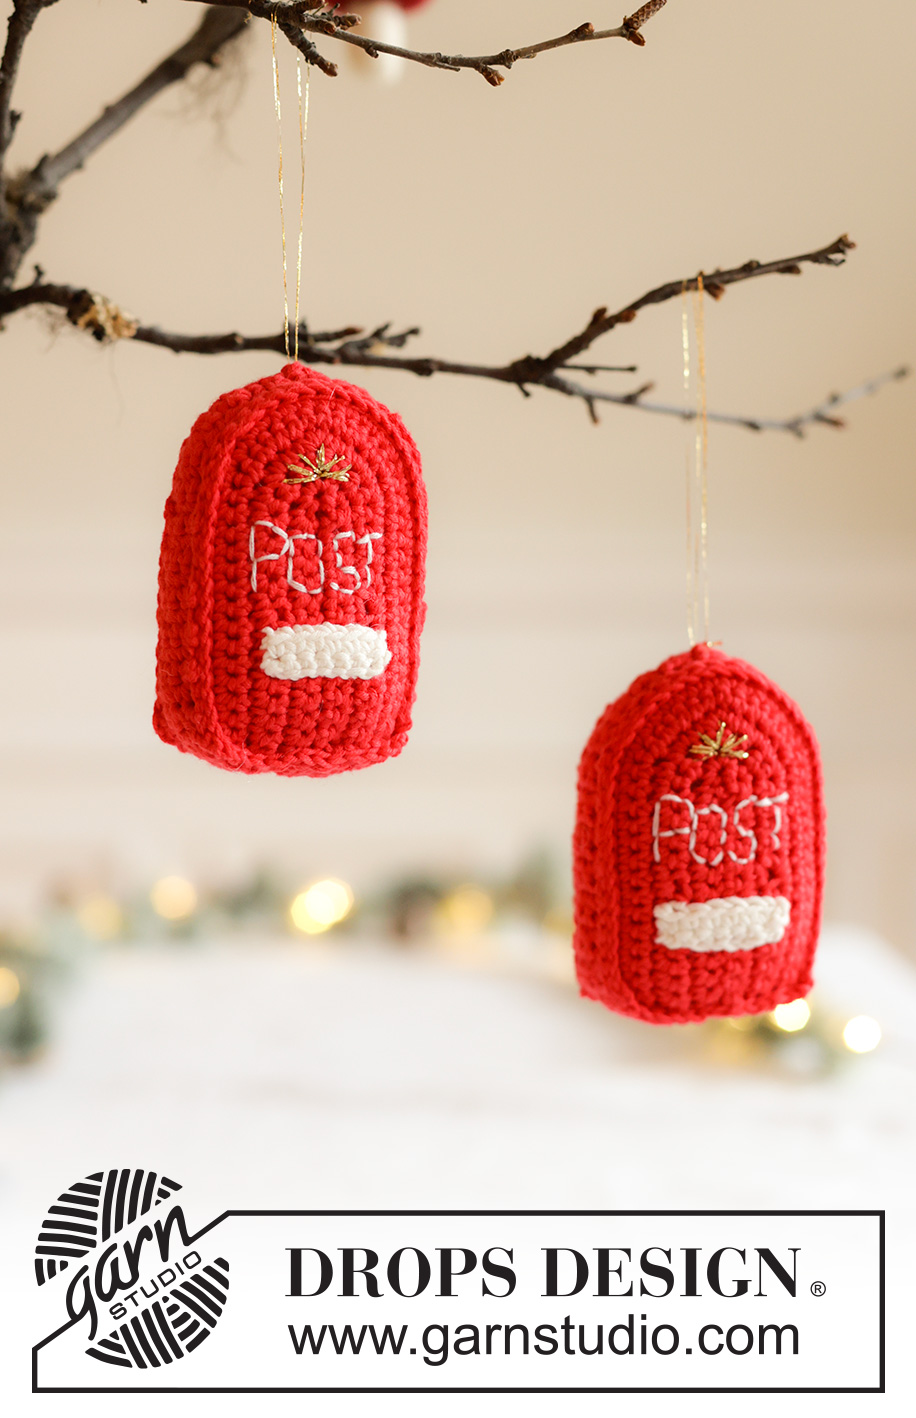
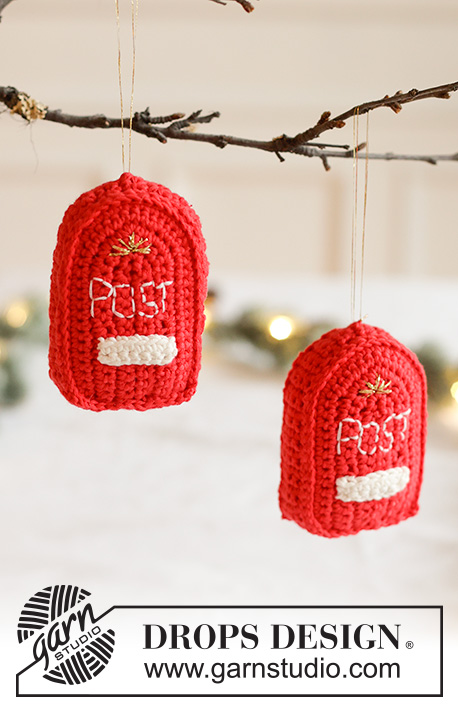
Santa's Mailbox#dropssantasmailbox |
||||||||||||||||||||||||||||
 |
 |
|||||||||||||||||||||||||||
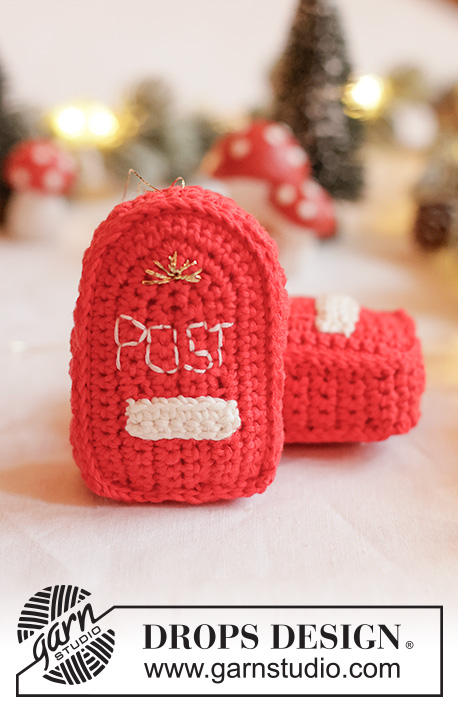
Crocheted postbox/Christmas decoration in DROPS Safran and DROPS Glitter. Theme: Christmas.
DROPS Extra 0-1667 |
||||||||||||||||||||||||||||
|
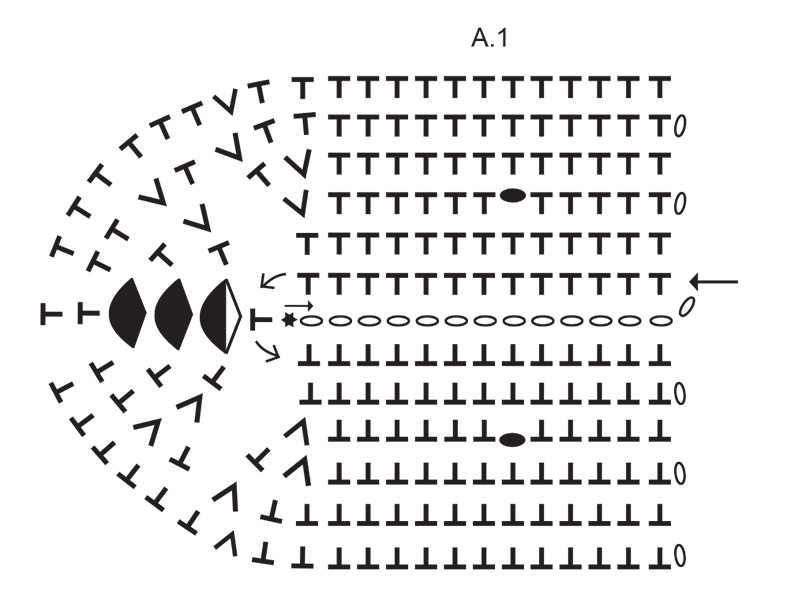
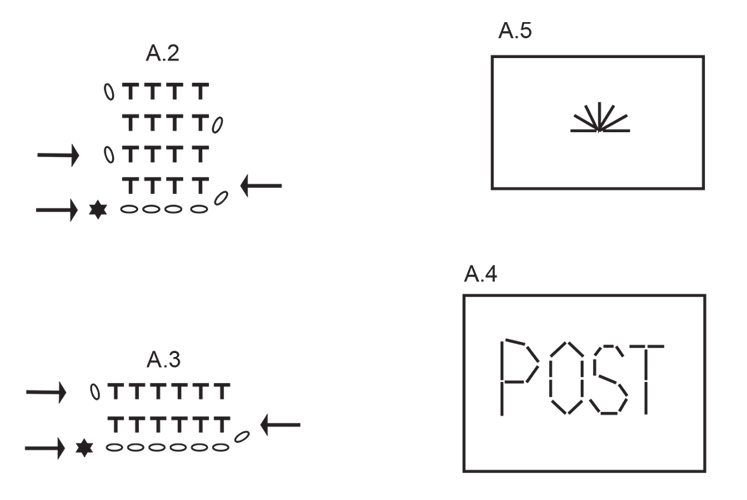
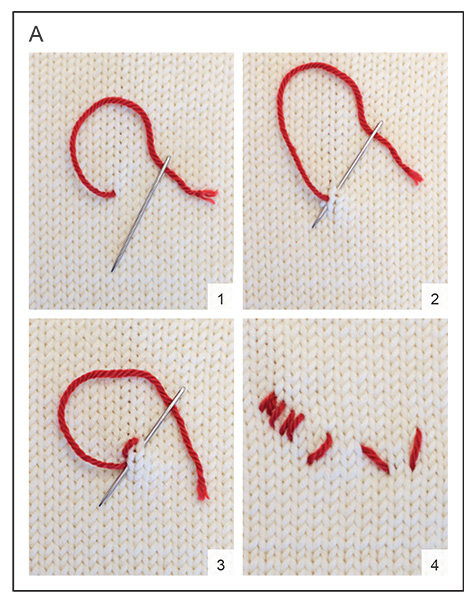
------------------------------------------------------- EXPLANATIONS FOR THE PATTERN: ------------------------------------------------------- CHAIN STITCH: If you work outermost on the hook the chain stitch will often be too tight; 1 chain stitch should be as long as 1 double crochet is wide. PATTERN: See diagrams A.1 to A.3. The diagrams are read from right to left when working from the right side and left to right when working from the wrong side. CROCHET INFORMATION: Each row begins with 1 chain stitch which does not replace the first double crochet (is in addition). Do not work in this chain stitch. ------------------------------------------------------- START THE PIECE HERE: ------------------------------------------------------- POSTBOX – SHORT OVERVIEW OF THE PIECE: The piece is worked back and forth in sections, first the front and back pieces, then the sides and finally a small letterbox. The letterbox is sewn onto the front of the postbox and text and decorations are embroidered on the same side. The pieces are crocheted together and the postbox filled with wadding. A loop is fastened to the top. FRONT: Use crochet hook size 3 mm and colour Red DROPS Safran. Work diagram A.1, starting at the black star in the middle of the diagram. Work 14 CHAIN STITCHES – see explanation above, as shown, then continue A.1 back and forth, i.e., work the first row as follows: 1 double crochet in the 2nd chain stitch from the hook, 1 double crochet in each chain stitch until there is 1 chain stitch left, work 3 double crochets in this chain stitch, continue along the other side of the chain-stitch row with 1 double crochet in each chain stitch, turn. Work back and forth according to A.1 – read CROCHET INFORMATION. Remember to maintain the crochet tension. When A.1 is finished, cut and fasten the strand. BACK: Work in the same way as the front but on row 3 in A.1 replace the chain stitches (which mark the letterbox on the front piece) with double crochets. SIDES: Use crochet hook size 3 mm and colour Red. Work diagram A.2, starting at the black star in the diagram. Work 5 chain stitches as shown, then continue A.2 back and forth, i.e., work the first row as follows: 1 double crochet in the 2nd chain stitch from the hook, 1 double crochet in each of the last 3 chain stitches, turn. Continue back and forth according to A.2 – remember CROCHET INFORMATION until the piece measures approx. 24 cm, matching the length to the circumference on the front/back pieces. The sides are later crocheted to the front/back pieces. LETTER BOX: Use crochet hook size 3 mm and colour Off White. Work diagram A.3, starting at the black star in the diagram. Work 7 chain stitches as shown, then continue A.3 back and forth (= 2 rows). When the 2 rows are finished, cut the strand, leaving a length for sewing. ASSEMBLY-1: Sew the letterbox to the front of the postbox using colour Off White. Sew with small stitches. The top corners of the letterbox should match the chain stitches worked in row 3 of A.1. TEXT: Use 1 strand DROPS Safran, colour Off White. Divide the strand in 2 to give a thinner strand. Embroider text on the front of the postbox with flat stitch – see photo and A.4 (text embroidered across 4 stitches in height and 8 rows in width). DECORATION: Use 2 strands DROPS Glitter. Embroider a small decoration with flat stitch – see photo and A.5 (each stitch should measure 0.5 to 0.8 cm). ASSEMBLY-2: Use crochet hook size 3 mm and colour Red. Lay the long-side of the side piece edge-to-edge with the front of the postbox (start at one bottom corner), hold the postbox with the front towards you and work 1 double crochet through both layers in the corner, then work 1 double crochet in each stitch/row (through both layers) around the postbox. Cut and fasten the strand. Lay the back piece edge-to-edge with the other long-side of the side piece and crochet together in the same way as the front piece. Fill with wadding and sew the short sides of the side piece together with small stitches. Cut and fasten the strand. LOOP: Cut 2 strands DROPS Glitter, 15 cm in length. Thread the strands through a stitch at the top of the postbox (in the middle of the side piece) and tie a knot in the end. |
||||||||||||||||||||||||||||
Diagram explanations |
||||||||||||||||||||||||||||
|
||||||||||||||||||||||||||||
 |
||||||||||||||||||||||||||||
 |
||||||||||||||||||||||||||||
 |
||||||||||||||||||||||||||||
Have you finished this pattern?Tag your pictures with #dropspattern #dropssantasmailbox or submit them to the #dropsfan gallery. Do you need help with this pattern?You'll find 7 tutorial videos, a Comments/Questions area and more by visiting the pattern on garnstudio.com. © 1982-2026 DROPS Design A/S. We reserve all rights. This document, including all its sub-sections, has copyrights. Read more about what you can do with our patterns at the bottom of each pattern on our site. |
||||||||||||||||||||||||||||


With over 40 years in knitting and crochet design, DROPS Design offers one of the most extensive collections of free patterns on the internet - translated to 17 languages. As of today we count 325 catalogues and 12291 patterns translated into English (UK/cm). 12291
We work hard to bring you the best knitting and crochet have to offer, inspiration and advice as well as great quality yarns at incredible prices! Would you like to use our patterns for other than personal use? You can read what you are allowed to do in the Copyright text at the bottom of all our patterns. Happy crafting!
Post a comment to pattern DROPS Extra 0-1667
We would love to hear what you have to say about this pattern!
If you want to leave a question, please make sure you select the correct category in the form below, to speed up the answering process. Required fields are marked *.