
Categorías populares
¿Buscas un hilo?


Cómo tejer el borde delantero de una chaqueta separadamente

Coser los bordes delanteros cuidadosamente en el interior de 1 punto de orillo del canesú.
Usamos el hilo DROPS Snow en el video.
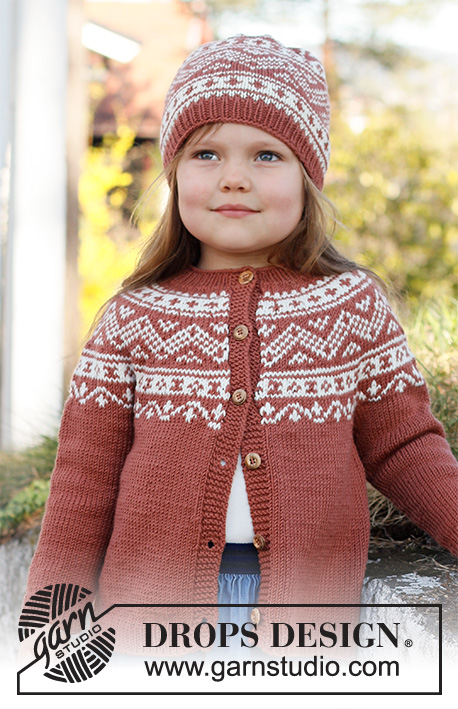
Un borde delantero como este es usado en el modelo «Scent of pine Jacket», DROPS 215-7. Encontrarás el patrón al hacer clic en la fotografía abajo.
Patrones que utilizan esta técnica

Video #1556, listado en: Aprende a hacer punto, Tips & trucos de punto, Tejiendo Bordes Delanteros & Ojales
Nuestros videos no tienen sonido. Somos una empresa internacional y nuestros videos son vistos por personas que hablan diferentes idiomas y muchas de ellas no comprenden el español. Consecuentemente, como no hay un idioma determinado a usar por nosotros, hemos escrito las instrucciones que acompañan el video, y no hay ningún sonido que interfiera mientras se ve el video.
Puedes ajustar la velocidad de este video haciendo clic en el ícono en la barra de reproducción.
Dejar un comentario o pregunta acerca de este video
Tu dirección de email no será publicada. Los campos obligatorios están marcados con un *.
También te podría gustar...


Con más de 40 años en el diseño de modelos de punto y de ganchillo, DROPS Design ofrece una de las más vastas colecciones de patrones gratuitos en el internet - traducidos en 17 idiomas. Al día de hoy, contamos con 325 catálogos y 12298 patrones - de los cuales 11698 están traducidos en español.
Nosotros trabajamos con mucho esmero para brindarte lo mejor que las labores de punto y ganchillo tienen para ofrecer,inspiración y consejos, así como hilos de magnífica calidad a precios increíbles! Te gustaría usar nuestros patrones para otro fin además del uso personal? Puedes leer acerca de lo que estás permitida a hacer en el texto de Copyright en la parte de abajo de todos nuestros patrones. Felices labores!
Thanks for all your great patterns! I have two questions. I do understand the technique in this video, but I don't understand the purpose of doing the edge loose? Was also mostly think about how to manage the pattern when knitting back and forth. Reading the pattern I think I will have the white yarn on the wrong side many times. Do you work with multiple yarn buns to make the pattern work?
07.12.2021 - 06:54DROPS Design :
Dear Mrs Lakso, this technique can be used when the piece is worked in another pattern as the front band stitches or when the front band stitches will be worked afterwards with another colour/pattern - garter stitch also tends to tighten piece in height, in that case, you will avoid this since you will work the garter stithch piece separately. You can sometimes work 2 rows from the same side, ie 2 rows from RS (or from WS) each row with a different colour. to avoid cutting yarn. Happy knitting!
07.12.2021 - 07:39Thanks for all your great patterns! I have two questions. I do understand the technique in this video, but I don't understand the purpose of doing the edge loose? Was also mostly think about how to manage the pattern when knitting back and forth. Reading the pattern I think I will have the white yarn on the wrong side many times. Do you work with multiple yarn buns to make the pattern work?
07.12.2021 - 06:53I do not understand the Garter St. (Back and Forth on needle). I have watced the videos and read the instructions. But still don't know what it means. Please can you help?
19.09.2020 - 02:30DROPS Design :
Dear Mrs Perkins, the video shows from 01:45 how we work the stitches in garter stitch (= back and forth), ie knit all stitches on every row. Happy knitting!
21.09.2020 - 15:57