
Catégories populaires
Vous cherchez un fil?


Comment tricoter une bordure devant séparément

On coud ensuite soigneusement la bordure des devants à 1 maille lisière du bord le long de l'empiècement.
Dans la vidéo, nous utilisons la laine DROPS Snow.
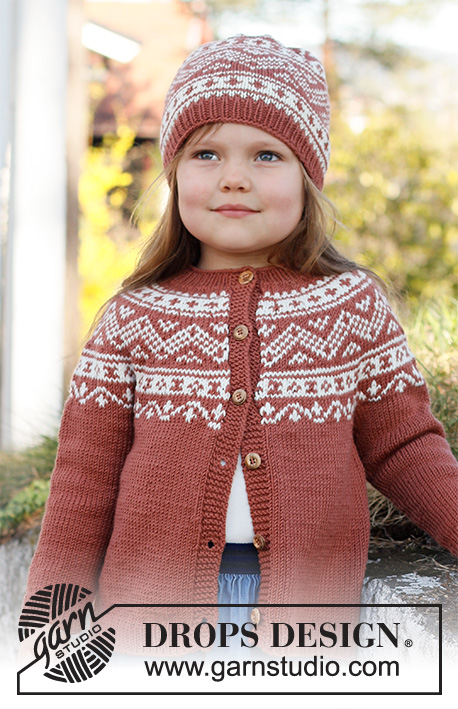
On utilise cette technique dans le modèle «Scent of pine Jacket», DROPS 215-7, vous trouverez les explications en cliquant sur la p photo ci-dessous.
Modèles utilisant cette technique

Vidéo #1556, classé dans: Apprendre à tricoter, Tricot, Trucs & Astuces, Bordures Devant & Boutonnières
Nos vidéos n'ont pas de son. Nous sommes une entreprise internationale et nos vidéos sont regardées par des personnes parlant différentes langues et beaucoup d'entre elles ne comprennent pas le français. Comme on ne peut utiliser aucune langue déterminée, nous avons des instructions écrites pour accompagner la vidéo, et il n'y a pas de son perturbant lorsque vous regardez la vidéo.
Vous pouvez ajuster la vitesse de la vidéo en cliquant sur l'icône sur la barre de lecture.
Écrire un commentaire ou une question à propos de cette vidéo
Votre adresse mail ne sera pas publiée. Les champs obligatoires sont indiqués par une *.
Vous pourriez aussi aimer...


Avec plus de 40 ans dans la conception de modèles tricot et crochet, DROPS Design offre l'une des plus vastes collections de modèles gratuits sur internet - traduits dans 17 langues. À ce jour, on compte 324 catalogues et 12290 modèles en français.
Nous nous efforçons de vous apporter le meilleur de ce que le tricot et le crochet peuvent vous offrir, inspiration et conseils mais également des fils de haute qualité à des prix incroyables! Vous souhaiteriez utiliser nos modèles autrement que pour un usage personnel? Vous pouvez lire ce que vous êtes autorisés à faire dans le Copyright en bas de page de chacun de nos modèles. Bon tricot!
Thanks for all your great patterns! I have two questions. I do understand the technique in this video, but I don't understand the purpose of doing the edge loose? Was also mostly think about how to manage the pattern when knitting back and forth. Reading the pattern I think I will have the white yarn on the wrong side many times. Do you work with multiple yarn buns to make the pattern work?
07.12.2021 - 06:54DROPS Design :
Dear Mrs Lakso, this technique can be used when the piece is worked in another pattern as the front band stitches or when the front band stitches will be worked afterwards with another colour/pattern - garter stitch also tends to tighten piece in height, in that case, you will avoid this since you will work the garter stithch piece separately. You can sometimes work 2 rows from the same side, ie 2 rows from RS (or from WS) each row with a different colour. to avoid cutting yarn. Happy knitting!
07.12.2021 - 07:39Thanks for all your great patterns! I have two questions. I do understand the technique in this video, but I don't understand the purpose of doing the edge loose? Was also mostly think about how to manage the pattern when knitting back and forth. Reading the pattern I think I will have the white yarn on the wrong side many times. Do you work with multiple yarn buns to make the pattern work?
07.12.2021 - 06:53I do not understand the Garter St. (Back and Forth on needle). I have watced the videos and read the instructions. But still don't know what it means. Please can you help?
19.09.2020 - 02:30DROPS Design :
Dear Mrs Perkins, the video shows from 01:45 how we work the stitches in garter stitch (= back and forth), ie knit all stitches on every row. Happy knitting!
21.09.2020 - 15:57