DROPS Big Merino
DROPS Big Merino
100% Wool
from 4.55 $ /50g
Get the yarn to make this pattern from 50.05$.

The yarn cost is calculated from the pattern’s smallest size and the yarn’s cheapest product type. Looking for an even better price? You might find it on the DROPS Deals!

DROPS SS24

Belfast

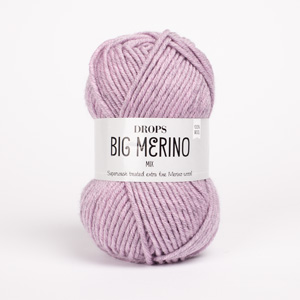
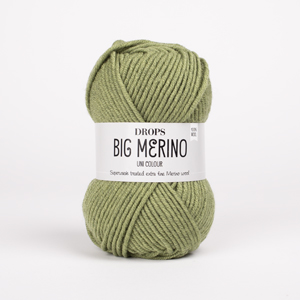
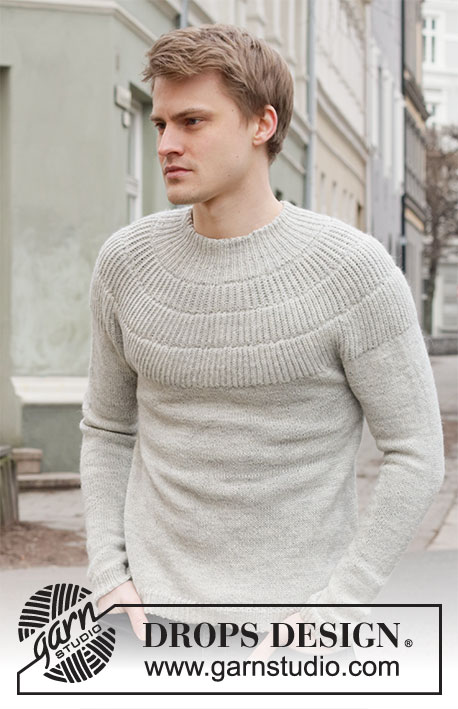
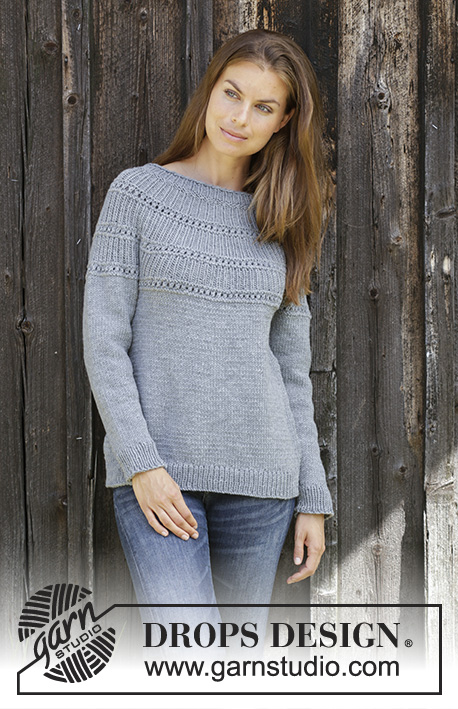
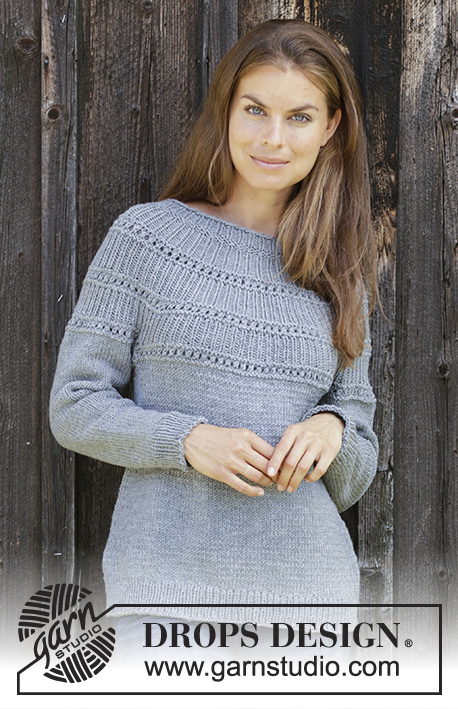
Knitted sweater in DROPS BIG MERINO. The piece is worked top down, with textured pattern and stockinette stitch.

DROPS 195-33
DROPS Design: Pattern no mb-048
Yarn group C or A + A
-------------------------------------------------------

Sizes: S - M - L - XL - XXL – XXXL
Finished measurements:
Chest measurements: 80-88-96-106-118-130 cm = 31½"-34⅝"-37¾"-41¾"-46½"-51¼"
Full length: 63-65-67-69-71-73 cm = 24¾"-25½"-26⅜"-27⅛"-28"-28¾"

All measurements in charts are in cm.

Materials:
DROPS BIG MERINO from Garnstudio (belongs to yarn group C)
550-600-650-750-800-900 g color 02, grey

-------------------------------------------------------
ACCESSORIES FOR THE PIECE:

KNITTING GAUGE:
17 stitches in width and 22 rows in height with stockinette stitch = 10 x 10 cm = 4" x 4".

NEEDLES:
DROPS DOUBLE POINTED NEEDLES SIZE 4.5 MM = US 7 for rib on sleeves.
DROPS CIRCULAR NEEDLE SIZE 4.5 MM = US 7: length 40 cm = 16" and 80 cm = 32" for rib on neck and bottom of body.
DROPS DOUBLE POINTED NEEDLES SIZE 5 MM = US 8.
DROPS CIRCULAR NEEDLE SIZE 5 MM = US 8: length 40 cm = 16" and 80 cm = 32".
The needle size is only a guide. If you have too many stitches on 10 cm = 4", change to a larger needle size. If you have too few stitches on 10 cm = 4", change to a smaller needle size.

-------------------------------------------------------

-------------------------------------------------------

Alternative Yarn – See how to change yarns here
Yarn Groups A to F – Use the same pattern and change the yarn here
Yarn usage using an alternative yarn – Use our yarn converter here

-------------------------------------------------------

DROPS Big Merino
DROPS Big Merino
100% Wool
from 4.55 $ /50g
Get the yarn to make this pattern from 50.05$.

The yarn cost is calculated from the pattern’s smallest size and the yarn’s cheapest product type. Looking for an even better price? You might find it on the DROPS Deals!

Pattern instructions

NOTE: This pattern is written in American English. All measurements in charts are in cm. For conversion from inches to cm - click here. There are different terms for crocheting in American and British English. If this pattern includes crochet, click for "crochet terms" here. For this pattern in British English, please click here.
-------------------------------------------------------

EXPLANATIONS FOR THE PATTERN:

-------------------------------------------------------

RIDGE/GARTER STITCH (worked in the round):
1 ridge = 2 rounds. Knit 1 round and purl 1 round.

INCREASE TIP (evenly spaced):
To work out how to increase evenly, count the total number of stitches on the needle (e.g. 82 stitches) and divide by the number of increases to be made (e.g. 10) = 8.2. In this example, increase by making 1 yarn over after approx. each 8th stitch; on the next round work the yarn overs twisted to avoid holes.

PATTERN:
See diagram A.1. The diagram shows all the rows in the pattern seen from the right side.

INCREASE TIP (for sides of body):
Start 1 stitch before the marker thread, make 1 yarn over, knit 2 (marker thread sits between these 2 stitches), 1 yarn over (= 2 stitches increased). On the next round work the yarn overs twisted to avoid holes.

DECREASE TIP (for mid under sleeve):
Start 3 stitches before the marker thread, knit 2 together, knit 2 (marker thread sits between these 2 stitches), slip 1 stitch as if to knit, knit 1 and pass the slipped stitch over the knitted stitch (= 2 stitches decreased).

-------------------------------------------------------

START THE PIECE HERE:

-------------------------------------------------------

SWEATER - SHORT OVERVIEW OF THE PIECE:
The piece is worked in the round with circular needle, from mid back and top down. When you have worked as far as the armholes, the piece is divided - the body is continued in the round with circular needle and the sleeves are worked in the round with short circular needle/double pointed needles.

YOKE:
Cast on 82-84-88-92-96-102 stitches with circular needle size 4.5 mm = US 7 and Big Merino. Knit 1 round. On the next round work rib as follows: * Knit 1 /purl 1 *, work from *-* to end of round. Continue this rib for 2-3-2-3-2-3 cm = ¾"-1⅛"-¾"-1⅛"-¾"-1⅛".
Change to circular needle size 5 mm = US 8. Then work as follows:
Work 2 RIDGES – see description above. On the last round of the ridges increase 10-14-14-18-22-23 stitches evenly on round – read INCREASE TIP = 92-98-102-110-118-126 stitches.
Work rib as follows: * Knit 1 /purl 1 *, work from *-* to end of round. Work this rib for 4-4-5-5-6-6 cm = 1½"-1½"-2"-2"-2⅜"-2⅜".
On the next round work A.1 over all stitches, AT THE SAME TIME on the first round of A.1 increase 40-44-50-58-62-64 stitches evenly on round = 132-142-152-168-180-190 stitches.
Work rib as before for 4-4-5-5-6-6 cm = 1½"-1½"-2"-2"-2⅜"-2⅜", then work A.1, AT THE SAME TIME on the first round in A.1 increase 40-45-50-58-62-65 stitches evenly on round = 172-187-202-226-242-255 stitches. NOTE! Finish the 4th round in A.1 with knit 0-1-0-0-0-1 stitch. REMEMBER THE KNITTING GAUGE!
Work rib as before for 4-4-5-5-6-6 cm = 1½"-1½"-2"-2"-2⅜"-2⅜", then work A.1, on the first round in A.1 increase 40-45-50-58-62-65 stitches evenly on round = 212-232-252-284-304-320 stitches. The piece measures approx. 21-22-24-25-27-28 cm = 8¼"-8¾"-9½"-9¾"-10⅝"-11" from the cast-on edge.

The next round is worked as follows: Knit the first 31-34-37-41-45-49 stitches (= half back piece), place the next 44-48-52-60-62-62 stitches on a thread for sleeve, cast on 6-6-8-8-10-12 new stitches on the needle (= in side under sleeve), knit 62-68-74-82-90-98 stitches (= front piece), place the next 44-48-52-60-62-62 stitches on a thread for sleeve, cast on 6-6-8-8-10-12 new stitches on the needle (= in side under sleeve) and knit the remaining 31-34-37-41-45-49 stitches (= half back piece). Body and sleeves are finished separately.
THE PIECE IS NOW MEASURED FROM HERE!

BODY:
= 136-148-164-180-200-220 stitches. Insert 1 marker thread in each side, in the middle of the new stitches cast on under the sleeve. Work stockinette stitch in the round. When the piece measures 3 cm = 1⅛" from the division, increase 2 stitches on each side – read INCREASE TIP (= 4 stitches increased). Increase like this every 8-6½-5-4½-4½-4½ cm = 3⅛"-2½"-2"-1¾"-1¾"-1¾" a total of 5-6-7-8-8-8 times = 156-172-192-212-232-252 stitches. When the piece measures 37-38-38-39-39-40 cm = 14½"-15"-15"-15¼"-15¼"-15¾", knit 1 round where you increase 24-20-20-18-22-24 stitches evenly on round = 180-192-212-230-254-276 stitches. Change to circular needle size 4.5 mm = US 7. Work rib (knit 1 /purl 1) for 5 cm = 2", then bind off with knit over knit and purl over purl, The piece measures approx. 63-65-67-69-71-73 cm = 24¾"-25½"-26⅜"-27⅛"-28"-28¾" from the shoulder down.

SLEEVE:
Place the 44-48-52-60-62-62 stitches from the one thread on short circular needle size 5 mm = US 8 and knit up 1 stitch in each of the 6-6-8-8-10-12 stitches cast on under the sleeve = 50-54-60-68-72-74 stitches. Insert 1 marker thread in the middle of the cast on stitches under the sleeve = beginning of round. Work stockinette stitch in the round. When the sleeve measures 4 cm = 1½" from the division, decrease 2 stitches mid under sleeve – read DECREASE TIP. Decrease like this every 4½-3½-3-2-2-2 cm = 1¾"-1¼"-1⅛"-¾"-¾"-¾"- a total of 8-9-11-14-15-15 times = 34-36-38-40-42-44 stitches. Continue working until the piece measures 37-37½-36-35½-34-33½ cm = 14½"-14¾"-14¼"-14"-13⅜"-13⅛" from the division (shorter measurements in larger sizes due to longer yoke). Knit 1 round where you increase 8 stitches evenly on round = 42-44-46-48-50-52 stitches. Change to double pointed needles size 4.5 mm = US 7 and work rib in the round (= knit 1 / purl 1). When the rib measures 5 cm = 1½" (or to desired length) bind off with knit over knit and purl over purl. The sleeve measures approx. 43-42½-42-40½-39-37 cm = 17"-16¾"-16½"-16"-15¼"-14½" from the division.
Work the other sleeve in the same way.

This pattern has been corrected.

Updated online: 16.09.2019
Work 2 RIDGES – see description above. On the last round of the ridges increase 10-14-14-18-22-24 stitches evenly on round – read INCREASE TIP = 92-98-102-110-118-126 stitches. Work rib as follows: * Knit 1 /purl 1 *, work from *-* to end of round. Work this rib for 4-4-5-5-6-6 cm = 1 1/2"-1 1/2"-2"-2"-2 3/8"-2 3/8". On the next round work A.1 over all stitches, AT THE SAME TIME on the first round of A.1 increase 40-44-50-58-62-64 stitches evenly on round = 132-142-152-168-180-190 stitches.

Diagram

All measurements in charts are in cm.

symbols = knit from right side
symbols = purl from right side
symbols = knit 2 together
symbols = between 2 stitches make 1 yarn over; the yarn over is knitted on the next round to leave a hole.
diagram
diagram

Each of our patterns has specific tutorial videos to help you.

Do you have a question? See a list of frequently asked questions (FAQ)

Knitting tension is what determines the final measurements of your work, and is usually measured per 10 x 10 cm. It is provided like so: number of stitches in width x number of rows in height - eg: 19 stitches x 26 rows = 10 x 10 cm.

The knitting tension is very individual; some people knit/crochet loosely while others work tightly. You adjust the knitting tension with the needle size, which is why the suggested needle size only serve as a guide! You need to adjust this (up or down) to ensure that YOUR knitting tension matches the knitting tension provided in the pattern. If you work with a different knitting tension than provided you will have a different yarn consumption, and your work will have different measurements than what the pattern suggests.

The knitting tension also determines which yarns can replace each other. As long as you achieve the same knitting tension you can replace one yarn with another.

See DROPS lesson: How to measure your tension/gauge

See DROPS video: How to make a gauge tension swatch

The required amount of yarn is provided in grams, eg: 450 g. To calculate how many balls you’ll need you first need to know how many grams are in 1 ball (25g, 50g or 100g). This information is available if you click on the individual yarn quality on our pages. Divide the amount required with the amount of each ball. For example, if each ball is 50g (the most common amount), the calculation will be as follows: 450 / 50 = 9 balls.

The important thing when changing from one yarn to another is that the knitting/crochet tension remains the same. This is so that the measurements of the finished piece will be the same as on the sketch provided. It is easier to achieve the same knitting tension using yarns from the same yarn group. It is also possible to work with multiple strands of a thinner yarn to achieve the knitting tension of a thicker one. Please try our yarn converter. We recommend you to always work a test swatch.

Please NOTE: when changing yarn the garment might have a different look and feel to the garment in the photo, due to individual properties and qualities of each yarn.

See DROPS lesson: Can I use a different yarn than the one mentioned in the pattern?

All our yarns are categorised into yarn groups (from A to F) according to thickness and knitting tension – group A contains the thinnest yarns and group F the thickest. This makes it easier for you to find alternative yarns to our patterns, should you wish to switch yarn. All yarns within the same group have a similar knitting tension and can easily replace each other. However, different yarn qualities have different structures and properties which will give the finished work a unique look and feel.

Click here for an overview of the yarns in each yarn group

At the top of all our patterns you’ll find a link to our yarn converter, which is a helpful tool should you wish to use a different yarn than suggested. By filling in the yarn quality you wish to replace, the amount (in your size) and number of strands, the converter will present good alternative yarns with the same knitting tension. Additionally it will tell you how much you’ll require in the new qualities and whether you’ll need to work with multiple strands. Most skeins are 50g (some are 25g or 100g).

If the pattern is worked with multiple colours, every colour will have to be converted separately. Similarly, if the pattern is worked with several strands of different yarns (for example 1 strand Alpaca and 1 strand Kid-Silk) you will have to find alternatives for each, individually.

Click here to see our yarn converter

Since different yarns have different qualities and textures we have chosen to keep the original yarn in our patterns. However, you can easily find options among our available qualities by using our yarn converter, or simply pick a yarn from the same yarn group.

It is possible that some retailers still have discontinued yarns in stock, or that someone has a few skeins at home that they would like to find patterns for.

The yarn converter will provide both alternative yarn as well as required amount in the new quality.

If you think it's hard to decide what size to make, it can be a good idea to measure a garment you own already and like the size of. Then you can pick the size by comparing those measures with the ones available in the pattern's size chart.

You'll find the size chart at the bottom of the pattern.

See DROPS lesson: How to read size chart

The needle size provided in the pattern serves only as a guide, the important thing is to follow the knitting tension. And since knitting tension is very individual, you will have to adjust the needle size to ensure that YOUR tension is the same as in the pattern – maybe you’ll have to adjust 1, or even 2 needle sizes, up or down to achieve the correct tension. For this, we recommend that you work test swatches.

Should you work with a different knitting tension than the one provided, the measurements of the finished garment might deviate from the measurement sketch.

See DROPS lesson: How to measure your tension/gauge

See DROPS video: How to make a gauge tension swatch

Working a garment top-down provides more flexibility and room for personal adjustment. For example it is easier to try the garment on while working, as well as making adjustments to length of yoke and shoulder caps.

The instructions are carefully explaining every step, in the correct order. Diagrams are adjusted to the knitting direction and are worked as usual.

The diagram depicts all rows/rounds, and every stitch seen from the right side. It is read from bottom to top, from right to left. 1 square = 1 stitch.

When working back and forth, every other row is worked from the right side and every other row is worked from the wrong side. When working from the wrong side, the diagram will have to be worked reversed: from left to right, knit stitches are purled, purl stitches are knit etc.

When working in the round every round is worked from the right side and the diagram are worked from right to left on all rounds.

See DROPS lesson: How to read knitting diagrams

The diagram depicts all rows/rounds, and every stitch seen from the right side. It is worked from bottom to top, from right to left.

When working back and forth every other row is worked from the right side: from right to left and every other row is worked from the wrong side: from left to right.

When working in the round, every row in the diagram are worked from the right side, from right to left.

When working a circular diagram you start in the middle and work your way outwards, counter clockwise, row by row.

The rows usually start with a given number of chain stitches (equivalent to the height of the following stitch), this will either be depicted in the diagram or explained in the pattern.

See DROPS lesson: How to read crochet diagrams

Instructions for working several diagrams after each other on the same row/round, will often be written like so: “work A.1, A.2, A.3 a total of 0-0-2-3-4 times". This means you work A.1 once, then A.2 is worked once, and A.3 is repeated (in width) the number of times provided for your size – in this case like so: S = 0 times, M = 0 times, L=2 times, XL= 3 times and XXL = 4 times.

The diagrams are worked as usual: begin with the first row in A.1, then work the first row in A.2 etc.

See DROPS lesson: How to read knitting diagrams

See DROPS lesson: How to read crochet diagrams

The total width of the garment (from wrist-to-wrist) will be larger in the larger sizes, despite the actual sleeves being shorter. The larger sizes have longer sleeve caps and wider shoulders, so there will be a good fit in all sizes.

The measurement sketch/schematic drawing provides information regarding the full length of the garment. If it’s a jumper or a jacket the length is measured from the highest point on the shoulder (usually closest to the neckline), and straight down to the bottom of the garment. It is NOT measured from the tip of shoulder. Similarly, the length of yoke is measured from the highest point on the shoulder and down to where yoke is split into body and sleeves.

See DROPS lesson: How to read a schematic drawing

Diagrams are often repeated on the round or in height. 1 repeat is the diagram the way it appears in the pattern. If it says to work 5 repeats of A.1 in the round, then you work A.1 a total of 5 times after/next to each other in the round. If it says to work 2 repeats of A.1 vertically/in height you work the entire diagram once, then begin again at the start and work the entire diagram one more time.

Chain stitches are slightly narrower than other stitches and to avoid working the cast-on edge too tight, we simply chain more stitches to begin with. The stitch count will be adjusted on the following row to fit the pattern and measurement sketch.

The rib edge is more elastic and will contract slightly compared to, for example, stocking stitch. By increasing before the rib edge, you avoid a visible difference in width between the rib edge and the rest of the body.

It’s very easy to cast off too tightly, and by making yarn overs while casting off (and simultaneously casting these off) you avoid a too tight cast off edge.

See DROPS video: How to bind off with yarn overs (yo)

To achieve an even increase (or decrease) you can increase on, for example: every 3rd and 4th row alternately, like so: work 2 rows and increase on the 3rd row, work 3 rows and increase on the 4th. Repeat this until the increase is complete.

See DROPS lesson: Increase or decrease 1 st on every 3rd and 4th row alternately

Should you prefer to work in the round instead of back and forth, you may of course adjust the pattern. You’ll need to add steeks mid-front (usually 5 stitches), and follow the instructions. When you would normally turn and work from the wrong side, simply work across the steek and continue in the round. At the end you’ll cut the piece open, pick up stitches to work bands, and cover the cut edges.

See DROPS video: How to knit steeks and cut open

Should you prefer to work back and forth instead of in the round, you may of course adjust the pattern so you work the pieces separately and then assemble them at the end. Divide the stitches for the body in 2, add 1 edge stitch in each side (for sewing) and work the front and back pieces separately.

See DROPS lesson: Can I adapt a pattern for circular needles into straight needles?

Pattern repeats can vary slightly in the different sizes, in order to get the correct proportions. If you’re not working the exact same size as the garment in the photo, yours might deviate slightly. This has been carefully developed and adjusted so that the complete impression of the garment is the same in all sizes.

Make sure to follow instructions and diagrams for your size!

If you have found a pattern you like which is available in women’s size it’s not very difficult to convert it to men’s size. The biggest difference will be the length of sleeves and body. Start working on the women size that you think would fit across the chest. The additional length will be worked right before you cast off for the armhole/sleeve cap. If the pattern is worked top-down you can add the length right after the armhole or before the first decrease on sleeve.

Regarding additional yarn amount, this will depend on how much length you add, but it is better with a skein too many than too few.

All yarns will have excess fibres (from production) that might come off as lint or shedding. Brushed yarns (ie hairier yarns) have more of these loose, excess fibres, causing more shedding.

Shedding also depends on what is worn under or over the garment, and whether this pulls at the yarn fibres. It’s therefore not possible to guarantee that there will be no shedding

Below are some tips on how to get the best result when working with hairier yarns:

1. When the garment is finished (before you wash it) shake it vigorously so the looser hairs come off. NOTE: do NOT use a lint roller, brush or any method that pulls at the yarn.

2. Place the garment in a plastic bag and put it in your freezer - the temperature will cause the fibres to become less attached to each other, and excess fibres will come off easier.

3. Leave in the freezer for a few hours before taking it out and shaking it again.

4. Wash the garment according to the instructions on the yarn label.

Pilling is a natural process that happens to even the most exclusive of fibers. It's a natural sign of wear and tear that is hard to avoid, and that is most visible in high friction areas of your garment like a sweater's arms and cuffs.

You can make your garment look as new by removing the pilling, using a fabric comb or a pill/lint remover.

Still can't find the answer you need? Then scroll down and leave your question so one of our experts can try to help you. This will be done normally within 5 to 10 working days.
In the meantime, you can read the questions and answers that others have left to this pattern or join the DROPS Workshop on Facebook to get help from fellow knitters/crocheters!

You might also like...

Belfast

Ania, Poland

Belfast

Karolina Tobor, Poland

Post a comment to pattern DROPS 195-33

We would love to hear what you have to say about this pattern!

If you want to leave a question, please make sure you select the correct category in the form below, to speed up the answering process. Required fields are marked *.

Comments / Questions (23)

country flag Jutta wrote:

Hallo, in Gr. M müssen bei der passe verteilt 13 m zugenommen werden. Beim Rippenmuster ist geht aber die ungerade Maschenzahl von 97 m nicht auf. 2 gleiche nebeneinander sieht nicht schön aus. Ist da etwas falsch?

15.09.2019 - 12:49

DROPS Design answered:

Liebe Jutta, Sie sind ja recht, eine Korrektur erfolgt gleich, in der Größe M muss man 14 M zunehmen = 98 M dann Rippenmuster stricken und bei der 1. Runde in A.1 muss man dann 44 M zunehmen = 142 M. Viel Spaß beim stricken!

16.09.2019 - 15:22

country flag Agata wrote:

Nie rozumiem zapisu:kończyć 4-te okrążenie schematu A.1 przerabiając 0-1-0-0-0-1 oczko prawe Nie wiem jak to "ugryźć "????

30.08.2019 - 11:36

DROPS Design answered:

Witaj Agato! To znaczy, że w 2 rozmiarach (M i XXXL) na końcu 4-tego okrążenia schematu A.1 przerabiasz 1 oczko prawe (nie na końcu każdego schematu A.1, a po wszystkich powtórzeniach schematu A.1 w okrążeniu). To dlatego, że w tych rozmiarach jest nieparzysta liczba oczek. W pozostałych rozmiarach nic się w schemacie A.1 nie zmienia. Powodzenia!

30.08.2019 - 18:53

country flag Dutika wrote:

Cosa vuol dire: "0-1-0-0-0-1 maglie diritto" Sono alle prime armi e vorrei imparare..grazie!

18.08.2019 - 16:01

DROPS Design answered:

Buongiorno Dutika. I numeri fanno riferimento alle diverse taglie. Il primo numero è per la taglia S, il secondo per la taglia M e così via. L'istruzione dice che nelle taglie M e XXXL, il quarto giro del diagramma A.1 (quello con le maglie gettate) finisce con 1 maglia diritto. Nelle altre taglie, si finisce con la maglia gettata. Buon lavoro!

18.08.2019 - 18:32

country flag Christiane wrote:

Hi, mir geht's um die Zunahmen am Arm? Da heißt es in der Anleitung ".... Maschen für den Ärmeln stilllegen, .... neue Maschen anschlagen (= an der Seite unter dem Arm)". Wo sind die Zunahmen zu machen, am Ärmel?

26.03.2019 - 00:55

country flag Christiane wrote:

Hallo , mir sind die Zunahmen nicht klar Zählen die Machen dann zu den Ärmeln oder zum Vorder-bzw. Rückenteil?

24.03.2019 - 21:28

DROPS Design answered:

Liebe Christiane, die Passe ist hier eine Rundpasse, dh die Zunahmen bei der Passe werden regelmäßig verteilt - hier lesen Sie wie man regelmäßig zunimmt. Viel Spaß beim stricken!

25.03.2019 - 12:03

country flag Susanne wrote:

Ich habe noch eine grundsätzliche Frage zum Modell: Warum sind vor den Bündchen jeweils noch Zunahmen zu stricken? Ich kenne das nur so, dass das Bündchen höchstens gleich viele oder oft auch weniger Maschen hat als der glatt gestrickte Teil. Wird das nicht zu weit auf diese Weise? (Bin gerade am Übergang zum Bündchen und bin im Zweifel, ob ich da zunehmen soll...)

05.03.2019 - 13:28

DROPS Design answered:

Liebe Susanne, wenn Sie nicht zunehmen, werden dann die Bündchen enger werden, damit die Bündchen nicht zu eng sind, wird es vor den Bündchen zugenommen. Viel Spaß beim stricken!

05.03.2019 - 14:43

country flag Susanne wrote:

Ich habe das Modell für Drops Belle angepasst, was gut ging. Beim Muster ist die Anleitung allerdings unklar. In einem rund gestrickten Modell gibt es keine Hin- und Rückreihen. Eine linke Rückreihe müsste von vorne rechts erscheinen, das Foto zeigt aber, dass es nicht so gemeint ist. Das sollten Sie noch ändern.

27.02.2019 - 11:33

DROPS Design answered:

Liebe Susanne, stimmt, deutsche Anleitung wird angepasst. Das Diagramm lesen Sie immer rechts nach links, dh keine Rückreihe stricken (= 1. Reihe = rechts, 2. Reihe = links usw). Viel Spaß beim stricken!

27.02.2019 - 12:17

country flag Andrea wrote:

Hallo, könnte man dieses Modell evt auf eine dünnere Wollstärke (Maschenprobe 24Mx32R) umrechnen? Wenn ja, wie? Bzw. gibt es eine Raglanärmel-Anleitung für meine (dünnere) Wollstärke. Dann könnte ich ja dann das strukturMuster einfach anwenden? LG Andrea

25.02.2019 - 19:36

DROPS Design answered:

Liebe Andrea, wir können leider nicht jede Anleitung nach jeder Anfrage anpassen, gerne können Sie sich ein anderes Modell aussuchen, das mit der gewünschten Maschenprobe gestrickt wird. Viel Spaß beim stricken!

26.02.2019 - 10:46

country flag Sara wrote:

Hej, jag förstår inte denna del: "OBS! Avsluta varvet i A.1 med omslag och 2 maskor räta tillsammans, med att sticka 0-1-0-0-0-1 rätmaska" Kan ni förklara det lite tydligare? Sista varvet i diagrammet är ju avigt, men skall jag avsluta det med att, när det är 2 maskor kvar, först ett omslag och sedan sticka ihop de två sista maskorna rät? Förstår inte alls vad "010001 maska" betyder och vart den skall in?

28.01.2019 - 10:11

DROPS Design answered:

Hei Sara. Den setningen var itt uklar, dette vil vli rettet med en gang. Det det skal stå er at på slutten av omgang 4 i diagrammet (den som slutter med 2 rett sammen, 1 kast) skal du strikke 0-1-0-0-0-1 maske rett. Det er fordi det i 2 størrelser vil gjenstå 1 maske før omgangen er ferdig (M og XXXL). De andre størrelsene trenger ikke å strikke denne rettmasken, derfor står det 0 for dem. God fornøyelse.

30.01.2019 - 13:38

country flag Petra wrote:

Gibt es diese Anleitung auch als Jacke?

26.12.2018 - 14:53

DROPS Design answered:

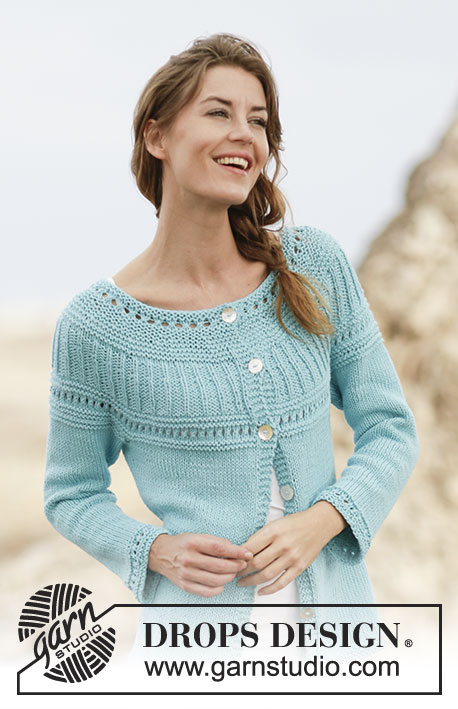
Liebe Petra, dieses Modell gibt es nur als Pullover, aber hier finden Sie eine ähnliche Jacke. Viel Spaß beim stricken!

02.01.2019 - 09:57