
Popular categories
Looking for a yarn?


Comments / Questions (72)
![]() Terttu Tisinen wrote:
Terttu Tisinen wrote:
Miten langanvaihto kaaviota luetaan, en oikein ymmärrä sitä. Pitääkö puikkokokoa muuttaa ja langanmäärää?
25.11.2024 - 09:25DROPS Design answered:
Voit neuloa työn ohjeessa mainitulla puikkokoolla, kunhan vaihdat samaan lankaryhmään kuuluvaan lankaan. Laske aluksi ohjeessa mainitun langan metrimäärä (esim. DROPS Merino Extra Fine 300 g = 630 m). Jos vaihdat esim. DROPS Lima-lankaan, tarvitset 7 kerää kyseisestä langasta (yhdessä kerässä on vain 100 m).
25.11.2024 - 17:24
![]() Julie Klint wrote:
Julie Klint wrote:
Hej. Så i mit spørgsmål? Vh julie
05.11.2024 - 06:58DROPS Design answered:
Hej Julie, ja når du har slået de 28 masker op midt foran, så strikker du om til midt bagpå, vender arbejdet og nu strikker du frem og tilbage fra midt bagpå :)
05.11.2024 - 08:16
![]() Julie Klint wrote:
Julie Klint wrote:
Undskyld jeg forstyrrer igen:) jeg har slået 28 xtra masker op før min retning. Så har jeg strikket dem ret+ yderligere 62- ialt 90 ret. Så skal jeg lade det resterende (det endnu udtrykke på retpinden være på en tråd) og nu strikke frem og tilbage i ret og vrang, til det stykke måler 10 cm?
30.10.2024 - 23:38
![]() Julie wrote:
Julie wrote:
Tak for svar. Så udtagning med de 12 masker er over de næste 7 kommende pinde, hvor jeg tager ud på både ret og vrang pind, lige efter hinanden?
30.10.2024 - 13:13DROPS Design answered:
Hej Julie, ja det stemmer - god fornøjelse :)
30.10.2024 - 13:16
![]() Julie Klint wrote:
Julie Klint wrote:
Hej. jeg er ny strikker og er ved at strikke jeres baclava i baby merino fine. Jeg er nået til der, hvor der er strikket 24 cm og jeg skal begynde udtagninger, men jeg forstår ikke..... de 12 masker der nu skal tages ud på hver side...er det over 4 rækker, så der tages 12 masker ud i enden, af første ret pind( så en vrang række retur uden udtagninger) - så 12 igen på den næste retfind? Jeg ved at det skal ende med at der er 12 på hver side, men hvordan? Bh Julie
30.10.2024 - 08:41DROPS Design answered:
Hej Julie, når du slår nye masker op i hver side gør du således: slå 1 maske op sidst på pinden, vend og strik pinden ud, slå 1 maske op sidst på pinden i den anden side. Vend strik pinden ud, slå 1 maske op sidst på pinden i første side igen, og samme sidst på pinden i den anden side. Næste gang slår du 2 masker op sidst på pinden og det gør du ialt 5 gange i hver side :)
30.10.2024 - 12:29
![]() Lezelle wrote:
Lezelle wrote:
Can you please confirm about the correted pattern? Thank you Lezelle
08.04.2024 - 12:41
![]() Lezelle wrote:
Lezelle wrote:
Such a beautiful pattern. Still learning to knit, so am going to beg my mother in law to make this or at least teach me how. Thank you.
08.04.2024 - 12:27
![]() Julie Klint wrote:
Julie Klint wrote:
Hej Skøn opskrift, men hvordan finder jeg min størrelse her...l/xl eller større....hvad måler jeg efter? Bh Julie
28.01.2024 - 11:43DROPS Design answered:
Hej Julie, Hætten er den samme, omkredsen er hhv 107-115-122cm og længden er 58-60-62 cm
02.02.2024 - 12:19
![]() Sophia wrote:
Sophia wrote:
Can you please also confirm at what point I sew the hood together and which sides are being sewn together? Is this at the end of the project or will I need to sew this together before knitting the ‘body’ part?
24.01.2024 - 17:04DROPS Design answered:
Dear Sophia, when hood is done you will fold the cast on edge double and sew the stitches together = mid top on hood, then sew the sides on mid back (from where you started to work in rows as explained in previous question). Happy knitting!
25.01.2024 - 08:32
![]() Sophie wrote:
Sophie wrote:
Can you please Clarify: At what point I start knitting in the round? After the 28 stitches for the face opening? And whether I should skip the 28 stitches ( I cast for for face opening) and then knit 62 stitches? Also this is not clear: Now divide the piece and work back and forth from here - mid back (this is done so that the seam is mid back). Thank you.
24.01.2024 - 16:57DROPS Design answered:
Dear Sophie, after you have cast on ne new 28 stitches, work the next 62 stitches = mid back, this is now the new beg of the rows so that the seam will be on mid back; now work back and forth from here, the 28 sts are now in the middle of the row. Happy knitting!
25.01.2024 - 08:30
|
|
Lawless#lawlesshood |
|
 |
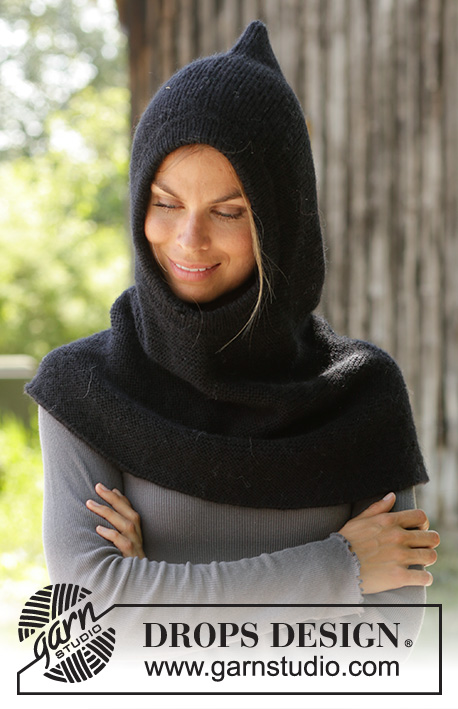 |
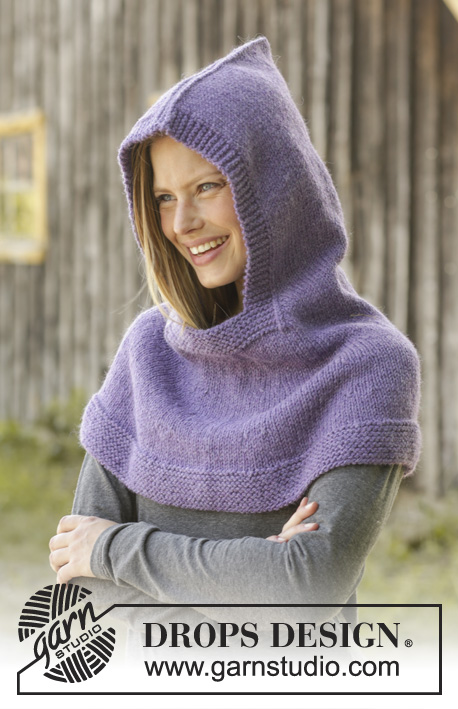
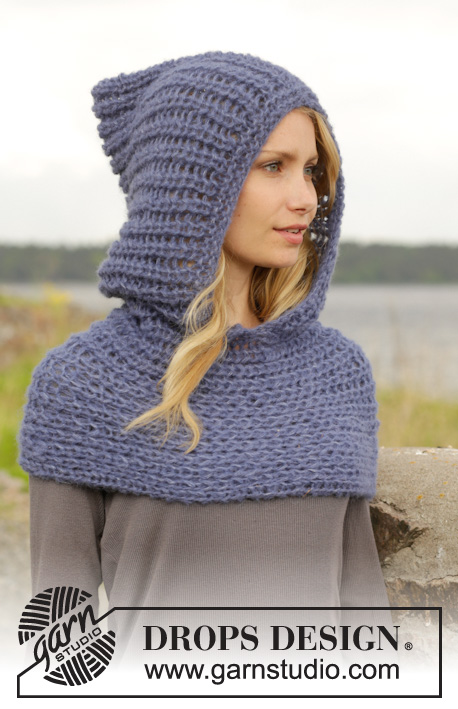
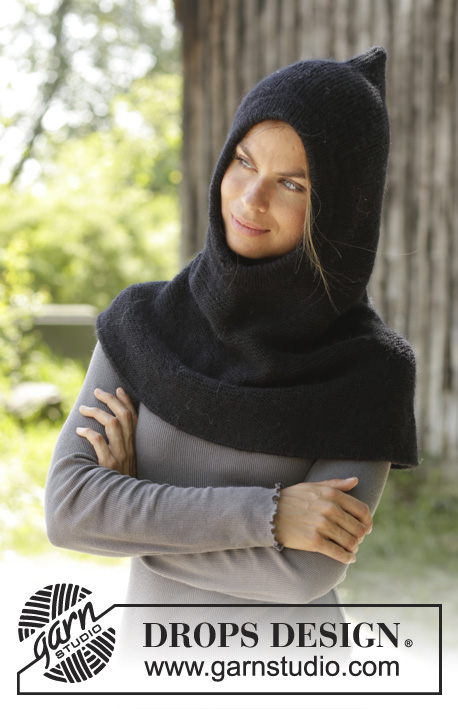
Knitted hooded cowl in DROPS Merino Extra Fine or DROPS Karisma. Piece is knitted top down in garter stitch. Size: S - XXXL
DROPS 192-2 |
|
|
---------------------------------------------------------- EXPLANATION FOR THE PATTERN: ---------------------------------------------------------- GARTER STITCH (back and forth): 1 ridge = knit 2 rows. INCREASE TIP: Work until 1 stitch remains before marker thread, 1 yarn over, knit 2 (marker thread is in the middle of these stitches), 1 yarn over. On next round work yarn over twisted to avoid hole. ---------------------------------------------------------- START THE PIECE HERE: ---------------------------------------------------------- HOODED COWL - SHORT OVERVIEW OF THE PIECE: Worked back and forth on circular needle, top down. At the end the work is sewn together in the back and on top of the hood. HOODED COWL: Cast on 100 stitches on circular needle size 3 mm with Merino Extra Fine or Karisma. Work in GARTER STITCH - read explanation above, back and forth. REMEMBER THE KNITTING TENSION! When piece measures 24 cm, cast on stitches at the end of every row in each side (towards mid front – towards face) as follows: Cast on 1 stitch 2 times and 2 stitches 5 times (= 12 stitches increased in each side) = 124 stitches. At the end of next row cast on 28 stitches at the end of row (towards mid front – under opening for face) = 152 stitches. Knit until mid back on helmet hat by knitting 62 stitches from after the 28 stitches cast on mid front. Now divide the piece and work back and forth from here - mid back (this is done so that the seam is mid back). Work in garter stitch back and forth until piece measures 10 cm from the 28 stitches cast on mid front. Now insert 8 marker threads in the piece as follows: Begin mid back and insert first marker thread after 10 stitches, then insert the next 7 marker threads after 19 stitches, there are now 9 stitches on needle after last marker thread. Continue in garter stitch. On next row from right side, increase 1 stitch on each side of every marker thread - read INCREASE TIP. Increase like this approx. every 3 cm 6-7-8 times in total = 248-264-280 stitches. Work until piece measures 58-60-62 cm in total. Cast off with 2 strands. ASSEMBLY: Sew together helmet hat in outer loop of outermost stitch mid back and along the cast on edge at the top of hood. EDGE AROUND FACE: Pick up from right side 158 stitches around face opening on a short circular needle size 2.5 mm. Purl 1 round, knit 1 round, purl 1 round, knit 1 round. Then work rib (= knit 1/purl 1) for 6 cm. Cast off stitches with knit over knit and purl over purl. Fold edge double towards wrong side and fasten it. |
|
Have you finished this pattern?Tag your pictures with #dropspattern #lawlesshood or submit them to the #dropsfan gallery. Do you need help with this pattern?You'll find 17 tutorial videos, a Comments/Questions area and more by visiting the pattern on garnstudio.com. © 1982-2025 DROPS Design A/S. We reserve all rights. This document, including all its sub-sections, has copyrights. Read more about what you can do with our patterns at the bottom of each pattern on our site. |
|


With over 40 years in knitting and crochet design, DROPS Design offers one of the most extensive collections of free patterns on the internet - translated to 17 languages. As of today we count 314 catalogues and 11822 patterns translated into English (UK/cm).
We work hard to bring you the best knitting and crochet have to offer, inspiration and advice as well as great quality yarns at incredible prices! Would you like to use our patterns for other than personal use? You can read what you are allowed to do in the Copyright text at the bottom of all our patterns. Happy crafting!
Post a comment to pattern DROPS 192-2
We would love to hear what you have to say about this pattern!
If you want to leave a question, please make sure you select the correct category in the form below, to speed up the answering process. Required fields are marked *.