
Popular categories
Looking for a yarn?


Comments / Questions (47)
![]() Hella wrote:
Hella wrote:
Goeiemiddag. Ik vind dit een prachtig patroon, maar mijn "model" zou graag de mouwen langer hebben. Ik vraag me af hoe ik dat het best kan doen. Is het bijv. een optie om na elke verkorte toeren herhaling een paar naalden "gewoon" tricotsteek te breien?
13.04.2023 - 11:53DROPS Design answered:
Dag Hella,
Het is voor ons helaas niet mogelijk om een patroon aan te passen naar persoonlijke wensen. Voor de mouwen zul je inderdaad extra naalden moeten breien om ze langer te maken.
14.04.2023 - 21:17
![]() Hella wrote:
Hella wrote:
Het voorgestelde garen bij dit vest is Verdi, maar dat staat niet meer in de lijst. De aangegeven stekenverhouding kan ik bij een ander garen van Drops ook niet terugvinden, hebben jullie een idee welk garen (of dubbele draad) ik dan het best kan kiezen. Ik brei sowieso een proeflap natuurlijk.
27.03.2023 - 10:30DROPS Design answered:
Dag Hella,
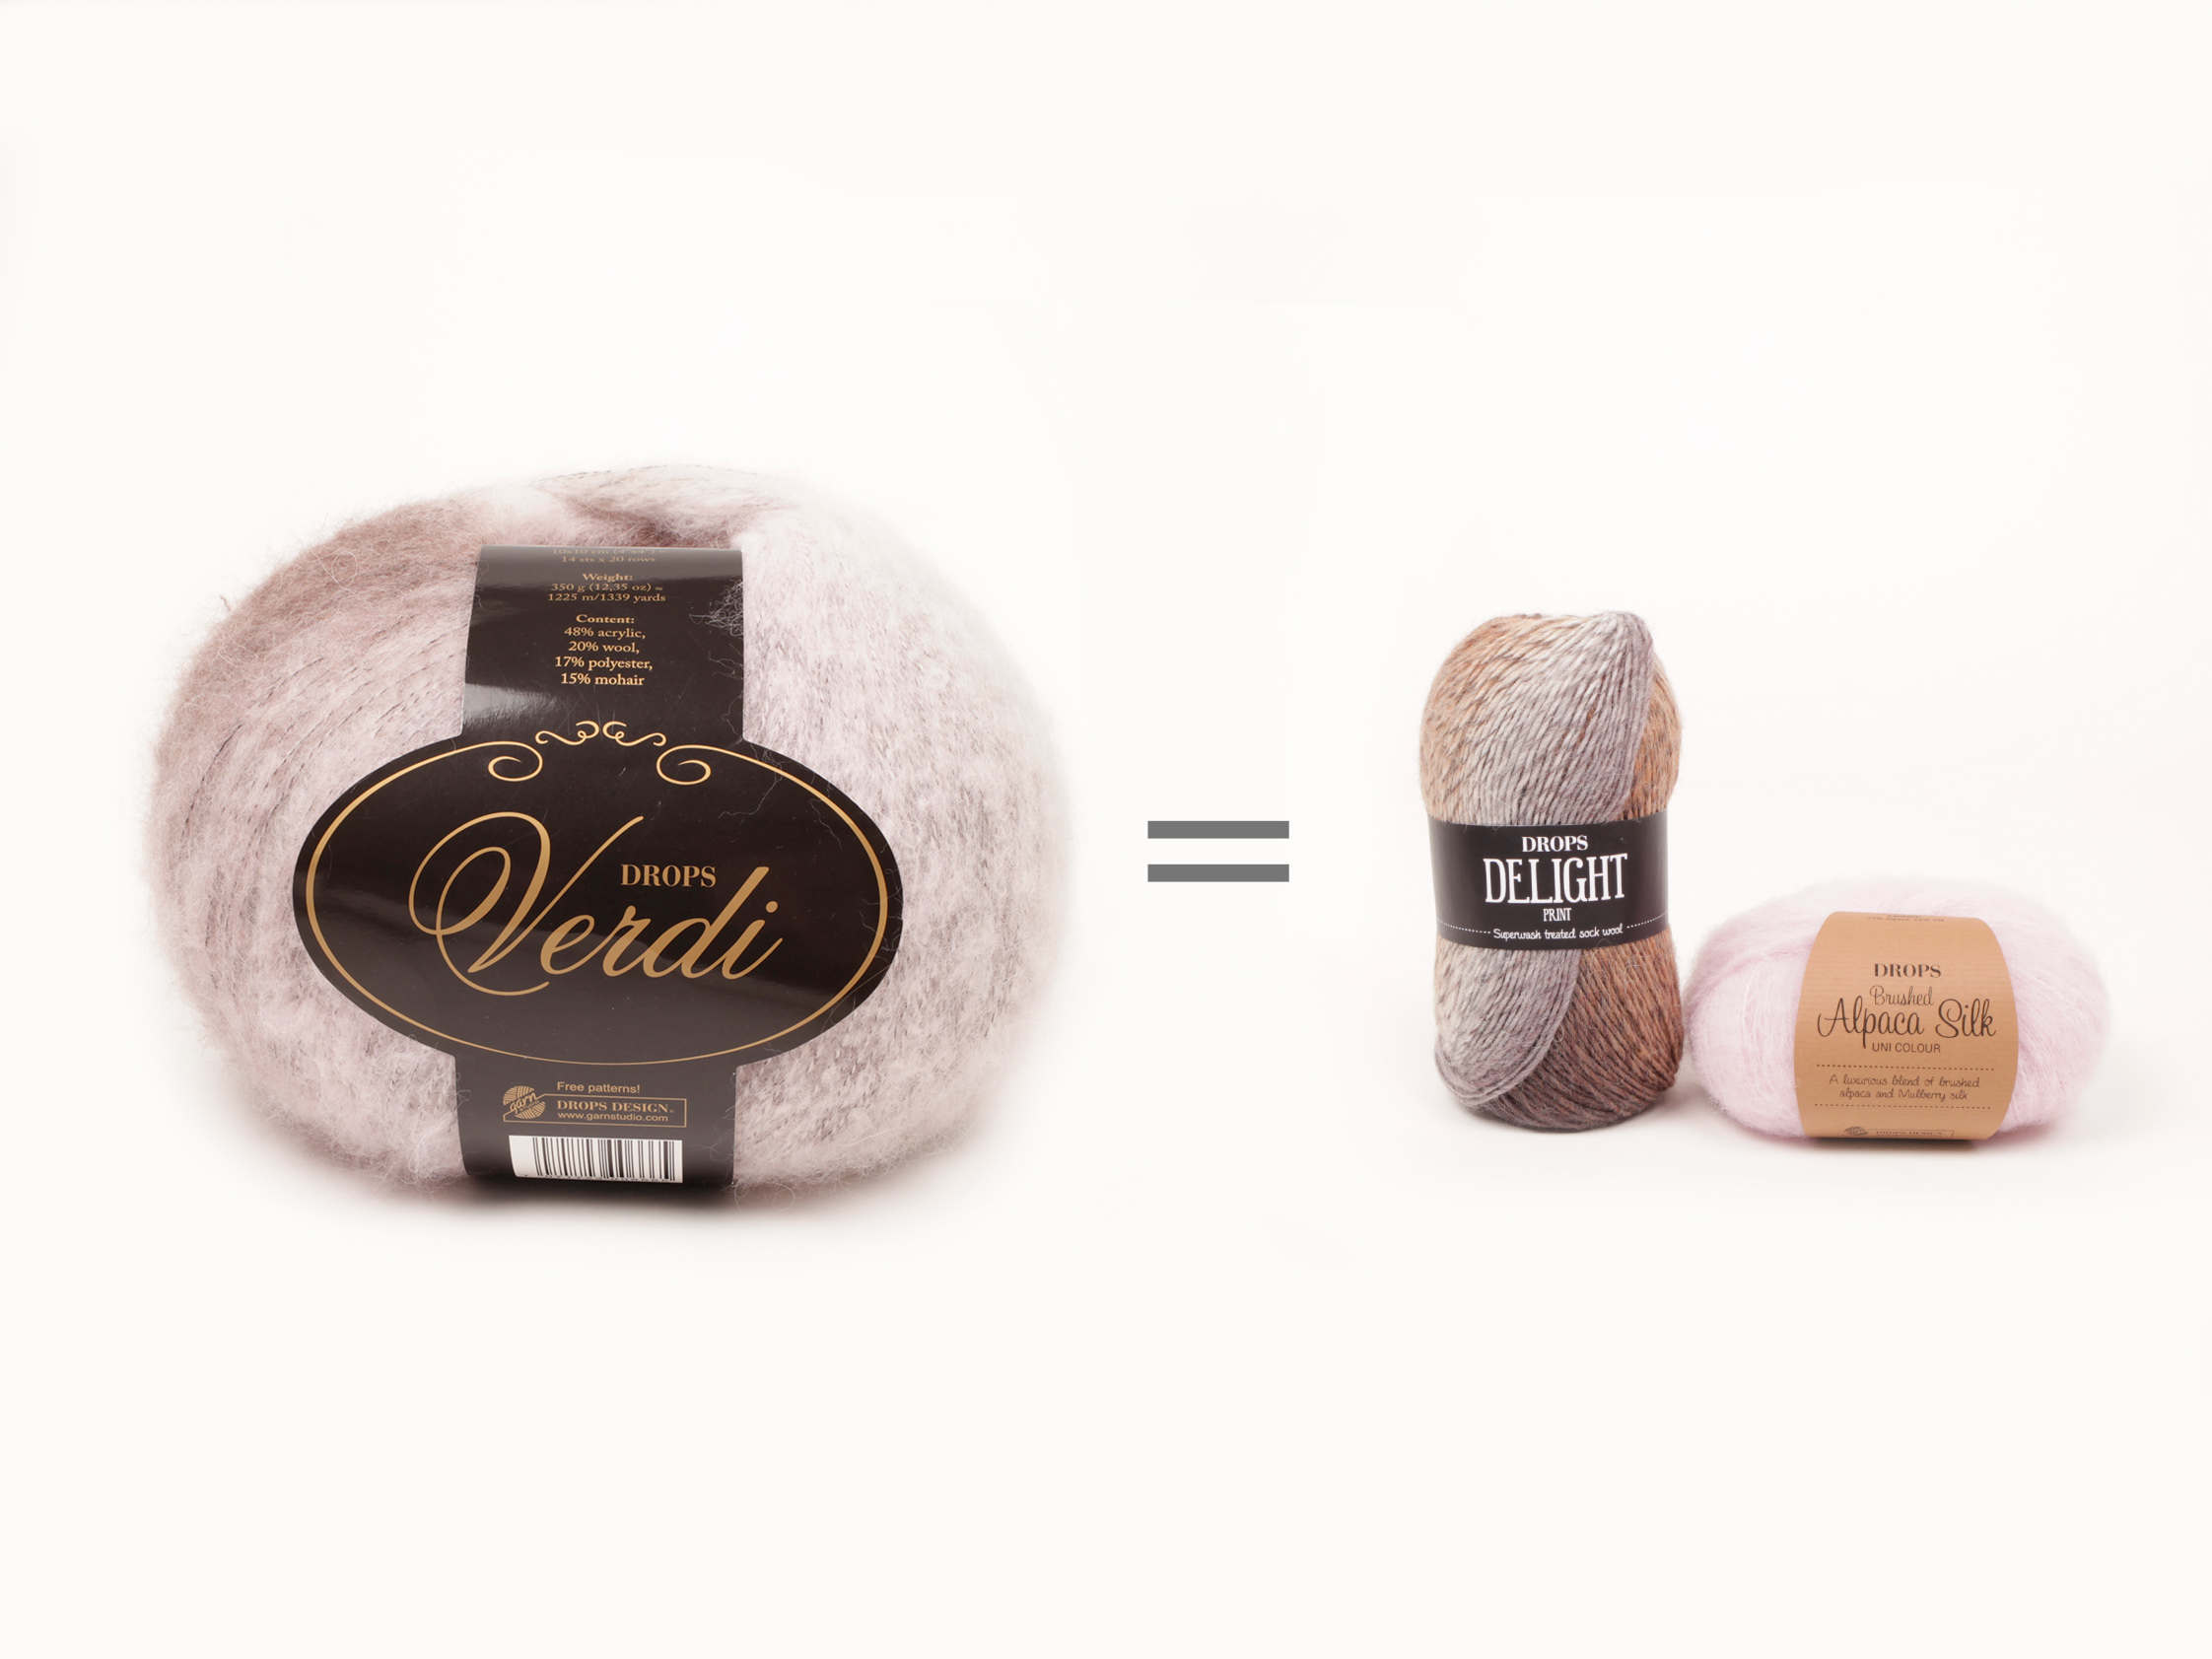
Klopt, dit is een ouder patroon en het garen is uit de handel. Om een ander garen te vinden kun je de garenvervanger gebruiken. Hiervan vindt je een link onder de materialenlijst bij ieder patroon. (Voor Verdi wordt als vervanging bijvoorbeeld 1 draad Melody of 2 draden Brushed Alpaca Silk aangegeven.)
27.03.2023 - 20:35
![]() Karin wrote:
Karin wrote:
Gerne würde ich das Modell Gentle Breeze nacharbeiten.Finde aber zu Drops Verdi keinerlei Angaben zu Qualität und Lauflänge.Die Garnalternative Brushed+Delight gefällt mir nicht.da die Farbauswahl bei Delight doch sehr eingeschränkt ist.Ich gehe davon aus,dass Drops Verdi nicht mehr erhältlich ist.Gibt es noch andere Alternativen? Vielen Dank!
27.01.2023 - 11:47
![]() Libre wrote:
Libre wrote:
Is dit patroon te verkrijgen dat niet met rondbreinaalden gebreid is?
24.02.2021 - 22:08DROPS Design answered:
Dag Libre,
Het patroon wordt heen en weer gebreid, dus je zou het met rechte naalden kunnen breien. Je hebt dan wel veel steken op de naald. Dat is ook de reden dat er rondbreinaalden geadviseerd worden.
26.02.2021 - 11:52
![]() Marie Poppins wrote:
Marie Poppins wrote:
Bonjour, Je ne suis pas sûre d'avoir bien compris...Après les 2 rangs de point mousse, le rang sur 10 mailles : on tricote 5mmousse puis 5mjersey endroit puis on retourne son ouvrage et on tricote 5mjersey envers puis 5mailles mousse. Les "5 m mousses- les mailles jersey -5 m mousse " de calculent sur les 2 rangs raccourcis? Ou faut il finir chaque rang raccourci par 5 mailles mousses. Merci
11.11.2018 - 11:54DROPS Design answered:
Bonjour Mary Poppins, quand vous tricotez les rangs raccourcis, tricotez les mailles soit au point mousse (= les 5 premières et les 5 dernières mailles) soit en jersey (celles du milieu), par ex pour le 1er rang: 10 m = 5 m point mousse, 5 m jersey (2ème rang= 5 m env, 5 m end), 3ème rang: 5 m end, 26 m jersey (= 31 m), 4ème rang: 26 m env, 5 m end et ainsi de suite. Bon tricot!
12.11.2018 - 10:02
![]() Debbie wrote:
Debbie wrote:
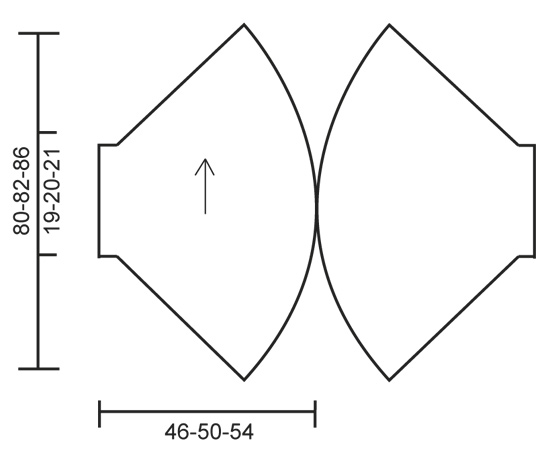
Is the arc the widest point for meaning or is it point to point? I am measuring to finish Knitting and not sure if it is the right size. ( the other question was what do the numbers on the drawing represent)
09.11.2018 - 14:31DROPS Design answered:
Dear Debbie, the longuest measurement (=80-82-86 cm) is the total length of garment - the shorter length (= 19-20-21 cm) is the width of wrist/sleeve (folded = when worn). Each piece is 46-50-54 cm width from sleeve edge to middle front/back piece. Should you need any futher help to choose your size, please contact your DROPS store, even per mail or telephone, they will be able to give you further advices. Happy knitting!
09.11.2018 - 15:28
![]() Debbie wrote:
Debbie wrote:
What is considered the widest for 64\" measurement. The outside circular edge or point to point. Also what are the numbers for on the drawing?
09.11.2018 - 02:47DROPS Design answered:
Dear Debbie, all measurements in chart are taken in cm and measured flat from side to side - read more here. At the beginning of the pattern (header) you'll find the matching chest measurements in inches. Happy knitting!
09.11.2018 - 08:57
![]() Pamela Franks wrote:
Pamela Franks wrote:
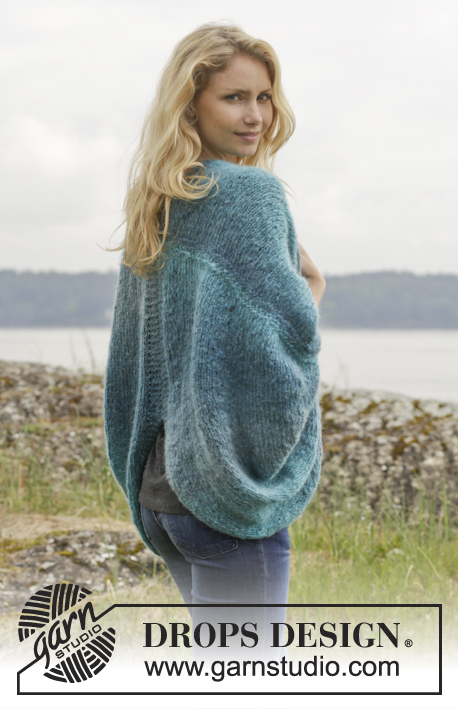
If this pattern is correct and there are only 2 pieces, then I can only deduce the horizontal seam across the back, shown in the PHOTO for the pattern, is a result of the knitter sewing the back seam while the sleeve seams run across the back instead of under the arms, giving the appearance of three pattern pieces. Please review the PHOTO of the back of the garment and let me know if this is the case or if the wrong PHOTO is posted for this pattern.
20.06.2018 - 23:52DROPS Design answered:
Dear Mrs Franks, picture is matching pattern, you work first the right front piece/back piece and sew the cast on edge to the cast off edge together on this piece (= ridge against ridge as you can see in the middle back on the picture). Work then the left front piece/back piece and sew the cast on edge to the cast off edge together. (ridge against ridge as for 1st piece). Now sew both pieces together along midback. Happy knitting!
21.06.2018 - 08:24
![]() Pamela Franks wrote:
Pamela Franks wrote:
I have made two of your garments in this shape (Summer Snug 154-8 and Barroque 149-6), so I understand the diagram. However the photo of this one shows what appears to be a horizontal seam across the back which seems to indicate thete are THREE pieces to this pattern. It is shown clearly on the photo of the BACK of the garment. Is this the correct photo for this pattern? I didn't see any instructions for a third piece.....
19.06.2018 - 22:17DROPS Design answered:
Dear Mrs Franks, the ridge you can see in the back is the ridges at the beg and end end of each piece, ie you sew each piece together with cast on edge to cast off edge (1st ridge to last ridge on piece). There are 2 pieces (right front/back piece and left front/back piece) that are both sewn into a "ring" then you sew both pieces tog along back piece. Happy knitting!
20.06.2018 - 08:08
![]() Anna wrote:
Anna wrote:
Hi. Please can you explain when and how to join the edges first? I can see on the picture that the joining bit is on the back... Thanks
10.02.2018 - 12:18DROPS Design answered:
Dear Arina, the back is sewn together in the following way: put the edges next to each other so they are barely touch. Then stitching in to the outer leg of the edge stitch one on the right side and one the left side pul them a bit closer. This way the sem lies flat and will not be chunky. Happy knitting!
11.02.2018 - 09:29
|
||||
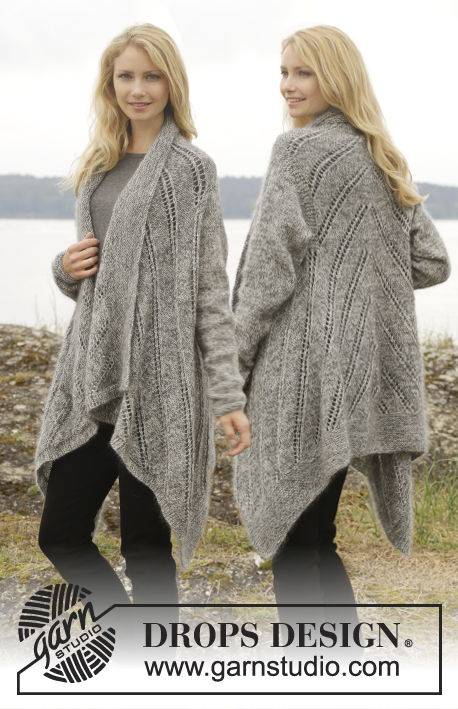
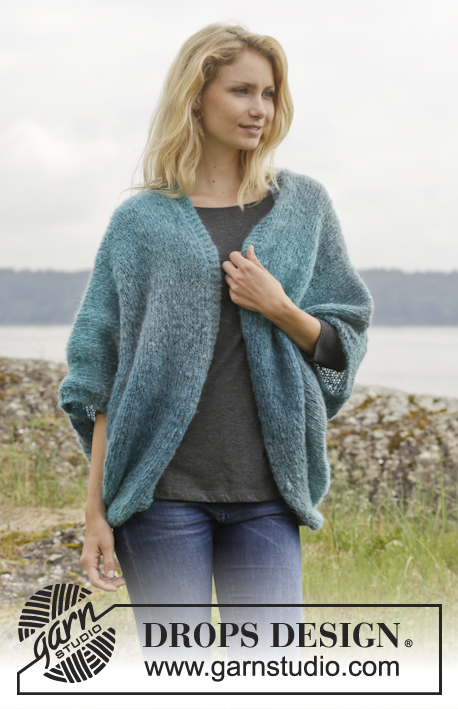
Gentle Breeze#gentlebreezecardigan |
||||
 |
 |
|||
Knitted DROPS jacket worked in a circle in garter st and stocking st in ”Verdi”. Size: S - XXXL.
DROPS 156-26 |
||||
|
GARTER ST (back and forth on needle): K all rows. 1 ridge = 2 rows K. SHORT ROWS: * Work 1 row over the first 10 sts on row, turn and work back. Work 1 row over the first 31 sts on row, turn and work back. Work 1 row over the first 52 sts on row, turn and work back. Work 1 row over all sts, turn and work back *, repeat from *-*, i.e. 8 rows at the widest and 2 rows at the most narrow in 1 repetition. ---------------------------------------------------------- RIGHT FRONT PIECE/BACK PIECE: Worked back and forth on circular needle. Cast on 64-70-76 sts on circular needle size 7 mm with Verdi. Work 1 ridge in GARTER ST - see explanation above. Then work SHORT ROWS – see explanation above (1st row = from RS): 5 sts in garter st, stocking st over the 54-60-66 sts and finish with 5 sts in garter st. REMEMBER THE KNITTING TENSION! Continue with short rows until piece measures 38-39-41 cm at the most narrow and 160-164-172 cm at the widest. Work 1 ridge in garter st and cast off. Sew tog the cast-on and cast-off edge. LEFT FRONT PIECE/BACK PIECE: Work as right front piece/back piece. ASSEMBLY: Place the two part towards each other on the widest so that the 5 ridges are edge to edge, and sew tog in outer loops of edge sts approx. 30-35 cm mid back – make sure that seam on the parts is mid under sleeve. |
||||
Diagram explanations |
||||
|
||||
|
||||
Have you finished this pattern?Tag your pictures with #dropspattern #gentlebreezecardigan or submit them to the #dropsfan gallery. Do you need help with this pattern?You'll find 18 tutorial videos, a Comments/Questions area and more by visiting the pattern on garnstudio.com. © 1982-2025 DROPS Design A/S. We reserve all rights. This document, including all its sub-sections, has copyrights. Read more about what you can do with our patterns at the bottom of each pattern on our site. |
||||


With over 40 years in knitting and crochet design, DROPS Design offers one of the most extensive collections of free patterns on the internet - translated to 17 languages. As of today we count 314 catalogues and 11822 patterns translated into English (UK/cm).
We work hard to bring you the best knitting and crochet have to offer, inspiration and advice as well as great quality yarns at incredible prices! Would you like to use our patterns for other than personal use? You can read what you are allowed to do in the Copyright text at the bottom of all our patterns. Happy crafting!
Post a comment to pattern DROPS 156-26
We would love to hear what you have to say about this pattern!
If you want to leave a question, please make sure you select the correct category in the form below, to speed up the answering process. Required fields are marked *.