
Popular categories
Looking for a yarn?


Comments / Questions (21)
![]() Dorine Anselme wrote:
Dorine Anselme wrote:
Bonjour, je bloque au niveau de: mesurer à partir d'ici, je doit tricoter en Côte 8 cm et au tour suivant augmenter 1 m end et ds toutes les sections 3 m end pour un total de 102m Je ne comprends pas, dois-je augmenter des deux côtés de 1 ou 3 mailles Merci.
23.01.2022 - 00:40DROPS Design answered:
Bonjour Mme Anselme, vous devez maintenant augmenter le nombre de mailles dans les sections 3 mailles endroit des côtes pour tricoter désormais en côtes 4 mailles endroit, 2 mailles envers. Vous pouvez augmenter au début de chaque section en mailles endroit par exemple en faisant 1 jeté -tricotez ce jeté torse à l'endroit au tour suivant; vous allez ainsi augmenter 17 mailles et continuer en côtes 4 mailles endroit, 2 mailles envers sur les 102 mailles obtenues. Bon tricot!
24.01.2022 - 10:39
![]() Lisen Hillestad wrote:
Lisen Hillestad wrote:
Hei! Jeg begynner nå fellingen på ryggstykket. 2 m "på hver pinne" - vil det si at man også skal felle på vrangen?
10.02.2021 - 11:27DROPS Design answered:
Hei Lisen, Ja, du feller både på retten og vrangen. God fornøyelse!
11.02.2021 - 07:23
![]() Sine wrote:
Sine wrote:
Guten Tag, leider ist keine Skizze dabei. Ich weiß nicht wie der Pullover von unten aussieht, und habe daher keine Ahnung , wie ich die Unterseite vernähen soll. Ich habe einiges ausprobiert, dass aber nicht funktionierte. Ich habe keine Vorstellung wie die Teile zusammengehören, so das es passt. Danke für ihre Hilfe.
06.01.2021 - 18:02DROPS Design answered:
Liebe Sine, wir haben dafür auch keine Skizze. Das untere Teil wird als Einzelteil gestrickt: die stillgelegten Maschen + 2 Maschen beidseitig hinter die Maschen vom Rückenteil aufgefassen dann wie zuvor Bündchen mit 2 Maschen kraus rechts beidseitig stricken und dann nach 13-23 cm (siehe Größe) abketten. Die Knöpfe werden dann auf beiden Seiten genäht (passend zu den Knopflöchern vom Rückenteil). Hoffentlich kann es Ihnen weiterhelfen. Viel Spaß beim stricken!
07.01.2021 - 09:39
![]() Esti Tomson wrote:
Esti Tomson wrote:
Am l reading correctly in saying your yarns are not available in Canada? What a crime! Esti
06.04.2019 - 08:22DROPS Design answered:
Dear Mrs Tomson, please find here our DROPS retailer in/for Canada. Happy knitting!
08.04.2019 - 10:34
![]() Angela wrote:
Angela wrote:
I loved this pattern. So happy it had buttons as it is much easier to put on. The small size fit my Brussels Griffon perfectly, no sizing adjustments needed. Thank you.
27.01.2019 - 00:12
![]() Anne wrote:
Anne wrote:
Hallo, ich habe ein Problem die Anleitung zu lesen. Ich habe das Unterteil auf den Hilfsfaden und will nun das Rückenteil stricken. Ich habe 38 M auf der Nadel und soll 5 mal Maschen auf beide Seiten aufnehmen. Das ergibt bei mir nur 48 M. Wie komme ich auf die 50M? Lieben Dank für die Hilfe. Anne
27.09.2018 - 22:20DROPS Design answered:
Liebe Anne, Sie sollen insgesamt 6 Mal zunehmen = 12 Maschen werden insgesamt zugenommen - Deutsche Anleitung wird bald korrigiert. Viel Spaß beim stricken!
28.09.2018 - 08:33
![]() Anne wrote:
Anne wrote:
Hello, my sister is knitting this pattern. She is at the point to bind off the first time. She slipped the stitches to a stitch holder. Her working yarn is on the stitch holder! What did she do wrong? Please help. I’m reading the pattern and cannot figure it out. Thank you, Anne (and Annette) in Canada
18.12.2017 - 19:30DROPS Design answered:
Dear Anne and Anette, when dividing piece for front (stomach) and back piece, she can work the first sts before slipping them on a stitch holder, so that she doesn't have to cut the yarn. Happy knitting!
19.12.2017 - 08:17
![]() Susan wrote:
Susan wrote:
Don't know what the following means? " Knit in addition up 2 sts in each side at the back of the 2 sts in garter st worked on back piece = 14-20-26-32 sts. " Am I adding two additional stitches to each side in garter stitch? Am I Attaching to the back piece? For how many rows? Is finished piece measured with neck folded? Would greatly appreciate your help.. Thank you.
16.09.2017 - 01:01DROPS Design answered:
Dear Susan, knit up sitches means you should be picking up stitches into the back loop of the garter stitch you knitted earlier on the back. I hope this helps. Happy Knitting!
18.09.2017 - 00:27
![]() Bonnie wrote:
Bonnie wrote:
Is the chest dimension supposed to be the circumference or diameter of the dogs chest? Thank you.
22.12.2016 - 17:35DROPS Design answered:
Dear Bonnie, the chest dimension is the circumference of the dog around chest. Happy knitting!
22.12.2016 - 18:21June wrote:
Where is the stitches for the second leg I only see where u take off for 1 leg
20.12.2016 - 01:59DROPS Design answered:
Dear Mrs June, you don't cast off sts for legs, only slip the first 10-16-22-28 sts on a st holder for front piece (stomach) and then work each piece separately . When you will work below piece you will pick up 2 sts on each side (in sts on back piece). Happy knitting!
20.12.2016 - 09:18
|
|
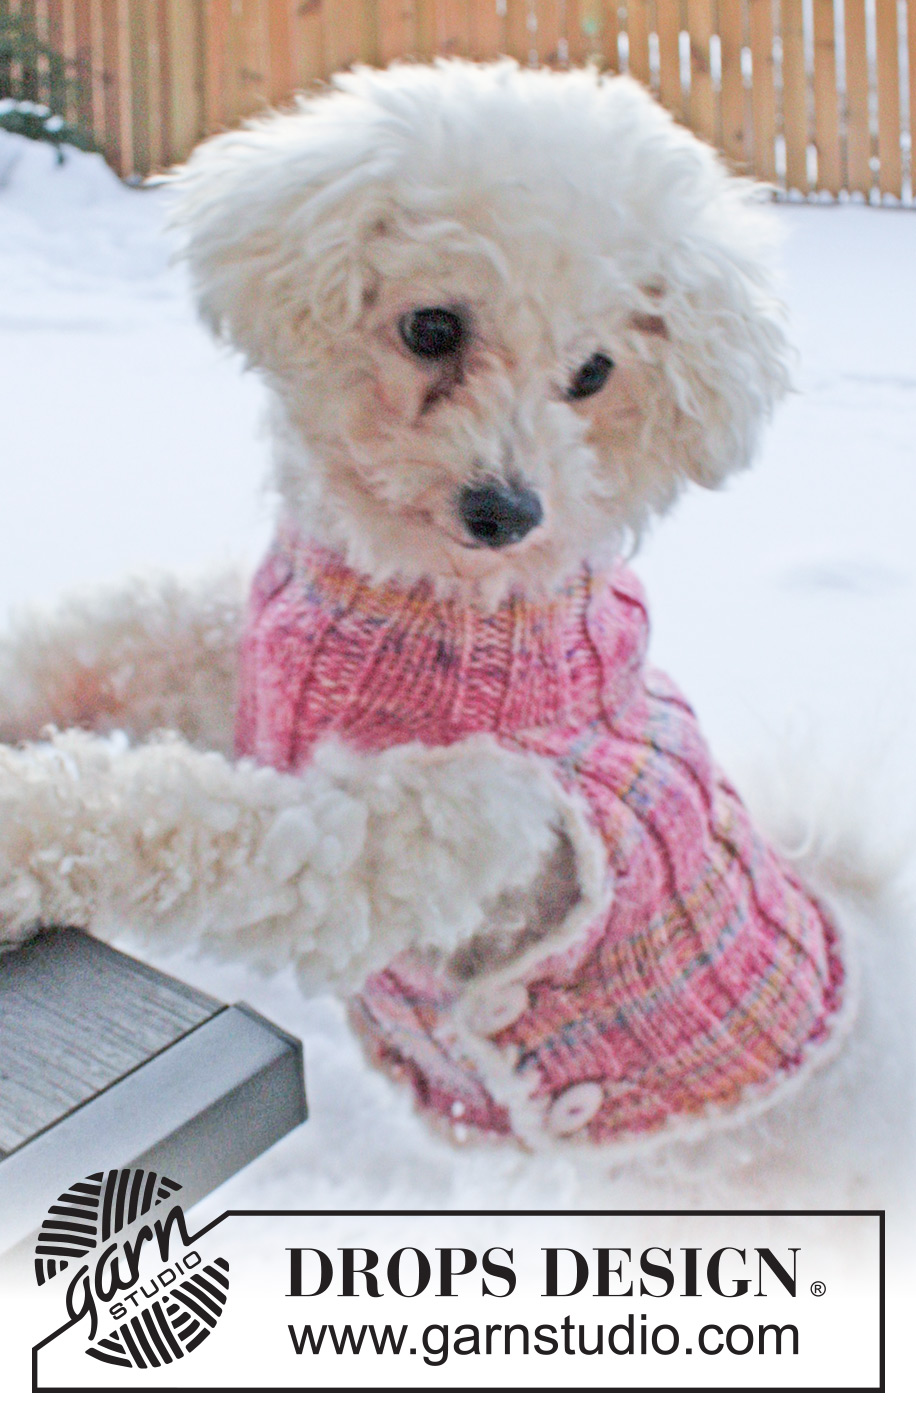
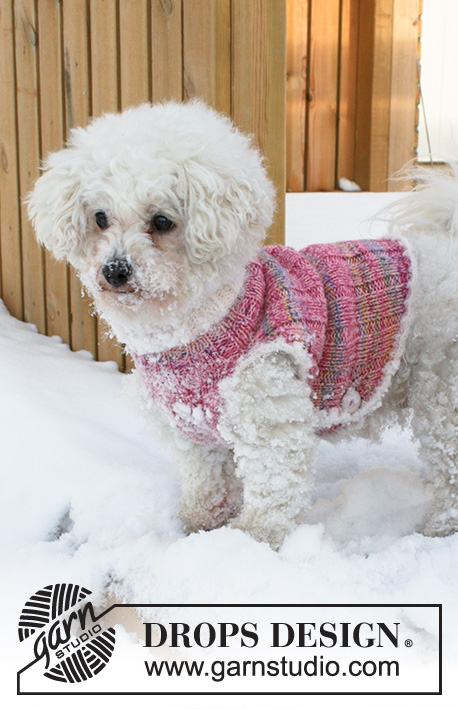
Warm Banjo#warmbanjodogsweater |
|
 |
 |
Knitted DROPS dog coat in DROPS Fabel and DROPS BabyMerino with edges in DROPS Symphony. Size XS - L.
DROPS Extra 0-835 |
|
|
------------------------------------------------------- GARTER ST (back and forth on needle): K all rows. INCREASE TIP: Inc inside 2 sts in garter st in each side. Inc by picking up st from previous row and knitting it in the rib. ---------------------------------------------------------- COAT: Garment is worked in the round with double pineted needles from neck down – change to circular needle when there are enough stitches. Piece is divided later for over piece and under piece and worked back and forth. Cast on 40-55-70-85 sts on double pointed needles size 4.5 mm with DROPS Symphony. Work rib = K 3/P 2 for 5-8-11-14 cm (= neck). Switch to 1 thread DROPS Fabel + 1 thread DROPS Baby Merino – NOW MEASURE PIECE FROM HERE! Continue rib for 2-4-6-8 cm. On next round, inc all 3 K sts to 4 K sts = 48-66-84-102 sts. When piece measures 6-9-12-15 cm, cast off for front legs as follows: Slip the first 10-16-22-28 sts on a stitch holder – there should be 4 K sts at the beg and end of holder = 38-50-62-74 sts remain on needle. Continue with over piece. OVER PIECE: Work rib back and forth on needle with 2 sts in GARTER ST in each side - see explanation above! AT THE SAME TIME on next row from RS, inc 1 st in each side - Read INCREASE TIP! Repeat inc on every row from RS 5-11-11-17 more times = 50-74-86-110 sts. Piece now measures approx. 12-19-22-31 cm. On next row from RS, cast off for 1 button hole in each side as follows: Cast off the middle 2 K sts in the outermost K-section in each side and cast on 2 new sts over the cast off sts on next row. Repeat button hole cast off when piece measures 16-24-28-37 cm. When piece measures 19-26-32-38 cm, cast off at beg of every row: 2 sts 7-9-11-14 times in each side = 22-38-42-54 sts. Then cast off the remaining sts. Piece measures approx. 30-42-53-64 cm incl the neck. UNDER PIECE: Slip sts from stitch holder back on needle size 4.5 mm. Knit in addition up 2 sts in each side at the back of the 2 sts in garter st worked on over piece = 14-20-26-32 sts. Work rib with 1 thread DROPS Fabel + 1 thread DROPS Baby Merino back and forth on needle with 2 sts in garter st in each side. Cast off when under piece measures 13-17-20-23 cm. CROCHET EDGE: Crochet with hook size 4 mm and DROPS Symphony around the entire over piece and under piece as follows: Join yarn with 1 sl st, crochet 1 ch, skip approx. ½-1 cm, *1 dc, 1 chain, skip approx. ½-1 cm*, crochet from *-* - making sure that the crochet edge is neither to tighten nor to lose. Turn piece, *crochet 4 ch, skip approx. 1 cm, 1 dc around the next ch/in the next dc*, crochet from *-* all the row, finish with 1 sl st in the first dc from beg of previous row. Cut and fasten the yarn. ASSEMBLY: Sew 4 buttons on under piece, 2 in each side to match the button holes on over piece. TIP: Try the coat on the dog. If it is too wide, only sew 2 buttons in the middle of under piece and button both sides of over piece with the same button. PS: The neck is folded double when worn. |
|
Have you finished this pattern?Tag your pictures with #dropspattern #warmbanjodogsweater or submit them to the #dropsfan gallery. Do you need help with this pattern?You'll find 21 tutorial videos, a Comments/Questions area and more by visiting the pattern on garnstudio.com. © 1982-2025 DROPS Design A/S. We reserve all rights. This document, including all its sub-sections, has copyrights. Read more about what you can do with our patterns at the bottom of each pattern on our site. |
|


With over 40 years in knitting and crochet design, DROPS Design offers one of the most extensive collections of free patterns on the internet - translated to 17 languages. As of today we count 314 catalogues and 11822 patterns translated into English (UK/cm).
We work hard to bring you the best knitting and crochet have to offer, inspiration and advice as well as great quality yarns at incredible prices! Would you like to use our patterns for other than personal use? You can read what you are allowed to do in the Copyright text at the bottom of all our patterns. Happy crafting!
Post a comment to pattern DROPS Extra 0-835
We would love to hear what you have to say about this pattern!
If you want to leave a question, please make sure you select the correct category in the form below, to speed up the answering process. Required fields are marked *.