
Popular categories
Looking for a yarn?


|
|
Winter Jolly |
|
|
|
|
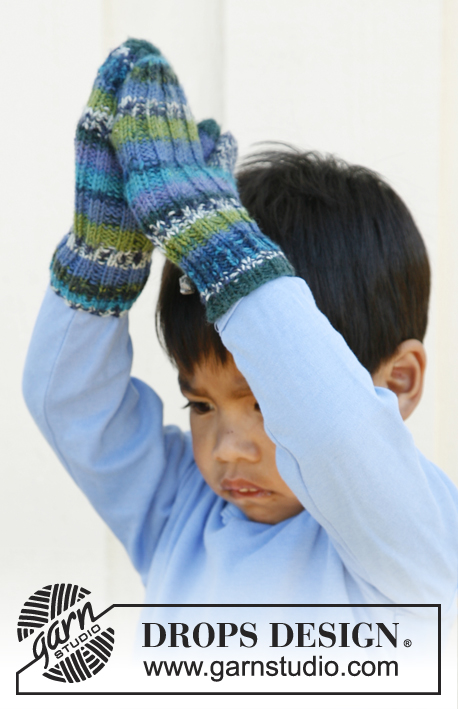
Knitted balaclava hat in DROPS Delight, with pompom. Size children 3 to 12 years.
DROPS Children 22-38 |
|
|
DECREASE TIP: Work until 2 sts remain before marker, K 2 tog (marker), slip 1 st as if to K, K 1, psso. MONK'S COWL: Work from bottom up. Cast on 324-348-372 sts on circular needle size 2.5 mm (60 cm) with Delight. Work 4 rounds in rib = K 2/P 2. Work next round as follows: * K 2, P 2, P 2 tog, P 2, P 2 tog, P 2 *, repeat from *-* the entire round = 270-290-310 sts. Continue with * K 2, P 8 *. At the same time on 3rd-4th-5th round, dec 1 st in every P-section by P the last 2 P sts tog, repeat dec every 3rd-4th-5th round until only 2 P sts remain in every P-section – NOTE: Dec alternately at the beg and end of every P-section (switch to a shorter circular needle when there are too few sts for the long one) = 108-116-124 sts. Piece measures approx. 7-8-10 cm. Work K 2/P 2 for 3-4-5 cm. On next round, inc all 2 P sts to 3 P sts = 135-145-155 sts. Work 2 rounds with K 2/P 3. On next round, cast off the first 12 sts for opening for face. NOW MEASURE PIECE FROM HERE! Then work back and forth on circular needle until finished measurements. AT THE SAME TIME cast off 1 st at beg of every row 7 times in each side = 109-119-129 sts remain on needle. Continue rib with 1 st in garter st in each side for approx. 16-18-20 cm (from where the first 12 sts were cast off), finish after 1 row from WS. Continue with upper piece. UPPER PIECE: Work 1 row in rib as before (from RS) and cast on 37 new sts at the end of row = 146-156-166 sts. Work 1 round over all sts as follows: P 1, * K 2, P 3 *, repeat from *-* until 3 sts remain before the new sts, K 2, P 1, then work the new sts as follows: * K 2, P 3 *, repeat from *-*, and finish with K the last 2 sts (i.e. the rib does not work out in the transitions between upper piece and the rest of the cowl, this will not be visible because of dec). Now work back and forth over the new sts while at the same time dec sts from each side, i.e. work as follows: Turn piece, * work back from WS until 1 st remains of the new sts, then P 2 tog. Turn piece, slip first as if to K, work until 1 st remains of the new sts, slip this st as if to K, K 1 and psso. Turn piece, slip first st as if to P *, repeat from *-* until 38-43-48 sts have been dec in each side. 70 sts now remain on needle and the rib works out the entire round in K 2/P 3. Continue with the tail. TAIL: Now continue in the round on double pointed needle over all sts – insert a marker in the middle of the 2 K sts at the beg and end of upper piece. When 3-3-4 rounds have been worked, dec 1 st on each side of both markers – SEE DECREASE TIP, repeat dec every 4th-4th-5th round a total of 15 times = 10 sts remain on needle. Cut the thread and pull it through the remaining sts, tighten tog and fasten. Tail measures approx. 17-17-21 cm. EDGE AROUND FACE: Knit up 130-140-150 sts on a short circular needle size 2.5 mm inside 1 edge st around the opening of cowl – NOTE: Along the upper piece knit up 2 sts over the 2 K sts and 2 sts over the 3 P sts. Then work rib = K 2/P 2 (make sure that K and P sts match on top of each other at the top of upper piece) for approx. 5-6-7 cm, cast off with K over K and P over P. Fold the rib double towards WS and fast in the knit up-edge. POMPOM: Make a dense pompom with a diameter of approx 4-5 cm and fasten at the tip of the tail. |
|
|
Have you made this or any other of our designs? Tag your pictures in social media with #dropsdesign so we can see them! Do you need help with this pattern?You'll find tutorial videos, a Comments/Questions area and more by visiting the pattern on garnstudio.com. © 1982-2024 DROPS Design A/S. We reserve all rights. This document, including all its sub-sections, has copyrights. Read more about what you can do with our patterns at the bottom of each pattern on our site. |


With over 40 years in knitting and crochet design, DROPS Design offers one of the most extensive collections of free patterns on the internet - translated to 17 languages. As of today we count 304 catalogues and 11422 patterns - 11422 of which are translated into English (UK/cm).
We work hard to bring you the best knitting and crochet have to offer, inspiration and advice as well as great quality yarns at incredible prices! Would you like to use our patterns for other than personal use? You can read what you are allowed to do in the Copyright text at the bottom of all our patterns. Happy crafting!
Comments / Questions (48)
Bonjour Je viens de relire mon parton et j'ai réalisé que l'erreur vient du début du dessus de tete J'ai bien mon 146 mailles je doit diminuer 38 mailles chaque côté et c'est à ce moment qu'il reste un total de 70 mailles je vient de réaliser que j'ai diminuer juste l'équivalent de 38 mailles Voilà l'erreur Merci de votre patience maintenant ca devrait fonctionner
30.09.2019 - 16:15Ok avant de commencer la pointe on a un total de 107mailles? Et pour vous dessus de tete on parle des 37 mailles? La pointe ne fait pas comme la photo du patron 70 mailles moins 60 je sais que ca donne 10 je sais compter et j'ai fait ces diminutions sur les 70 mailles Mais il reste toujours les 37 mailles
30.09.2019 - 14:26DROPS Design answered:
Bonjour Diane, vous diminuez 1 m avant le 1er marqueur du dessus de la tête et 1 m après le 1er marqueur du dessus de la tête), vous tricotez les mailles suivantes jusqu'à ce qu'il reste 2 m avant le marqueur suivant, vous diminuez ensuite 1 m du dessus de la tête avant le 2ème marqueur et 1 m du côté après le 2ème marqueur = après cette 1ère diminution, vous avez diminué 4 m: 2 sur le dessus de la tête et 2 sur le "dessous" (côté "queue" de la cagoule) et il reste 66 mailles. Vous devez ainsi toujours diminuer 4 mailles, avant et après chacun des marqueurs à chaque fois. Bon tricot!
30.09.2019 - 16:13Ca fait 2 fois que j'essaie ca ne marche pas. Pourtant ca fait longtemps que je tricote. Donc je tricote 37 maille .je place un marqueur.je tricote les 70 mailles je pose un mar queur avant de commencer les 37 mailles...si je comprends votre message je ne diminue pas sur les 37mailles??? Seulement sur les 70 mailles Est-ce que je bouge les marqueurs apres chaque diminutions?? À l'aide j'aime beaucoup le modele un video aurait grandement aidé les tricoteuses.....merci
29.09.2019 - 06:03DROPS Design answered:
Bonjour Diane, vous devez avoir un marqueur entre les 2 premières mailles endroit du dessus de la tête m et un autre marqueur entre les 2 dernières mailles endroit du dessus de la tête. Vous diminuez ensuite de chaque côté de chacun de ces marqueurs (= avant + après chacun des marqueurs = 4 diminutions par tour) 15 fois au total = soit 60 mailles diminuées au total. Vous aviez 70 mailles avant de commencer, il vous en reste 10. Bon tricot!
30.09.2019 - 10:37Quand on commence la pointe on a 107 mailles(70côtes +37 (dessus de tete) donc je tricote 35(dessus tete)1dim 2 mailles marqueurs et 1 dim) je tric jusque fin dessus tete et 1dim..2 mailles marqueurs et dim sur 37 mailles....15x 4 mailles =60 et on a au debut dim 108 on ne peut pas arriver à 10 total
27.09.2019 - 14:45DROPS Design answered:
Bonjour Diane, vous diminuez 4 m au total = 2 m de chaque côté de chaque marqueur et 15 fois au total, vous allez donc diminuer 4 x 15 = 60 mailles. Vous aviez 70 mailles avant la pointe, il reste donc 10 mailles. Bon tricot!
27.09.2019 - 15:54Pointe est ce qu'on diminue seulement sur les 70 mailles côtés ce qui donne 10 mailles ou c'est 10 totales est ce qu'on diminue aussi sur les 37 centrales???
26.09.2019 - 17:08DROPS Design answered:
Bonjour Diane, on diminue 2 m à chaque marqueur (avant et après le dessus de la tête) soit 4 mailles au total par tour jusqu'à ce qu'il reste 10 m, on diminue avant et après les 37 m (avant et après le marqueur) et les 37 m (après et avant le marqueur). Bon tricot!
27.09.2019 - 08:04Meine Frage hat sich erledigt, in der deutschen Übersetzung fehlt ein entscheidender Satz, nämlich dass die linken Maschen sich entsprechend der Abnahme reduzieren 🤷🏻♀️ war vom Muster her logisch.. Steht SO aber nicht in der deutschen Übersetzung.
24.05.2019 - 20:24DROPS Design answered:
Die Anleitung wurde korrigiert, sodass die entsprechende Stelle nun klarer und eindeutiger sein sollte. Viel Spaß beim Weiterstricken!
27.05.2019 - 10:25Mit * 2 re., 8 li.* weiterstricken. Gleichzeitig bei jeder 3. Runde in jeder li.-Partie abwechslungsweise die 2 ersten/ letzten Maschen zusammenstricken Versteh ich richtig, dass das Muster da "verrutscht" und ich die abzunehmenden Maschen mal links mal rechts zusammen abstricke? Je nach dem, wo ich grad im Muster bin?
24.05.2019 - 15:27DROPS Design answered:
Lieber Kilian, die 8 li Maschen werden abgenommen bis nur 2 li Maschen bleiben, dh bis Bündchen 2 re, 2 li aussehen. Viel Spaß beim stricken!
27.05.2019 - 08:20Bonjour, Je suis arrivée au dessus de la tête et ai augmenté de 37 mailles au bout du rang. Je ne comprends pas vraiment comment continuer l'ouvrage. Reprend-on en rond ou en A-R? Je sais que la suestion à déjà été posée mais là réponse ne m'a pas paru très claire, je suis navrée d'insister. Je vous remercie
15.01.2019 - 22:45DROPS Design answered:
Bonjour Laura, quand les 37 m sont montées, tricotez le tour suivant comme indiqué en commençant par les dernières mailles sur l'aiguille (= en rond, on va terminer par les 37 m montées). Au rang suivant, vous tricotez uniquement les 37 m en même temps, vous tricotez la dernière de ces 37 m avec la m suivante du côté de la tête (en fin de rang sur l'envers (1er rang) et en fin de rang sur l'endroit), ces diminutions se font à la fin de chaque rang jusqu'à ce qu'il reste 70 m (= vous avez diminué 38-43-48 m de chaque côté). Bon tricot!
16.01.2019 - 08:28Bonsoir . Je voudrai faire cette cagoule mais sans la pointe comment faut il que je fasse , merci de vos réponses
27.08.2018 - 18:29DROPS Design answered:
Bonjour Mme Bellecullee, nous ne sommes malheureusement pas en mesure de pouvoir adapter chacun de nos modèles à chaque demande individuelle. N'hésitez pas à vous adresser à votre magasin, même par mail ou téléphone, pour toute assistance complémentaire. Bon tricot!
04.09.2018 - 13:32Ich verstehe nicht ganz den Übergang: Mütze mit 1 R. von der Rückseite abschliessen. Von der Vorderseite 1 R. Bündchen stricken und am Schluss der R. 37 neue M. anschlagen = 146-156-166 M. Mir ist nicht ganz klar, wo ich die Maschen für die Vorderseite hernehmen soll. Irgendwie verstehe ich das nicht ganz
29.01.2018 - 12:44DROPS Design answered:
Liebe Silvia, diese 37 M sind oben am Kopf, dann stricken Sie 1 Rd wie beschrieben über alle Maschen (mit den neuen Maschen enden). Dann werden Sie nur die neuen Maschen stricken, gleichzeitig, am Ende jeder reihe stricken Sie die letzte der neuen Maschen zusammen mit der nächsten Masche der Seite bis 38-43-48 M abgenommen werden. Viel Spaß beim stricken!
29.01.2018 - 13:18