
Popular categories
Looking for a yarn?


Comments / Questions (45)
![]() Lilup wrote:
Lilup wrote:
Liebes drops-Team, ich wüsste gerne welche Grösse das Modell auf dem Bild trägt um die Passform besser abschätzen zu können - S/M oder L/XL? Danke im Voraus und liebe Grüsse
27.06.2025 - 17:04DROPS Design answered:
Liebe Lilup, das Modell auf dem Bild ist wahrscheinlich eine Größe S/M - wählen Sie die Größe nach dem Kopfumfang. Viel Spaß beim Stricken!
27.06.2025 - 17:11
![]() Nicole Benedicto wrote:
Nicole Benedicto wrote:
I have started to knit this hug hoed. I have noticed that the pattern does not look the same on my work. I do not understand why. The pattern is 1 point mousse et 2 mailles endroit pour les cotes But on the picture and on the video the stich between the cotes is with kind of holes. Not on my work. What a pity because your hoed looks much nicer. Can you help me understand what I am doing wrong. Many thanks from a fan of Drop Designs
28.05.2025 - 17:23DROPS Design answered:
Hi Nicole, try to block the hood, the pattern will get a nicer look - hand wash at 30ºC, don’t let the garment soak. Move the garment gently back and forth, do not rub or squeeze it. Press carefully the water out of the garment with a dry towel. To dry the garment, shape it and lay it flat - do not hang - ideally on a warm bathroom floor or on top of a drying rack in a room with good air circulation. Kind regards!
09.06.2025 - 08:19
![]() Cristina Gil wrote:
Cristina Gil wrote:
Hi, I'm working on knitting up stitches along the sides. It says knit up 36 stitches, but I have more than 36 rows form which to pick up, if that makes sense (I worked the first instructions until I had 19cm, so it's not a fixed number of rows). From the photos I can't really tell if I'm supposed to skip rows to arrive at 36 stitches, or something else. Can you clarify please? Thank you!
21.03.2025 - 20:30DROPS Design answered:
Dear Cristina, yes, you will usually have a few more rows than you need to pick up. So you need to spread evenly the rows to skip (as if they were even decreases) so that you manage to pick up 36 stitches without skipping all the rows in a specific section (like, work 3 rows, skip the next one). You can calculate, according to the number of rows and stitches to pick up, how many rows to skip and how to spread them. Happy knitting!
23.03.2025 - 19:30
![]() Linda wrote:
Linda wrote:
Please delete comments/Questions I posted on 10.03.2025 - 00:46 and 10.03.2025 - 00:24. It was a question, but I figured it out. I don't want to confuse the users. Thank you very much! I appreciate it.
16.03.2025 - 14:37
![]() Linda wrote:
Linda wrote:
I think my question should have been what do you do to the face opening row after completing "with the last row from the wrong side. Cut the strand and slip stitches on another needle; this piece is top front of hood." After slip stitches to another needle, then what do you do to this piece the top front of the hood? Thank you.
10.03.2025 - 00:46
![]() Linda wrote:
Linda wrote:
Instructions: "You now knit up stitches along both sides, inside the 1 garter stitch: From the right side, start from the corner by the cast-on edge and knit up 36-36 stitches along one side (left side of piece), work across the 22-28 stitches with pearl rib as before (back of hood)" Is work across 22-28 stitches where it's around the face opening of the hood? Or the cast on end? Thank you.
10.03.2025 - 00:24
![]() MW wrote:
MW wrote:
This is to thank Angela Long for her comment posted on 31.01.2025 on how to stitch the hood rows: 'Row 1 ...knit. Row 2... knit 1 pearl 2.' I couldn't figure it out because it just didn't look like the picture until I saw your comment. Hooray!
01.03.2025 - 03:55
![]() Stine Jensen wrote:
Stine Jensen wrote:
Hej! I sidste paragraf på højre side af tørklædet står der “Strik 8 pinde frem og tilbage med perlerib som før og 2 i-cord kantmasker + 1 maske glatstrik i hver side.” Men umiddelbart på hjælpevideoerne ligner det at der kun bliver strikket 2 i-cord masker. Er det rigtigt? Skal jeg strikke fra start retside: 1 maske glatstrik, tage næste maske fra venstre pind over på højre med garnet foran arbejdet, en maske ret?
26.02.2025 - 10:30DROPS Design answered:
Hei Stine. I videoen, tid 14:34 strikkes det etter forklaringen: I-CORD KANTMASKER (= 2 masker): STARTEN AV PINNEN: Ta 1 maske løst av pinnen som om den skulle strikkes vrang med tråden foran arbeidet, strikk 1 maske rett. Ved tiden 14:45 strikkes det 1 rett + 1 rille, men her er det et lite hak i videoen, kanskje det er det som gjøre det litt uklart? Så strikkes det videre med perleribb. mvh DROPS Design
10.03.2025 - 08:19
![]() Lara wrote:
Lara wrote:
Ich stehe gerade bei der Hin Reihe der linken Seite. Ich stricke am Ende der Reihe 2 links zusammen, danach wenden, 2 von rechts auf links und 3 rechts zusammen. Aber dann gibt es eine sichtbare Abnahme anstelle einer geraden Reihe wie der rechten Seite. Könnten Sie mir da erklären, was ich falsch mache?
23.02.2025 - 11:15DROPS Design answered:
Liebe Lara, bei der 1. Hinreihe der linken Seite legen Sie 2 von den stillgelegten Maschen auf der linke Nadel und diese 2 Maschen stricken Sie mit der 1. Maschen von der linken Seiten rechts zusammen (- 3 rechts zusammen), so haben Sie 2 M von der Kapuze zusammen mit der ersten Masche vom Schal gestrickt. Man wird nicht bei der 1. Reihe (Rückreihe) abnehmen sondern am Anfang der 2. Reihe (Hinreihe). Viel Spaß beim Stricken!
24.02.2025 - 09:05
![]() Lotti wrote:
Lotti wrote:
Hallo, Ich bin gerade dabei den rechten Schal zu stricken und er rollt sich immer mehr von den Seiten ein. Gibt es einen Weg das zu verhindern?
21.02.2025 - 10:34DROPS Design answered:
Liebe Lotti, versuchen Sie vielleicht die Maschen dieser Seite nicht zu eng zu stricken - siehe Video - es sollte sich nicht einrollen. Sonnst können Sie vielleicht auch am Ende die Arbeit mit Stecknadeln auf einer geeigneten Unterlage spannen, anfeuchten (z.B. mit einer Sprühflasche für Blumen) und trocknen lassen, danach entfernen Sie die Stecknadeln, dann sollte sich der Rand nicht mehr rollen. Viel Spaß beim Stricken!
21.02.2025 - 14:08
|
||||||||||
Winter Hug Hood#winterhughood |
||||||||||
 |
 |
|||||||||
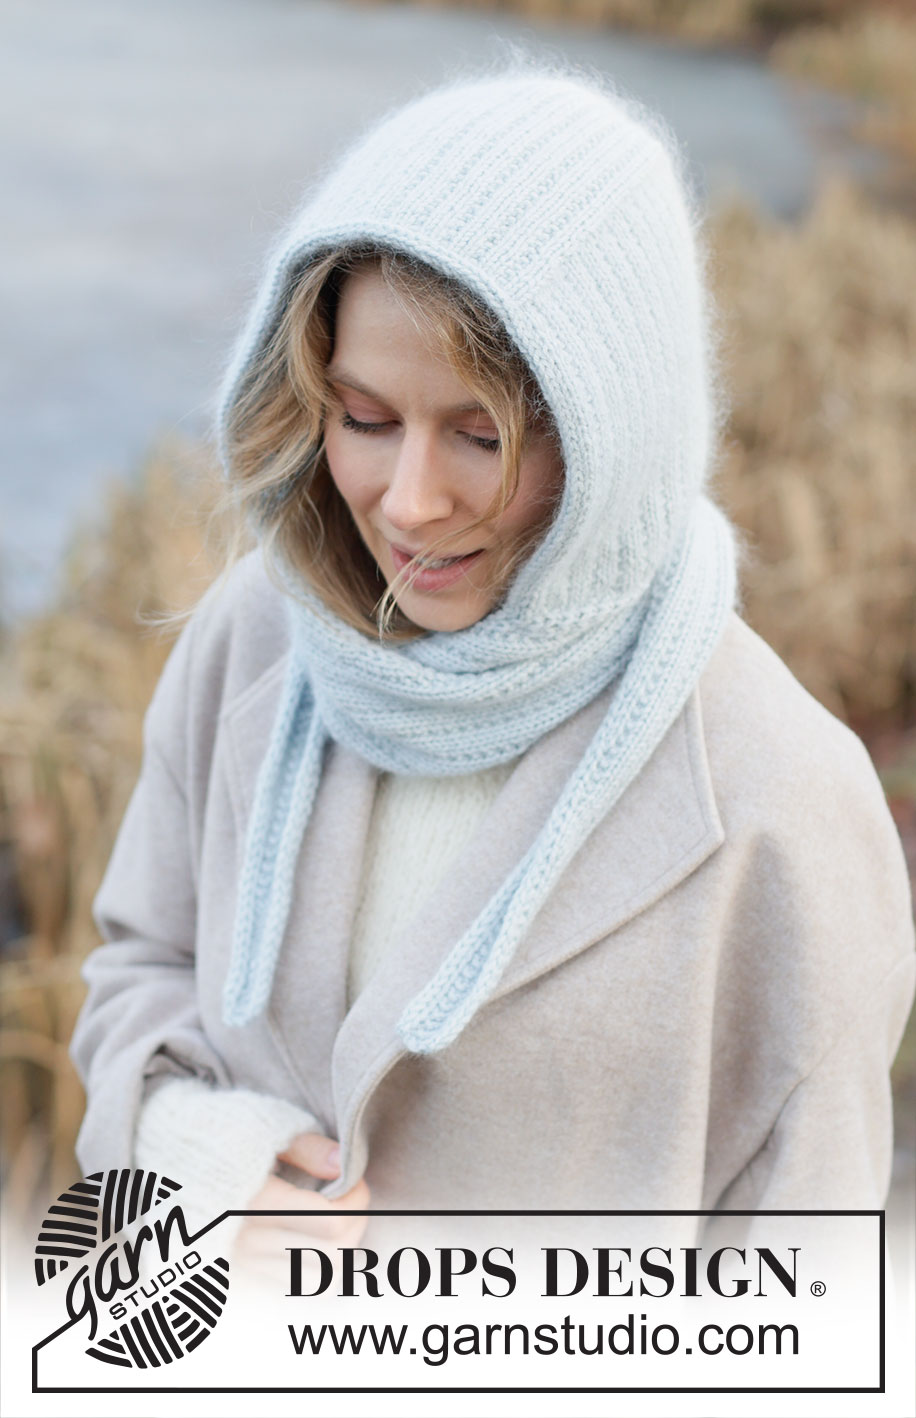
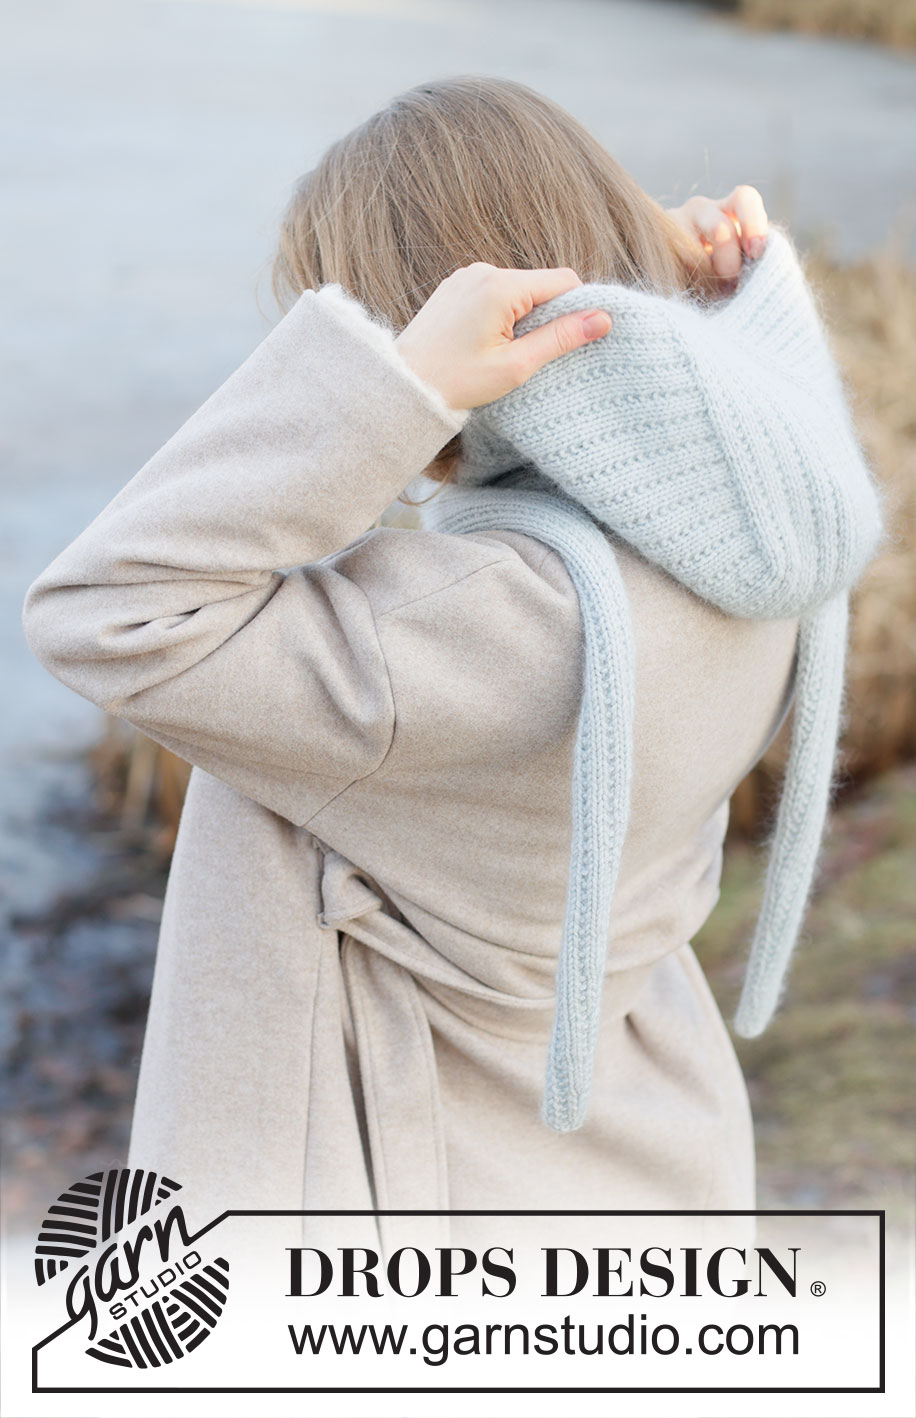
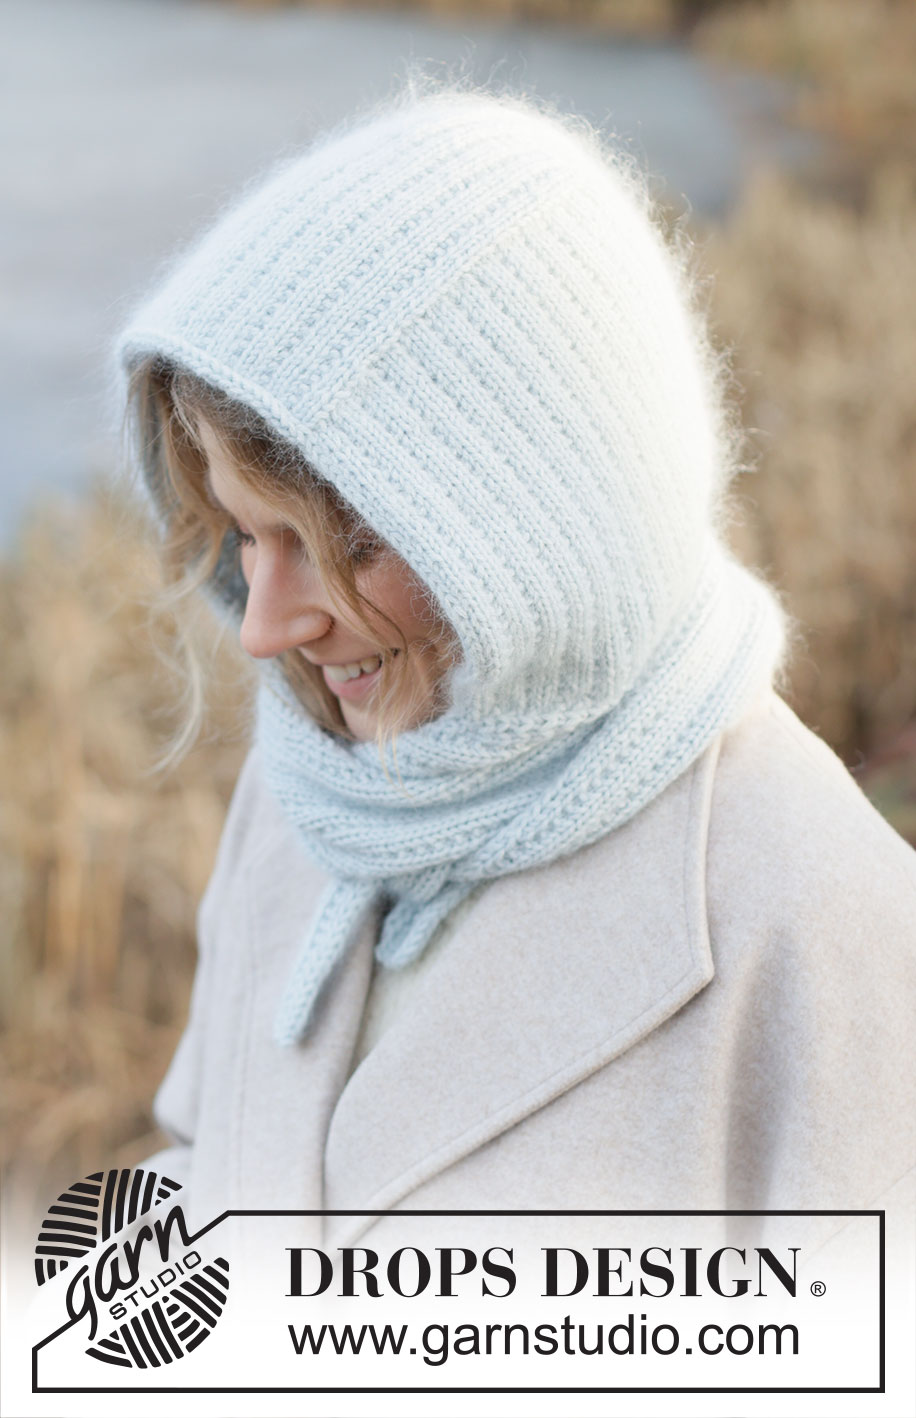
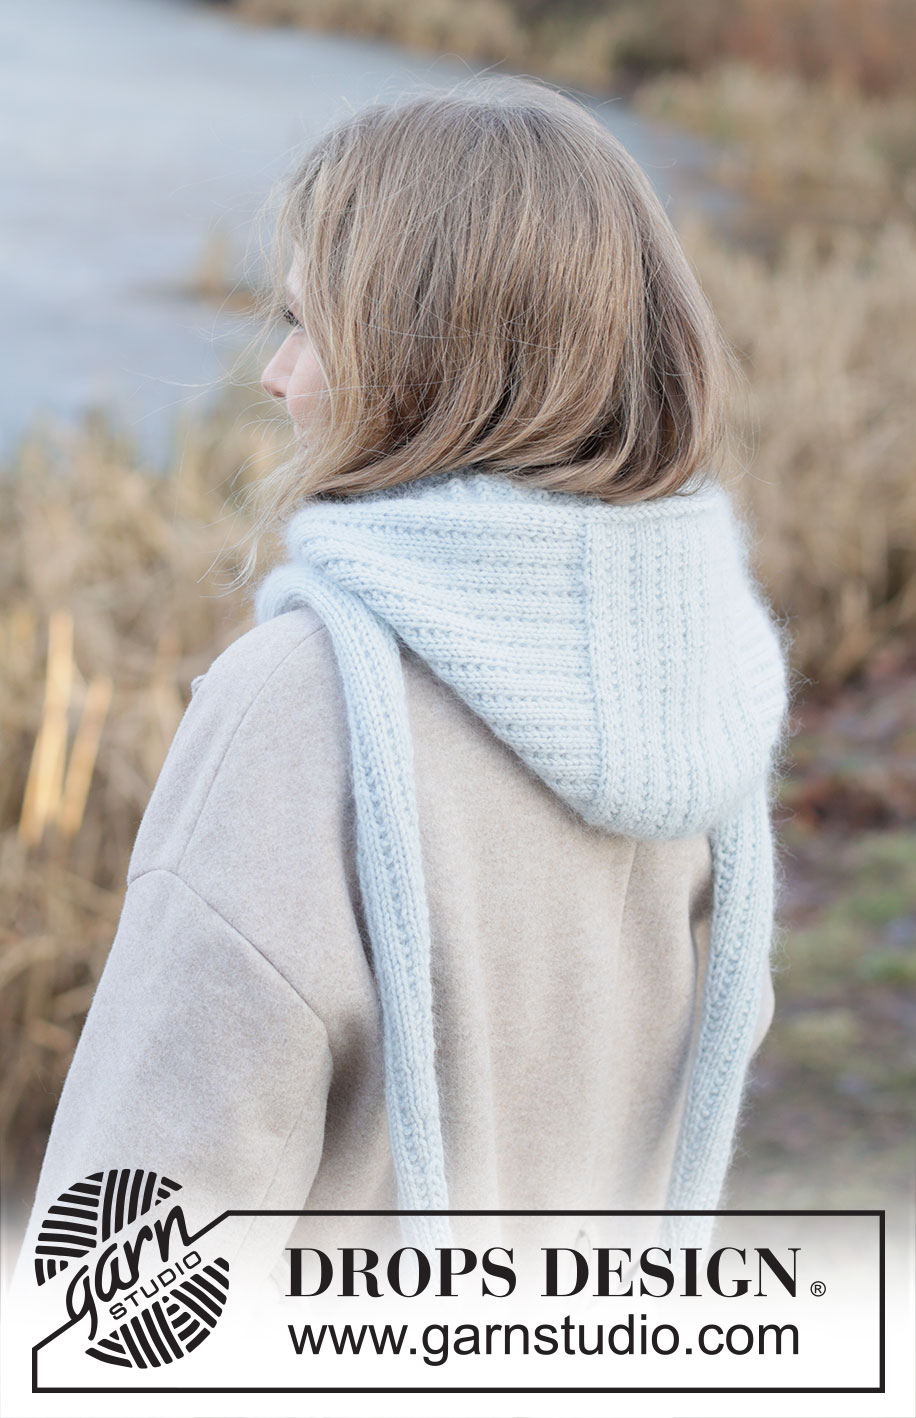
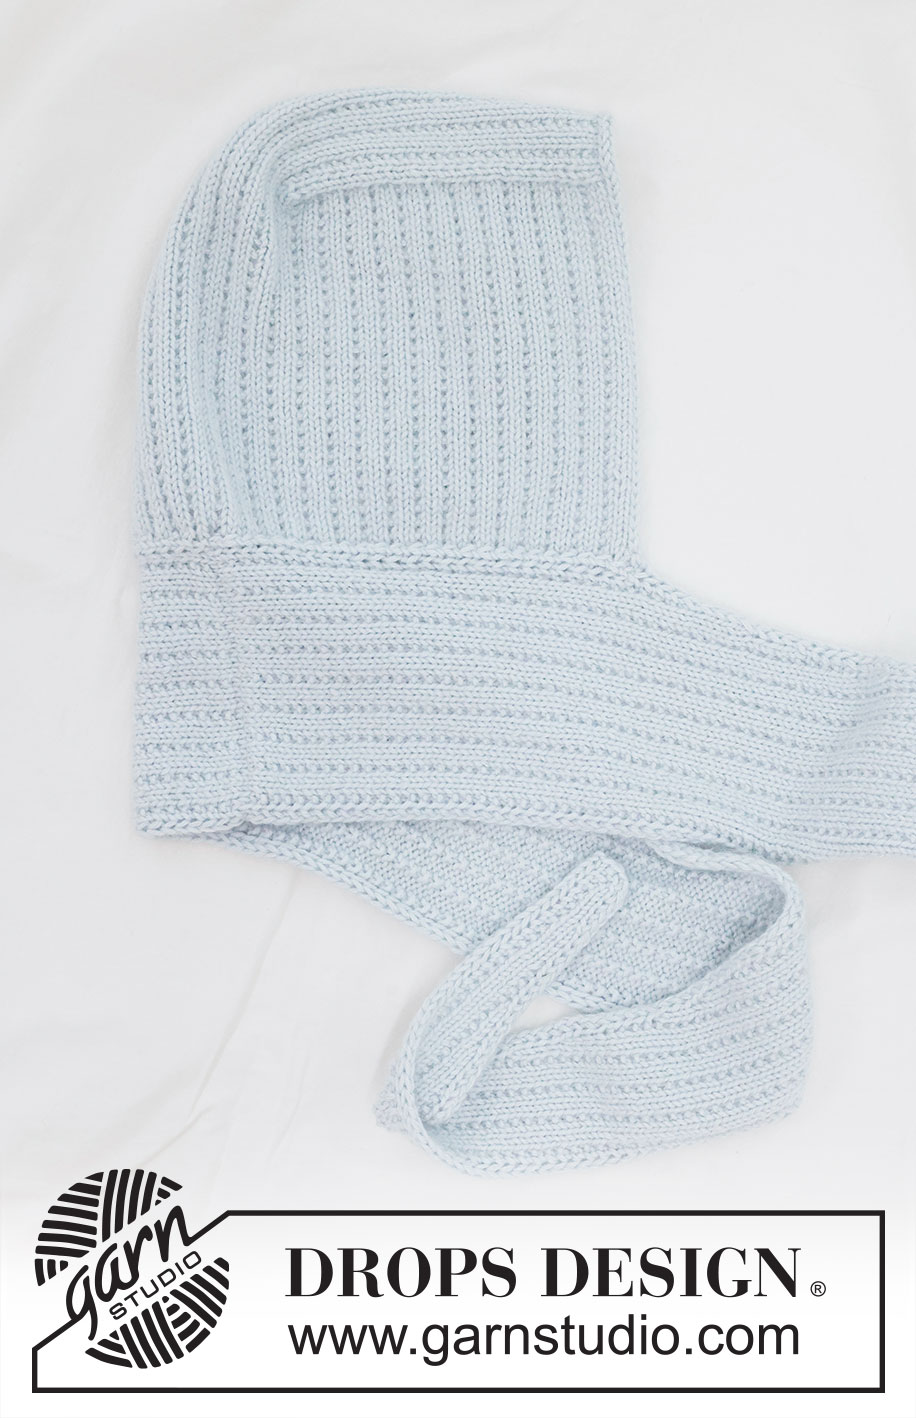
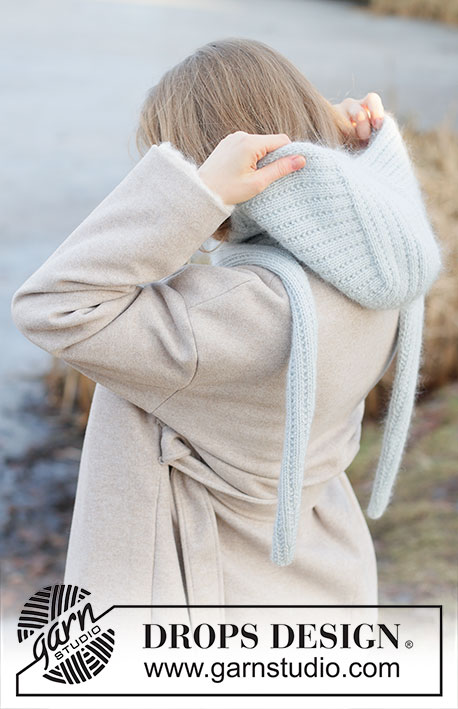
Knitted hooded scarf in DROPS Daisy and DROPS Kid-Silk. The piece is worked with pearl rib and I-cord. Sizes S - XL.
DROPS 253-61 |
||||||||||
|
------------------------------------------------------- EXPLANATIONS FOR THE PATTERN: ------------------------------------------------------- GARTER STITCH (worked back and forth): Knit all rows, from both the right and wrong side. 1 ridge in height = knit 2 rows. I-CORD CAST OFF: Cast on 2 stitches on the right needle, slip these 2 stitches onto the left needle with the strand 2 stitches in on the left needle, * knit 1, knit the next 2 stitches twisted together, slip the 2 stitches from the right needle back onto the left needle *, work from *-* until there are 2 stitches left on the row. I-CORD EDGE STITCHES (= 2 stitches): BEGINNING OF ROW: Slip 1 stitch purl-wise with strand in front, knit 1. END OF ROW: Work until there are 2 stitches left on the row, slip 1 stitch purl-wise with strand in front, knit 1. Work like this from both the right and wrong side. ------------------------------------------------------- START THE PIECE HERE: ------------------------------------------------------- HOODED SCARF - SHORT OVERVIEW OF THE PIECE: The hood is worked back and forth with circular needle, from mid-front and backwards. Stitches are picked up on each side and the piece is continued downwards. When the hood is finished the stitches are placed on a stitch holder. An edge is knitted up around the face-opening which is cast off with I-cord. Stitches are cast on for the scarf, starting mid-back. These stitches are worked together with the stitches from the hood. When all stitches are knitted up on one side from mid-back (half the hood), one side of the scarf is finished back and forth. This is then repeated on the other side. The scarf is sewn together mid-back to finish. HOOD: Cast on 22-28 stitches with circular needle size 5 mm, 1 strand DROPS Daisy and 1 strand DROPS Kid-Silk (2 strands). Cast-on edge = mid-front of hood. Work back and forth as follows: ROW 1 (right side): 1 GARTER STITCH – read description above, work pearl rib (knit 2, 1 garter stitch) to end of row. ROW 2 (wrong side): 1 garter stitch, work pearl rib (purl 2, 1 garter stitch) to end of row. Work ROWS 1 and 2 for 19-19 cm, with the last row from the wrong side. Cut the strand and slip stitches on another needle; this piece is top front of hood. You now knit up stitches along both sides, inside the 1 garter stitch: From the right side, start from the corner by the cast-on edge and knit up 36-36 stitches along one side (left side of piece), work across the 22-28 stitches with pearl rib as before (back of hood), knit up 36-36 stitches along the other side (right side of piece) = 94-100 stitches. Further measurements are taken from this knitted-up row. ROW 1 (wrong side): 1 garter stitch, work pearl rib (purl 2, 1 garter stitch) to end of row. ROW 2 (right side): 1 garter stitch, work pearl rib (knit 2, 1 garter stitch) to end of row Work ROWS 1 and 2 until the piece measures 20-21 cm from the knitted-up row. Cut the strand; the hood is finished. Place the first 47-50 stitches on a stitch holder and the last 47-50 stitches on a second stitch holder (divided mid-back). The stitches are for each scarf-length. Now work an I-cord edge around the hood as follows: I-CORD EDGE: Start bottom right of hood (when worn), knit up 34-36 stitches inside the 1 garter stitch as far as the knitted up row, 20-24 stitches along the cast-on edge mid-front and 34-36 stitches down the left side of the hood = 88-96 stitches around the opening. Cut the strand. Start bottom right and work I-CORD CAST OFF – read description above. Cut the strand. Place the remaining 2 stitches on the stitch holder together with the 47-50 stitches on the left side of the hood = 49-52 stitches for left scarf. Pick up 2 stitches where 2 stitches were cast on for the I-cord edge on the opposite side, place these 2 stitches on the stitch holder with the 47-50 stitches on the right side of the hood = 49-52 stitches for right scarf. RIGHT SCARF: Stitches are cast-on for the scarf, AT THE SAME TIME as stitches are knitted together 2 and 2 from the hood. Start with the stitches at the division mid-back and work together with the right side of the hood as follows. Cast on 30-30 stitches with 1 strand of each quality (2 strands) – this is the cast-on edge that will be sewn afterwards to left part of scarf = mid back. ROW 1 (right side): Work 2 I-CORD EDGE STITCHES – read description above, knit 1, work pearl rib (1 garter stitch, knit 2) until there are 3 stitches left, 1 garter stitch, knit 1, slip 1 stitch knit-wise (= last stitch), knit 2 stitches together from the hood, pass the slipped stitch over the knitted together stitches from the hood = 30-30 stitches. ROW 2 (wrong side): Work pearl rib (purl 2, 1 garter stitch) until there are 3 stitches left, purl 1, 2 I-cord edge stitches. Work ROWS 1 and 2 until the first 46-50 stitches from the hood are picked up (= 46-50 rows worked). There are 3-2 stitches left on the stitch holder (including the 2 stitches picked up in I-cord). Work as follows from the right side: 2 I-cord edge stitches, knit 1, 1 garter stitch, work pearl rib (knit 2, 1 garter stitch) to end of row, knit 1-2 stitches from the stitch holder, knit together 2 and 2 the last stitches 1-0 time = 32-32 stitches. Work as follows from the wrong side: 2 I-cord edge stitches, purl 2 together, 1 garter stitch, work pearl rib (purl 2, 1 garter stitch) until there are 3 stitches left, purl 1, 2 I-cord edge stitches = 31-31 stitches. Work 8 rows of pearl rib as before, with 2 I-cord edge stitches + 1 stocking stitch on each side. On the next row (right side) decrease 1 stitch as follows: Work as before until there are 4 stitches left, knit 2 together, 2 I-cord edge stitches. Continue as before back and forth decreasing like this every 8th row (approx. each 3 cm) until there are 7-7 stitches left. Cast off at the same time as the first and last 2 stitches on the row are knitted together. The scarf measures approx. 96-98 cm from the cast-on edge mid-back. LEFT SCARF: Work in the same way as the right scarf, working along the left side of the hood at the same time as 2 and 2 stitches from the hood are worked together with the first stitch on the row as follows: Cast on 30-30 stitches with 1 strand of each quality (2 strands). ROW 1 (wrong side): Work 2 I-cord edge stitches, purl 1, 1 garter stitch, work pearl rib (purl 2, 1 garter stitch) until there are 2 stitches left, purl 2. ROW 2 (right side): Place 2 stitches from the stitch holder on the left needle, knit 3 together (2 stitches from stitch holder + 1 stitch from scarf), knit 1, work pearl rib (1 garter stitch, knit 2) until there are 4 stitches left, 1 garter stitch, knit 1, 2 I-cord edge stitches = 30-30 stitches. Work ROWS 1 and 2 until the first 46-50 stitches from the hood are picked up (= 46-50 rows worked). There are 3-2 stitches left on the stitch holder (including the 2 stitches from the I-cord cast off). Work as follows from the wrong side: 2 I-cord edge stitches, purl 1, 1 garter stitch, work pearl rib (purl 2, 1 garter stitch) to end of row, purl 1-2 stitches from the stitch holder, purl together 2 and 2 the last stitches 1-0 time = 32-32 stitches. Work as follows from the right side: 2 I-cord edge stitches, slip 1 stitch knit-wise, knit 1, pass the slipped stitch over the knitted stitch, 1 garter stitch, work pearl rib (knit 2, 1 garter stitch) until there are 3 stitches left on the row, knit 1, 2 I-cord edge stitches = 31-31 stitches. Work 7 rows of pearl rib as before, with 2 I-cord edge stitches + 1 stocking stitch on each side. On the next row (right side) decrease 1 stitch as follows: 2 I-cord edge stitches, slip 1 stitch knit-wise, knit 1, pass the slipped stitch over the knitted stitch, work to end of row. Continue as before back and forth decreasing like this every 8th row (approx. each 3 cm) until there are 7-7 stitches left. Cast off at the same time as the first and last 2 stitches are knitted together. The scarf measures approx. 96-98 cm from the cast-on edge mid-back. ASSEMBLY: Sew the cast-on edge of right and left sides of the scarf together mid-back with grafting stitches. |
||||||||||
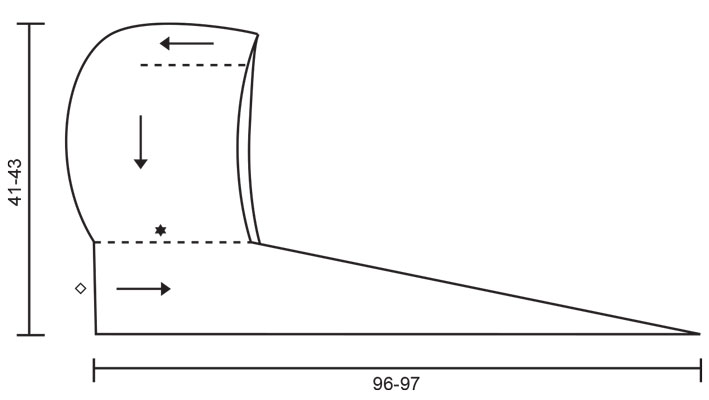
Diagram explanations |
||||||||||
|
||||||||||
|
||||||||||
Have you finished this pattern?Tag your pictures with #dropspattern #winterhughood or submit them to the #dropsfan gallery. Do you need help with this pattern?You'll find 21 tutorial videos, a Comments/Questions area and more by visiting the pattern on garnstudio.com. © 1982-2025 DROPS Design A/S. We reserve all rights. This document, including all its sub-sections, has copyrights. Read more about what you can do with our patterns at the bottom of each pattern on our site. |
||||||||||


With over 40 years in knitting and crochet design, DROPS Design offers one of the most extensive collections of free patterns on the internet - translated to 17 languages. As of today we count 314 catalogues and 11822 patterns translated into English (UK/cm).
We work hard to bring you the best knitting and crochet have to offer, inspiration and advice as well as great quality yarns at incredible prices! Would you like to use our patterns for other than personal use? You can read what you are allowed to do in the Copyright text at the bottom of all our patterns. Happy crafting!
Post a comment to pattern DROPS 253-61
We would love to hear what you have to say about this pattern!
If you want to leave a question, please make sure you select the correct category in the form below, to speed up the answering process. Required fields are marked *.