
Popular categories
Looking for a yarn?


Comments / Questions (31)
![]() Natalia wrote:
Natalia wrote:
Buenos días, si quiero que el escote queda más bajo y el largo total también, podría añadir 4 cm a los tirantes y comenzar la sisa 2 cm antes por ejemplo?? Por otro lado, si quiero usar un hilo más fino ( tensión 24x24) como calculo cuantos metros necesito para la talla L? Gracias!!!
11.06.2025 - 13:03DROPS Design answered:
Hola Natalia, sí, puedes modificarlo como has dicho. Puedes leer aquí cómo calcular un patrón según tu tensión.
15.06.2025 - 23:25
![]() VANESSA wrote:
VANESSA wrote:
On 20.08.23 Christine queried the upper part of A7, and this is the part where I stopped knitting and binned the project because everything was misaligned and I was fed up - you have explained the problem to Christine, but why on earth does the pattern not explain it? Your patterns are so nice but the lack of instruction is infuriating and the amount of questions you get highlights this....
05.06.2025 - 10:31
![]() Faith Pembleton wrote:
Faith Pembleton wrote:
I am making Dazzling Diamonds in size XS/S. When I am working the A1. A2, A3 chart for the second time. It says to work the last 3 stitches of A3. One of the stitches is a ssk and then 2 knit stitches. What should I do-work the half stitch of the ask as a knit stitch? Thanks
21.05.2025 - 00:11DROPS Design answered:
Dear Mrs Pembleton, you shouldn't work the last 3 sts in A.3 but work these last 3 stitches as the last stitch in A.3, ie knit these 3 sts from both right side and wrong side (garter stitch). Happy knitting!
21.05.2025 - 08:42
![]() Mette wrote:
Mette wrote:
Str XXL. Jeg skal samle for- og bagstykke. Er det meningen, at jeg skal "spejle" maskerne på de lige rækker, når jeg strikker rundt? Så en retmaske skal strikkes som vrang og omvendt? For der strikker jeg jo kun fra retsiden. Hvis jeg strikker mønstret uden at spejle, bliver det jo bare glatstrikning. Der mangler noget beskrivelse af fremgangsmåden. Især når man ikke er en rutineret strikker:-)
05.05.2025 - 21:31DROPS Design answered:
Hej Mette, når du strikker rundt, skal du strikke hver række fra retsiden. Så første omgang nederst i diagrammet hele vejen rundt, så anden række i diagrammet hele vejen rundt osv :)
20.05.2025 - 13:35
![]() Gitte Søgaard Zinn wrote:
Gitte Søgaard Zinn wrote:
Hej. Vil I lige tjekke det mønster, det passer ikke med maske antal, jeg er træt af jeres opskrifter, det er som regel fejl i mønstret, nu har jeg købt garnet, og vil strikke den ,men det er sidste gang jeg strikker noget fra drops. Vil I lige tjekke det mønster?? Mvh Gitte
12.04.2025 - 16:23
![]() Lenka wrote:
Lenka wrote:
Dobrý den, jak se prosím spojují dva díly na kruhovou jehlici? Děkuji
20.03.2025 - 08:12DROPS Design answered:
Dobrý den, Lenko, v této video-ukázce naleznete názorný postup, jak spojit práci do kruhové řady. Ať se vám dobře plete!
20.03.2025 - 10:41
![]() Lenka Janíčková wrote:
Lenka Janíčková wrote:
Dobrý den, jak se prosím napojuje druhé ramínko? V popisu je uvedeno: upleteme 10 ok prvního ramínka. A když pletu trup, velikost S, tak návod říká: Přízi odstřihneme, začátek kruhové řady posuneme o 3 oka zpět (tj. začínáme před posledními 3 oky předního dílu). Kterého vzoru se to týká? Děkuji
22.02.2025 - 18:52
![]() Leda wrote:
Leda wrote:
Buongiorno, sto realizzando questo modello,non mi è chiaro il passaggio inizio corpo tagli xs-s "tagliare il filo e iniziare il giro 3 maglie all'interno sul davanti". Si intende che inizio dalla terzultima maglia alla fine del davanti o dalla quarta all'inizio del davanti? Grazie in anticipo della risposta.
29.07.2024 - 16:45DROPS Design answered:
Buongiorno Leda, deve spostare l'inizio 3 maglie all'interno del davanti, quindi nella 4° maglia. Buon lavoro!
30.07.2024 - 15:21
![]() Nathalie wrote:
Nathalie wrote:
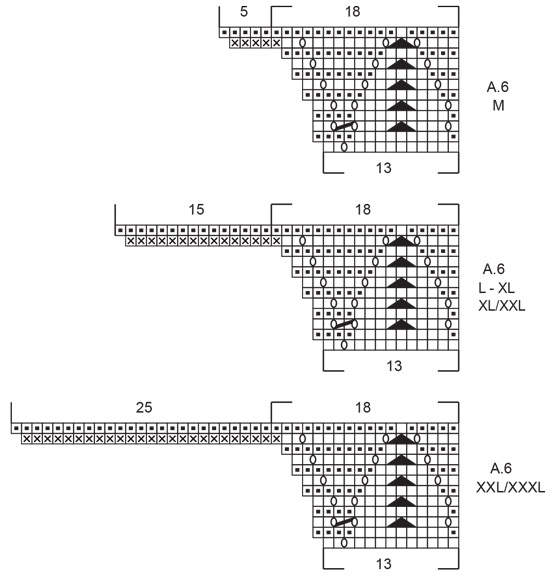
Bonjour ! Je ne comprends pas les explications des augmentations du diagramme A.4 - A.5 et A.6 de ce modèle en taille XL. D'avance merci de votre aide !
30.06.2024 - 11:44DROPS Design answered:
Bonjour Nathalie, les augmentations figurent dans les diagrammes A.4 et A.5 (vous diminuez 2 mailles mais vous faites 3 jetés (à partir du 5ème rang) = vous augmentez 1 m au 1er rang, pas d'augmentations au 3ème puis 1 augmentation à partir du 5ème; Dans A.6, vous montez les mailles à gauche à la fin d'un rang sur l'endroit (avant-dernier rang), avant cela, vous augmentez de la même façon que dans A.4 et A.5; mettez des marqueurs entre chaque diagramme, cela pourra vous aider à bien suivre votre nombre de mailles à chaque rang. Bon tricot!
01.07.2024 - 13:46
![]() Pernille Mortensen wrote:
Pernille Mortensen wrote:
Jeg strikker xxl og synes 4 cm til stropperne på hver side virker som meget kort. Den vil komme til at sidde helt oppe i halsen. Kan det passe?
29.06.2024 - 20:09DROPS Design answered:
Hej Pernille, husk at du også skal strikke 4 cm strop på forstykket - og du kan jo altid forlænge dem :)
02.07.2024 - 12:25
|
||||||||||||||||||||||
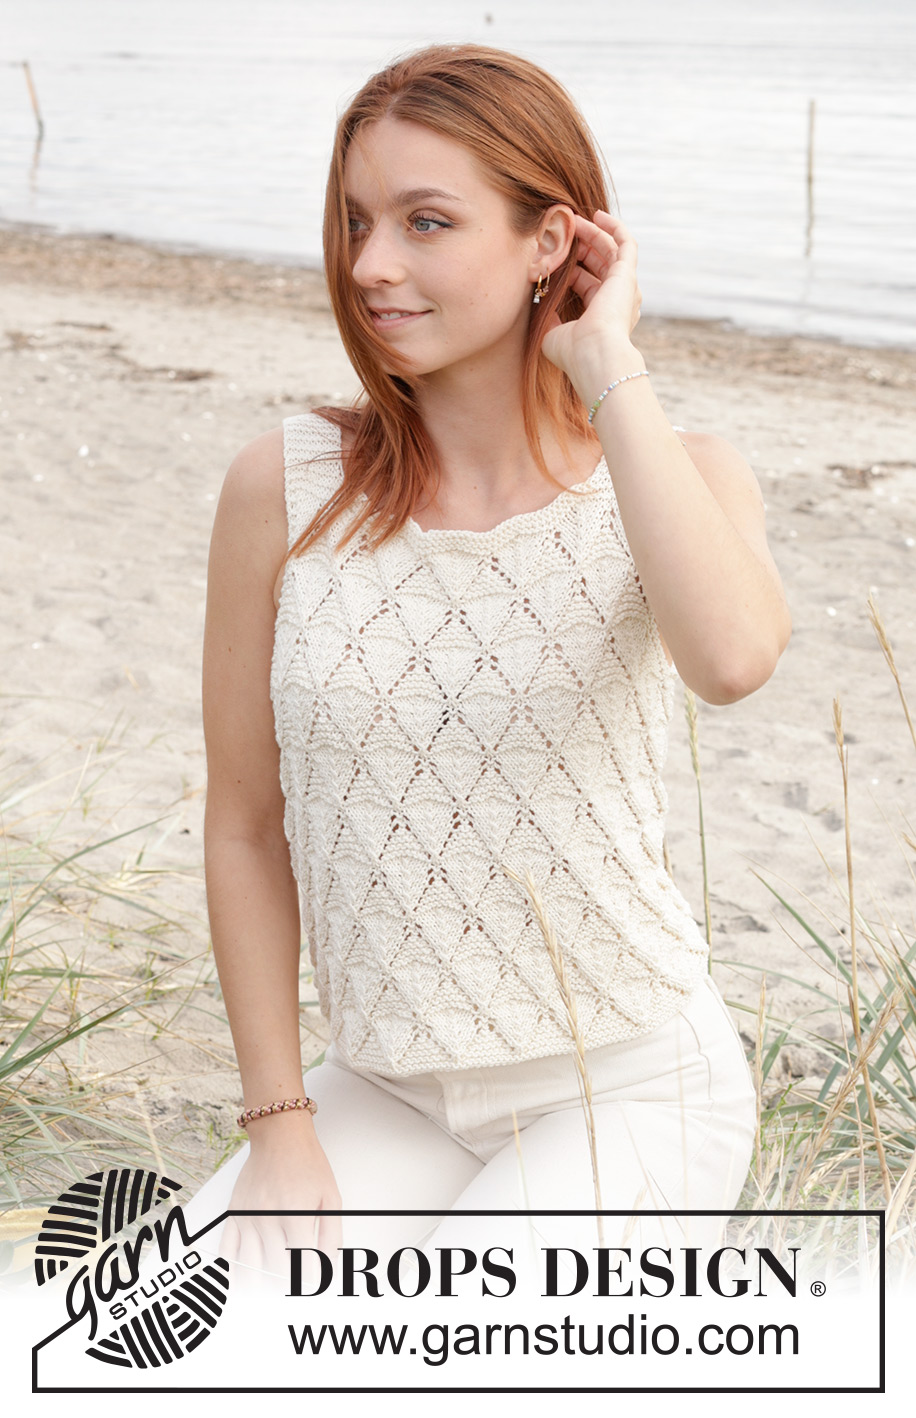
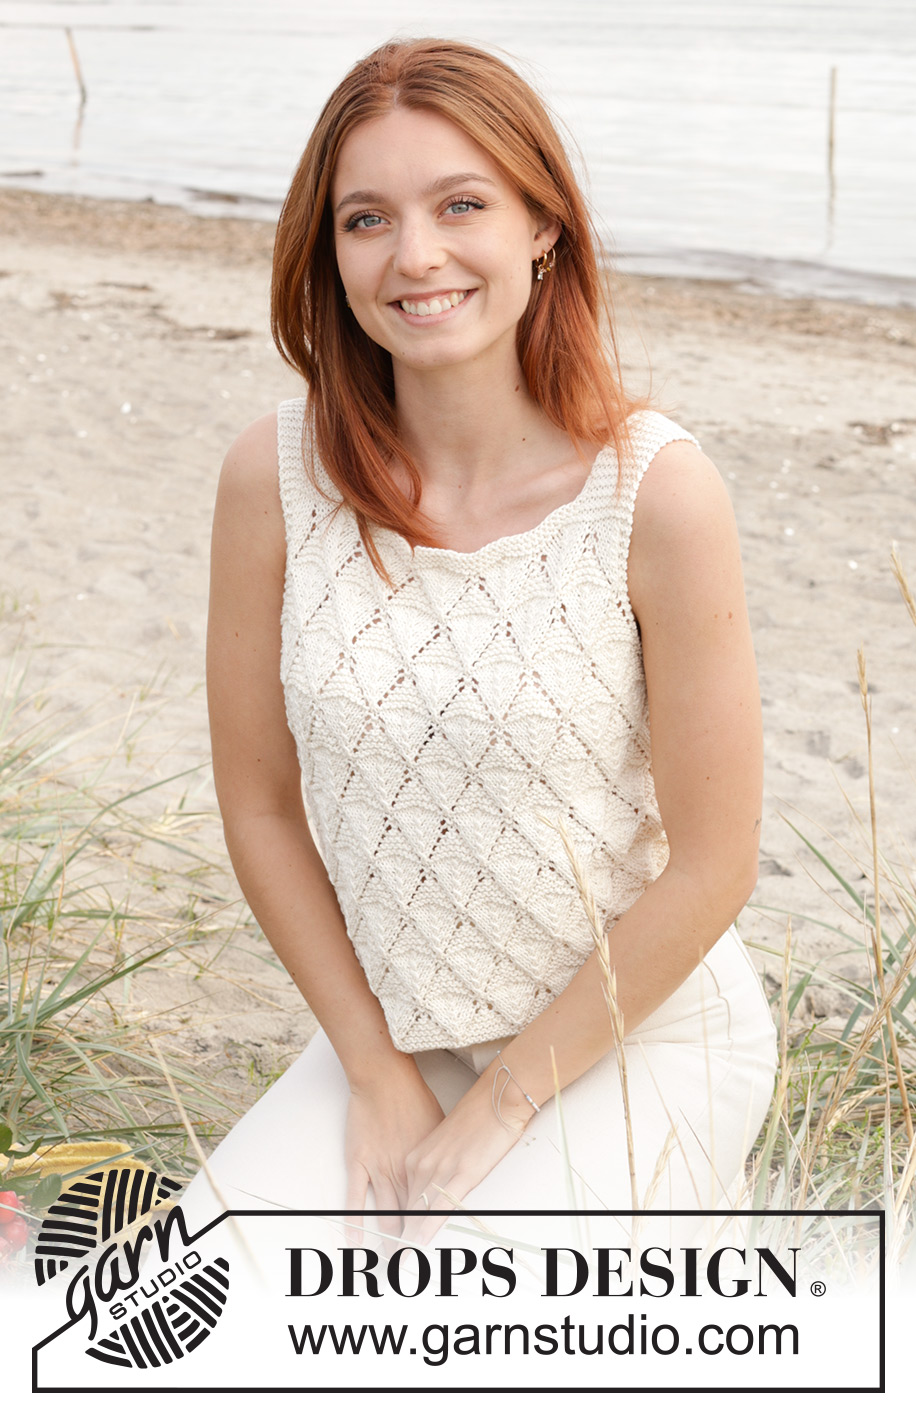
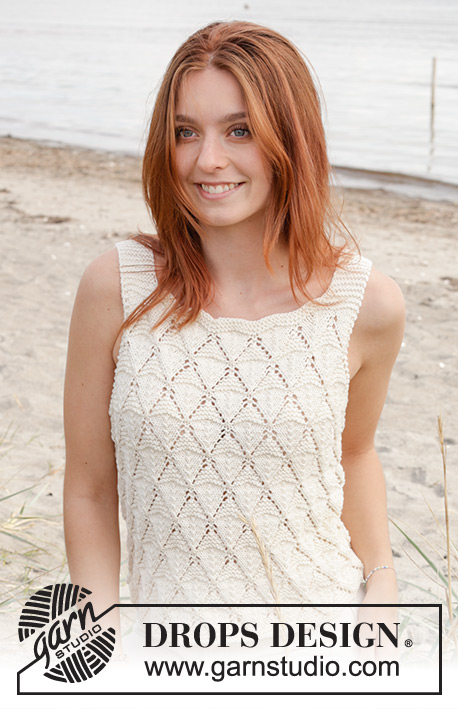
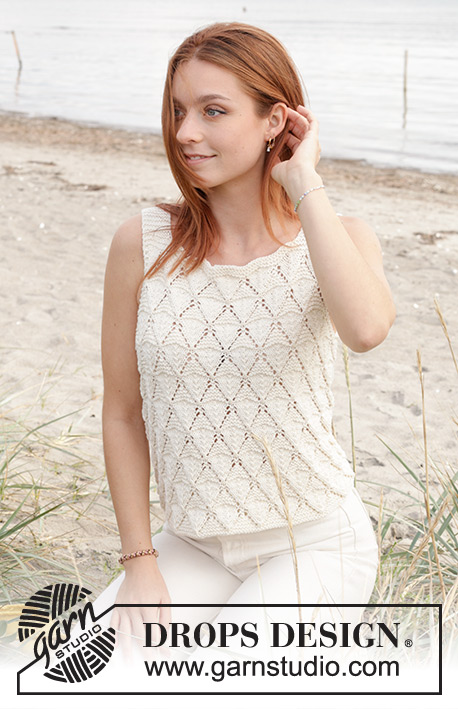
Dazzling Diamonds Top#dazzlingdiamondstop |
||||||||||||||||||||||
 |
 |
|||||||||||||||||||||
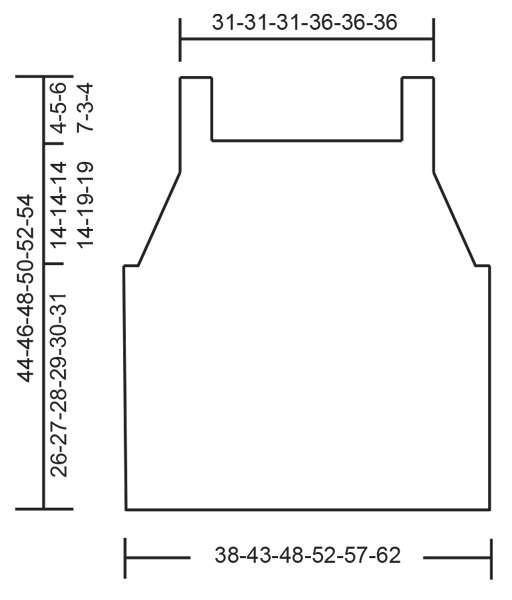
Knitted top in DROPS Muskat or DROPS Cotton Merino. Piece is knitted top down with straps and lace pattern. Size XS – XXXL.
DROPS 240-8 |
||||||||||||||||||||||
|
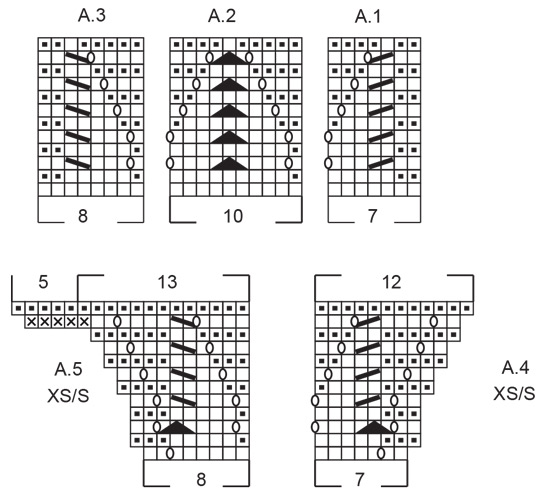
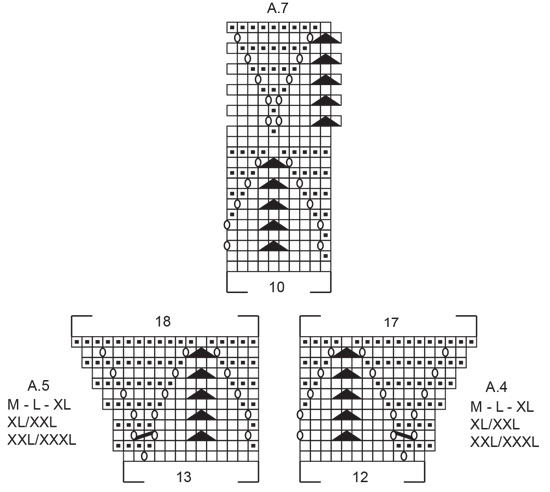
---------------------------------------------------------- EXPLANATION FOR THE PATTERN: ---------------------------------------------------------- GARTER STITCH (back and forth): Knit all rows. 1 ridge vertically = knit 2 rows. PATTERN: See diagrams A.1 to A.7. Choose diagram for your size (applies to A.4, A.5 and A.6). Diagrams show all rows in pattern seen from the right side. ---------------------------------------------------------- START THE PIECE HERE: ---------------------------------------------------------- TOP - SHORT OVERVIEW OF THE PIECE: Worked top down. Work back piece and front piece back and forth on circular needle separately. Then put pieces together and work in the round until finished measurements. Sew straps together on each shoulder. BACK PIECE: Cast on 10 stitches on double pointed needles size 4 mm with DROPS Muskat or DROPS Cotton Merino. Work back and forth in GARTER STITCH - read explanation above. Work until piece measures 4-5-6-7-3-4 cm lightly stretched. First strap is done, cut the yarn and put piece aside. Knit another strap the same way on a circular needle size 4 mm. At the end of last row cast on 45-45-45-55-55-55 new stitches on row, then work over the 10 stitches from first strap (make sure that the ridges fit on both straps). There are 65-65-65-75-75-75 stitches on needle. Now measure piece from here! Work in garter stitch back and forth until 3 ridges have been worked over all stitches and next row is worked from right side. Work A.1 over 7 stitches, work A.2 over the next 50-50-50-60-60-60 stitches, and A.3 over 8 stitches. Work diagrams 1 time vertically. Now work as follows in the different sizes: SIZE XS/S: = 65 stitches. Work the first 2 stitches in A.1, work A.2 over the next 60 stitches, 3 stitches remain on needle and work the last 3 stitches as last stitch in A.3. Work diagrams 1 time vertically. Work A.4 over 7 stitches, work A.2 over 50 stitches, work A.5 over 8 stitches. When the diagram has been worked 1 time vertically, there are 80 stitches on row. Increase in size XS/S is done. Piece measures approx. 14 cm from where straps were put together. SIZE M, L and XL: = 65-65-75 stitches. Work A.4 over 12 stitches, work A.2 over the next 40-40-50 stitches, and A.5 over 13 stitches. When diagrams have been worked 1 time vertically, there are 75-75-85 stitches on row. Work A.4 over 12 stitches, work A.2 over 50-50-60 stitches, work A.6 over 13 stitches. When diagrams have been worked 1 time vertically, there are 90-100-110 stitches on needles. Increase in size M, L and XL is done. Piece measures approx. 14-14-14 cm from where straps were put together. SIZE XL/XXL AND XXL/XXXL: = 75-75 stitches. Work A.4 over 12 stitches, work A.2 over 50-50 stitches, work A.5 over 13 stitches. When diagrams have been worked 1 time vertically, there are 85-85 stitches on needles. Work A.4 over 12 stitches, work A.2 over 60-60 stitches, work A.5 over 13 stitches. When diagrams have been worked 1 time vertically there are 95-95 stitches on needles. Work A.4 over 12 stitches, work A.2 over 70-70 stitches, work A.6 over 13 stitches. When diagrams have been worked 1 time vertically, there are 120-130 stitches on needles. Increase in size XL/ XXL and XXL/ XXL is done. Piece measures approx. 19-19 cm from where straps were put together. ALL SIZES: = 80-90-100-110-120-130 stitches. Slip stitch on a thread or an extra needle. Now work front piece. FRONT PIECE: Work as on back piece. When front piece is done, slip stitches from back piece on circular needle together with front piece. Slip the stitches on needle to work directly from front piece to back piece. Now measure piece from here. BODY: = 160-180-200-220-240-260 stitches. NOTE! The round is now displaced in the different sizes as follows: SIZE XS/S: Cut the yarn and begin round 3 stitches in on front piece! SIZE M, L, XL, XL/XXL and XXL/XXXL: Knit 2 and begin round here. ALL SIZES: Insert 1 marker thread at the beginning of round so make it easy to see where the round begins and ends. Work A.7 over all stitches. Work the diagram until piece is measures approx. 26-27-28-29-30-31 cm from where work was put together or after one whole or half repetition vertically. Cast off by knitting next round. ASSEMBLY: Sew tog straps on shoulder. |
||||||||||||||||||||||
Diagram explanations |
||||||||||||||||||||||
|
||||||||||||||||||||||
|
||||||||||||||||||||||
|
||||||||||||||||||||||
|
||||||||||||||||||||||
|
||||||||||||||||||||||
Have you finished this pattern?Tag your pictures with #dropspattern #dazzlingdiamondstop or submit them to the #dropsfan gallery. Do you need help with this pattern?You'll find 21 tutorial videos, a Comments/Questions area and more by visiting the pattern on garnstudio.com. © 1982-2025 DROPS Design A/S. We reserve all rights. This document, including all its sub-sections, has copyrights. Read more about what you can do with our patterns at the bottom of each pattern on our site. |
||||||||||||||||||||||


With over 40 years in knitting and crochet design, DROPS Design offers one of the most extensive collections of free patterns on the internet - translated to 17 languages. As of today we count 314 catalogues and 11822 patterns translated into English (UK/cm).
We work hard to bring you the best knitting and crochet have to offer, inspiration and advice as well as great quality yarns at incredible prices! Would you like to use our patterns for other than personal use? You can read what you are allowed to do in the Copyright text at the bottom of all our patterns. Happy crafting!
Post a comment to pattern DROPS 240-8
We would love to hear what you have to say about this pattern!
If you want to leave a question, please make sure you select the correct category in the form below, to speed up the answering process. Required fields are marked *.