
Popular categories
Looking for a yarn?


Comments / Questions (12)
![]() Ann Joshage wrote:
Ann Joshage wrote:
Hej varför är början av vänstra sidan av era mönster borta? Oläs bar då hela texten inte kommer med.
07.10.2023 - 12:21
![]() Mary Nielsen wrote:
Mary Nielsen wrote:
Hej flot nederdel og elegant Ved afsnittet, hækle information 2 , hvad skal hækle for at for en spids mønster ved sidesømmen ? Skal jeg starte med 2 stgm i hver af de 2 sidste stgm ? Jeg har sand farve safran som jeg glædes til at lave den i . Please as soon as possible..tusind tak. Mary.
03.10.2023 - 15:16DROPS Design answered:
Hej Mary, jeg forstår ikke spørgsmålet... du får automatisk spidserne hvis du følger opskriften, zig-zag mønsteret starter ved 1.RÆKKE og alle rækker beskrives i opskriften :)
12.10.2023 - 15:43
![]() Lisbeth Høyer wrote:
Lisbeth Høyer wrote:
Forskyder den første stangmaske på en omgang sig ikke to fordi man slår 2 m om luft maske bue, hvad gør man så når man kommer hen til at man skal strikke de 3 m sammen og samtidig skifte farve til en ny omgang ?
26.08.2023 - 09:25DROPS Design answered:
Hei Lisebeth. Litt usikker på hvor du er i oppskriften, skriv gjerne hvilken rad du hekler ( og str. du hekler). Ta også en titt på hvelkevidoene som du finner nederst på oppskriften. mvh DROPS Design
11.09.2023 - 11:55
![]() Lisbeth Høyer wrote:
Lisbeth Høyer wrote:
Jeg havde glemt de 3 luftmasker, inden man begynder at hækle rundt.
24.08.2023 - 12:29
![]() Lisbeth Høyer wrote:
Lisbeth Høyer wrote:
Jeg har det samme problem ,når man begynder at hækle rundt som Christina, skal der ikke laves en bue af 3 luftmasker i samlingen, så det også bliver sik sak mønster der, det stemmer heller ikke med antal masker. Vil gerne se en nederdel bagfra med samlingen om muligt .
24.08.2023 - 12:01
![]() Aslaug Lerbæk Lerbaek wrote:
Aslaug Lerbæk Lerbaek wrote:
Jeg vil hekle skjørtet ensfarget - hvor nye garn da?
29.06.2023 - 17:13DROPS Design answered:
Hej Aslaug, det har vi ingen information om, men vi gætter at du skal bruge ca 500 g i de mindste størrelser og ca 700 g i de største størrelser :)
30.06.2023 - 09:03
![]() Tze Moi Ang wrote:
Tze Moi Ang wrote:
I finished my skirt and noticed the curly result (yellow stripe immediately after the waist band. Why is that and if I were to make another one, can I improve the design? And do you have other color combinations for suggestion? Thanks.
19.04.2023 - 11:53DROPS Design answered:
Dear Mrs Ang, you can block your skirt, ie spray water and let dry flat, this should help. Enjoy your skirt!
19.04.2023 - 13:11
![]() Cherry Lim wrote:
Cherry Lim wrote:
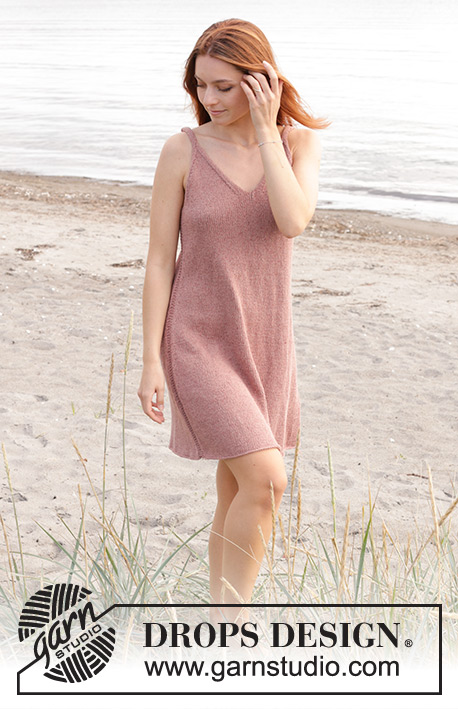
It would be very nice if this zig-zag pattern in the form of a dress with a slightly flared skirt can be created, similar to the knitted dress version :)
08.04.2023 - 17:55
![]() Christina Rasmussen wrote:
Christina Rasmussen wrote:
Hej med jer Når jeg begynder at hækle rundt, så siger opskriften ikke noget om at tage ud i de første 2 og sidste 2 masker… men så passer maskerne ikke med 7 stm efterfulgt af 2x3 indtagninger og der er ikke siksak mønster i samlingen… skal der ikke tages ud på en eller dansen måde??? Håber mit spørgsmål giver mening😅
26.03.2023 - 13:37DROPS Design answered:
Hej Christina, det stemmer, du tager ud i luftmaskerne som beskrevet i opskriften, da vil antal masker stemme :)
12.04.2023 - 14:40
![]() Dinah wrote:
Dinah wrote:
🇧🇷 Quais os passos para aumentar, ou seja um tamanho maior para mulheres cheinhas? São múltiplos de quanto? Obrigada.
20.03.2023 - 17:24DROPS Design answered:
Bom dia, Este modelo tem explicações para os tamanhos S - M - L - XL - XXL - XXXL Basta seguir as instruções para os números acima. Bom croché!
21.03.2023 - 09:54
|
|
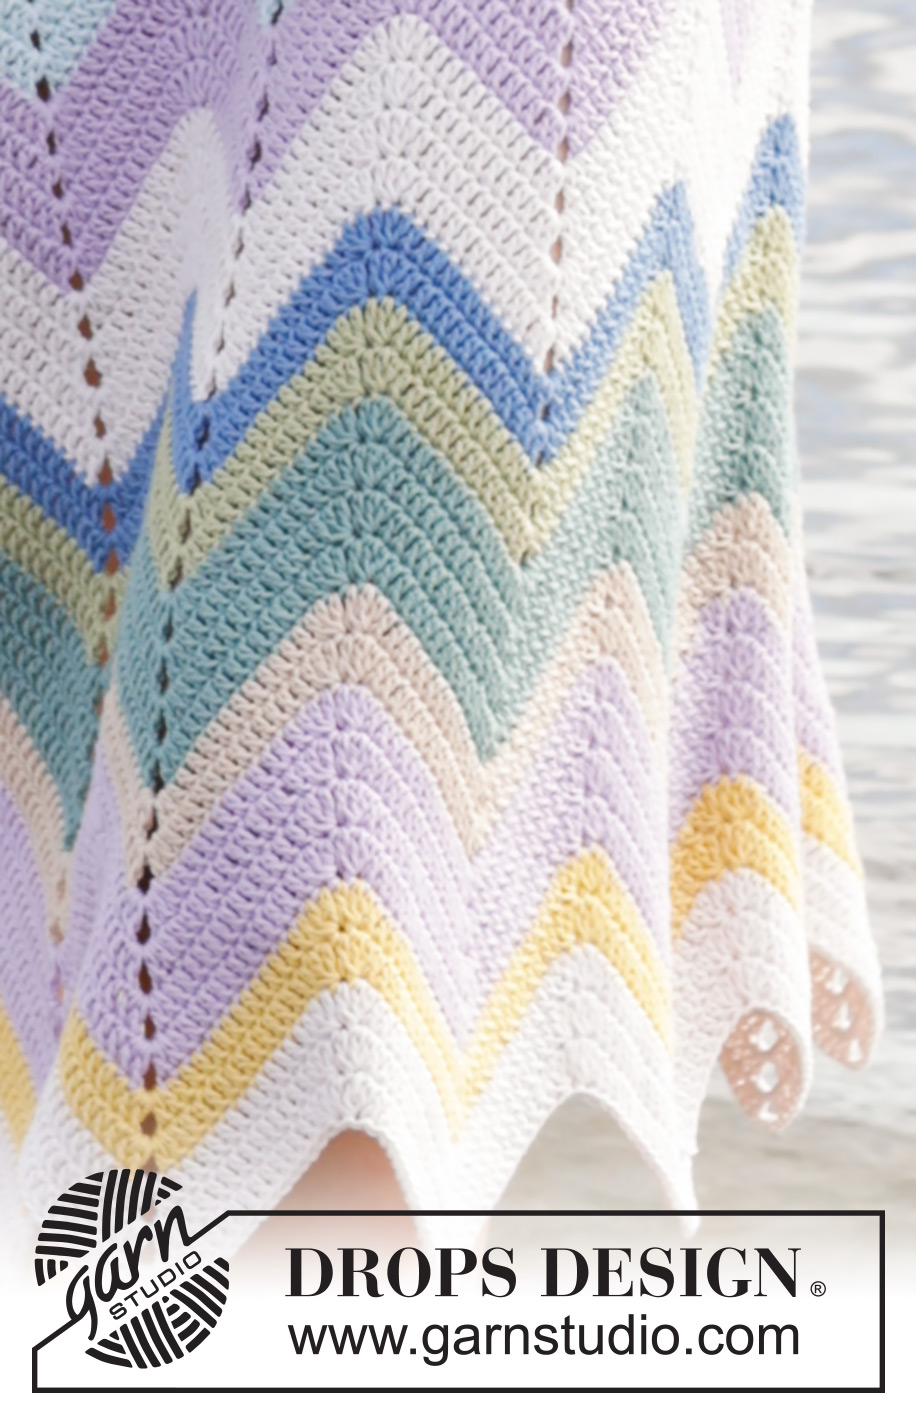
Reflections of Aurora#reflectionsofauroraskirt |
|
 |
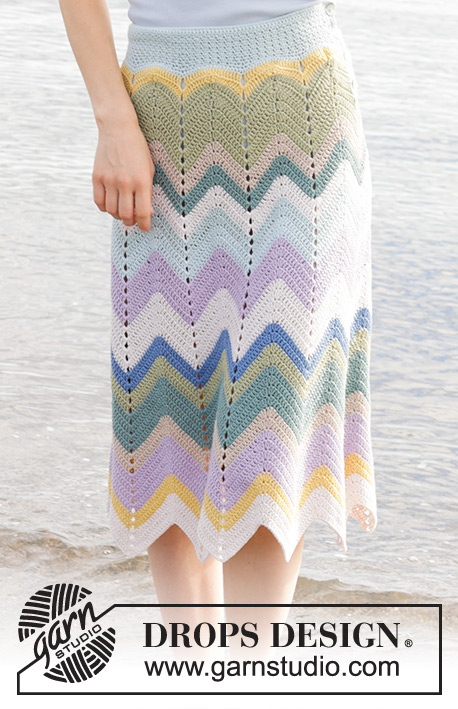 |
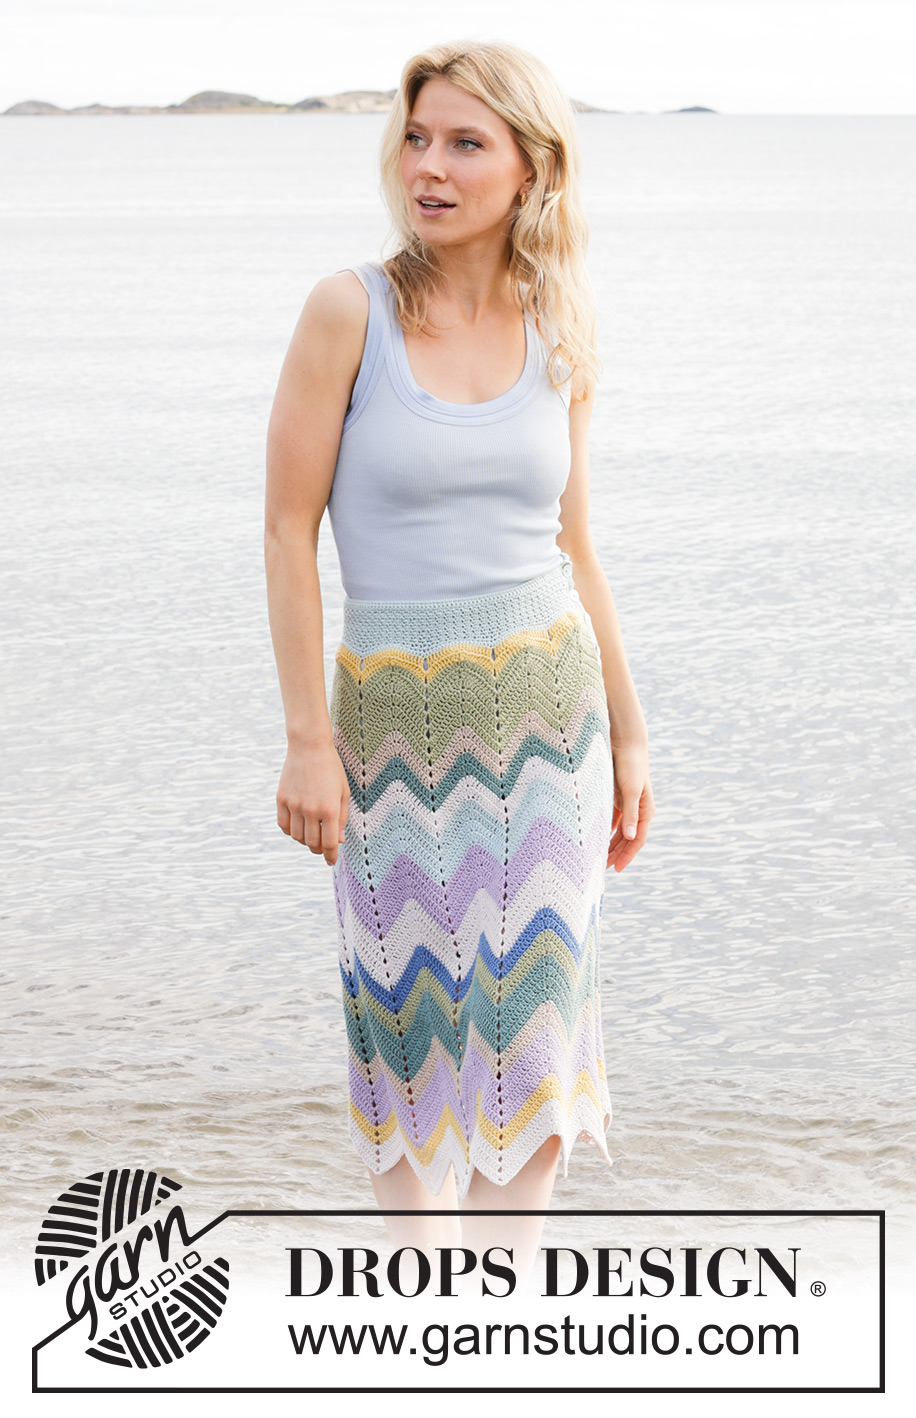
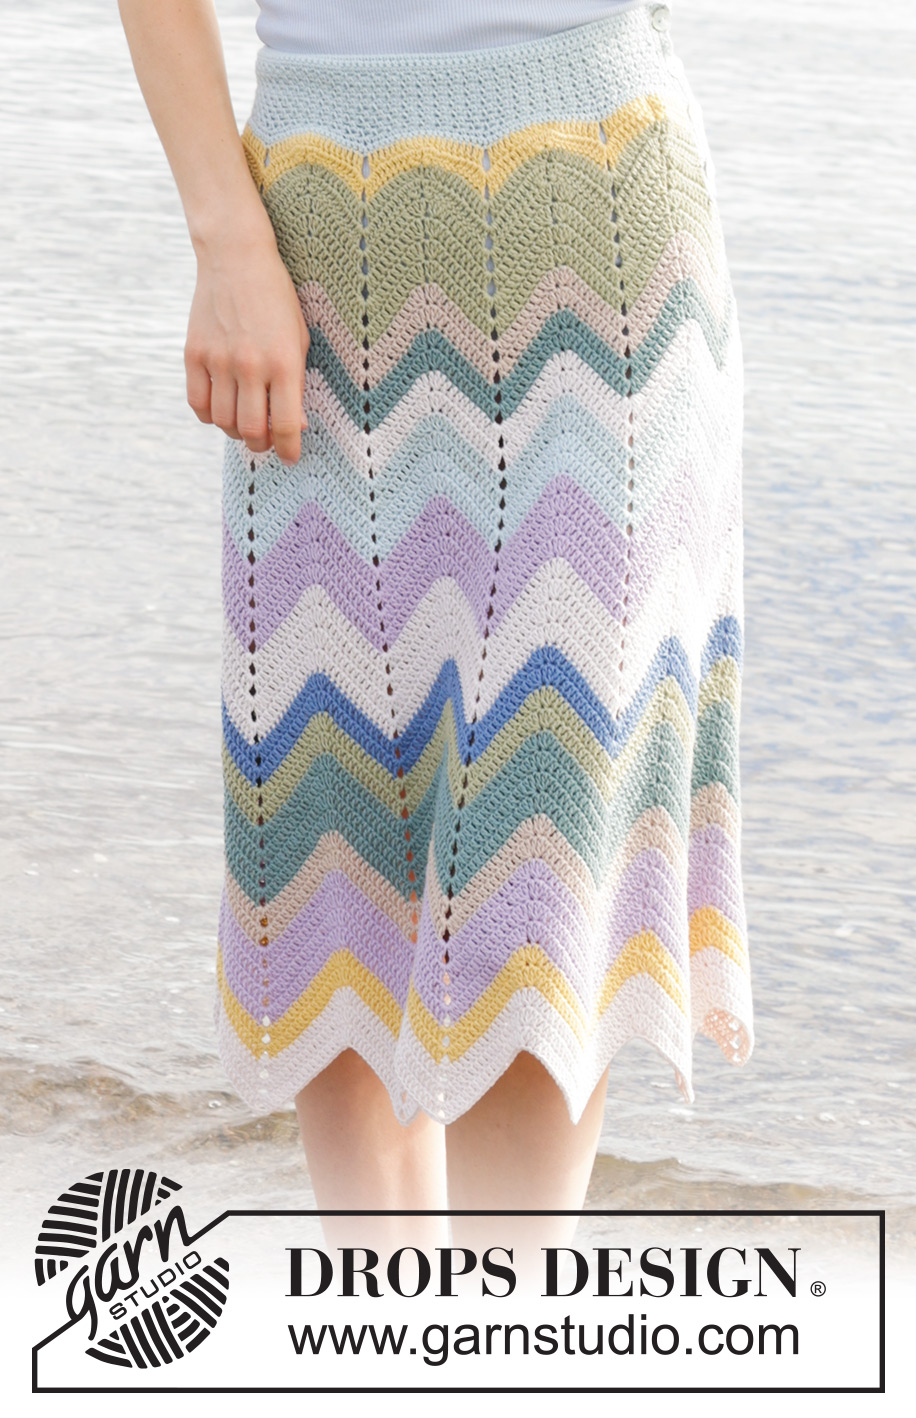
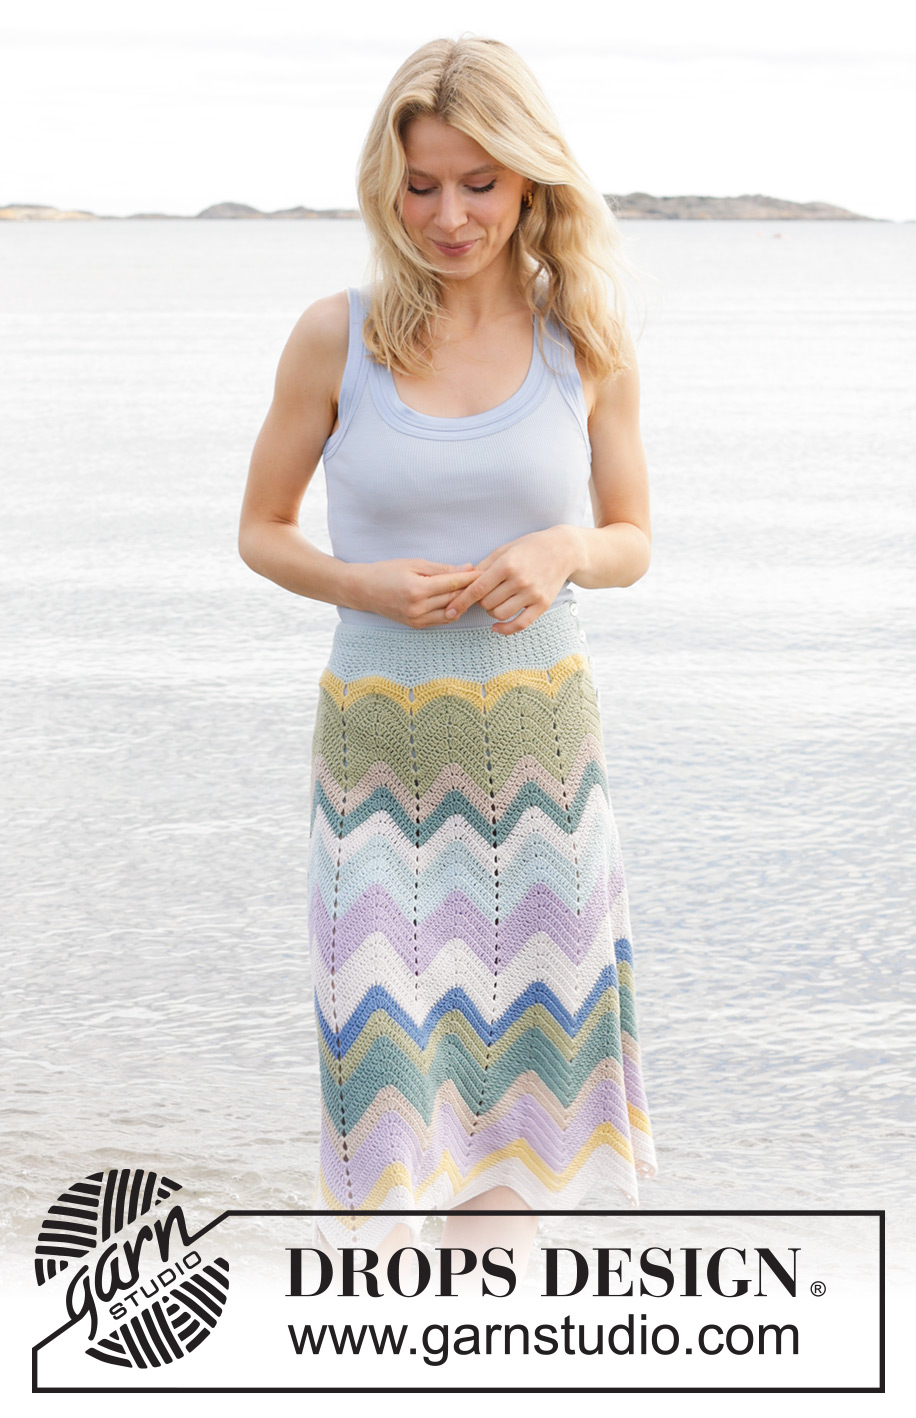
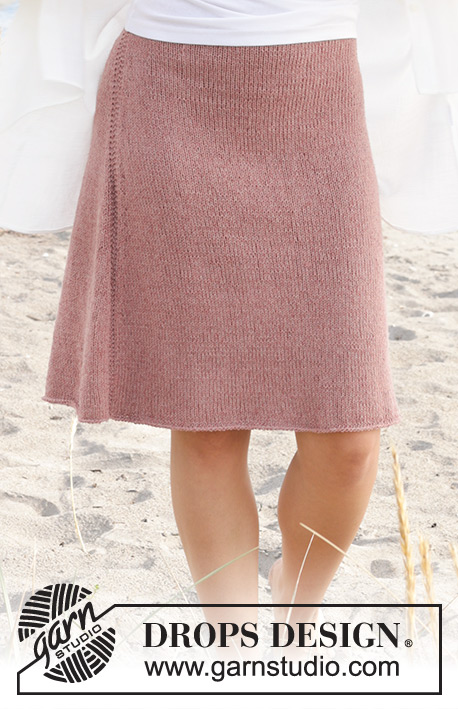
Crocheted skirt in DROPS Safran. The piece is worked top down with zig-zag pattern and stripes. Sizes S - XXXL.
DROPS 239-27 |
|
|
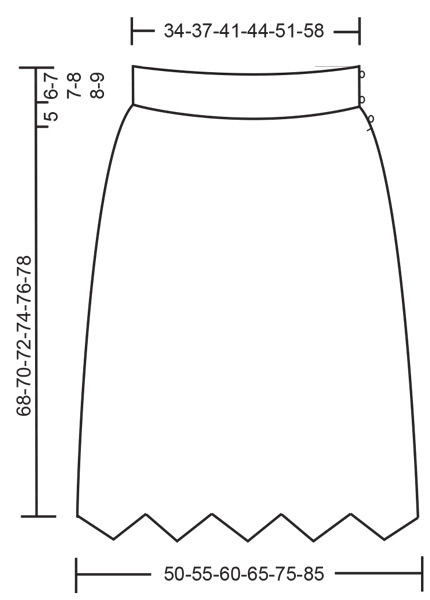
------------------------------------------------------- EXPLANATIONS FOR THE PATTERN: ------------------------------------------------------ CROCHET INFORMATION-1: Each row of double crochets turns with 1 chain stitch which does not replace the first double crochet. CROCHET INFORMATION-2: On each row of zig-zag pattern replace the first treble crochet with 3 chain stitches. The round finishes with 1 slip stitch in the 3rd chain stitch at the beginning of the round. CHAIN STITCH: If you work outermost on the hook the chain stitch will often be too tight; 1 chain stitch should be as long as 1 double/treble crochet is wide. STRIPES: NOTE! The stripes finish differently in the different sizes: 2 rows colour 62, lemon 6 rows colour 65, pistachio 2 rows colour 64, light beige 2 rows colour 63, sea green 2 rows colour 72, chalk 4 rows colour 50, mint 4 rows colour 70, sweet orchid 4 rows colour 72, chalk 2 rows colour 06, denim blue 2 rows colour 65, pistachio 4 rows colour 63, sea green 2 rows colour 64, light beige 4 rows colour 70, sweet orchid 2 rows colour 62, lemon 3 rows colour 72, chalk 2 rows colour 50, mint 2 rows colour 63, sea green 2 rows colour 64, light beige 4 rows colour 06, denim blue If all the stripes are finished, begin again from the top. DECREASE TIP: WORK 2 STITCHES TOGETHER: * Make 1 yarn over, insert the hook through the next stitch, pick up the strand and pull it through the stitch, make 1 yarn over and pull it through the first 2 loops on the hook *, work from *-* 1 more time, make 1 yarn over and pull it through all 3 loops on the hook (1 stitch decreased). WORK 3 STITCHES TOGETHER: * Make 1 yarn over, insert the hook through the next stitch, pick up the strand and pull it through the stitch, make 1 yarn over and pull it through the first 2 loops on the hook *, work from *-* 2 more times, make 1 yarn over and pull it through all 4 loops on the hook (2 stitches decreased). ------------------------------------------------------- START THE PIECE HERE: ------------------------------------------------------- SKIRT – SHORT OVERVIEW OF THE PIECE: The piece is worked top down, back and forth until the split is finished then in the round. SKIRT: Work 151-165-181-195-225-255 CHAIN STITCHES – read description above, with hook size 3.5 mm and colour mint DROPS Safran. Work 1 double crochet in the 2nd chain stitch from the hook then 1 double crochet in each chain stitch = 150-164-180-194-224-254 double crochets + 1 chain stitch – read CROCHET INFORMATION-1. Work 2 rows with 1 double crochet in each double crochet. Work the next row as follows: 2 chain stitches, skip 1 double crochet, 1 double crochet in the next double crochet, * 1 chain stitch, skip 1 double crochet, 1 double crochet in the next double crochet *, work from *-* to the end of the row = 75-82-90-97-112-127 double crochets and 75-82-90-97-112-127 chain stitches. Work the next row as follows: 2 chain stitches, skip the first double crochet and work 1 double crochet around the first chain stitch, * 1 chain stitch, skip 1 double crochet, 1 double crochet around the next chain stitch *, work from *-* to the end of the row. Repeat this last row until the piece measures 5-6-6-7-7-8 cm. REMEMBER THE CROCHET TENSION! Work 1 row with 1 double crochet in each double crochet and 1 double crochet around each chain stitch = 150-164-180-194-224-254 stitches. On the next row increase evenly as follows: * 1 double crochet in each of the 2 first double crochets, 2 double crochets in the next double crochet *, work from *-*, until there are 0-2-0-2-2-2 double crochets left, work 2 double crochets in each of these double crochets = 200-220-240-260-300-340 stitches. Work STRIPES– read description above – AT THE SAME TIME as you work zig-zag pattern back and forth as follows: ROW 1 (right side): 3 chain stitches (1 treble crochet), 1 treble crochet in each of the next 7 double crochets, * work the next 4 stitches together 2 and 2 – read DECREASE TIP, 1 treble crochet in each of the next 8 double crochets, 3 chain stitches, 1 treble crochet in each of the next 8 double crochets *, work from *-* 8-9-10-11-13-15 more times, work the next 4 stitches together 2 and 2, 1 treble crochet in each of the last 8 double crochets = 180-198-216-234-270-306 stitches. ROW 2: 3 chain stitches (1 treble crochet) + 1 treble crochet in the first treble crochet, 2 treble crochets in each of the next 2 treble crochets, 1 treble crochet in each of the next 3 treble crochets, * work the next 6 treble crochets together 3 and 3, 1 treble crochet in each of the next 6 treble crochets, 3 treble crochets around the chain-space, 3 chain stitches, 3 treble crochets around the same chain-space, 1 treble crochet in each of the next 6 treble crochets*, work from *-* 8-9-10-11-13-15 more times, work the next 6 treble crochets together 3 and 3, 1 treble crochet in each of the next 3 treble crochets and 2 treble crochets in each of the last 3 treble crochets = 200-220-240-260-300-340 stitches. ROW 3: 3 chain stitches (1 treble crochet) + 1 treble crochet in the first treble crochet, 2 treble crochets in the next treble crochet, 1 treble crochet in each of the next 5 treble crochets, * work the next 6 treble crochets together 3 and 3, 1 treble crochet in each of the next 7 treble crochets, 2 treble crochets around the chain-space, 3 chain stitches, 2 treble crochets around the same chain-space, 1 treble crochet in each of the next 7 treble crochets *, work from *-* 8-9-10-11-13-15 more times, work the next 6 treble crochets together 3 and 3, 1 treble crochet in each of the next 5 treble crochets, 2 treble crochets in each of the last 2 treble crochets = 200-220-240-260-300-340 stitches. Repeat row 3 one more time, turn. The piece measures approx. 11-12-12-13-13-14 cm. The split is finished; work the next row as follows: 3 chain stitches + 1 treble crochet in the first treble crochet, 2 treble crochets in the next treble crochet, 1 treble crochet in each of the next 5 treble crochets, * work the next 6 treble crochets together 3 and 3, 1 treble crochet in each of the next 7 treble crochets, 2 treble crochets around the chain-space, 3 chain stitches, 2 treble crochets around the same chain-space, 1 treble crochet in each of the next 7 treble crochets *, work from *-* 8-9-10-11-13-15 more times, work the next 6 treble crochets together 3 and 3, 1 treble crochet in each of the next 5 treble crochets, 2 treble crochets in each of the last 2 treble crochets on the round, 3 chain stitches, 1 slip stitch in the 3rd chain stitch at the beginning of the round = 200-220-240-260-300-340 stitches. Work the next round as follows - read CROCHET INFORMATION-2: * 1 treble crochet in each of the first 7 treble crochets, work the next 6 treble crochets together 3 and 3, 1 treble crochet in each of the next 7 treble crochets, 2 treble crochets around the chain-space, 3 chain stitches, 2 treble crochets around the same chain-space *, work from *-* to the end of the round. Continue in the round with zig-zag pattern. AT THE SAME TIME on the next round increase 2 treble crochets in each repeat by working 3 treble crochets + 3 chain stitches + 3 treble crochets around each chain-space instead of 2 treble crochets + 3 chain stitches + 2 treble crochets (increase from 10 to 11 treble crochets along each angle) = 220-242-264-286-330-374 stitches. Repeat this increase every 6th round 5 more times = 320-352-384-416-480-544 stitches (there are now 16 treble crochets along each angle). Continue working until the skirt measures 68-70-72-74-76-78 cm at the longest point. Cut and fasten the strands. BUTTON-LOOPS: Along the back of the split work a band with button-loops: Work 3 rows of double crochets and colour mint. Work 3-3-3-4-4-4 button-loops evenly on the next row: 1 button-loop = 3 chain stitches, skip 1 cm, work 1 double crochet in the next stitch. The bottom loop is 1 cm from the bottom of the split and the top loop 1 cm from the top. Work back as follows: 1 double crochet in each double crochet and 3 double crochets around each chain-space. Cut and fasten the strand. BUTTON-LINING: Along the other side of the split work 5 rows of double crochets with colour mint. Cut and fasten the strand Sew the buttons onto row 1, matching the button-loops. |
|
|
|
Have you finished this pattern?Tag your pictures with #dropspattern #reflectionsofauroraskirt or submit them to the #dropsfan gallery. Do you need help with this pattern?You'll find 12 tutorial videos, a Comments/Questions area and more by visiting the pattern on garnstudio.com. © 1982-2025 DROPS Design A/S. We reserve all rights. This document, including all its sub-sections, has copyrights. Read more about what you can do with our patterns at the bottom of each pattern on our site. |
|


With over 40 years in knitting and crochet design, DROPS Design offers one of the most extensive collections of free patterns on the internet - translated to 17 languages. As of today we count 314 catalogues and 11822 patterns translated into English (UK/cm).
We work hard to bring you the best knitting and crochet have to offer, inspiration and advice as well as great quality yarns at incredible prices! Would you like to use our patterns for other than personal use? You can read what you are allowed to do in the Copyright text at the bottom of all our patterns. Happy crafting!
Post a comment to pattern DROPS 239-27
We would love to hear what you have to say about this pattern!
If you want to leave a question, please make sure you select the correct category in the form below, to speed up the answering process. Required fields are marked *.