
Popular categories
Looking for a yarn?


Comments / Questions (13)
![]() Astrid Brokate wrote:
Astrid Brokate wrote:
Hallo, eine tolle Anleitung. Werde ich nachstricken. Was für eine Hunderasse ist das? Der Hund gefällt mir sehr. Liebe Grüße von Astrid
01.12.2024 - 10:02
![]() Lotte Østergaard wrote:
Lotte Østergaard wrote:
Hej, hvis jeg skal lave denne i ensfarvet air , hvor meget garn skal jeg da ca. bruge? På forhånd tak - Lotte Ø
22.11.2024 - 10:06DROPS Design answered:
Hej Lotte, du skal nok bruge 1 nøgle mere :)
22.11.2024 - 15:18
![]() Charlotte wrote:
Charlotte wrote:
Hvis jeg vil strikke denne model i én farve, hvor meget garn skal da jeg bruge (str. M)?
20.11.2024 - 21:06DROPS Design answered:
Hej Charlotte, så skal du nok bruge 1 nøgle mere :)
22.11.2024 - 13:53
![]() Patricia Ramos wrote:
Patricia Ramos wrote:
Er det muligt at fremskaffe denne opskrift i en størrelse Large? Jeg takker på forhånd :)
19.09.2024 - 06:24DROPS Design answered:
Hei Patricia. Det har vi dessverre ikke muligheten til. mvh DROPS Design
19.09.2024 - 09:48
![]() Anni Jetten wrote:
Anni Jetten wrote:
Ich würde gerne diesen Hundepullover stricken. Allerdins hat mein Hund eine Brustweite von 71 cm und eine Länge von 65 cm. Wie sind dann die Maschenzahlen und Zu- und Abnahmen?
22.07.2024 - 10:24DROPS Design answered:
Liebe Anni, es tut mir leid, aber können wir Ihnen keine weiteren Größen oder angepasste Maschenzahlen zur Verfügung stellen. Die Hundepullover-Anleitungen sind bei uns meistens nur bis 52 cm Brustweite berechnet.
26.07.2024 - 14:07
![]() Irene wrote:
Irene wrote:
Buonasera, nel paragrafo dedicato al bordo delle zampe si dice di riprendere 56 maglie per la taglia M, ma dopo aver proseguito per 13 cm dalla divisione ho solo 38 maglie (incluse le 4 avviate per il sottomanica). Dovrei fare degli aumenti oppure proseguire con la lavorazione in piano per più di 13 cm? Grazie mille!
15.10.2023 - 19:42DROPS Design answered:
Buonasera Irene, in quel punto deve riprendere dalle 40 alle 56 maglie: abbiamo modificato leggermente il testo. Buon lavoro!
19.10.2023 - 23:42
![]() Stefanie Hellbach wrote:
Stefanie Hellbach wrote:
Meine Tochter wünscht sich den Pullover im Partnerlook mit ihrem Hund. Der Pullover für meine Tochter ist fertig, aber der Hund passt nicht in die angegebenen Maße. Könnten Sie mir bitte Anleitung geben, wie ich bei Brustumfang des Hundes von 58 cm verfahren sollte? Wieviel Maschen sollte ich anschlagen, und kann ich dann einfach nach der Anleitung in der größten Größe M angegebenen Anleitung verfahren, oder wie muss ich Zu- und Abnehm-Angaben abwandeln?
24.03.2023 - 15:49DROPS Design answered:
Liebe Frau Hellbach, leider können wir nicht jede Anleitung nach jeder Maschenprobe anpsassen, wir haben aber einige Modellen für Größe L, eins davon könnte schon passen, schauen Sie mal hier und lassen Sie sich inspirieren. Viel Spaß beim stricken!
24.03.2023 - 16:04
![]() Jacqueline Ziemer wrote:
Jacqueline Ziemer wrote:
Hallo, Frage ist, was bedeutet z.B. Rundstricknadel Nr 5 oder 4? Sind das 5mm/4 mm Nadeln? Vielen Dank Jacqueline
13.10.2022 - 07:02DROPS Design answered:
Liebe Frau Ziemer, ja genau. Viel Spaß beim stricken!
13.10.2022 - 09:25
![]() Anna Johanne Toset wrote:
Anna Johanne Toset wrote:
Hei.Har dere strikkeoppskrift på villmarksgenser / potegenser til hund ?
11.10.2022 - 15:41
![]() María wrote:
María wrote:
Lindo traje para madcota, lo hice. Muchas gracias
11.09.2022 - 07:10
|
||||||||||||||||
Merry Santas#merrysantasdogsweater |
||||||||||||||||
 |
 |
|||||||||||||||
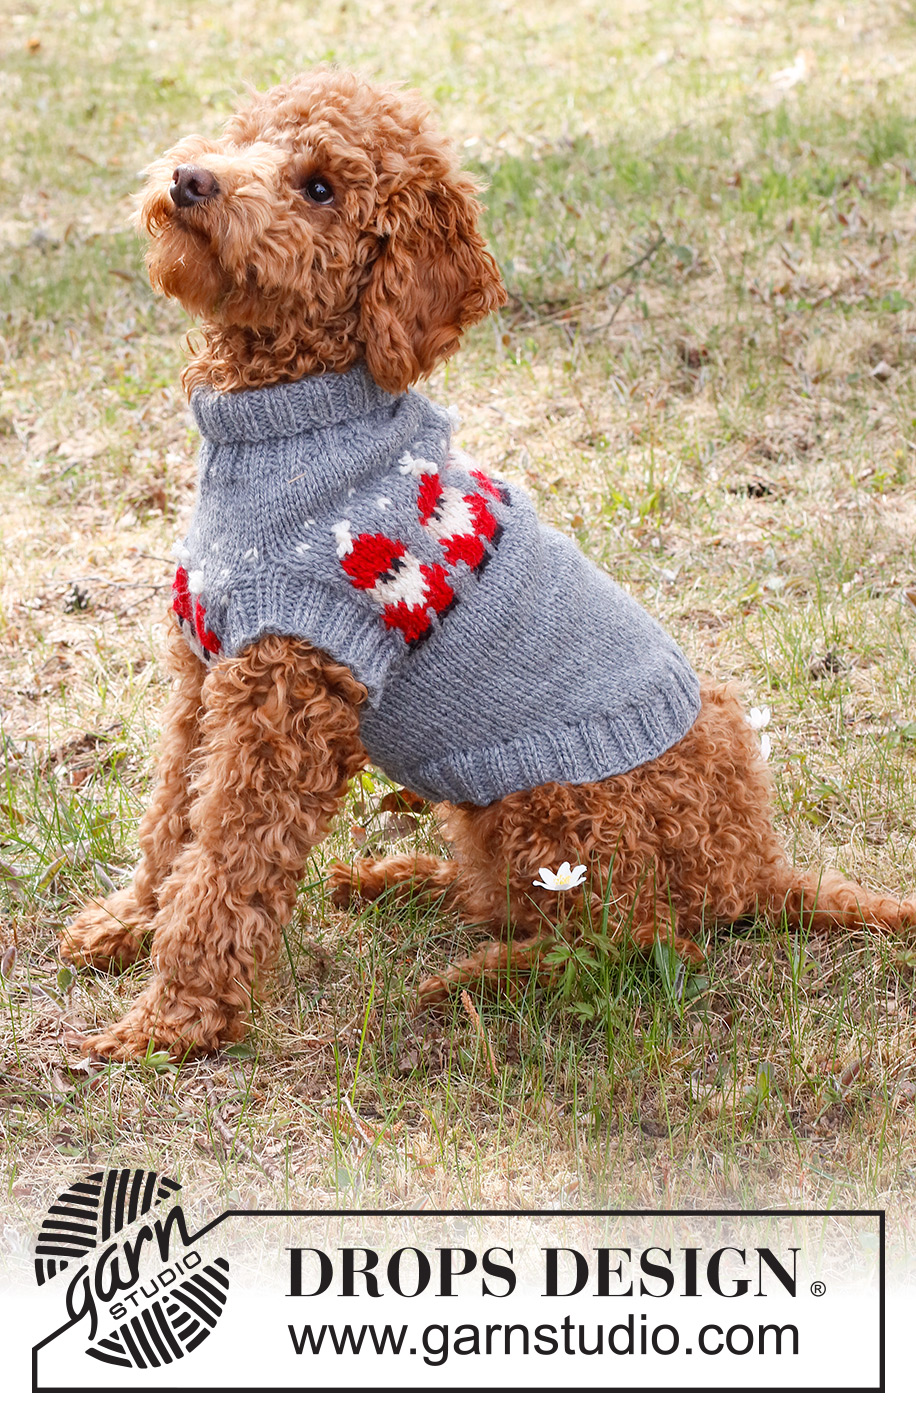
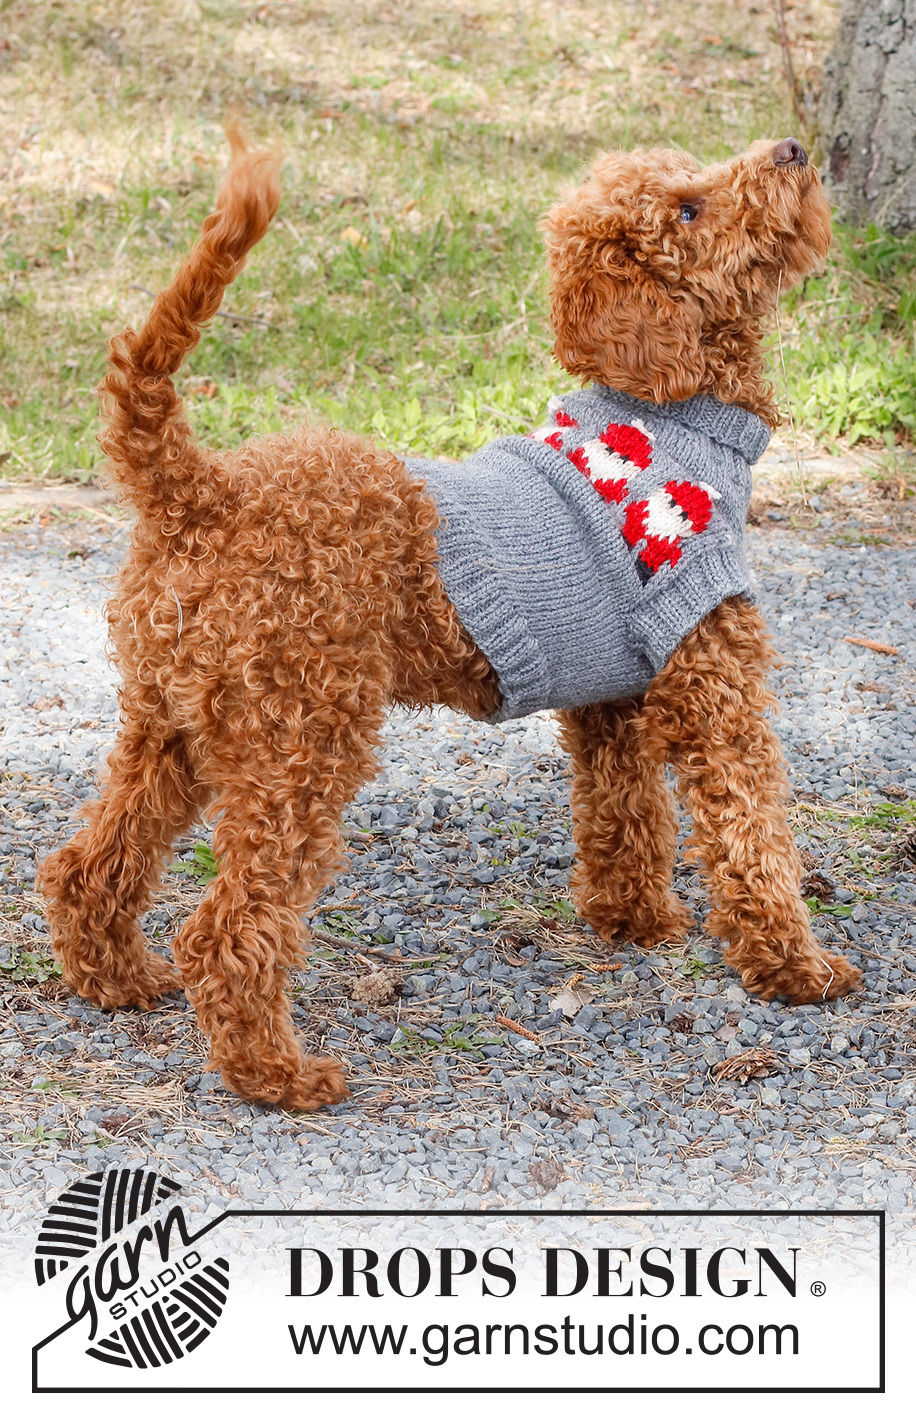
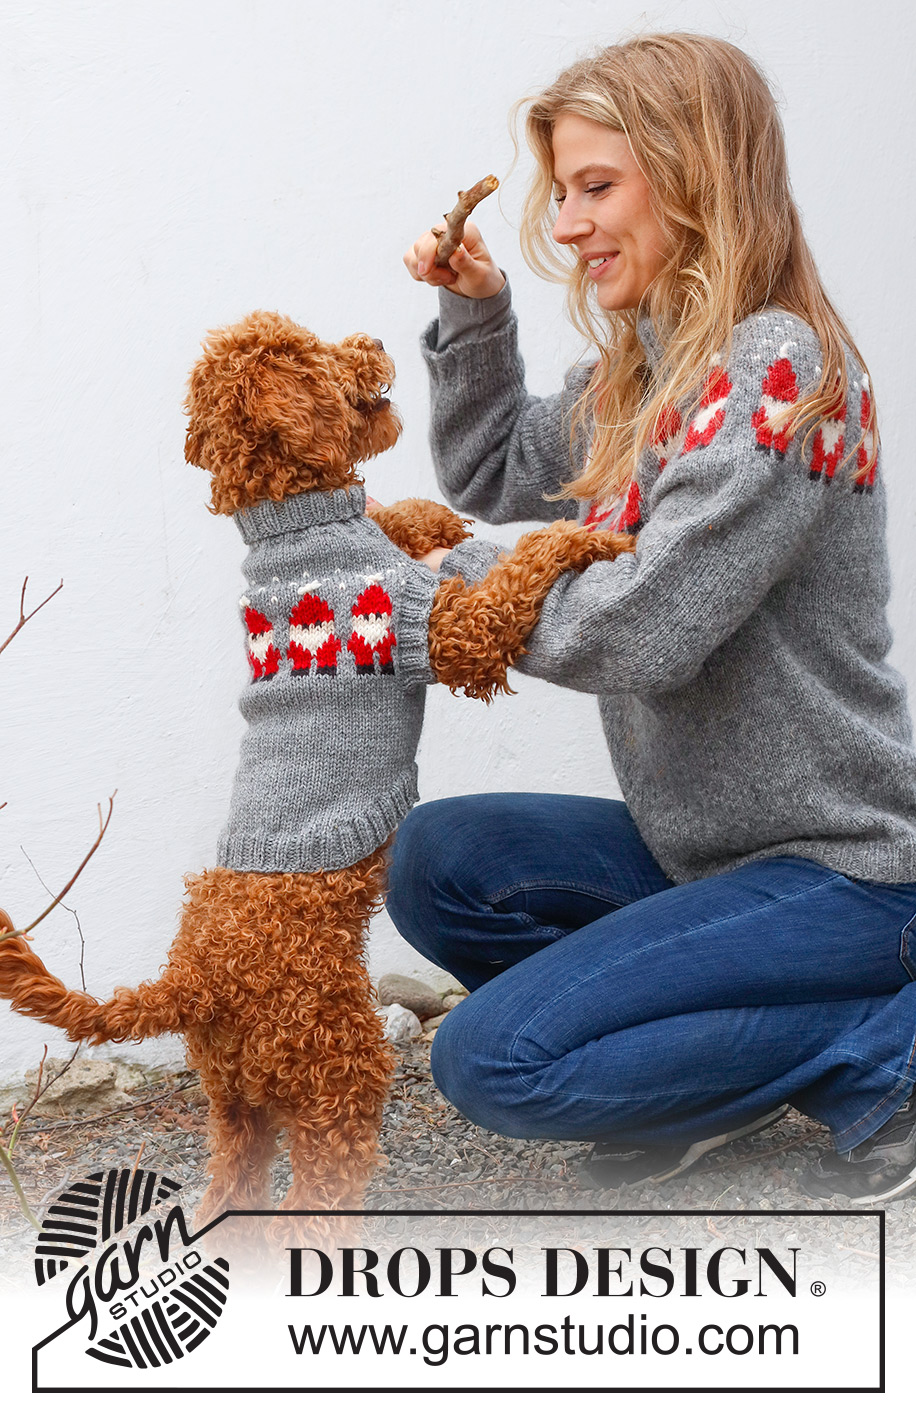
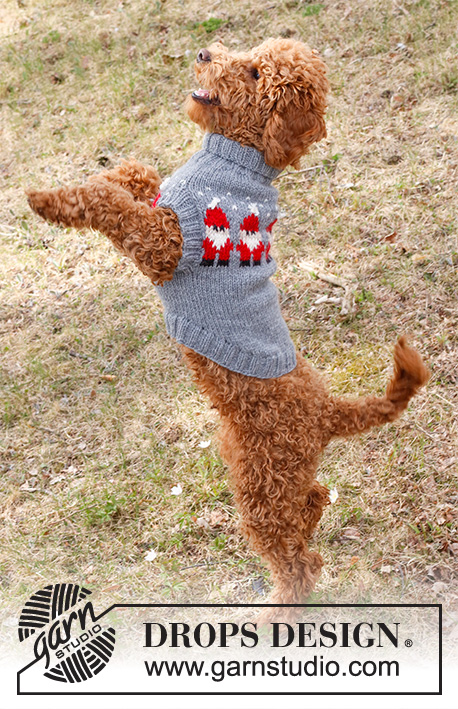
Knitted Christmas jumper for dogs in DROPS Alaska. The piece is worked with Nordic Santa pattern. Sizes XS - M. Theme: Christmas.
DROPS 228-54 |
||||||||||||||||
|
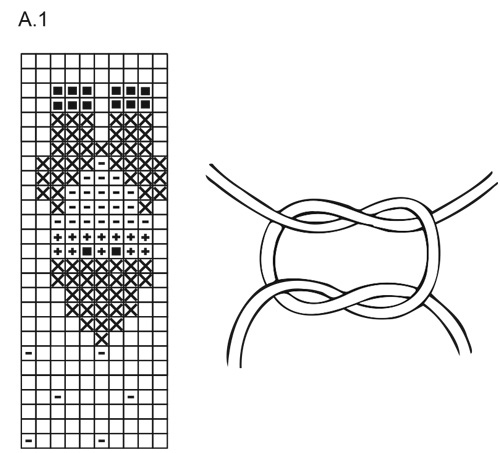
------------------------------------------------------- EXPLANATIONS FOR THE PATTERN: ------------------------------------------------------- RIDGE/GARTER STITCH (worked back and forth): Knit all rows. 1 ridge = knit 2 rows. PATTERN: See diagram A.1. The pattern is worked in stocking stitch. INCREASE TIP (evenly spaced): To work out how to increase evenly, count the total number of stitches on the needle (e.g. 60 stitches) and divide by the number of increases to be made (e.g. 10) = 6. In this example, increase by making 1 yarn over after each 6th stitch. On the next round work the yarn overs twisted to avoid holes. CASTING-OFF TIP: To avoid the cast-off edge being tight you can cast off with a larger size needle. If the edge is still tight, make 1 yarn over after approx. each 4th stitch at the same time as casting off; the yarn overs are cast off as normal stitches. ------------------------------------------------------- START THE PIECE HERE: ------------------------------------------------------- JUMPER FOR DOGS – SHORT OVERVIEW OF THE PIECE: The neck and body are worked in the round as far as the front legs, then continued back and forth between the legs and over the back. When the holes for the front legs are finished the piece is joined and continued in the round, before casting off under the tummy and finished back and forth. Edges are worked around the front legs and body to finish. NECK: Cast on 48-60-80 stitches with short circular needle/double pointed needles size 4 mm and grey DROPS Alaska. Work rib (knit 2, purl 2) in the round for 7-8-9 cm. Change to short circular needle/double pointed needles size 5 mm. Knit 1 round and increase 2-10-10 stitches evenly spaced – read INCREASE TIP = 50-70-90 stitches. Insert 1 marker at the beginning of the round; the yoke/body is measured from here! YOKE: Continue with stocking stitch and grey for 3-3-5 cm. REMEMBER THE KNITTING TENSION! The beginning of the round is just above the one front leg. Now work A.1 (= 5-7-9 repeats on the round) until the piece measures 4-4-7 cm from the marker. Now the piece is divided for the front legs. BACK PIECE: Work the first 20-20-30 stitches and place them on a thread = 30-50-60 stitches on the needle. Continue back and forth over these 30-50-60 stitches and cast on 1 stitch at the end of the first 2 rows = 32-52-62 stitches. Continue A.1 as before with 1 edge stitch in GARTER STITCH on each side – read description above. When A.1 is finished, continue with grey until the piece measures 9-11-13 cm from the division and on the last row from the wrong side cast off the 1 edge stitch on each side = 30-50-60 stitches. Cut the strand. SECTION BETWEEN THE LEGS: Place the 20-20-30 stitches from the thread on circular needle size 5 mm and cast on 1 stitch at the end of the first 2 rows = 22-22-32 stitches. Continue A.1 as before with 1 edge stitch in garter stitch on each side. When A.1 is finished continue with grey until the piece measures 9-11-13 cm from the division, on the last row from the wrong side cast off the 1 edge stitch on each side. Keep the stitches on the needle. Now join the piece together as follows: Start from the right side with grey and work the 20-20-30 stitches on the needle, cast on 4 stitches, then work the 30-50-60 stitches on the back piece and cast on 4 stitches = 58-78-98 stitches. Continue in the round until the piece measures 16-21-29 cm from the marker. There is approx. 3 cm left (measured along the tummy and 8-11-11 cm along the back). Try the jumper on and work to desired length. Place the first 20-20-30 stitches on a thread (= mid-under tummy) = 38-58-68 stitches on the needle. Continue back and forth and cast off stitches at the beginning of each row as follows: 3 stitches 1 time, 2 stitches 1-2-2 times, 1 stitch 1-2-2 times, 2 stitches 1-2-2 times and 3 stitches 1 time on each side = 16-26-36 stitches. Place the remaining stitches on a thread. The piece measures 21-29-37 cm from the marker. EDGE AROUND THE LEGS: Use double pointed needles size 4 mm and knit up 40 to 56 stitches with grey, inside the 1 edge stitch around the leg opening. The number of stitches should be divisible by 4. Work rib (knit 2, purl 2) in the round for 3 cm. Cast off with knit over knit and purl over purl - read CASTING-OFF TIP. Work a similar edge around the other leg. EDGE AROUND BODY: Now work an edge around the body, starting mid-underneath. Work from the right side using circular needle size 4 mm and grey. Knit up 80 to 104 stitches (including the stitches from the thread). The number of stitches should be divisible by 4. Work rib (knit 2, purl 2) in the round for 3 cm. Cast off with knit over knit and purl over purl - remember CASTING-OFF TIP. The piece measures approx. 24-32-40 cm from the marker along the back and 19-24-32 cm from the neck under the tummy. KNOT: Make a knot at the top of every Santa hat. Tie the knot around a stitch. Cut 2 lengths of colour off white. approx. 10 cm. Place strands together, use a needle and pull strands through the top off white stitch so that both yarn ends are on the right side of piece, on each side of stitch. Tie a knot, then tie another knot but in the opposite direction - see figure. Cut the yarn ends approx. ½ cm long. Repeat at the top of on each Santa hat. |
||||||||||||||||
Diagram explanations |
||||||||||||||||
|
||||||||||||||||
|
||||||||||||||||
Have you finished this pattern?Tag your pictures with #dropspattern #merrysantasdogsweater or submit them to the #dropsfan gallery. Do you need help with this pattern?You'll find 28 tutorial videos, a Comments/Questions area and more by visiting the pattern on garnstudio.com. © 1982-2025 DROPS Design A/S. We reserve all rights. This document, including all its sub-sections, has copyrights. Read more about what you can do with our patterns at the bottom of each pattern on our site. |
||||||||||||||||


With over 40 years in knitting and crochet design, DROPS Design offers one of the most extensive collections of free patterns on the internet - translated to 17 languages. As of today we count 314 catalogues and 11821 patterns translated into English (UK/cm).
We work hard to bring you the best knitting and crochet have to offer, inspiration and advice as well as great quality yarns at incredible prices! Would you like to use our patterns for other than personal use? You can read what you are allowed to do in the Copyright text at the bottom of all our patterns. Happy crafting!
Post a comment to pattern DROPS 228-54
We would love to hear what you have to say about this pattern!
If you want to leave a question, please make sure you select the correct category in the form below, to speed up the answering process. Required fields are marked *.