


Komentáře / Otázky (8)
![]() Karine Sengenes napsala:
Karine Sengenes napsala:
Bonjour quand vous dites rabattre 0 fois 3 mailles cela veut dire quoi. Merci
02.03.2025 - 18:04Odpověď DROPS Design :
Bonjour Mme Sengenes, sautez simplement cette information et passez à la suivante, dans votre taille, vous n'avez pas ces 3 mailles à rabattre. Bon tricot!
03.03.2025 - 12:05
![]() Esperanza napsala:
Esperanza napsala:
Punto alargado Hay algún video explicativo de este punto? no acabo de sacarlo
08.11.2024 - 22:57Odpověď DROPS Design :
Hola Esperanza, aquí tienes un video sobre cómo trabajar el punto alargado siguiendo los diagramas: https://www.garnstudio.com/video.php?id=1663&lang=es
10.11.2024 - 18:54
![]() Roos napsala:
Roos napsala:
Is er ook een filmpje hoe de lange steek te maken? Breit men de opgenomen steek? Of hoe zorgt men anders dat de draad lang genoeg is en het werk niet trekt?
23.08.2024 - 14:09
![]() Dania napsala:
Dania napsala:
I have question please, why all Drops design patterns indicate how many Grams we need for a garment? The length is what makes a difference. For example if i by a yarn that is 100 m per 50g , is it the same as another yarn that has 150m per 50 gram? So we have to calculate the length of yarn we need for garment than search for yarns (if we want to change the yarn indicated) in the pattern. Is this correct? Why don’t you just specify the meters needed ? :)
11.10.2023 - 02:51Odpověď DROPS Design :
Dear Dania, that's the method choosen to give the amount of yarn, but you are right depending on the yarn you will use the amount in grams will be different, you can use our yarn converter to get the new amount for the new yarn choosen. Happy knitting!
11.10.2023 - 08:38
![]() Liedeke napsala:
Liedeke napsala:
Ik denk dat ik mijn fout heb gevonden na het lezen van het Noorse patroon. “Strikk glattstrikk og fell av til ermetopp på begynnelsen av hver pinne i hver side slik:” Vertaalt niet als “Brei tricotsteek en kant af op het begin van elke naald als volgt:” Maar als “Brei tricotsteek en kant af op het begin en eind van elke naald als volgt:” Aan beide kanten dus. En dan kloppen de cijfers weer. Nogmaals bedankt voor het patroon van dit mooie vestje! Mvg, Liedeke
10.08.2022 - 10:53Odpověď DROPS Design :
Dag Liedeke,
Mooi dat je het gevonden hebt en nu verder kunt. Bedankt voor de terugkoppeling!
10.08.2022 - 17:16
![]() Liedeke napsala:
Liedeke napsala:
Hallo, bedankt voor dit patroon! Ik kom in de knoop bij de kop van mouw. Op een gegeven moment heb ik inderdaad volgens patroon 108 steken voor maat L op de naald. Als ik daarna de minderingen volg, heb ik 30 steken geminderd, en 78 resterend op de naald en geen 54? vervolgens nog 18 steken minderen door van 32 steken steeds 2 samen te breien levert me dan in totaal 60 steken op waardoor die naald dus echt niet uitkomt volgens oatroon. Ik doe vast iets fout. Met vriendelijke groeten, Liedeke
09.08.2022 - 18:22
![]() Liedeke napsala:
Liedeke napsala:
Hallo, bedankt voor dit patroon! Ik kom in de knoop bij de kop van mouw. Op een gegeven moment heb ik inderdaad volgens patroon 108 steken voor maat L op de naald. Als ik daarna de minderingen volg, heb ik 30 steken geminderd, en 78 resterend op de naald en geen 54? vervolgens nog 18 steken minderen door van 32 steken steeds 2 samen te breien levert me dan in totaal 60 steken op waardoor die naald dus echt niet uitkomt volgens oatroon. Ik doe vast iets fout. Met vriendelijke groeten, Liedeke
09.08.2022 - 18:21
![]() Julie napsala:
Julie napsala:
Romantic dreams
05.08.2021 - 09:04
|
||||||||||||||||
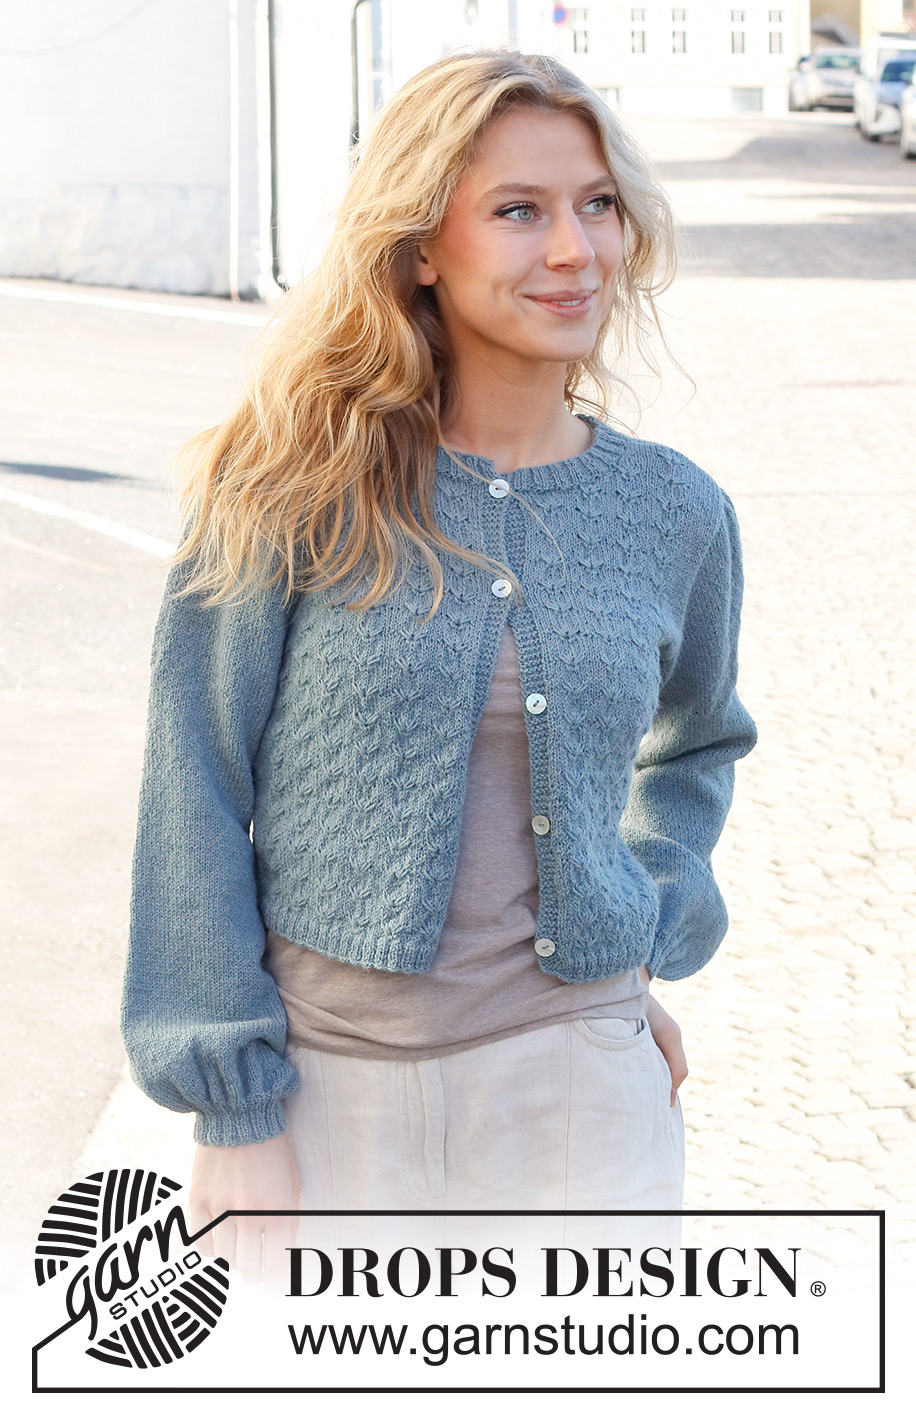
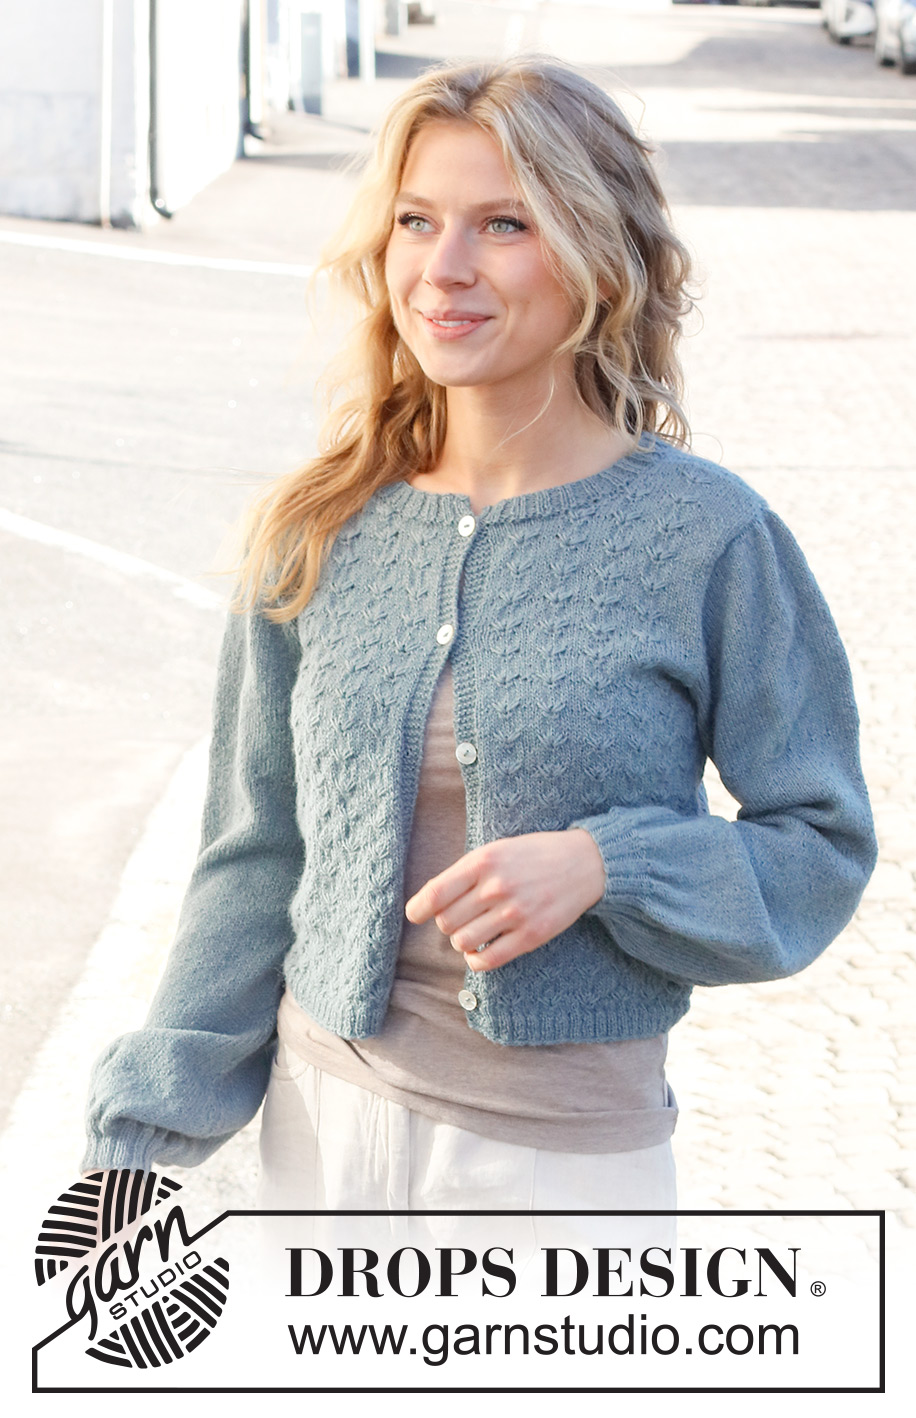
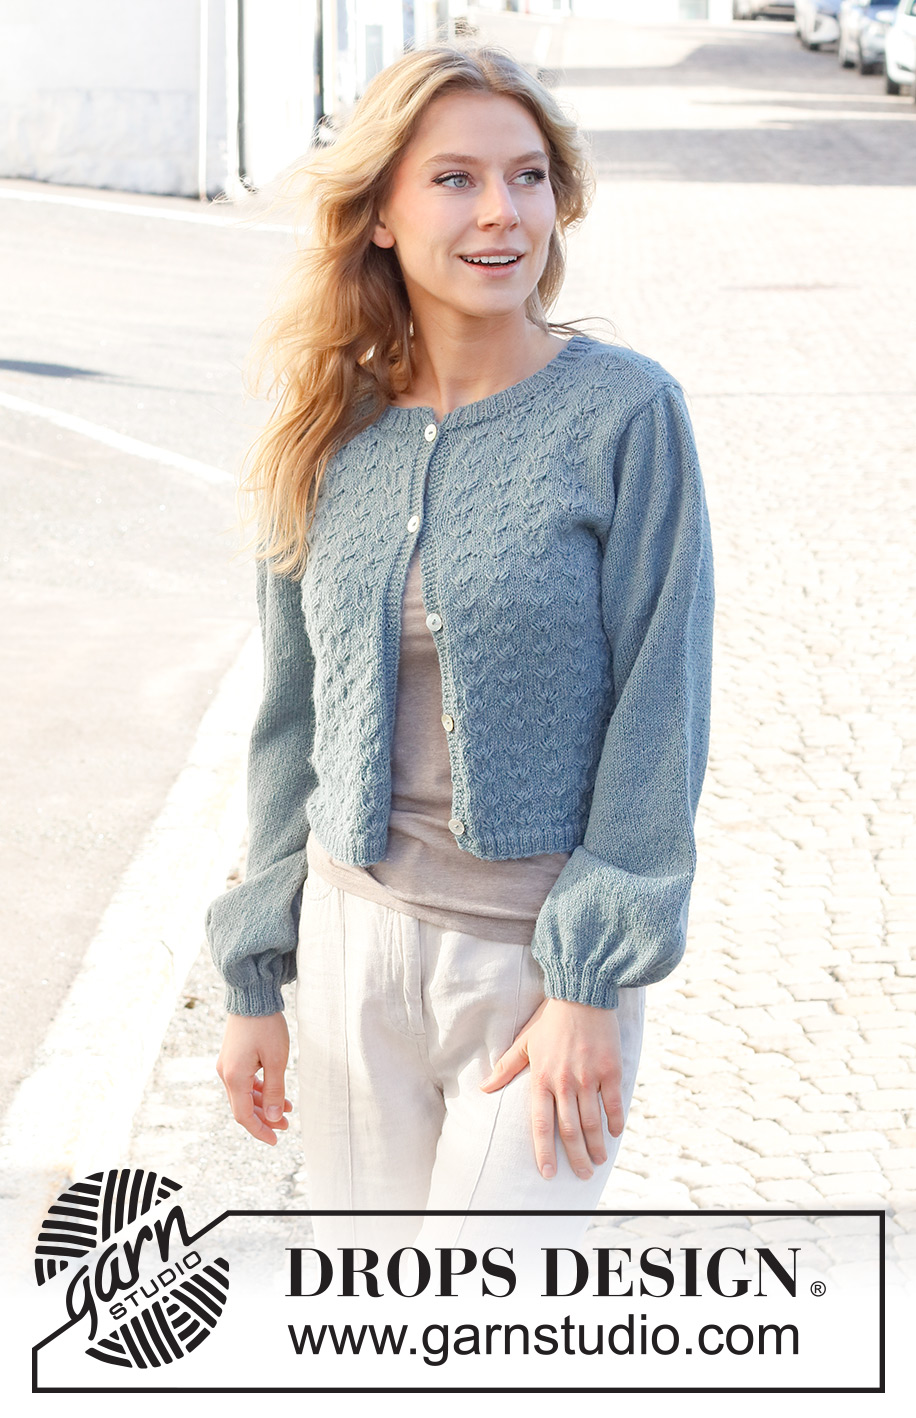
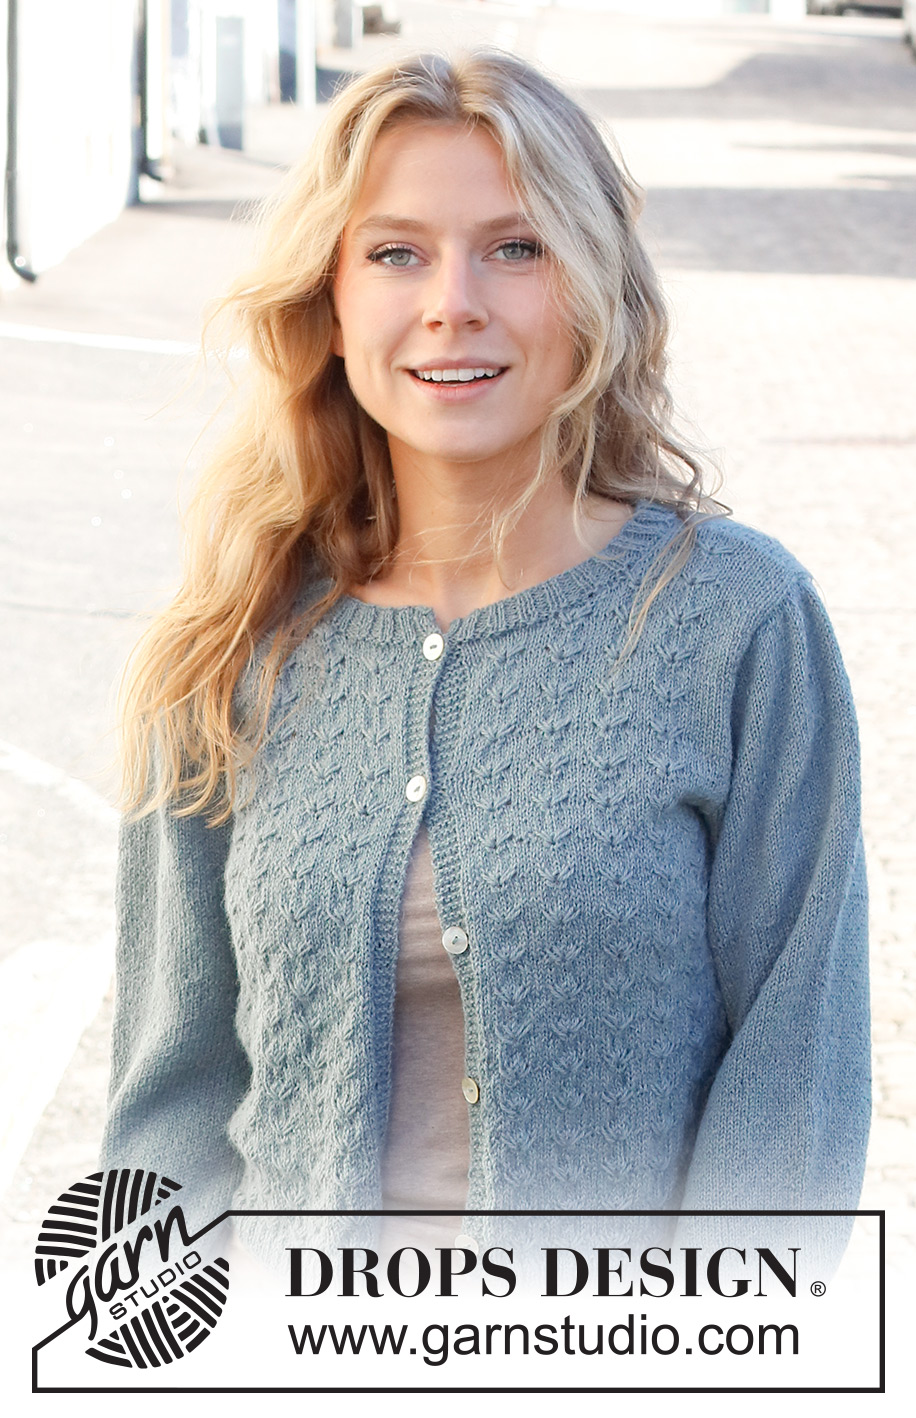
Migrating South Jacket#migratingsouthjacket |
||||||||||||||||
 |
 |
|||||||||||||||
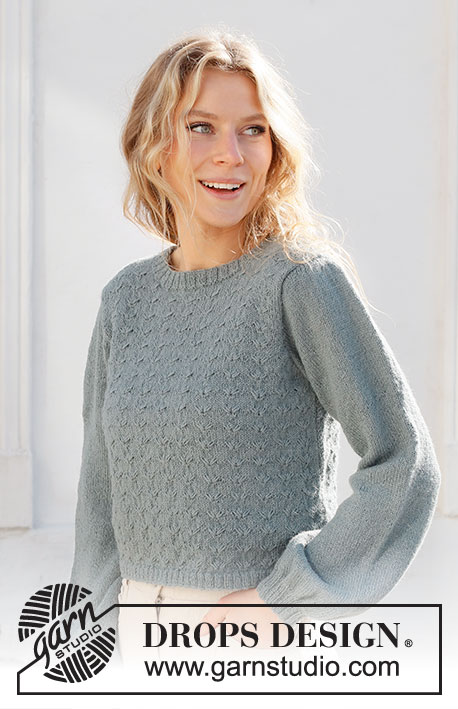
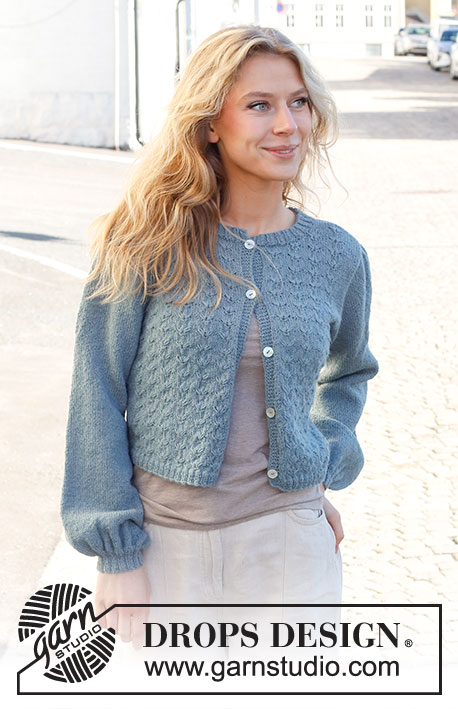
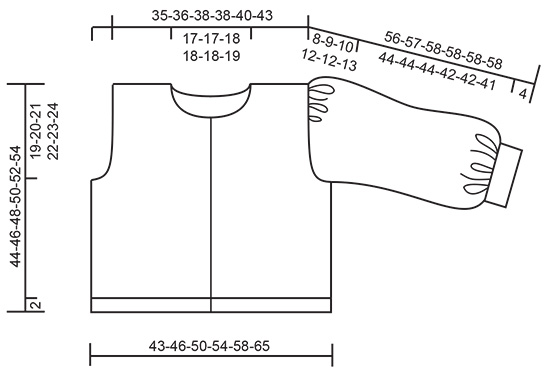
Propínací svetr s plastickým vzorem pletený zdola nahoru z příze DROPS Alpaca nebo DROPS BabyAlpaca Silk. Velikost S - XXXL.
DROPS 227-43 |
||||||||||||||||
|
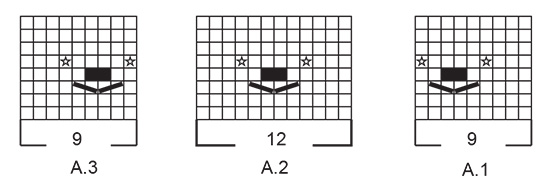
------------------------------------------------------- VYSVĚTLIVKY K NÁVODU: ------------------------------------------------------- VROUBKOVÝ VZOR: Pleteme stále hladce, lícové i rubové řady. 1 vroubek = 2 řady hladce. VZOR: Viz schémata A.1 až A.3. V průběhu celého vzoru ujímáme a přidáváme oka; počet ok ve vzorech A.1 a A.3 se pohybuje mezi 9 a 7 oky, ve vzoru A.2 se pohybuje mezi 12 a 10 oky. Zobrazeny jsou všechny řady vzoru nahlížené z lícové strany. TIP – PŘIDÁVÁNÍ/UJÍMÁNÍ (rovnoměrně): Abychom vypočítali, v jakých rozestupech máme přidávat/ujímat, odečteme od celkového počtu ok na jehlici (např. 132 ok), obě krajová oka/oka légy (např. 2 oka) a zbytek vydělíme počtem ok která potřebujeme přidat/ujmout (např. 28) = 4,6; tj: 132-2=130 : 28 = 4,6. V tomto případě tedy 1x nahodíme za každým zhruba 4. a 5. okem; krajová oka nezahrnujeme do přidávání. V následující řadě pleteme nahození za zadní nit, aby se v pletenině netvořily dírky. Při ujímání spleteme střídavě každé 3. a 4. oko a každé 4. a 5. oko. TIP - UJÍMÁNÍ-2 (pro rukávy): Ujímáme 1 oko na každé straně značky takto – začínáme 3 oka před značkou: 2 oka spleteme hladce, 2 oka upleteme hladce (značka leží mezi nimi), 1 oko sejmeme hladce, 1 upleteme hladce a sejmuté přes ně přetáhneme (= ujmuli jsme 2 oka). KNOFLÍKOVÉ DÍRKY: Knoflíkové dírky vyplétáme na lícové straně v léze pravého předního dílu. 1 knoflíková dírka = spleteme 3. a 4. oko od kraje hladce, 1x nahodíme. V následující (rubové) řadě pleteme nahození hladce – vznikne dírka. Knoflíkové dírky vyplétáme, když pletenina měří: S: 4, 12, 20, 28 a 36 cm M: 4, 12½, 21, 29½ a 38 cm L: 3, 12, 21, 30 a 39 cm XL: 3½, 11, 18½, 26, 33½ a 41 cm XXL: 4½, 12, 19½, 27, 34½ a 42 cm XXXL: 4, 12, 20, 28, 36 a 44 cm ------------------------------------------------------- PRÁCE ZAČÍNÁ ZDE: ------------------------------------------------------- SVETR - JAK BUDEME POSTUPOVAT: Přední a zadní díl pleteme samostatně v řadách na kruhové jehlici, zdola nahoru. Rukávy upleteme v kruhových řadách zdola nahoru na krátké kruhové jehlici/ponožkových jehlicích, a potom upleteme rukávovou hlavici. Nakonec dopleteme v řadách průkrčník. ZADNÍ DÍL: Na kruhovou jehlici č. 2,5 nahodíme přízí DROPS Alpaca nebo DROPS Baby Alpaca Silk 132-144-152-164-176-200 ok a upleteme lícovou stranu takto: 1 krajové oko vroubkovým vzorem – viz popis výše, pak pleteme pružným vzorem (2 hladce, 2 obrace) až po poslední 3 oka, upleteme 2 oka hladce a 1 krajové oko vroubkovým vzorem. V tomto rozvržení pokračujeme v řadách do výše 2 cm, tj. oka vroubkového vzoru pleteme vroubkovým vzorem, hladká oka pleteme hladce, a obrácená oka pleteme obrace - potom pokračujeme rubovou stranou. V této řadě (rubové) ujmeme oka takto: nejdříve upleteme 1 krajové oko vroubkovým vzorem, pak upleteme obrace 130-142-150-162-174-198 ok, v nichž rovnoměrně ujmeme 28-31-30-33-36-42 ok - viz TIP – PŘIDÁVÁNÍ/UJÍMÁNÍ, a poslední 1 krajové oko upleteme vroubkovým vzorem = 104-113-122-131-140-158 ok. Práci převedeme na kruhovou jehlici č. 3 a pokračujeme lícovou řadou vzory A.1 a A.2 takto: 1 krajové oko vroubkovým vzorem, následujících 90-99-108-117-126-144 ok vzorem A.1 (= 10-11-12-13-14-16 sekvencí po 9 okách), vzor A.2 (= 12 ok) a 1 krajové oko vroubkovým vzorem. Takto pleteme až do výše 25-26-27-28-29-30 cm od nahozeného okraje. Nyní začneme na začátku každé řady ujímat oka pro průramky takto: Na každé straně ujmeme 4 oka 1x, 3 oka 0-0-0-1-2-2x, 2 oka 2-3-4-4-4-6x a 1 oko 2-3-4-5-4-6x = 84-87-90-91-96-102 ok. Pokračujeme v tomto rozvržení a dbáme na to, aby na každé straně u průramků byly alespoň 4 oka lícovým žerzejem. Takto pleteme až do výše 42-44-46-48-50-52 cm od nahozeného okraje. V další řadě uzavřeme prostředních 36-37-40-39-40-42 ok (=průkrčník) a každou náramenici dokončíme odděleně. Pokračujeme vzorem jako dosud, přičemž oka, která nevyjdou do celé sekvence vzorů, upleteme lícovým žerzejem. Na začátku následující řady ujmeme 1 oko = 22-23-23-24-26-28 ok náramenice. Pleteme až do výše 44-46-48-50-52-54 cm od ramene dolů. Nakonec zbylá oka uzavřeme a stejným způsobem vypracujeme druhou náramenici. LEVÝ PŘEDNÍ DÍL: Na kruhovou jehlici č. 2,5 nahodíme přízí DROPS Alpaca nebo DROPS Baby Alpaca Silk 70-78-82-90-94-106 ok a pleteme dále lícovou stranu: 1 krajové oko vroubkovým vzorem, pak pleteme patent (2 obrace, 2 hladce) až po posledních 5 ok, nakonec upleteme 5 ok légy vroubkovým vzorem. Pokračujeme v řadách v tomto rozvržení, tj. oka vroubkového vzoru pleteme vroubkovým vzorem, hladká oka pleteme hladce, a obrácená oka pleteme obrace, do výše 2 cm - pokračujeme rubovou stranou. V následující řadě ujímáme oka takto: upleteme 5 ok légy vroubkovým vzorem, následujících 64-72-76-84-88-100 ok pleteme obrace a současně v nich rovnoměrně ujmeme 12-16-15-18-18-21 ok viz TIP – PŘIDÁVÁNÍ/UJÍMÁNÍ a poslední 1 krajové oko vroubkovým vzorem = 58-62-67-72-76-85 ok. Práci převedeme na kruhovou jehlici č. 3 a pokračujeme lícovou řadou vzory A.1 a A.2 takto: 1 krajové oko vroubkovým vzorem, 4-8-4-0-4-4 ok lícovým žerzejem, následujících 36-36-45-54-54-63 ok vzorem A.1 (= 4-4-5-6-6-7 sekvence po 9 okách), dále vzor A.2 (= 12 ok) a 5 ok légy vroubkovým vzorem. Takto pleteme až do výše 25-26-27-28-29-30 cm od nahozeného okraje. Pak začneme na lícové straně na začátku každé řady ujímat oka pro průramky: Ujmeme 4 oka 1x, 3 oka 0-0-0-1-2-2x, 2 oka 2-3-4-4-4-6x a 1 oko 2-3-4-5-4-6x = 48-49-51-52-54-57 ok. Pokračujeme v tomto rozvržení a dbáme na to, aby na straně u průramku byly alespoň 4 oka lícovým žerzejem. Takto pokračujeme výše 36-38-39-41-42-44 cm od nahozeného okraje – končíme rubovou řadou. V další řadě pleteme tak dlouho, dokud nám nezůstane 15-15-17-17-17-18 ok - tato oka odložíme bez pletení na pomocnou jehlici (pro průkrčník). Práci teď otočíme a pokračujeme dále v rubové řadě. Každou řadu uzavřeme oka na rubové straně takto: 3 oka 1x, 2 oka 2x a 1 oko 4x = 22-23-23-24-26-28 ok náramenice. Pleteme až do výše 44-46-48-50-52-54 cm od ramene dolů. Nakonec zbylá oka uzavřeme. PRAVÝ PŘEDNÍ DÍL: Na kruhovou jehlici č. 2,5 nahodíme přízí DROPS Alpaca nebo DROPS Baby Alpaca Silk 70-78-82-90-94-106 ok a pleteme lícovou stranu: 5 ok légy vroubkovým vzorem, pak pleteme patent (2 obrace, 2 hladce) až po poslední 1 oko a nakonec upleteme 1 krajové oko vroubkovým vzorem. Pokračujeme v řadách v tomto rozvržení, tj. oka vroubkového vzoru pleteme vroubkovým vzorem, hladká oka pleteme hladce, a obrácená oka pleteme obrace, do výše 2 cm - pokračujeme rubovou stranou. V další řadě ujmeme oka takto: upleteme 1 krajové oko vroubkovým vzorem, pak upleteme obrace 64-72-76-84-88-100 ok, v nichž rovnoměrně ujmeme 12-16-15-18-18-21 ok - viz TIP – PŘIDÁVÁNÍ/UJÍMÁNÍ, a upleteme 5 ok légy vroubkovým vzorem = 58-62-67-72-76-85 ok. Práci převedeme na kruhovou jehlici č. 3, pokračujeme lícovou řadou vzory A.2 a A.3 v tomto rozvržení: 5 ok légy vroubkovým vzorem, vzor A.2 (= 12 ok), následujících 36-36-45-54-54-63 ok (= 4-4-5-6-6-7 sekvencí po 9 okách) vzorem A.3, upleteme 4-8-4-0-4-4 ok lícovým žerzejem a pak 1 krajové oko vroubkovým vzorem. Pamatujeme na vyplétání KNOFLÍKOVÝCH DÍREK – viz popis výše. Tímto způsobem pleteme až do výše 25-26-27-28-29-30 cm od nahozeného okraje. Nyní začneme na začátku každé řady na rubové straně ujímat oka pro průramky: ujmeme 4 oka 1x, 3 oka 0-0-0-1-2-2x, 2 oka 2-3-4-4-4-6x a 1 oko 2-3-4-5-4-6x = 48-49-51-52-54-57 ok. Pokračujeme v tomto rozvržení a dbáme na to, aby na straně u průramku byly alespoň 4 oka lícovým žerzejem. Takto pleteme až do výše 36-38-39-41-42-44 cm od nahozeného okraje – končíme lícovou řadou (v této řadě pleteme také poslední knoflíkovou dírku). V další řadě pleteme tak dlouho, dokud nám nezůstane 15-15-17-17-17-18 ok - tato oka odložíme bez pletení na pomocnou jehlici (pro průkrčník). Práci otočíme a pokračujeme lícovou řadou. Pokračujeme stejným vzorem jako dříve a na začátku každé řady na lícové straně ujmeme oka pro průkrčník: 3 oka 1x, 2 oka 2x a 1 oko 4x = 22-23-23-24-26-28 ok na náramenici. Pleteme až do výše 44-46-48-50-52-54 cm od ramene dolů, pak zbylá oka uzavřeme. RUKÁV: Na ponožkové jehlice č. 2,5 nahodíme přízí DROPS Alpaca nebo DROPS Baby Alpaca Silk 56-60-64-68-72-76 ok a pleteme v kruhových řadách pružným vzorem (2 hl, 2 obr) do výše 4 cm. V další kruhové řadě rozpleteme každé oko na 2 (pleteme za přední i za zadní nit; tím zdvojnásobíme počet ok) = 112-120-128-136-144-152 ok. Teď převedeme pleteninu na kruhovou jehlici č. 3 a na začátek kruhové řady vložíme značku = střed vnitřní strany rukávu. Značku využijeme později při ujímání, a proto ji během práce snímáme vždy do aktuálně pletené kruhové řady. Pokračujeme v kruhových řadách lícovým žerzejem. Jakmile rukáv měří 9 cm (platí pro všechny velikosti), ujmeme 2 oka v podpaží - viz TIP - UJÍMÁNÍ-2. Takto ujímáme v každé 4.-4.-4.-3.-3.-3. kruhové řadě, celkem 16-18-19-20-20-21x = 80-84-90-96-104-110 ok. Ve výši rukávu 39-39-39-38-38-37 cm, přidáme rovnoměrně 16-16-18-18-20-20 ok v kruhové řadě - TIP – PŘIDÁVÁNÍ/UJÍMÁNÍ. Po dokončení veškerého přidávání a ujímání ok máme 96-100-108-114-124-130 ok. Jakmile rukáv měří 48-48-48-46-46-45 cm, upleteme následující kruhovou řadu takto: Začneme 3 oka před značkou, ujmeme 6 ok a pleteme až do konce řady. Nyní začneme vypracovávat rukávovou hlavici: Pleteme lícovým žerzejem a na začátku každé řady na obou stranách ujmeme oka takto: 3 oka 0-0-0-0-1-1x, 2 oka 3-4-4-4-4-4x, 1 oko 4-4-7-10-9-10x, 2 oka 4-4-3-3-3-4x a 3 oka 1-1-1-1-1-1x = 48-48-54-54-60-60 ok. Následující lícovou řadu pleteme takto: upleteme 8-8-9-9-10-10 ok lícovým žerzejem, pak spleteme hladce po 2 následujících 32-32-36-36-40-40 ok (= ujmuli jsme 16-16-18-18-20-20 ok), a nakonec upleteme 8-8-9-9-10-10 ok lícovým žerzejem = 32-32-36-36-40-40 ok. Nakonec zbylá oka uzavřeme. Rukáv měří asi 56-57-58-58-58-58 cm po celé délce. Stejným způsobem upleteme i druhý rukáv. DOKONČENÍ: Sešijeme náramenice. Sešijeme postranní švy uvnitř krajového oka. Rukávy sešijeme uvnitř krajového oka – v horní části rukávu by mělo být mírné nabrání. PRŮKRČNÍK: Použijeme krátkou kruhovou jehlici č. 2,5 a přízi DROPS Alpaca nebo DROPS Baby Alpaca Silk. Vrátíme odložených 15-15-17-17-20 ok pravého předního dílu a upleteme je. Pak nabereme zbylá oka kolem průkrčníku a nakonec vrátíme odložená oka z pomocné jehlice levého předního dílu. Tato oka také upleteme. Upleteme dále 1 rubovou řadu, v níž upravíme počet ok na 120-120-130-130-140-140 ok (počet ok musí být dělitelný 4). Pak pleteme lem na lícové straně takto: 1 krajové oko vroubkový vzorem, patent 2/2 (2 hladce, 2 obrace) až po poslední 3 oka, pak 2 oka hladce a nakonec 1 krajové oko vroubkovým vzorem. Takto pleteme lem do výšky 2 cm. Pak všechna oka volně dle vzoru uzavřeme. Přízi odstřihneme a zapošijeme. |
||||||||||||||||
Vysvětlivky ke schématu |
||||||||||||||||
|
||||||||||||||||
|
||||||||||||||||
|
||||||||||||||||
Dokončili jste tento model?Pak označte své fotky tagem #dropspattern #migratingsouthjacket nebo je pošlete do galerie #dropsfan. Potřebujete s tímto návodem poradit?Otevřete-li si návod na stránce garnstudio.com, najdete tam 31 výukových video-ukázek, Komentáře/Dotazy a další užitečné informace. © 1982-2025 DROPS Design A/S. Vyhrazujeme si veškerá práva. Tento dokument, včetně všech jeho dílčích částí, podléhá autorským právům. Podrobnější komentář k možnostem užití našich návodů najdete dole pod každým návodem na našich stránkách. |
||||||||||||||||


V oblasti pletené a háčkované módy působí DROPS Design více než 40 let. Díky tomu vám můžeme nabídnout jednu z nejrozsáhlejších kolekcí modelů s bezplatnými návody dostupnými na internetu - navíc v 17 jazycích. K dnešnímu dni máme na 314 katalogů a 11822 návodů celkem - z nich je už 7048 dostupných v [češtině].
Přidejte komentář k návodu DROPS 227-43
Rádi bychom věděli, co si o tomto modelu myslíte!
Pokud se chcete na něco zeptat, dbejte prosím na to, abyste ve formuláři níže vybrali správnou kategorii - díky tomu se dříve dozvíte, co potřebujete vědět. Povinná pole jsou označena *.