Kommentare / Fragen (19)
![]() Jacqueline Briscoe hat geschrieben:
Jacqueline Briscoe hat geschrieben:
What changes are required if using bernat blanket yarn?
21.01.2020 - 19:08DROPS Design hat geantwortet:
Dear Mrs Briscoe, We are able to provide free patterns thanks to our yarns sold throughout the world. You will therefore understand that we can only recomand you to contact your DROPS Store in Canada for any further help & assistance. Thank you for your comprehension.
22.01.2020 - 08:16
![]() Patricia Bauer hat geschrieben:
Patricia Bauer hat geschrieben:
Sorry--still confused. To assemble, A and B are stitched together--but A has the extra edge stitch (seam allowance)on both sides on ALL rows, whereas last row of B the 2 edge stitches have been bound off--is this last row of B not part of the assembly seam?
03.12.2013 - 16:42DROPS Design hat geantwortet:
Dear Mrs Bauer, A and B are sewn together on each side (armholes), so that 1 st at beg of row + 1 st at end of row will be used for seam both armholes. Happy knitting!
04.12.2013 - 09:56
![]() Patricia Bauer hat geschrieben:
Patricia Bauer hat geschrieben:
88-96-102-110-120 sts. Piece now measures approx. 18-20-22-24-26 cm / 7"-8"-8 3/4"-9½"-10 1/4". On next row bind off 1 st at beg and end of row, then slip sts on a stitch holder. Why is the seam allowance (2 edge stitches) bound off as described above (to make 94 st on the size 5/6), when that is not done on the starting row that it will meet (96 st)?
03.12.2013 - 13:46DROPS Design hat geantwortet:
Dear Mrs Bauer, in size 5/6 you have 94 sts left at the end of body and pick up 94 sts in the 96 sts from cast on row so that you have again 1 st each side for seam = a total of 188 sts. Happy knitting!
03.12.2013 - 14:26
![]() Annetta Kerans hat geschrieben:
Annetta Kerans hat geschrieben:
Thank you so much for your reply and the video. I actually found the answer from someone else's question. It's always nice to know there is someone who can answer questions.
09.04.2013 - 22:31
![]() Riet hat geschrieben:
Riet hat geschrieben:
Zo heb ik het ook gedaan, maar dan krult het niet om! Op de foto is goed te zien,dat het het omgekrulde randje ribbelsteek en geen boordsteek is.
14.02.2013 - 15:00DROPS Design hat geantwortet:
Het is een rand van 1 r/1 av. Kijk op de foto van dichtbij, dat is geen ribbelst.
14.02.2013 - 15:33
![]() Riet Moraal hat geschrieben:
Riet Moraal hat geschrieben:
De beschrijving van de rand is anders dan op de foto staat. Ik heb de rand,( 8 cm.) in patroon M1 gebreid, maar dan krult hij niet om, zoals op de foto.volgens mij moeten de laatste naalden weer in ribbelsteek gebreid worden? Met vr. grt. Riet Moraal
29.01.2013 - 16:37DROPS Design hat geantwortet:
Het patroon klopt. Je moet niet de laatste nld in ribbelsteken breien, maar heel LOSJES afkanten met r boven r en av boven av.
06.02.2013 - 18:32
![]() Laura Graciani hat geschrieben:
Laura Graciani hat geschrieben:
Entiendo que para seguir la secuencia del diagrama M.1,es necesario que el número de puntos a tejer sea impar.Tenemos que terminar la secuencia con 1YO + slip 1 st, para que en la 2º vuelta poder K tog YO and slipped st. Gracias.
29.12.2012 - 08:06DROPS Design hat geantwortet:
Hola Laura, el diagrama M.1 se teje así: 1a vuelta: * 1 HEB + deslizar 1 pt de derecho, 1 revés *, repetir de *a* en toda la vta. 2a vuelta: * Tejer juntos de derecho la HEB y el pt desl, 1 revés *, repetir de *a* en toda la vta. Repetir la 1a y 2a vuelta.
29.12.2012 - 10:07Helen hat geschrieben:
I am almost finished this little vest but am not sure how to work the M1 diagram. Is it possible to get the instructions as words. Is the purl stitch every second round or every second stitch in a round row?
20.08.2012 - 04:13DROPS Design hat geantwortet:
Work 1st round in M1: *1 YO + slip 1 st as if to K, P1*, rep *-* around. 2nd round: *K tog YO and slipped st, P1*, rep *-* around. Repeat 1st and 2nd round.
25.08.2012 - 02:47Jill Forward hat geschrieben:
I've had 2attempts at this pattern & it still doesn't make sense. Cast off -does this mean knit to end and slip one over last stitch? The decline seems too rapid. Is the pattern grid illustrated referring to this pattern and in what way? Can't see the relevance of the 13, 48, 13 written at top of drawing. Help, I really want to make this.
20.04.2012 - 11:02DROPS Design hat geantwortet:
You bind off in beg of every row, which is not as how you write it above. Gauge in both width and height is just as important for correct measures. Numbers in chart are measures in centimeters.
23.04.2012 - 20:00
Pixie#pixievestbolero |
||||||||||
 |
 |
|||||||||
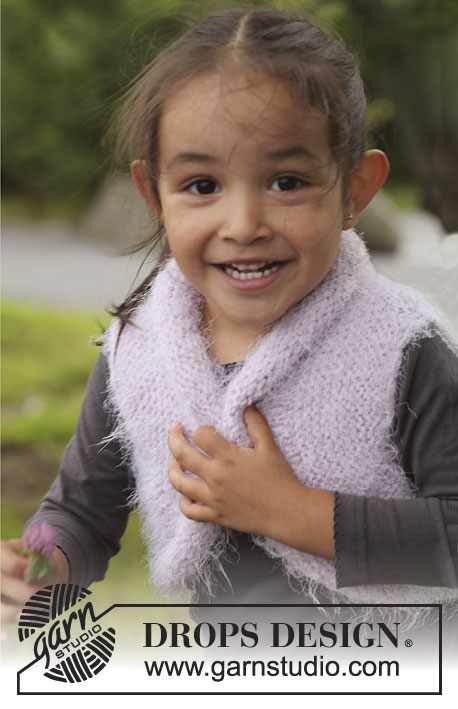
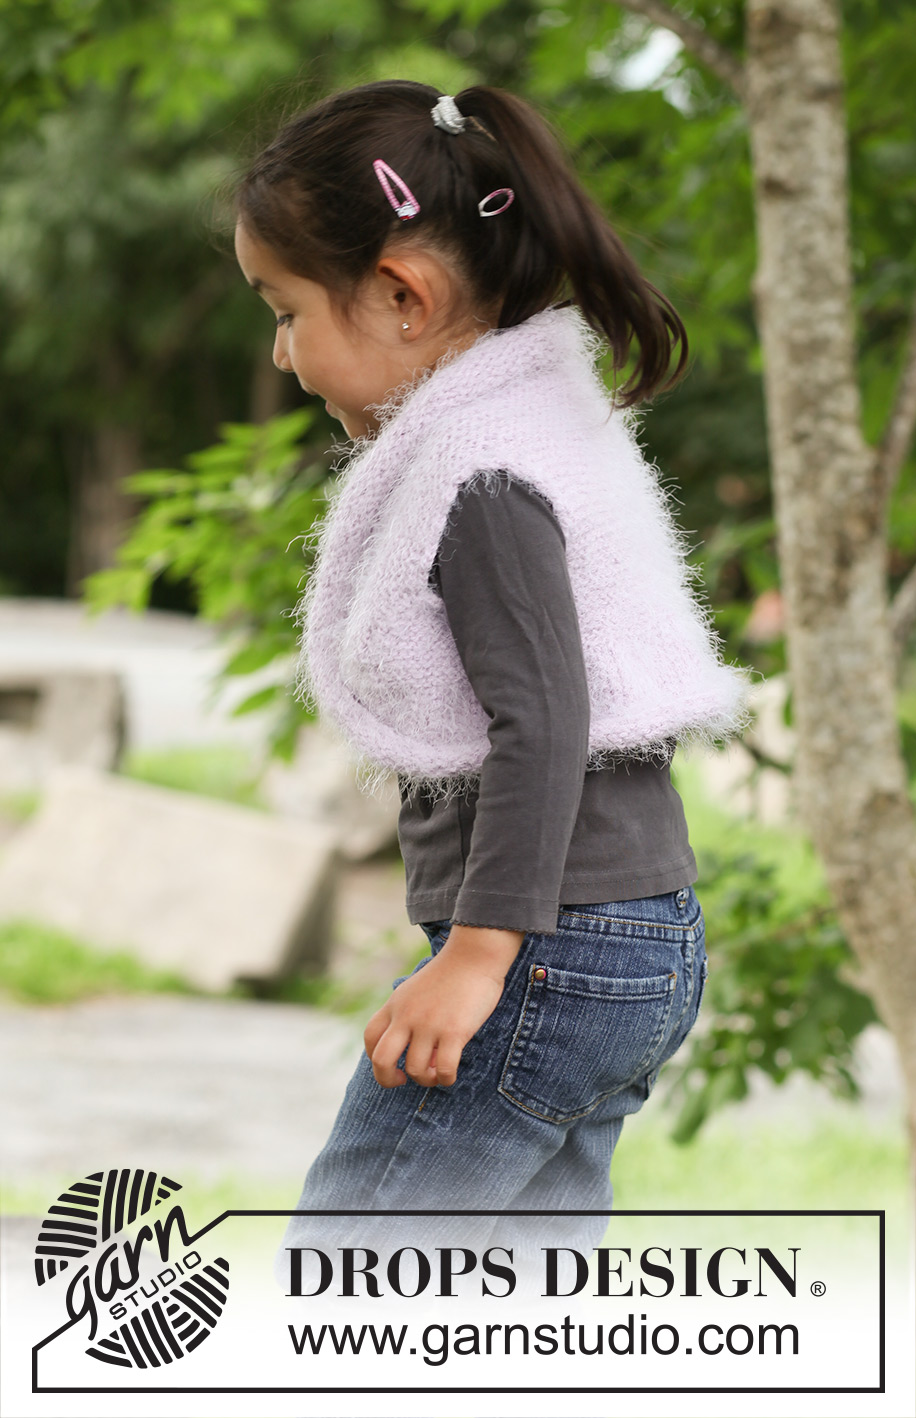
DROPS Weste in ”Symphony”. Grösse 3 - 12 Jahre.
DROPS Children 22-19 |
||||||||||
|
KRAUSRIPPE (hin und zurück): 1 Krausrippe = 2 R. re. MUSTER: Siehe Diagramm M1. --------------------------------------------------------- VORDER- UND RÜCKENTEIL: Die Arbeit wird auf einer Rundnadel hin und zurück gestrickt. Mit Symphony auf Rundnadel Nr. 4,5, 88-96-102-110-120 M. anschlagen (inkl. 1 Randm auf beiden Seiten). KRAUSRIPPEN über alle M. stricken – siehe oben. GLEICHZEITIG ab der 2. R. am Anfang jeder R. 1 M. abk. Total 9-11-12-14-16 Mal auf beiden Seiten. Weiter auf beiden Seiten je 15-15-16-16-17 M. abk. = 40-44-46-50-54 M. Mit Krausrippe weiterstricken bis die Arbeit 12-13-14-15-16 cm misst. Weiter am Schluss jeder R. wie folgt neue M. anschlagen: 1 Mal 15-15-16-16-17 auf beiden Seiten, 9-11-12-14-16 Mal 1 M. auf beiden Seiten = 88-96-102-110-120 M. Die Arbeit misst ca. 18-20-22-24-26 cm. Bei der nächsten R. am Anfang und am Schluss der R. je 1 M. abk. und die M. auf einen Hilfsfaden legen. ZUSAMMENNÄHEN: Die Arbeit falten und A auf B nähe – siehe Skizze. Auf der anderen Seite wiederholen. KANTE: Die Kante wird auf einer Rundnadel rund gestrickt. Die M. vom Hilfsfaden wieder auf die Nadel legen und an der Anschlagskante 86-94-100-108-118 M. aufnehmen = 172-188-200-216-236 M. Die erste R. wie folgt: * 1 re., 1 li.*, von *-* wiederholen. Danach M1 stricken. Nachdem die Kante 8-9-9-10-10 cm misst re. über re. und li. über li. abk. HÄKELKANTE: Rund um den Bolero und rund um das Armloch auf Nadel Nr. 5 wie folgt eine Kante häkeln: 1 fM in die erste * 3 Lm, ca. 1 cm überspringen, 1 fM in die nächste M. *, von *-* wiederholen und mit 1 Kettm in die erste fM abschliessen. |
||||||||||
Erklärungen zum Diagramm |
||||||||||
|
||||||||||
 |
||||||||||
Haben Sie diese Anleitung nachgearbeitet?Dann taggen Sie Ihre Fotos mit #dropspattern #pixievestbolero oder schicken Sie sie an die #dropsfan Galerie Brauchen Sie Hilfe bei dieser Anleitung?Sie finden 12 Videotutorials, einen Kommentar/Fragen-Bereich und vieles mehr, wenn sie die Anleitung bei garnstudio.com aufrufen. © 1982-2025 DROPS Design A/S. Wir besitzen alle Rechte. Dieses Dokument, einschließlich aller Untersektionen, hat Urheberrechte. Mehr dazu, was Sie mit unseren Anleitungen machen können, finden Sie ganz unten auf der Seite zu jeder Anleitung. |
||||||||||











Kommentieren Sie die Anleitung DROPS Children 22-19
Wir würden gerne Ihre Meinung zu diesem Modell erfahren!
Wenn Sie eine Frage stellen möchten, prüfen Sie bitte, dass Sie die richtige Kategorie im unten stehenden Formular gewählt haben - so bekommen Sie schneller eine Antwort. Die obligatorischen Felder sind mit einem * gekennzeichnet.