
Popular categories
Looking for a yarn?


Comments / Questions (36)
![]() Nathalie Leclerc wrote:
Nathalie Leclerc wrote:
Je n’aime pas tricoter avec de la laine Merino, Alpaca ou Snow (ça pique et c’est trop chaud). Est ce possible de faire cette couverture avec de la laine de coton “Paris”. Et si oui, quelle est la quantité requise pour remplacer 100 g de Snow
23.11.2022 - 03:21DROPS Design answered:
Bonjour Mme Leclerc, vous pouvez effectivement tricoter avec 2 fils Paris pour remplacer 1 fil Snow - utilisez notre convertisseur pour chaque couleur pour connaître la nouvelle quantité requise en Paris (avec 2 fils). Bon tricot!
23.11.2022 - 09:16
![]() Nicole wrote:
Nicole wrote:
Ich habe leider schon Probleme bei der Maschenprobe. Stricke mit einer Rundnadel 9,00 mm und bekomme mit 11 Maschen nur 4cm. Wo liegt der Fehler? Lieben Dank!
08.11.2022 - 17:14DROPS Design answered:
Liebe Nicole, stricken Sie DROPS Snow? Oder eine andere Wolle der Garngruppe E? Vielleicht stricken Sie zu fest, dann sollen Sie mit grösseren Nadlen versuchen. Hier lesen Sie mehr. Viel Spaß beim stricken!
09.11.2022 - 08:15
![]() Jess wrote:
Jess wrote:
Hi, I’m struggling to find super bulky yarn in the right Colours. Can you tell me if I can use chunky instead? If I order the yarn recommended on the pattern I won’t get it on time so I’m hoping to find a US equivalent.
03.07.2022 - 20:26DROPS Design answered:
Dear Jess, for any assistance choosing the best matching colour, please contact your DROPS Store, they will help you even per mail or telephone. Happy knitting!
04.07.2022 - 08:16
![]() Ginny Peacock wrote:
Ginny Peacock wrote:
Hi - Can the Abstract Rainbow blanket be knitted on straight needles rather than circular needles?
25.02.2022 - 17:34DROPS Design answered:
Dear Ginny, here you use circular needles because you have a high amount of stitches, so it's more comfortable to fit them in circular needles than in straight needles. But you can work it with straight needles without issues, Happy knitting!
27.02.2022 - 18:17
![]() Suzan wrote:
Suzan wrote:
Moet er bij streep 5 niet staan : steken opnemen "langs de KORTE kant van streep 3 en 4" in plaats van "langs de LANGE kant"?
07.02.2022 - 23:18DROPS Design answered:
Dag Suzan,
Ja, je hebt gelijk, dat moet inderdaad de korte kant zijn. Ik zal het doorgeven ter correctie.
11.02.2022 - 15:39
![]() Signe-Andrea Henden wrote:
Signe-Andrea Henden wrote:
Hei Mykje enklare å bruke to rundpinner.
24.11.2021 - 18:32
![]() May wrote:
May wrote:
Do you have downloadable pdf?
04.07.2021 - 12:32DROPS Design answered:
Dear May, when you select print in our page, a system window should show up, in which you can select to, instead of printing it, save it as a pdf.
04.07.2021 - 16:08
![]() Joselita wrote:
Joselita wrote:
Gostaria de agradecer pelas receitas de vocês, em especial essa manta que acabei de fazer, ela ficou muito linda! Gostaria de uma receita de manta três D em tricô, obrigada por tudo bjs.
19.05.2021 - 17:55
![]() Turid Indrelid wrote:
Turid Indrelid wrote:
Hei Jeg ønsker å strikke dette fine pleddet , men ønsker å lage det lengre , og også noe bredere. Kan jeg legge opp flere enn 11 m , fks 22m ? Eller er det andre lure/ bedre måter å gjøre det større. Skjønner at jeg kan fortsette utover diagrammet , med 21/22 og så 23 . Takknemlig for råd . Mvh Turid Indrelid
05.05.2021 - 21:18DROPS Design answered:
Hei Turid, Din ide om å legge opp flere masker i hver stripe er bra. God fornøyelse!
06.05.2021 - 08:01
![]() Bernice Baise wrote:
Bernice Baise wrote:
I cannot print out the pattern for the abstract Rainbow pattern Can younplease help thank you
27.04.2021 - 05:23DROPS Design answered:
Dear Mrs Blaise, we successfully could print a test of this pattern; make sure to check all the printer's settings . You can also try to clean cache/cookies and refresh the page. Hope this helps, happy knitting!
27.04.2021 - 07:41
|
||||
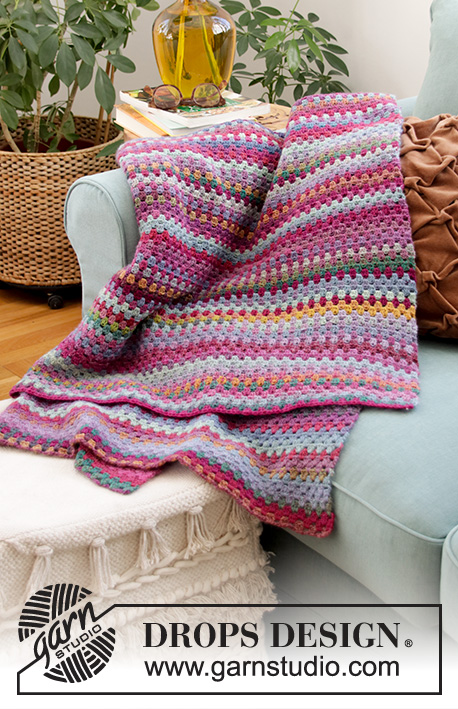
Abstract Rainbow#abstractrainbowblanket |
||||
 |
 |
|||
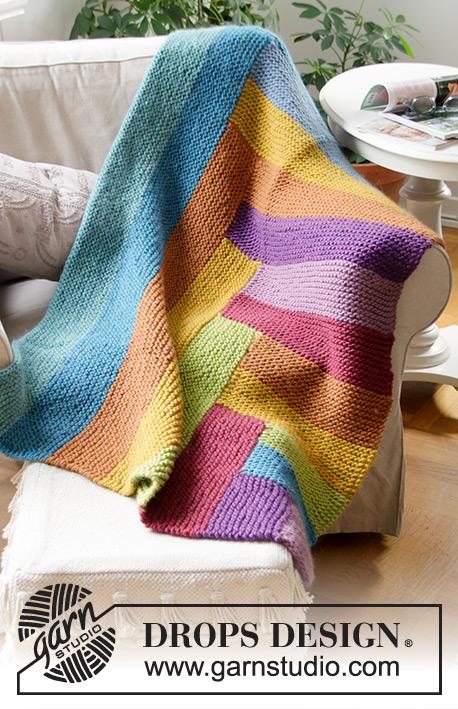
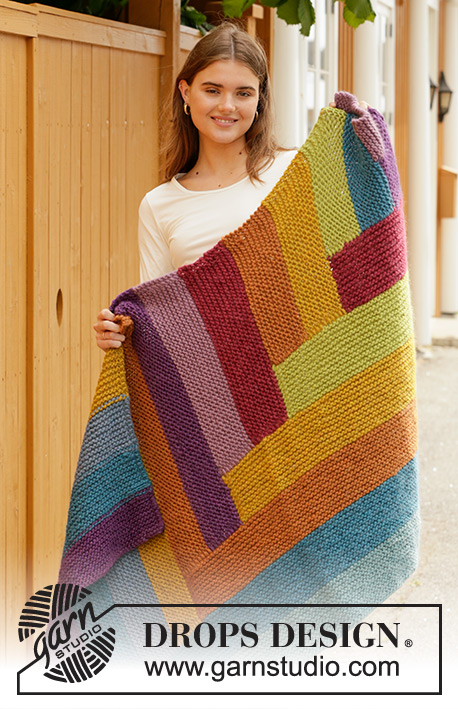
Knitted blanket in DROPS Snow. The piece is worked with garter stitch and stripes.
DROPS 203-2 |
||||
|
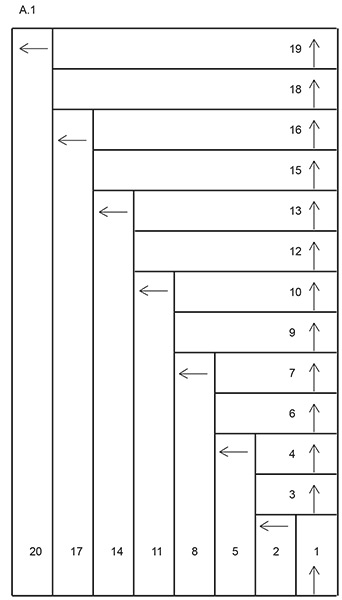
------------------------------------------------------- EXPLANATIONS FOR THE PATTERN: ------------------------------------------------------- PATTERN: See diagram A.1. The diagram shows the stripes in the blanket and the knitting direction. STRIPES: STRIPE 1: heather STRIPE 2: plum STRIPE 3: petrol STRIPE 4: green yellow STRIPE 5: dark pink STRIPE 6: curry STRIPE 7: copper STRIPE 8: green yellow STRIPE 9: dark rose STRIPE 10: heather STRIPE 11: curry STRIPE 12: plum STRIPE 13: copper STRIPE 14: copper STRIPE 15: curry STRIPE 16: peacock blue STRIPE 17: petrol STRIPE 18: petrol STRIPE 19: plum STRIPE 20: sea green RIDGE/GARTER STITCH (worked back and forth): Knit all rows. 1 ridge in height = Knit 2 rows. ------------------------------------------------------- START THE PIECE HERE: ------------------------------------------------------- BLANKET – SHORT OVERVIEW OF THE PIECE: The piece is worked back and forth with circular needle. A.1 shows the stripes in the blanket and the knitting direction. Change colour for each stripe – read STRIPES. BLANKET: STRIPE 1: Cast on 11 stitches with circular needle size 8 mm and heather and work 20 RIDGES – read description above and the last row is from the wrong side. REMEMBER THE KNITTING TENSION! Place stitches on a thread. STRIPE 2 (change colour): Knit up 1 stitch in each ridge from the long side of stripe 1 = 20 stitches. Work 11 ridges; the last row is from the wrong side. Place the stitches on a thread. STRIPE 3: (change colour): Knit the stitches from the thread on stripe 1 back onto the needle and knit up 1 stitch in each ridges from the short side of stripe 2 = 22 stitches. Work 10 ridges; the last row is from the wrong side. STRIPE 4: (change colour): Work 10 ridges; the last row is from the wrong side. Place the stitches on a thread. STRIPE 5 (change colour): Knit up 1 stitch in each ridge from the short side of stripe 4 and knit up 1 stitch in each ridge from the short side of stripe 3, knit the stitches from the thread on stripe 2 back on the needle = 40 stitches. Work 11 ridges; the last row is from the wrong side. Place the stitches on a thread. Repeat stripes 3 to 5 upwards (change colour on each stripe) until you have worked 20 stripes; i.e. on stripe 6 you work the stitches from the thread on stripe 4 and knit up stitches from the ridges on the side of stripe 5; on stripe 8 you work the stitches from the thread on stripe 5 and knit up stitches from the ridges on the side of stripe 6 and 7 and so-on upwards. Cast off after the last stripe; cut and fasten all strands. |
||||
Diagram explanations |
||||
|
||||
 |
||||
Have you finished this pattern?Tag your pictures with #dropspattern #abstractrainbowblanket or submit them to the #dropsfan gallery. Do you need help with this pattern?You'll find 9 tutorial videos, a Comments/Questions area and more by visiting the pattern on garnstudio.com. © 1982-2026 DROPS Design A/S. We reserve all rights. This document, including all its sub-sections, has copyrights. Read more about what you can do with our patterns at the bottom of each pattern on our site. |
||||


With over 40 years in knitting and crochet design, DROPS Design offers one of the most extensive collections of free patterns on the internet - translated to 17 languages. As of today we count 324 catalogues and 12245 patterns translated into English (UK/cm). 12245
We work hard to bring you the best knitting and crochet have to offer, inspiration and advice as well as great quality yarns at incredible prices! Would you like to use our patterns for other than personal use? You can read what you are allowed to do in the Copyright text at the bottom of all our patterns. Happy crafting!
Post a comment to pattern DROPS 203-2
We would love to hear what you have to say about this pattern!
If you want to leave a question, please make sure you select the correct category in the form below, to speed up the answering process. Required fields are marked *.